tailgate OPEL ASTRA J 2014 Manual user
[x] Cancel search | Manufacturer: OPEL, Model Year: 2014, Model line: ASTRA J, Model: OPEL ASTRA J 2014Pages: 331, PDF Size: 10.13 MB
Page 70 of 331

68Storage
Check the cable and lamp position to
make sure these are correctly
installed and are securely located.
Lock the rear carrier system
Swivel the right clamping lever ( 1)
first, followed by the left clamping
lever ( 2), until a resistance is
noticeable.
The rear carrier system is locked
when the clamping levers are
swivelled by approx. 50°. Otherwise
safe functionality is not guaranteed.
Note
Close the tailgate.
Page 73 of 331

Storage71
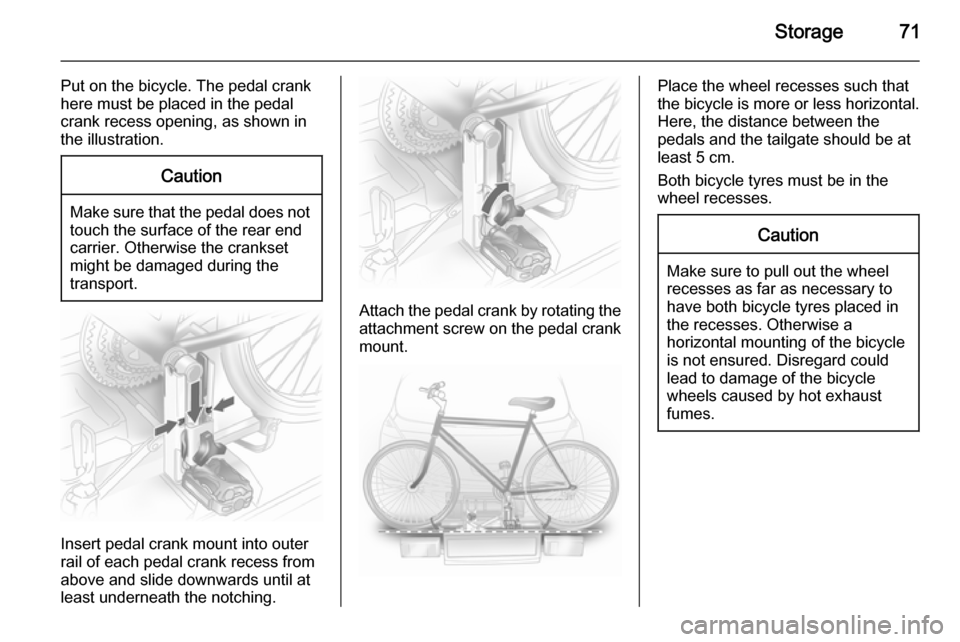
Put on the bicycle. The pedal crank
here must be placed in the pedal
crank recess opening, as shown in
the illustration.Caution
Make sure that the pedal does not
touch the surface of the rear end
carrier. Otherwise the crankset
might be damaged during the
transport.
Insert pedal crank mount into outer
rail of each pedal crank recess from
above and slide downwards until at
least underneath the notching.
Attach the pedal crank by rotating the
attachment screw on the pedal crank
mount.
Place the wheel recesses such that
the bicycle is more or less horizontal. Here, the distance between the
pedals and the tailgate should be at
least 5 cm.
Both bicycle tyres must be in the
wheel recesses.Caution
Make sure to pull out the wheel
recesses as far as necessary to
have both bicycle tyres placed in
the recesses. Otherwise a
horizontal mounting of the bicycle
is not ensured. Disregard could
lead to damage of the bicycle
wheels caused by hot exhaust
fumes.
Page 76 of 331

74Storage
Disengage the locking lever on the
diagonal support and fold both pedal crank recesses down.
9 Warning
Risk of pinching.
Swivel first the left clamping lever ( 1),
followed by the right clamping lever
( 2 ), until they stop.
Push the clamping lever down and
pull both lamp supports out of the recesses.
Fold in the lamp supports on the
backs of the tail lamps.
First place the front ( 1) tail lamp, then
the rear ( 2) tail lamp in the recesses
and push down as far as possible.
Push cables all the way into all guides
in order to prevent damage.
Open the tailgate.
Page 78 of 331

76StorageCaution
Consult your bicycle dealer before
attaching bicycles with carbon
frames. The bicycles might get
damaged.
Extending
Open the tailgate.
9 Warning
No-one should be in the extension
zone of the rear carrier system,
risk of injury.
Pull release lever up. The system
disengages and travels quickly out of
the bumper.
Completely pull out the rear carrier
system until you hear it engage.
Ensure that it is not possible to push in the rear carrier system without
pulling the release lever again.
9 Warning
It is only permissible to fit objects
to the rear carrier system if the
system has been correctly
engaged. If the rear carrier system
will not engage correctly, do not fit
objects to the system and slide the system back. Seek the assistance
of a workshop.
Unfold number plate holder
Lift the number plate holder and fold
it backwards.
Page 90 of 331

88Storage
The closed cover can be secured
from the side of the load
compartment. Turn the knob 90°:
knob
hori‐
zontal=cover secured from the
side of the passenger
compartmentknob
vertical=cover not secured
Rear storage
3-door hatchback
Press both buttons and fold down
cover.
Maximum load: 0.5 kg.
Load compartment cover Do not place any objects on the cover.
3-door and 5-door hatchback
Removing
Unhook retaining straps from tailgate.
Page 91 of 331

Storage89
Lift cover at the rear and push it
upwards at the front.
Remove the cover.
If the height adjustable cover is
mounted in the middle or upper
position, the load compartment cover can be stowed below it.
Height adjustable cover 3 90.
Fitting
Engage cover in side guides and fold
downwards. Attach retaining straps to
tailgate.
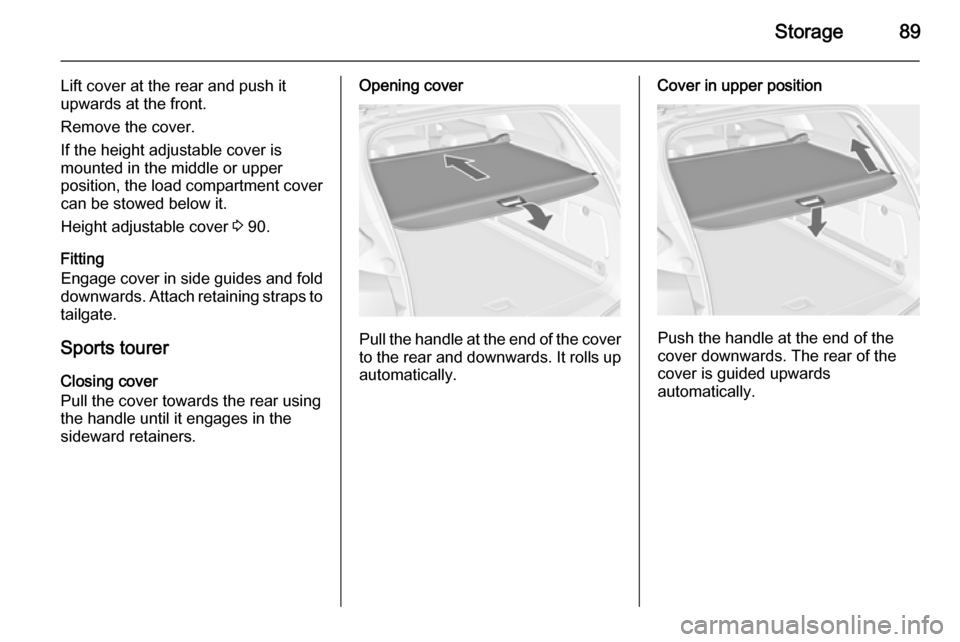
Sports tourer
Closing cover
Pull the cover towards the rear using the handle until it engages in the
sideward retainers.Opening cover
Pull the handle at the end of the cover
to the rear and downwards. It rolls up automatically.
Cover in upper position
Push the handle at the end of the
cover downwards. The rear of the
cover is guided upwards
automatically.
Page 99 of 331

Storage97
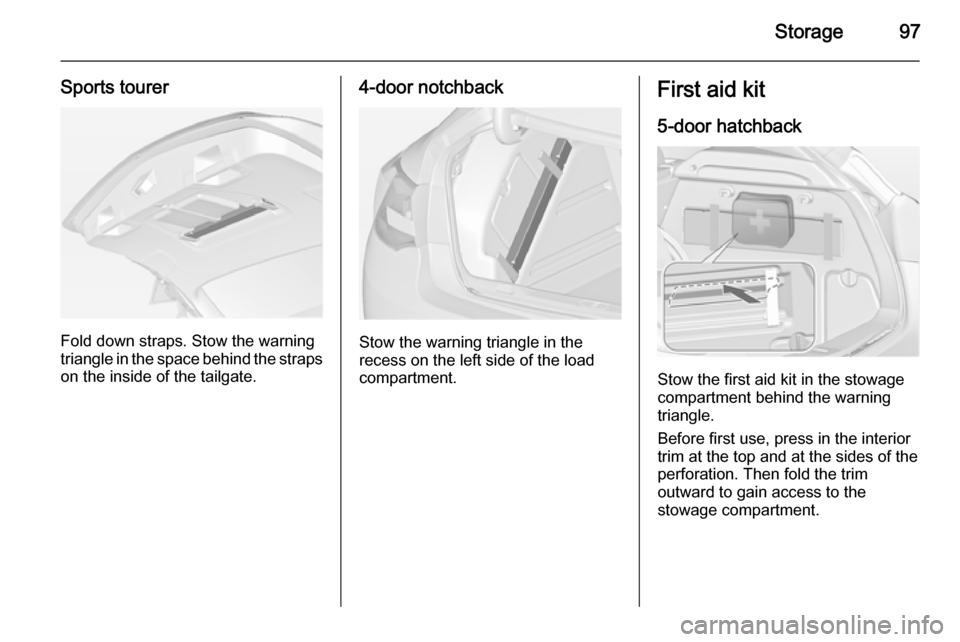
Sports tourer
Fold down straps. Stow the warning
triangle in the space behind the straps on the inside of the tailgate.
4-door notchback
Stow the warning triangle in the
recess on the left side of the load
compartment.
First aid kit
5-door hatchback
Stow the first aid kit in the stowage
compartment behind the warning
triangle.
Before first use, press in the interior
trim at the top and at the sides of the
perforation. Then fold the trim
outward to gain access to the
stowage compartment.
Page 100 of 331

98Storage
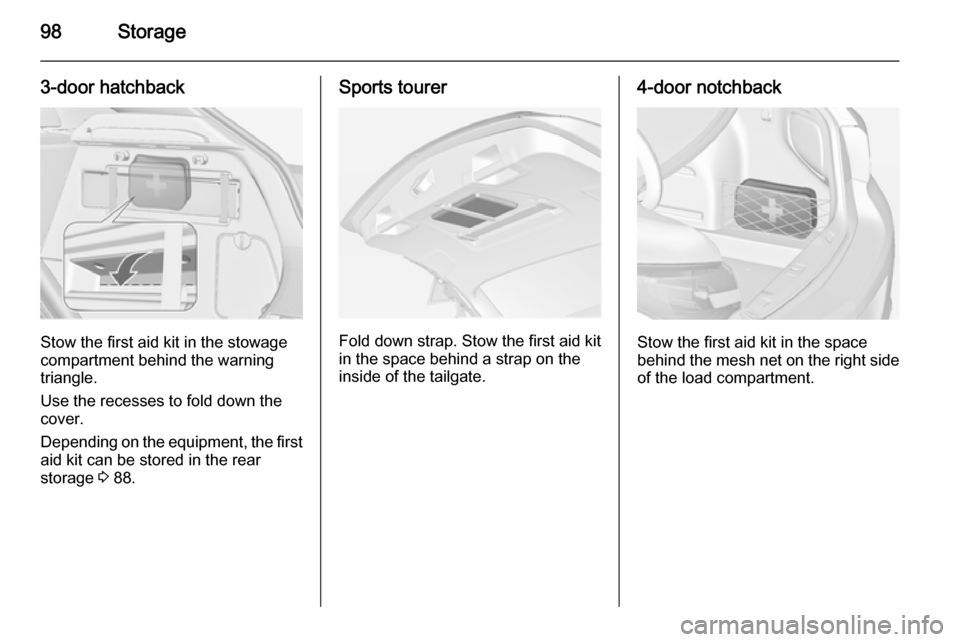
3-door hatchback
Stow the first aid kit in the stowage
compartment behind the warning
triangle.
Use the recesses to fold down the
cover.
Depending on the equipment, the first aid kit can be stored in the rear
storage 3 88.
Sports tourer
Fold down strap. Stow the first aid kit
in the space behind a strap on the
inside of the tailgate.
4-door notchback
Stow the first aid kit in the space
behind the mesh net on the right side of the load compartment.
Page 123 of 331

Instruments and controls121Rear fog light
r illuminates yellow.
The rear fog light is on 3 150.
Low washer fluid G illuminates yellow.
The washer fluid level is low.
Washer fluid 3 228.
Cruise control m illuminates white or green.
Illuminates white The system is on.
Illuminates green
Cruise control is active.
Cruise control 3 183.
Adaptive cruise control m illuminates white or green.
Illuminates white
The system is on.Illuminates green
Adaptive cruise control is active.
Adaptive cruise control 3 186.
Vehicle detected ahead A illuminates green.
A vehicle ahead is detected in the
same lane.
Adaptive cruise control 3 186,
Forward collision alert 3 193.
Door open h illuminates red.
A door or the tailgate is open.Information displays
Driver Information Centre The Driver Information Centre (DIC)
is located in the instrument cluster
between speedometer and
tachometer. It is available as
Midlevel-Display, Uplevel-Display or
Uplevel-Combi-Display.
Midlevel-Display indicates:
■ overall odometer
■ trip odometer
■ some control indicators
■ vehicle information
Page 133 of 331

Instruments and controls131
Vehicle messages on the
Colour-Info-Display Some important messages appear
additionally in the
Colour-Info-Display. Press the
multifunction knob to confirm a
message. Some messages only pop
up for a few seconds.
Warning chimes
When starting the engine or
whilst driving
Only one warning chime will sound at a time.
The warning chime regarding
unfastened seat belts has priority
over any other warning chime.
■ If seat belt is not fastened.
■ If a door or the tailgate is not fully closed when starting off.
■ If a certain speed is exceeded with parking brake applied.
■ If a programmed speed is exceeded.■ If a warning message or a warningcode appears in the Driver
Information Centre.
■ If the parking assist detects an object.
■ If unintended lane change occurs.
■ If the reverse gear is engaged and the rear end carrier extended.
■ If the diesel particle filter has reached the maximum filling level.
When the vehicle is parked and/ or the driver's door is opened ■ When the key is in the ignition switch.
■ With exterior lights on.
During an Autostop ■ If the driver's door is opened.
Battery voltage
When the vehicle battery voltage is
running low, a warning message or
warning code 174 will appear in the
Driver Information Centre.1. Switch off immediately any electric consumers which are not
required for a safe ride, e.g. seat
heating, heated rear window or
other main consumers.
2. Charge the vehicle battery by driving continuously for a while or
by using a charging device.
The warning message or warning
code will disappear after the engine
has been started twice consecutively
without a voltage drop.
If the vehicle battery cannot be
recharged, have the cause of the fault
remedied by a workshop.