engine OPEL ASTRA J 2014 Workshop Manual
[x] Cancel search | Manufacturer: OPEL, Model Year: 2014, Model line: ASTRA J, Model: OPEL ASTRA J 2014Pages: 331, PDF Size: 10.13 MB
Page 182 of 331

180Driving and operating
For a more sporty behaviour ESC and
TC can be deactivated separately:
■ press button b briefly: only Traction
control system is inactive, ESC
remains active, k illuminates
■ hold button b pressed for min.
5 seconds: TC and ESC are
deactivated, k and n illuminate.
Additionally the selected mode is
displayed as status message in the
Driver Information Centre.
If the vehicle comes into threshold
with deactivated ESP, the system will reactivate ESP for the time duration
of the threshold, when the brake pedal is depressed once.
ESC is reactivated by pressing the
b button again. If the TC system was
previously disabled, both TC and
ESC are reactivated.
ESC is also reactivated the next time
the ignition is switched on.Deactivation, OPC version
For very high-performance driving
ESC and TC can be deactivated
separately. The following modes are
selectable:
■ press button b briefly: only Traction
control system is inactive, ESC
remains active, k illuminates
■ press button b twice briefly within
2 seconds: TC is inactive, ESC is
operable without engine power
reduction, k and n illuminate
■ hold button b pressed for min.
5 seconds: TC and ESC are
completely inactive, k and n
illuminate.
Additionally the selected mode is
displayed as status message in the
Driver Information Centre.
On OPC version TC and ESC remain deactivated even if the vehicle comes into threshold with unstable
driveability.
ESC is reactivated by pressing the
b button again. If the TC system was
previously disabled, both TC and
ESC are reactivated.
ESC is also reactivated the next time
the ignition is switched on.
Page 183 of 331
Driving and operating181Interactive driving system
Flex Ride Flex Ride driving system allows the
driver to select between three driving
modes:
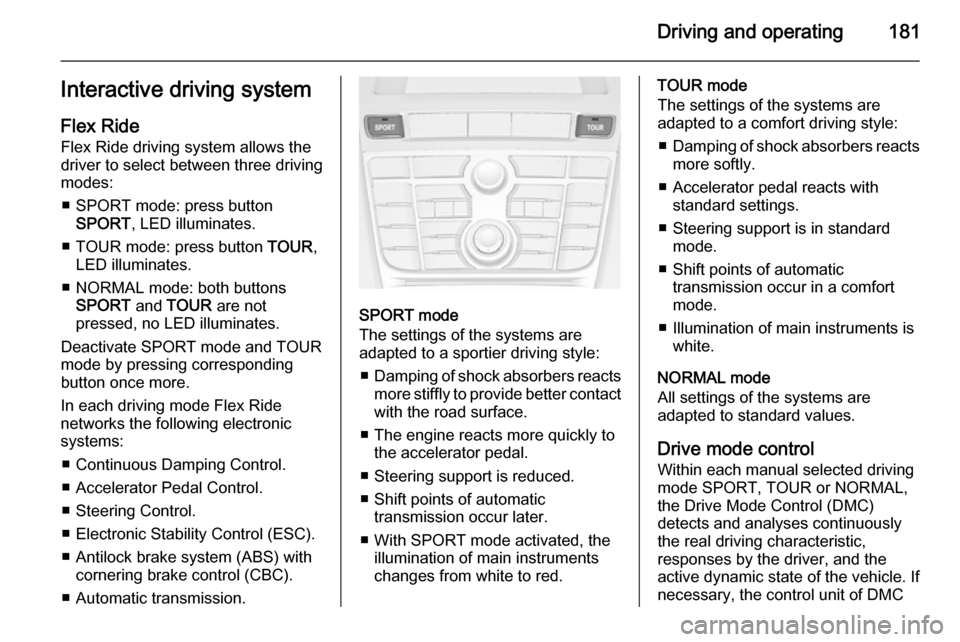
■ SPORT mode: press button SPORT , LED illuminates.
■ TOUR mode: press button TOUR,
LED illuminates.
■ NORMAL mode: both buttons SPORT and TOUR are not
pressed, no LED illuminates.
Deactivate SPORT mode and TOUR
mode by pressing corresponding
button once more.
In each driving mode Flex Ride
networks the following electronic systems:
■ Continuous Damping Control.
■ Accelerator Pedal Control.
■ Steering Control.
■ Electronic Stability Control (ESC).
■ Antilock brake system (ABS) with cornering brake control (CBC).
■ Automatic transmission.
SPORT mode
The settings of the systems are
adapted to a sportier driving style:
■ Damping of shock absorbers reacts
more stiffly to provide better contact
with the road surface.
■ The engine reacts more quickly to the accelerator pedal.
■ Steering support is reduced.
■ Shift points of automatic transmission occur later.
■ With SPORT mode activated, the illumination of main instruments
changes from white to red.
TOUR mode
The settings of the systems are
adapted to a comfort driving style:
■ Damping of shock absorbers reacts
more softly.
■ Accelerator pedal reacts with standard settings.
■ Steering support is in standard mode.
■ Shift points of automatic transmission occur in a comfort
mode.
■ Illumination of main instruments is white.
NORMAL mode
All settings of the systems are
adapted to standard values.
Drive mode control
Within each manual selected driving
mode SPORT, TOUR or NORMAL,
the Drive Mode Control (DMC)
detects and analyses continuously
the real driving characteristic,
responses by the driver, and the
active dynamic state of the vehicle. If
necessary, the control unit of DMC
Page 186 of 331

184Driving and operating
maintained. Control indicator m in
instrument cluster illuminates green.
Accelerator pedal can be released.
Vehicle speed can be increased by depressing the accelerator pedal.
When the accelerator pedal is
released, the previously stored speed
is resumed.
Cruise control remains activated
while gearshifting.
Increase speed With cruise control active, hold thumb
wheel turned to RES/+ or briefly turn
to RES/+ repeatedly: speed
increases continuously or in small
increments.
Alternatively accelerate to the desired speed and store by turning to SET/-.
Reduce speed
With cruise control active, hold thumb wheel turned to SET/- or briefly turn to
SET/- repeatedly: speed decreases
continuously or in small increments.
Deactivation
Press button y, control indicator m in
instrument cluster illuminates white.
Cruise control is deactivated. Last
used set speed is stored in memory
for later speed resume.
Automatic deactivation:
■ vehicle speed below approx. 30 km/h,
■ vehicle speed above approx. 200 km/h,
■ the brake pedal is depressed,
■ the clutch pedal is depressed for a few seconds,
■ selector lever in N,
■ engine speed in a very low range,
■ the Traction Control system or Electronic Stability Control is
operating.
Resume stored speed Turn thumb wheel to RES/+ at a
speed above 30 km/h. The stored
speed will be obtained.
Switching off
Press button m, control indicator m in
instrument cluster extinguishes. The
stored speed is deleted.
Pressing button L for activating
speed limiter or switching off the
ignition also switches off cruise
control and deletes the stored speed.
Page 192 of 331
190Driving and operating
■ Electronic Stability Control isoperating,
■ there is no traffic and nothing detected on the road sides for
several minutes. In this case there are no radar echoes and the sensor may report that it is blocked,
■ collision imminent braking is applying the brakes,
■ radar sensor is blocked by an ice or
water film,
■ fault is detected in the radar, engine
or brake system.
When adaptive cruise control is
deactivated automatically, the control
indicator m illuminates white and a
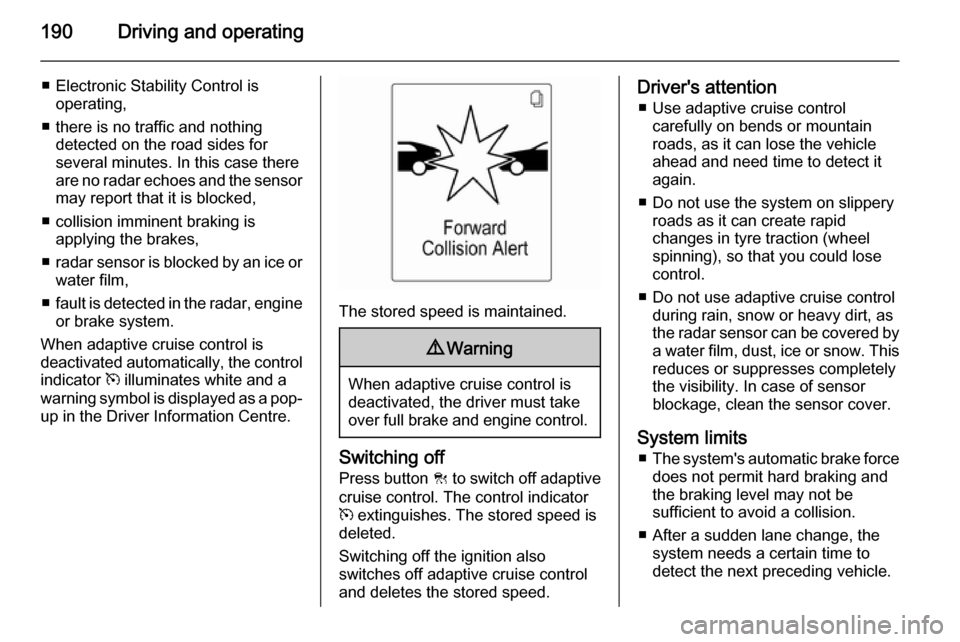
warning symbol is displayed as a pop- up in the Driver Information Centre.
The stored speed is maintained.
9 Warning
When adaptive cruise control is
deactivated, the driver must take
over full brake and engine control.
Switching off
Press button C to switch off adaptive
cruise control. The control indicator
m extinguishes. The stored speed is
deleted.
Switching off the ignition also
switches off adaptive cruise control
and deletes the stored speed.
Driver's attention
■ Use adaptive cruise control carefully on bends or mountain
roads, as it can lose the vehicle
ahead and need time to detect it
again.
■ Do not use the system on slippery roads as it can create rapid
changes in tyre traction (wheel
spinning), so that you could lose
control.
■ Do not use adaptive cruise control during rain, snow or heavy dirt, as
the radar sensor can be covered by a water film, dust, ice or snow. This
reduces or suppresses completely
the visibility. In case of sensor
blockage, clean the sensor cover.
System limits ■ The system's automatic brake force
does not permit hard braking and
the braking level may not be
sufficient to avoid a collision.
■ After a sudden lane change, the system needs a certain time todetect the next preceding vehicle.
Page 215 of 331
Driving and operating213Fuel
Fuel for petrol engines Only use unleaded fuel that complies
with European standard EN 228 or
E DIN 51626-1 or equivalent.
Your engine is capable to run with
E10 fuel that fulfills these standards.
E10 fuel contains up to 10 %
bioethanol.
Use fuel with the recommended
octane rating 3 292. Use of fuel with
too low an octane rating can reduce
engine power and torque and slightly
increases fuel consumption.Caution
Do not use fuel or fuel additives
that contain metallic compounds
such as manganese-based
additives. This may cause engine
damage.
Caution
Use of fuel that does not comply to EN 228 or E DIN 51626-1 or
equivalent can lead to deposits or
engine damage and may affect
your warranty.
Caution
Use of fuel with too low an octane
rating could lead to uncontrolled combustion and engine damage.
Fuel for diesel engines
Only use diesel fuel that complies
with EN 590.
In countries outside the European
Union use Euro-Diesel fuel with a
sulphur concentration below 50 ppm.
Caution
Use of fuel that does not comply to EN 590 or similar can lead to
engine powerloss, increased wear
or engine damage and may affect
your warranty.
Do not use marine diesel oils, heating
oils, Aquazole and similar diesel-
water emulsions. Diesel fuels must
not be diluted with fuels for petrol
engines.
Fuel for liquid gas
operation
Liquid gas is known as LPG
(Liquefied Petroleum Gas) or under
its French name GPL (Gaz de Pétrole Liquéfié). LPG is also known as
Autogas.
LPG consists mainly of propane and
butane. The octane rating is between
105 and 115, depending on the
butane proportion. LPG is stored
liquid at around 5 - 10 bar pressure.
Page 216 of 331
214Driving and operating
The boiling point depends on the
pressure and mixing ratio. At ambient pressure, it is between -42 °C (pure
propane) and -0.5 °C (pure butane).Caution
The system works at an ambient
temperature of approx. -8 °C to
100 °C.
Full function of the LPG system can
only be guaranteed with liquid gas
which complies with the minimum
requirements of DIN EN 589.
Fuel selector
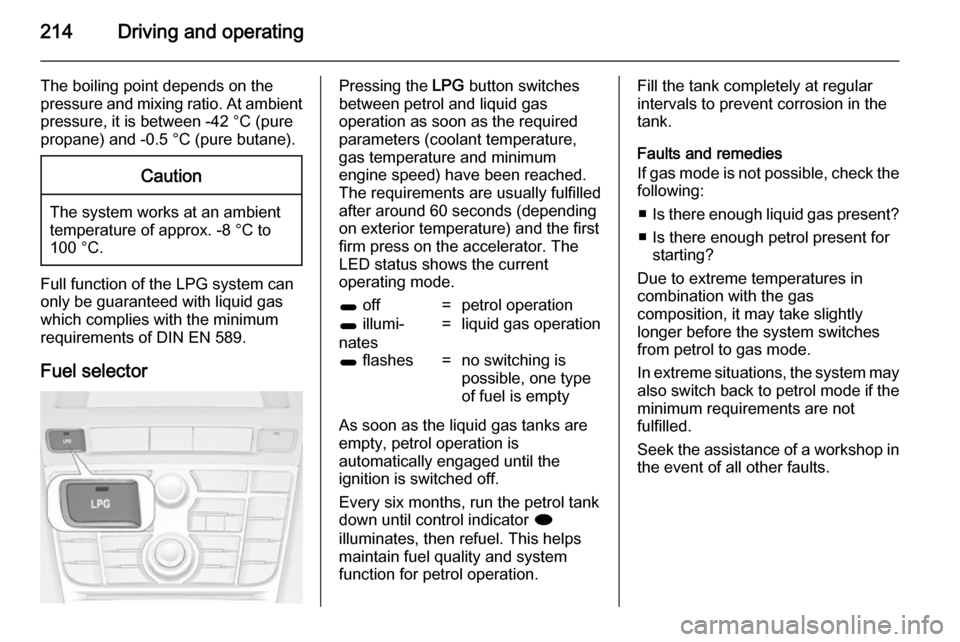
Pressing the LPG button switches
between petrol and liquid gas
operation as soon as the required
parameters (coolant temperature,
gas temperature and minimum
engine speed) have been reached.
The requirements are usually fulfilled
after around 60 seconds (depending
on exterior temperature) and the first
firm press on the accelerator. The
LED status shows the current
operating mode.1 off=petrol operation1 illumi‐
nates=liquid gas operation1 flashes=no switching is
possible, one type
of fuel is empty
As soon as the liquid gas tanks are
empty, petrol operation is
automatically engaged until the
ignition is switched off.
Every six months, run the petrol tank
down until control indicator i
illuminates, then refuel. This helps
maintain fuel quality and system
function for petrol operation.
Fill the tank completely at regular
intervals to prevent corrosion in the
tank.
Faults and remedies
If gas mode is not possible, check the following:
■ Is there enough liquid gas present?
■ Is there enough petrol present for starting?
Due to extreme temperatures in
combination with the gas
composition, it may take slightly
longer before the system switches
from petrol to gas mode.
In extreme situations, the system may
also switch back to petrol mode if the
minimum requirements are not
fulfilled.
Seek the assistance of a workshop in the event of all other faults.
Page 217 of 331
Driving and operating215Caution
Repairs and adjustments may onlybe made by trained specialists in
order to maintain the safety and
warranty on the LPG system.
Liquid gas is given a particular odour
(odorised) so that any leaks can be
detected easily.
9 Warning
If you smell gas in the vehicle or in
the immediate vicinity, switch to petrol mode immediately. No
smoking. No naked flames or
ignition sources.
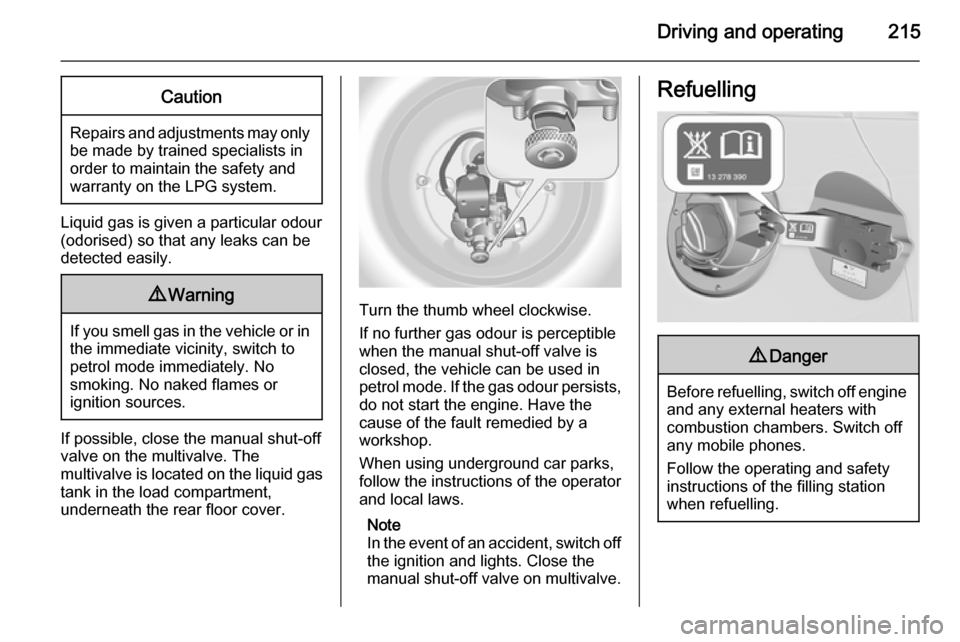
If possible, close the manual shut-off
valve on the multivalve. The
multivalve is located on the liquid gas
tank in the load compartment,
underneath the rear floor cover.
Turn the thumb wheel clockwise.
If no further gas odour is perceptible
when the manual shut-off valve is
closed, the vehicle can be used in
petrol mode. If the gas odour persists, do not start the engine. Have the
cause of the fault remedied by a
workshop.
When using underground car parks,
follow the instructions of the operator
and local laws.
Note
In the event of an accident, switch off
the ignition and lights. Close the
manual shut-off valve on multivalve.
Refuelling9 Danger
Before refuelling, switch off engine
and any external heaters with
combustion chambers. Switch off
any mobile phones.
Follow the operating and safety
instructions of the filling station
when refuelling.
Page 221 of 331

Driving and operating219
Croatia, Latvia, Lithuania,
Macedonia, Austria, Poland,
Portugal, Romania, Sweden,
Switzerland, Serbia, Slovakia,
Slovenia, Czech Republic, Turkey,
Ukraine, Hungary
Fuel filler cap
Only use genuine fuel filler caps. Diesel-engined vehicles have special fuel filler caps.
Fuel consumption - CO 2-
Emissions
The fuel consumption (combined) of
the model Opel Astra is within a range
of 8.1 to 3.7 l/100 km.
The CO 2 emission (combined) is
within a range of 189 to 99 g/km.
For the values specific to your
vehicle, refer to the EEC Certificate of
Conformity provided with your vehicle or other national registration
documents.General information
The official fuel consumption and
specific CO 2 emission figures quoted
relate to the EU base model with
standard equipment.
Fuel consumption data and CO 2
emission data are determined
according to regulation
R (EC) No. 715/2007 (in the latest
applicable version), taking into
consideration the vehicle weight in
running order, as specified by the
regulation.
The figures are provided only for the
purpose of comparison between
different vehicle variants and must
not be taken as a guarantee for the
actual fuel consumption of a
particular vehicle. Additional
equipment may result in slightly
higher results than the stated
consumption and CO 2 figures.
Furthermore, fuel consumption is dependent on personal driving style
as well as road and traffic conditions.Trailer hitch
General information
Only use towing equipment that has
been approved for your vehicle.
Entrust retrofitting of towing
equipment to a workshop. It may be
necessary to make changes that
affect the cooling system, heat
shields or other equipment.
The bulb outage detection function for
trailer brake light cannot detect a
partial bulb outage, e.g. in case of 4 x
5 Watt bulbs, the function only detects lamp outage when only a single
5 Watt lamp remains or none remain.
Fitting of towing equipment could
cover the opening of the towing eye.
If this is the case use the coupling ball
bar for towing. Always keep the
coupling ball bar in the vehicle.
Page 222 of 331

220Driving and operatingDriving characteristics and
towing tips Before attaching a trailer, lubricatethe coupling ball. However, do not do
so if a stabiliser, which acts on the
coupling ball, is being used to reduce
snaking movements.
For trailers with low driving stability
and caravan trailers with a permitted
gross vehicle weight of more than
1300 kg the use of a stabiliser is
strongly recommended when driving
above 80 km/h.
If the trailer starts snaking, drive more slowly, do not attempt to correct the
steering and brake sharply if
necessary.
When driving downhill, drive in the
same gear as if driving uphill and
drive at a similar speed.
Adjust tyre pressure to the value
specified for full load 3 309.Trailer towing
Trailer loads The permissible trailer loads are
vehicle and engine-dependent
maximum values which must not be
exceeded. The actual trailer load is
the difference between the actual
gross weight of the trailer and the
actual coupling socket load with the
trailer coupled.
The permissible trailer loads are
specified in the vehicle documents. In
general, they are valid for gradients
up to max. 12 %.
The permitted trailer load applies up
to the specified incline and up to an
altitude of 1000 metres above sea
level. Since engine power decreases
as altitude increases due to the air becoming thinner, therefore reducing
climbing ability, the permissible gross train weight also decreases by 10 %
for every 1000 metres of additional
altitude. The gross train weight does
not have to be reduced when driving
on roads with slight inclines (less than
8 %, e.g. motorways).The permissible gross train weight
must not be exceeded. This weight is
specified on the identification plate
3 287.
Vertical coupling load
The vertical coupling load is the load
exerted by the trailer on the coupling
ball. It can be varied by changing the
weight distribution when loading the
trailer.
The maximum permissible vertical
coupling load (75 kg) is specified on
the towing equipment identification
plate and in the vehicle documents.
Always aim for the maximum load,
especially in the case of heavy
trailers. The vertical coupling load
should never fall below 25 kg.
Page 225 of 331

Driving and operating223
Eye for break-away stopping cable
Attach breakaway stopping cable to
eye.
Check that the coupling ball bar is correctly installed
■ Green marking on rotary knob must
point towards green marking on
coupling ball bar.
■ There must be no gap between the
rotary handle and the coupling ball
bar.
■ The coupling ball bar must be firmly
engaged in the opening.
■ The coupling ball bar must be locked and the key removed.9 Warning
Towing a trailer is permitted only
when a coupling ball bar is fitted correctly. If the coupling ball bardoes not engage correctly, seekthe assistance of a workshop.
Dismounting the coupling ball
bar
Open the protective flap and turn the
key to position c to unlock the
coupling ball bar.
Pull out rotary handle and turn
clockwise as far as it will go. Pull out coupling ball bar downwards.
Insert sealing plug in opening. Fold away socket.
Replace cover, except 3-door
hatchback.
Trailer stability assist If the system detects snaking
movements, engine power is reduced
and the vehicle/trailer combination is selectively braked until the snaking
ceases. While system is working keep
steering wheel as still as possible.
Trailer stability assist (TSA) is a
function of the Electronic Stability
Control 3 179.