warning OPEL ASTRA J 2015 Manual user
[x] Cancel search | Manufacturer: OPEL, Model Year: 2015, Model line: ASTRA J, Model: OPEL ASTRA J 2015Pages: 343, PDF Size: 10.27 MB
Page 261 of 343
Vehicle care259Tyre pressure
Check the pressure of cold tyres at
least every 14 days and before any
long journey. Do not forget the spare
wheel. This also applies to vehicles
with tyre pressure monitoring system.
Unscrew the valve cap.
Tyre pressure 3 309.
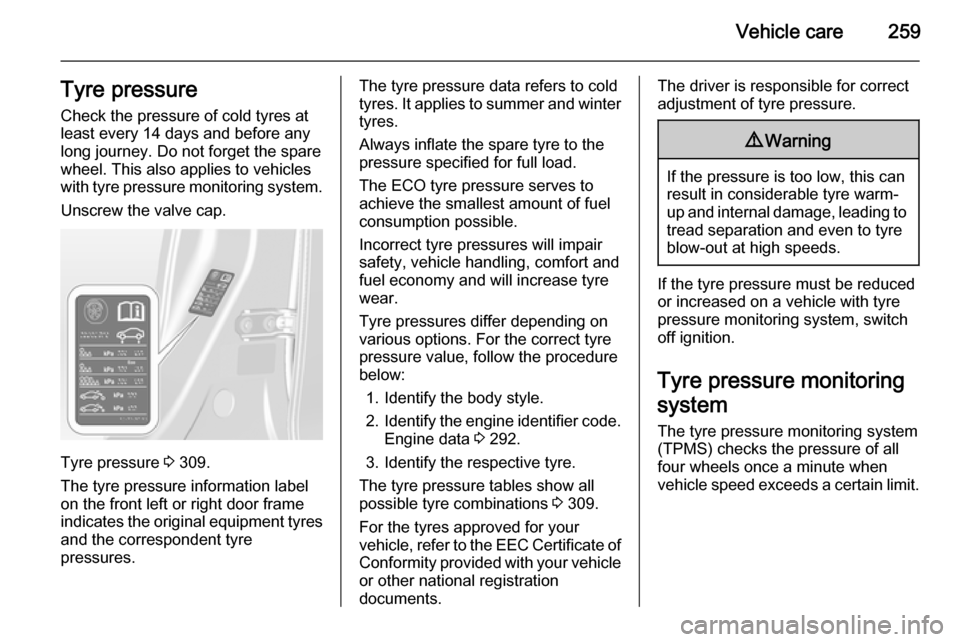
The tyre pressure information label
on the front left or right door frame
indicates the original equipment tyres
and the correspondent tyre
pressures.
The tyre pressure data refers to cold
tyres. It applies to summer and winter tyres.
Always inflate the spare tyre to the
pressure specified for full load.
The ECO tyre pressure serves to
achieve the smallest amount of fuel
consumption possible.
Incorrect tyre pressures will impair
safety, vehicle handling, comfort and
fuel economy and will increase tyre
wear.
Tyre pressures differ depending on
various options. For the correct tyre
pressure value, follow the procedure
below:
1. Identify the body style.
2. Identify the engine identifier code.
Engine data 3 292.
3. Identify the respective tyre.
The tyre pressure tables show all
possible tyre combinations 3 309.
For the tyres approved for your
vehicle, refer to the EEC Certificate of
Conformity provided with your vehicle
or other national registration
documents.The driver is responsible for correct
adjustment of tyre pressure.9 Warning
If the pressure is too low, this can
result in considerable tyre warm-
up and internal damage, leading to tread separation and even to tyre
blow-out at high speeds.
If the tyre pressure must be reduced
or increased on a vehicle with tyre
pressure monitoring system, switch
off ignition.
Tyre pressure monitoring system The tyre pressure monitoring system
(TPMS) checks the pressure of all
four wheels once a minute when
vehicle speed exceeds a certain limit.
Page 262 of 343
260Vehicle careCaution
Tyre pressure monitoring system
warns only about low tyre pressure condition and does not replace
regular tyre maintenance by the
driver.
All wheels must be equipped with pressure sensors and the tyres must
have the prescribed pressure.
Note
In countries where the tyre pressure
monitoring system is legally
required, the use of wheels without
pressure sensors will invalidate the
vehicle type approval.
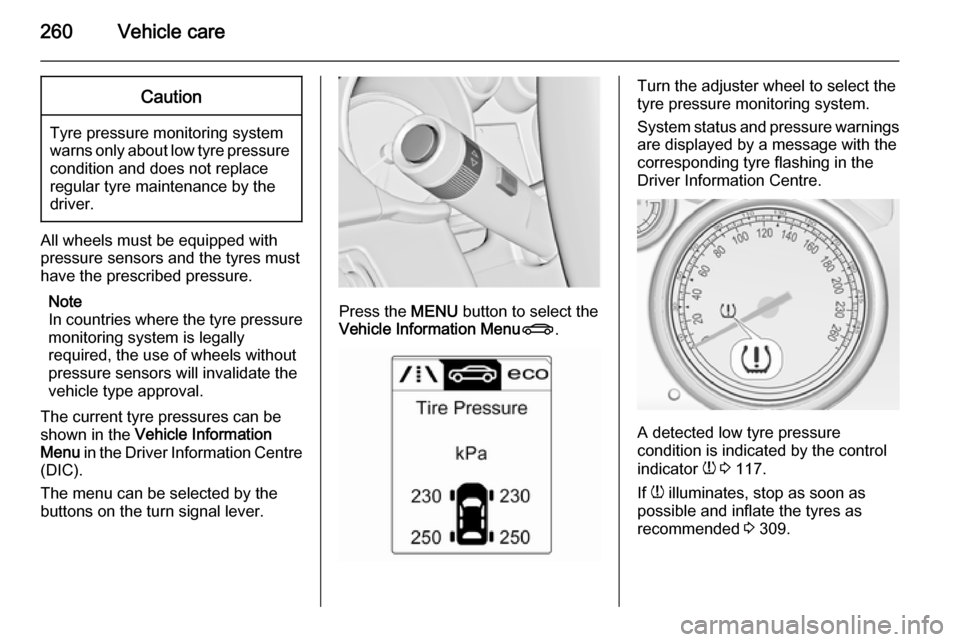
The current tyre pressures can be
shown in the Vehicle Information
Menu in the Driver Information Centre
(DIC).
The menu can be selected by the
buttons on the turn signal lever.
Press the MENU button to select the
Vehicle Information Menu X.
Turn the adjuster wheel to select the
tyre pressure monitoring system.
System status and pressure warnings
are displayed by a message with the
corresponding tyre flashing in the
Driver Information Centre.
A detected low tyre pressure
condition is indicated by the control
indicator w 3 117.
If w illuminates, stop as soon as
possible and inflate the tyres as
recommended 3 309.
Page 264 of 343

262Vehicle care
matching process should also be
performed after replacing a spare tyre with a road tyre containing the TPMS
sensor.
The malfunction light and the warning
message or code should go off at the
next ignition cycle. The sensors are
matched to the tyre/wheel positions,
using a TPMS relearn tool, in the
following order: left side front tyre,
right side front tyre, right side rear tyre and left side rear tyre. The turn signal
light at the current active position is
illuminated until sensor is matched.
Consult your workshop for service or
to purchase a relearn tool. There are
two minutes to match the first tyre/
wheel position, and five minutes
overall to match all four tyre/wheel
positions. If it takes longer, the
matching process stops and must be
restarted.The TPMS sensor matching process
is:
1. Apply the parking brake; on vehicles with automatic
transmission set the selector lever
to P.
2. Turn the ignition on.
3. Use the MENU button on the turn
signal lever to select the Vehicle
Information Menu in the Driver
Information Centre (DIC).
4. Turn the adjuster wheel to scroll to
the tyre pressure menu.
5. Press the SET/CLR button to
begin the sensor matching
process. A message requesting
acceptance of the process should
display.
6. Press the SET/CLR button again
to confirm the selection. The horn sounds twice to signal the
receiver is in relearn mode.
7. Start with the left side front tyre.
8. Place the relearn tool against the tyre sidewall, near the valve stem.Then press the button to activate
the TPMS sensor. A horn chirpconfirms that the sensor
identification code has been
matched to this tyre and wheel
position.
9. Proceed to the right side front tyre,
and repeat the procedure in Step 8.
10. Proceed to the right side rear tyre,
and repeat the procedure in
Step 8.
11. Proceed to the left side rear tyre, and repeat the procedure in
Step 8. The horn sounds twice to
indicate the sensor identification
code has been matched to the left side rear tyre, and the TPMS
sensor matching process is no
longer active.
12. Turn off the ignition.
13. Set all four tyres to the recommended air pressure level
as indicated on the tyre pressure
label.
14. Ensure the tyre loading status is set according selected pressure
3 119.
Page 265 of 343

Vehicle care263
Temperature dependencyTyre pressure depends on the
temperature of the tyre. During
driving, tyre temperature and
pressure increase.
The tyre pressure value displayed in
the DIC shows the actual tyre
pressure. Therefore it is important to
check tyre pressure with cold tyres.
Tread depth Check tread depth at regular
intervals.
Tyres should be replaced for safety
reasons at a tread depth of 2-3 mm
(4 mm for winter tyres).
For safety reasons it is recommended
that the tread depth of the tyres on
one axle should not vary by more than 2 mm.
The legally permissible minimum
tread depth (1.6 mm) has been
reached when the tread has worn
down as far as one of the tread wear
indicators (TWI). Their position is
indicated by markings on the
sidewall.
If there is more wear at the front than
the rear, swap round front wheels and
rear wheels periodically. Ensure that
the direction of rotation of the wheels
is the same as before.
Tyres age, even if they are not used.
We recommend tyre replacement
every 6 years.
Changing tyre and wheel
size
If tyres of a different size than those
fitted at the factory are used, it may be necessary to reprogramme the
speedometer as well as the nominal
tyre pressure and make other vehicle modifications.
After converting to a different tyre
size, have the label with tyre
pressures replaced.9 Warning
Use of unsuitable tyres or wheels
may lead to accidents and will
invalidate the vehicle type
approval.
Wheel covers
Wheel covers and tyres that are
factory approved for the respective
vehicle and comply with all of the
relevant wheel and tyre combination requirements must be used.
Page 266 of 343

264Vehicle care
If the wheel covers and tyres used are
not factory approved, the tyres must
not have a rim protection ridge.
Wheel covers must not impair brake
cooling.9 Warning
Use of unsuitable tyres or wheel
covers could lead to sudden
pressure loss and thereby
accidents.
Vehicles with steel wheels: When
using locking wheel nuts, the wheel
covers might not be attached to the
steel wheels.
Tyre chains
Use tyre chains only on front wheels.
9 Warning
Damage may lead to tyre blowout.
5-door hatchback, 4-door notchback
Always use fine mesh chains that add no more than 10 mm to the tyre tread
and the inboard sides (including chain
lock).
Tyre chains are only permitted on
tyres of size 205/60 R 16,
215/50 R 17 and 215/60 R 16.For the following restrictions apply to
the engines below:
■ Engine A16XHT and A20DTH: tyre
chains only permitted on tyres of
size 205/60 R 16.
■ Engine B16DTH and B16DTL: tyre chains only permitted on tyres of
size 215/60 R 16.Sports tourer
Always use fine mesh chains that add no more than 10 mm to the tyre tread
and the inboard sides (including chain
lock).
Tyre chains are only permitted on
tyres of size 205/60 R 16,
215/50 R 17 and 215/60 R 16.
For the following restrictions apply to
the engines below:
■ Engine A16XHT and A20DTH: tyre
chains only permitted on tyres of
size 205/60 R 16 and 215/50 R 17.
■ Engine B16DTH and B16DTL: tyre chains only permitted on tyres of
size 215/50 R 17 and 215/60 R 16.
Page 267 of 343
Vehicle care265
3-door hatchback
Tyre chains are permitted on tyres of
size 225/55 R 17. Always use fine
mesh chains that add no more than
10 mm to the tyre tread and the
inboard sides (including chain lock).
Tyre chains are also permitted on
tyres of size 245/45 R 18. Always use fine mesh chains that add no more
than 7 mm to the tyre tread and the
inboard sides (including chain lock).OPC Version
Tyre chains are permitted on tyres of
size 235/45 R 18. Always use fine
mesh chains that add no more than
10 mm to the tyre tread and the
inboard sides (including chain lock).General
The use of tyre chains is not permitted on the temporary spare wheel.
Tyre repair kit
Minor damage to the tyre tread can be
repaired with the tyre repair kit.
Do not remove foreign bodies from
the tyres.
Tyre damage exceeding 4 mm or that
is at tyre's sidewall cannot be repaired with the tyre repair kit.9 Warning
Do not drive faster than 80 km/h.
Do not use for a lengthy period.
Steering and handling may be
affected.
If you have a flat tyre:
Apply the parking brake and engage
first gear, reverse gear or P.
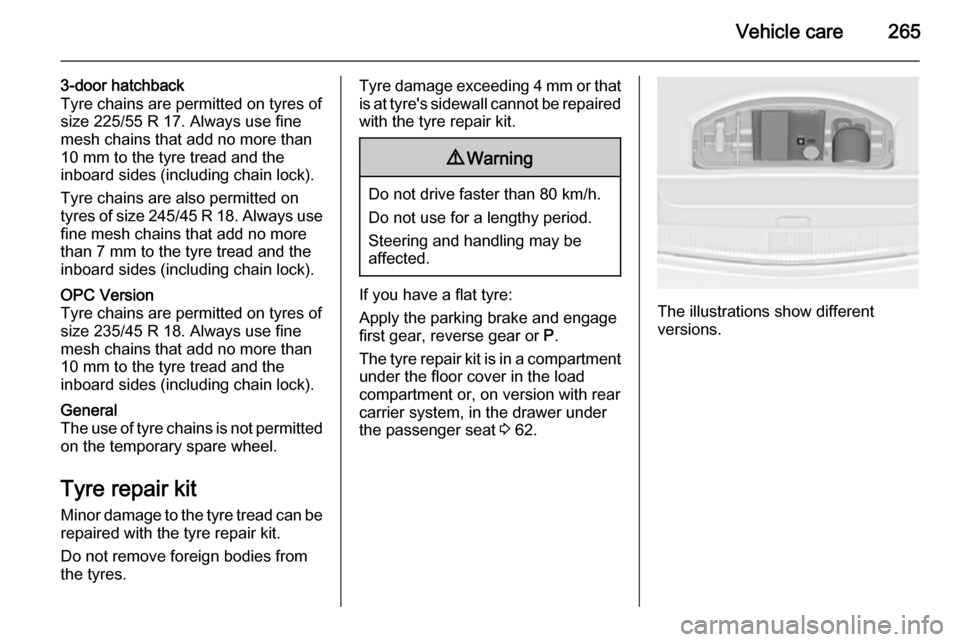
The tyre repair kit is in a compartment under the floor cover in the load
compartment or, on version with rear
carrier system, in the drawer under
the passenger seat 3 62.The illustrations show different
versions.
Page 271 of 343

Vehicle care269
■ Never crawl under a jacked-upvehicle.
■ Do not start the vehicle when it is raised on the jack.
■ Clean wheel nuts and thread with a
clean cloth before mounting the
wheel.9 Warning
Do not grease wheel bolt, wheel
nut and wheel nut cone.
1. Disengage wheel nut caps with a screwdriver and remove. Pull off
the wheel cover. Vehicle tools
3 256.
Alloy wheels: Disengage wheel
nut caps with a screwdriver and
remove. To protect the wheel,
place a soft cloth between the
screwdriver and the alloy wheel.
Alloy wheels with centre wheel
bolt cap: Disengage centre cap by
inserting and pulling the extractor
in the recess of the brand
emblem, vehicle tools 3 256.
2. Two types of jacks and wheel nut wrenches are possible dependingon the version, vehicle tools
3 256.
Variant 1a with rigid wheel
wrench:Install the wheel wrench ensuring
that it locates securely and loosen
each wheel nut by half a turn.
Variants 1b, 2 and 3 with foldable
wheel wrench:
Page 277 of 343

Vehicle care275
3. Take the extension bolt from thetool bag 3 256 and screw it in
hand-tight using the hexagon key
of the wheel wrench.
4. Store the tool box and the damaged wheel outside up in the
spare wheel well and secure it by
turning the wing nut clockwise on
the bolt.
The floor cover can be placed on the
projecting wheel.
Replace the extension bolt with the
short bolt before placing the
temporary spare wheel in the well after renewing or repairing the
defective wheel.
Stowing the spare wheel back in the well after replacing the
damaged wheel
1. Open the floor cover, untwist and remove wing nut.
Only 3-door hatchback: open floor
cover, remove rear storage,
untwist and remove wing nut and
conus.
2. Only Sports tourer and 4-door notchback with temporary spare
wheel: replace the extension bolt
with the short bolt by using the
hexagon key of the wheel wrench.
3. Place the tools in the tool box or the tool bag 3 256.
4. Place spare wheel outside up in the wheel well and secure by
turning the wing nut right back.Only 3-door hatchback: position
the excentric conus in the recess
of the spare wheel before turning
the wing nut right back.
5. Close floor cover and insert rear storage (only 3-door hatchback).
9 Warning
Storing a jack, a wheel or other
equipment in the load
compartment could cause injury if
Page 278 of 343
276Vehicle carethey are not fixed properly. During
a sudden stop or a collision, loose equipment could strike someone.
Store jack and tools always in the
respective storage compartments
and secure them by fixing.
Damaged wheel placed in the load compartment must always be
secured by the strap.
Temporary spare wheel
Caution
The use of a spare wheel that is smaller than the other wheels or in combination with winter tyres
could affect driveability. Have the defective tyre replaced as soon as
possible.
Only mount one temporary spare
wheel. Do not drive faster than
80 km/h. Take curves slowly. Do not use for a long period of time.
If your vehicle gets a flat tyre on the
rear while towing another vehicle,
mount the temporary spare wheel in the front and the full tyre in the rear.
Tyre chains 3 264.
Spare wheel with directional tyre Fit directional tyres such that they rollin the direction of travel. The rolling
direction is indicated by a symbol
(e.g. an arrow) on the sidewall.
The following applies to tyres fitted
opposing the rolling direction:
■ Driveability may be affected. Have the defective tyre renewed or
repaired as soon as possible.
■ Drive particularly carefully on wet and snow-covered road surfaces.Jump starting
Do not start with quick charger.
A vehicle with a discharged vehicle
battery can be started using jump
leads and the vehicle battery of
another vehicle.9 Warning
Be extremely careful when starting
with jump leads. Any deviation
from the following instructions can
lead to injuries or damage caused
by battery explosion or damage to the electrical systems of both
vehicles.
9 Warning
Avoid contact of the battery with
eyes, skin, fabrics and painted
surfaces. The fluid contains
sulphuric acid which can cause
injuries and damage in the event
of direct contact.
Page 287 of 343
Service and maintenance285
Confirmations
Confirmation of service is recorded in the Service and Warranty Booklet.
The date and mileage is completed
with the stamp and signature of the
servicing workshop.
Make sure that the Service and
Warranty Booklet is completed
correctly as continuous proof of
service and to assist with warranty
claims. It is also a benefit when selling the vehicle.
Service interval with remainingengine oil life duration
The service interval is based on
several parameters depending on
usage.
The service display lets you know
when to change the engine oil.
Service display 3 110.Recommended fluids,
lubricants and parts
Recommended fluids and
lubricants Only use products that meet the
recommended specifications.
Damage resulting from the use of
products not in line with these
specifications will not be covered by
the warranty.9 Warning
Operating materials are
hazardous and could be
poisonous. Handle with care. Pay
attention to information given on
the containers.
Engine oil
Engine oil is identified by its quality
and its viscosity. Quality is more
important than viscosity when
selecting which engine oil to use. The oil quality ensures e.g. engine
cleanliness, wear protection and oil
aging control, whereas viscosity
grade gives information on the oil's
thickness over a temperature range.
Dexos is the newest engine oil quality
that provides optimum protection for gasoline and diesel engines. If it is
unavailable, engine oils of other listed qualities must be used.
Recommendations for gasoline
engines are also valid for
Compressed Natural Gas (CNG),
Liquified Petroleum Gas (LPG) and
Ethanol (E85) fuelled engines.
Select the appropriate engine oil
based on its quality and on the
minimum ambient temperature
3 289.
Topping up engine oil
Engine oils of different manufacturers
and brands can be mixed as long as
they comply with the required engine
oil quality and viscosity.
Use of engine oil with only
ACEA A1/B1 or only A5/B5 quality is
prohibited, since it can cause long-
term engine damage under certain
operating conditions.