steering OPEL ASTRA K 2017.5 Manual user
[x] Cancel search | Manufacturer: OPEL, Model Year: 2017.5, Model line: ASTRA K, Model: OPEL ASTRA K 2017.5Pages: 311, PDF Size: 9.21 MB
Page 93 of 311

Instruments and controls91Controls
Steering wheel adjustment
Unlock lever, adjust steering wheel,
then engage lever and ensure it is
fully locked.
Do not adjust steering wheel unless
vehicle is stationary and steering
wheel lock has been released.
Steering wheel controls
Driver Information Centre, some
driver assistance systems,
Infotainment system and a connected mobile phone can be operated via the
controls on the steering wheel.
The illustrations show different
versions.
Driver Information Centre 3 115.
Driver assistance systems 3 182.
Further information is available in the
Infotainment manual.
Page 94 of 311

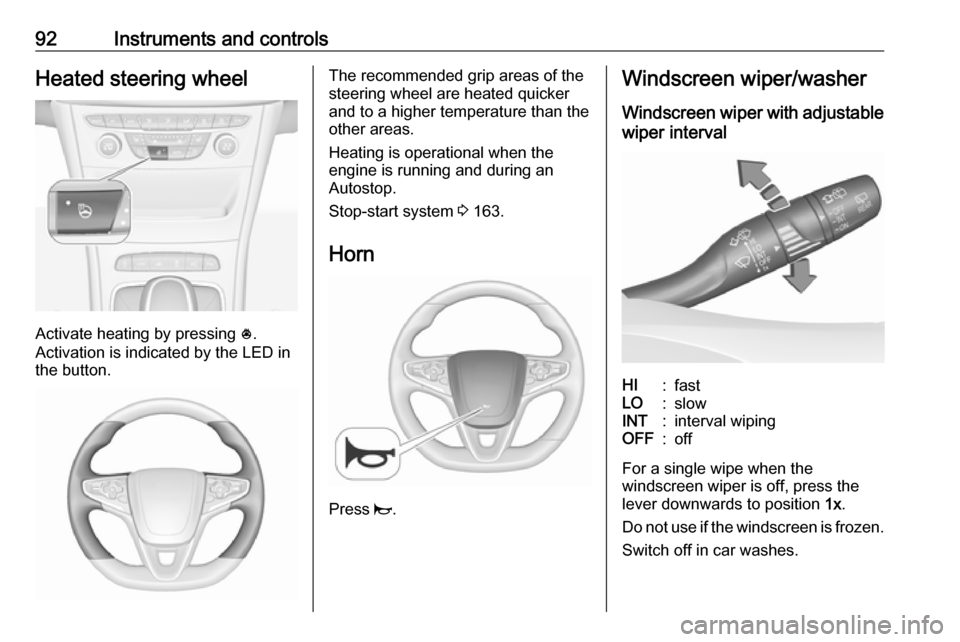
92Instruments and controlsHeated steering wheel
Activate heating by pressing *.
Activation is indicated by the LED in
the button.
The recommended grip areas of the
steering wheel are heated quicker
and to a higher temperature than the
other areas.
Heating is operational when the
engine is running and during an
Autostop.
Stop-start system 3 163.
Horn
Press j.
Windscreen wiper/washer
Windscreen wiper with adjustable
wiper intervalHI:fastLO:slowINT:interval wipingOFF:off
For a single wipe when the
windscreen wiper is off, press the
lever downwards to position 1x.
Do not use if the windscreen is frozen.
Switch off in car washes.
Page 107 of 311

Instruments and controls105Odometer
The total recorded distance is
displayed in km.
Trip odometer The recorded distance since the last
reset is displayed on the trip computer
page.
Trip odometer counts up to
9,999 km and then restarts at 0.
Two trip odometer pages are
selectable for different trips.
Midlevel instrument cluster
Select ; by pressing Menu on the
turn signal lever. Turn adjuster wheel
on turn signal lever and select ;1
or ; 2. Each trip odometer page can
be reset separately by pressing
SET/CLR on the turn signal lever for
a few seconds on the respective
menu.
Uplevel instrument cluster
Select Info page J on main menu.
Choose page Trip A or Trip B by
pressing o on the steering wheel.
Each trip odometer can be reset separately when ignition is on: select
respective page, press >. Confirm by
pressing 9.
Driver Information Centre 3 115.
Page 110 of 311

108Instruments and controls50:engine operating
temperature not yet
reachedcentral
area:normal operating
temperature130:temperature too highCaution
If engine coolant temperature is
too high, stop vehicle, switch off
engine. Danger to engine. Check
coolant level.
Service display
The engine oil life system informs
when to change the engine oil and
filter. Based on driving conditions, the interval at which an engine oil and
filter change will be indicated can vary
considerably.
The remaining oil life duration menu
is displayed in the Driver Information
Centre 3 115.
On Midlevel display select the
Settings Menu by pressing MENU on
the turn signal lever. Turn the adjuster wheel to select the Remaining Oil
Life page.
On Uplevel display select Info Menu
by pressing p on steering wheel.
Press P to select Remaining Oil
Life page.
Remaining oil life duration is indicated
in percentage.
Page 111 of 311

Instruments and controls109ResetOn Midlevel display press SET/CLR
on turn signal lever for several
seconds to reset. The ignition must be
switched on but engine not running.
On Uplevel display press > on
steering wheel to open the subfolder. Select Reset and confirm by pressing
9 for several seconds. The ignition
must be switched on but engine not
running.
The system must be reset every time
the engine oil is changed to allow
proper functionality. Seek the
assistance of a workshop.
Next service When the system has calculated that
engine oil life has been diminished,
Change Engine Oil Soon appears in
the Driver Information Centre. Have
engine oil and filter changed by a
workshop within one week or
500 km (whichever occurs first).
Service information 3 277.Control indicators
The control indicators described are
not present in all vehicles. The
description applies to all instrument
versions. Depending on the
equipment, the position of the control indicators may vary. When the
ignition is switched on, most control
indicators will illuminate briefly as a
functionality test.
The control indicator colours mean:red:danger, important reminderyellow:warning, information, faultgreen:confirmation of activationblue:confirmation of activationwhite:confirmation of activation
See all control indicators on different
instrument clusters 3 101.
Turn signal O illuminates or flashes green.
Illuminates briefly The parking lights are switched on.
Flashes
A turn signal or the hazard warning flashers are activated.
Rapid flashing: failure of a turn signal
light or associated fuse, failure of turn signal light on trailer.
Bulb replacement 3 235, Fuses
3 246.
Turn signals 3 142.
Seat belt reminder
Seat belt reminder on front seats
X for driver's seat illuminates or
flashes red in the instrument cluster.
k for front passenger seat illuminates
or flashes red in the roof console,
when seat is occupied.
Page 115 of 311

Instruments and controls113Have the cause of the fault remedied
by a workshop.
Flashes
The system is actively engaged.
Engine output may be reduced and
the vehicle may be braked
automatically to a small degree.
Electronic Stability Control 3 180,
Traction Control system 3 179.
Traction Control system off
k illuminates yellow.
The system is deactivated.
Preheating
! illuminates yellow.
Preheating of Diesel engine is
activated. Only activates when
outside temperature is low. Start the engine when control indicator
extinguishes.
Tyre pressure monitoring system
w illuminates or flashes yellow.Illuminates
Tyre pressure loss. Stop immediately
and check tyre pressure.
Flashes
Fault in system or tyre without
pressure sensor mounted (e.g. spare
wheel). After 60 to 90 seconds the
control indicator illuminates
continuously. Consult a workshop.
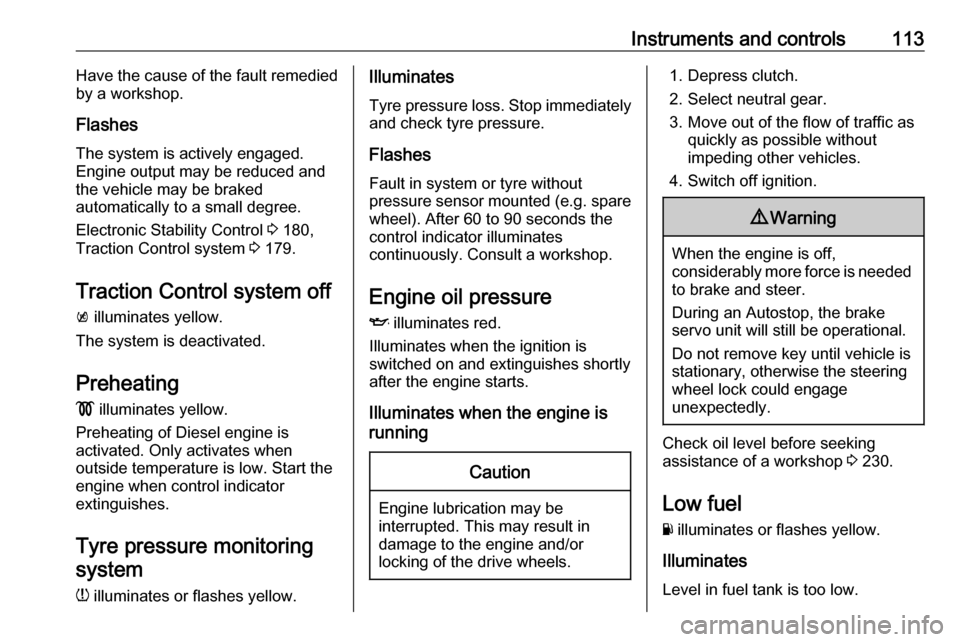
Engine oil pressure I illuminates red.
Illuminates when the ignition is
switched on and extinguishes shortly after the engine starts.
Illuminates when the engine is
runningCaution
Engine lubrication may be
interrupted. This may result in
damage to the engine and/or
locking of the drive wheels.
1. Depress clutch.
2. Select neutral gear.
3. Move out of the flow of traffic as quickly as possible without
impeding other vehicles.
4. Switch off ignition.9 Warning
When the engine is off,
considerably more force is needed
to brake and steer.
During an Autostop, the brake
servo unit will still be operational.
Do not remove key until vehicle is stationary, otherwise the steeringwheel lock could engage
unexpectedly.
Check oil level before seeking
assistance of a workshop 3 230.
Low fuel
Y illuminates or flashes yellow.
Illuminates
Level in fuel tank is too low.
Page 119 of 311

Instruments and controls117● Navigation information,displayed by Navigation, see
description below.
● Vehicle information, displayed by
Options , see description below.
Some of the displayed functions differ
when the vehicle is being driven or at
a standstill and some functions are
only active when the vehicle is being
driven.
Selecting menus and functions
The menus and functions can be selected via the buttons on the right
side in the steering wheel.
Press p to open main menu page.
Select a main menu page with Q or
P .
Confirm a main menu page with 9.
Once a main menu page is selected, press Q or P to select subpages.
Press q to open a next folder of the
selected subpage.
Press Q or P to select functions or
to set a numeric value, if required.
Press 9 to select and confirm a
function.
Once a main menu page is selected, this selection remains stored until
another main menu page is selected.
Subpages are changed by pressing
P or Q.
Vehicle and service messages are
popped-up in the Driver Information Centre if required. Confirm messages by pressing 9. Vehicle messages
3 123.Trip/fuel information menu, ;
or Info
The following list contains all possible Info Menu pages. Some may not be
available for your particular vehicle.
Depending on the display, some
functions are symbolised.
Turn the adjuster wheel or press Q
or P to select a page:
● Trip odometer 1/2 or A/B
● Average fuel consumption
● Average speed
● Digital speed
● Fuel range
● Instantaneous fuel consumption
● Remaining oil life
● Tyre pressure
● Traffic sign assistant
● Following distance
● Timer
● Outside temperature
Page 126 of 311

124Instruments and controls
On Uplevel display press 9 on the
steering wheel to confirm a message.
Vehicle and service messages
The vehicle messages are displayed
as text. Follow the instructions given
in the messages.
Messages in the
Colour-Info-Display
Some important messages may
appear additionally in the
Colour-Info-Display. Some
messages only pop-up for a few
seconds.
Warning chimes
When starting the engine or whilstdriving
Only one warning chime will sound at a time.
The warning chime regarding not
fastened seat belts has priority over
any other warning chime.
● If seat belt is not fastened.
● If a door or the tailgate is not fully
closed when starting off.
● If a certain speed is exceeded with parking brake applied.
● If adaptive cruise control deactivates automatically.
● If approaching a vehicle ahead too closely.
● If a programmed speed or speed
limit is exceeded.
● If a warning message appears in the Driver Information Centre.
● If the electronic key is not in the passenger compartment.
● If the parking assist detects an object.● If an unintended lane changeoccurs.
● If the diesel particle filter has reached the maximum filling
level.
● If safety function of the power tailgate detects obstacles in the
moving area.
When the vehicle is parked and/or the driver's door is opened
● With exterior lights on.
During an Autostop ● If the driver's door is opened.
● If any condition for an autostart is
not fulfilled.
Battery voltage When the vehicle battery voltage is
running low, a warning message will
appear in the Driver Information
Centre.
Page 141 of 311

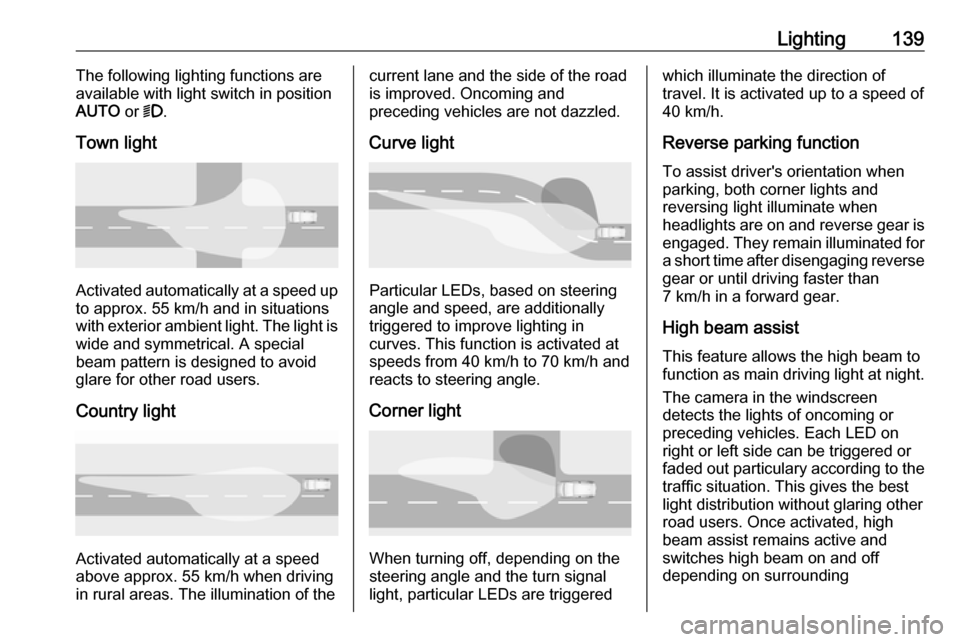
Lighting139The following lighting functions are
available with light switch in position
AUTO or 9.
Town light
Activated automatically at a speed up to approx. 55 km/h and in situations
with exterior ambient light. The light is
wide and symmetrical. A special
beam pattern is designed to avoid
glare for other road users.
Country light
Activated automatically at a speed
above approx. 55 km/h when driving
in rural areas. The illumination of the
current lane and the side of the road is improved. Oncoming and
preceding vehicles are not dazzled.
Curve light
Particular LEDs, based on steering
angle and speed, are additionally
triggered to improve lighting in
curves. This function is activated at
speeds from 40 km/h to 70 km/h and
reacts to steering angle.
Corner light
When turning off, depending on the
steering angle and the turn signal light, particular LEDs are triggered
which illuminate the direction of
travel. It is activated up to a speed of
40 km/h.
Reverse parking function To assist driver's orientation when
parking, both corner lights and
reversing light illuminate when
headlights are on and reverse gear is
engaged. They remain illuminated for
a short time after disengaging reverse gear or until driving faster than
7 km/h in a forward gear.
High beam assist This feature allows the high beam to
function as main driving light at night.
The camera in the windscreen
detects the lights of oncoming or
preceding vehicles. Each LED on
right or left side can be triggered or
faded out particulary according to the
traffic situation. This gives the best
light distribution without glaring other
road users. Once activated, high
beam assist remains active and
switches high beam on and off
depending on surrounding
Page 144 of 311

142Lighting
The illustrations show different
versions.
In the event of an accident with airbag
deployment, the hazard warning
flashers are activated automatically.
Turn and lane-change
signalslever up:right turn signallever down:left turn signal
If the lever is moved past the
resistance point, the turn signal is
switched on constantly. When the
steering wheel moves back, the turn
signal is automatically deactivated.
For three flashes, e.g. when changing
lanes, press the lever until resistance
is felt and then release.
With a trailer connected, turn signal
flashes six times and tone frequency
changes when pressing the lever until resistance is felt and then releasing.
Move the lever to the resistance point
and hold for longer indication.
Switch the turn signal off manually by
moving the lever to its original
position.
Front fog lights
Operated by pressing >.
Light switch in position AUTO:
switching on front fog lights will switch headlights on automatically.