display OPEL ASTRA K 2017 Manual user
[x] Cancel search | Manufacturer: OPEL, Model Year: 2017, Model line: ASTRA K, Model: OPEL ASTRA K 2017Pages: 305, PDF Size: 9.11 MB
Page 45 of 305
Keys, doors and windows43
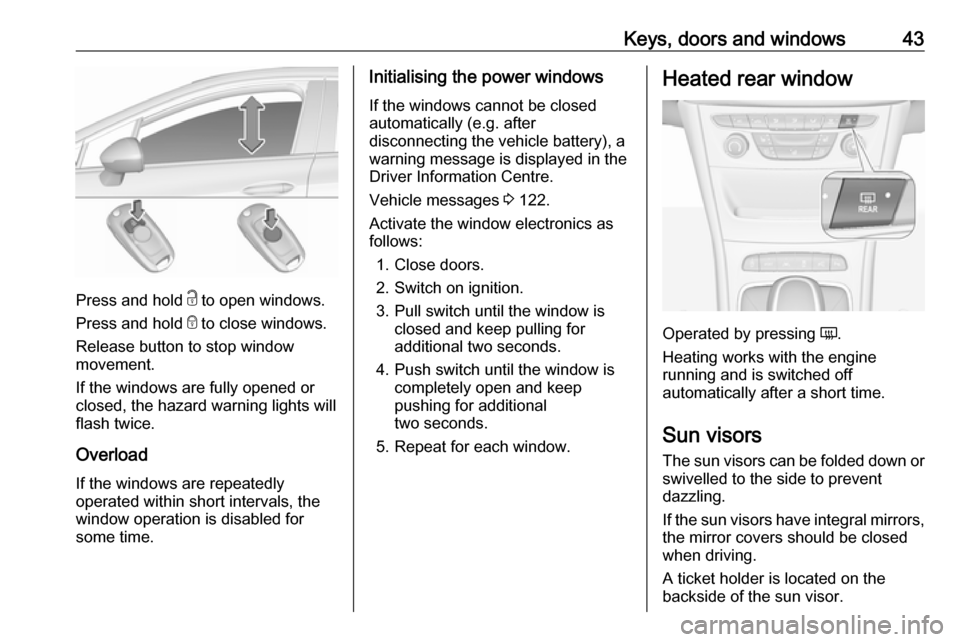
Press and hold c to open windows.
Press and hold e to close windows.
Release button to stop window
movement.
If the windows are fully opened or
closed, the hazard warning lights will
flash twice.
Overload
If the windows are repeatedly
operated within short intervals, the
window operation is disabled for
some time.
Initialising the power windows
If the windows cannot be closed
automatically (e.g. after
disconnecting the vehicle battery), a
warning message is displayed in the
Driver Information Centre.
Vehicle messages 3 122.
Activate the window electronics as
follows:
1. Close doors.
2. Switch on ignition.
3. Pull switch until the window is closed and keep pulling for
additional two seconds.
4. Push switch until the window is completely open and keep
pushing for additional
two seconds.
5. Repeat for each window.Heated rear window
Operated by pressing Ü.
Heating works with the engine
running and is switched off
automatically after a short time.
Sun visors The sun visors can be folded down or
swivelled to the side to prevent
dazzling.
If the sun visors have integral mirrors, the mirror covers should be closed
when driving.
A ticket holder is located on the
backside of the sun visor.
Page 50 of 305
48Seats, restraints
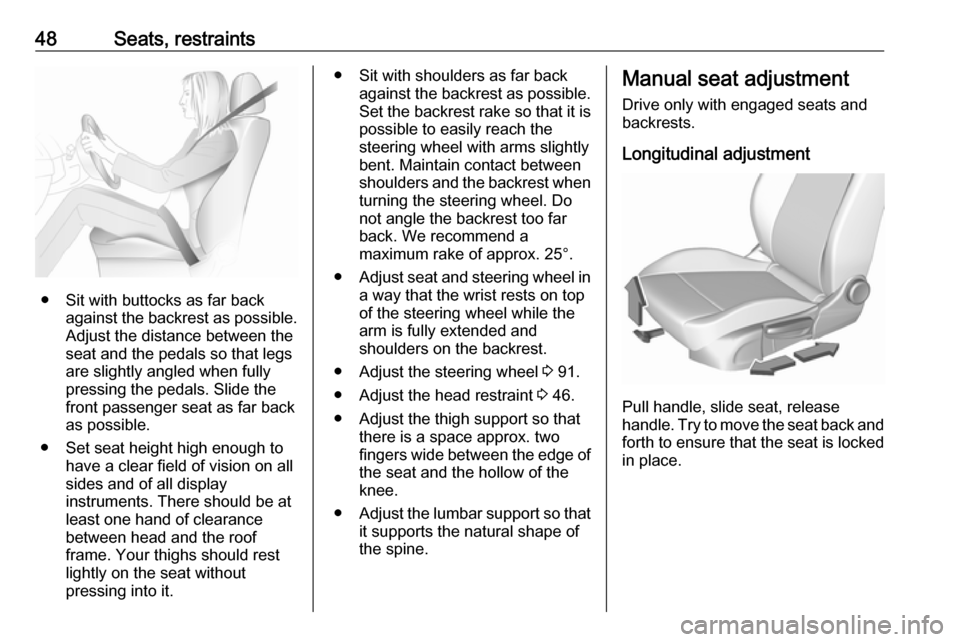
● Sit with buttocks as far backagainst the backrest as possible.
Adjust the distance between the
seat and the pedals so that legs
are slightly angled when fully
pressing the pedals. Slide the
front passenger seat as far back
as possible.
● Set seat height high enough to have a clear field of vision on all
sides and of all display
instruments. There should be at
least one hand of clearance
between head and the roof
frame. Your thighs should rest
lightly on the seat without
pressing into it.
● Sit with shoulders as far back against the backrest as possible.
Set the backrest rake so that it is possible to easily reach the
steering wheel with arms slightly
bent. Maintain contact between
shoulders and the backrest when
turning the steering wheel. Do
not angle the backrest too far
back. We recommend a
maximum rake of approx. 25°.
● Adjust seat and steering wheel in
a way that the wrist rests on top
of the steering wheel while the
arm is fully extended and
shoulders on the backrest.
● Adjust the steering wheel 3 91.
● Adjust the head restraint 3 46.
● Adjust the thigh support so that there is a space approx. two
fingers wide between the edge of the seat and the hollow of the
knee.
● Adjust the lumbar support so that
it supports the natural shape of
the spine.Manual seat adjustment
Drive only with engaged seats and
backrests.
Longitudinal adjustment
Pull handle, slide seat, release
handle. Try to move the seat back and forth to ensure that the seat is locked
in place.
Page 55 of 305

Seats, restraints53The stored positions are
automatically recalled when the
ignition is switched on.
To stop recall movement, press one
of the memory or power seat controls.
Precondition is that Personalisation
by Driver and Auto Memory Recall is
activated in the personal settings of
the Info-Display.
This function can be activated or
deactivated in the vehicle
personalisation.
Select the relevant setting in the Vehicle menu in the Info-Display.
Info-Display 3 119.
Vehicle personalisation 3 123.
Easy exit function
For a convenient exit out of the
vehicle, the power driver seat moves
rearwards when vehicle is stationary.
To activate the easy exit function: ● set selector lever to position P
(automatic transmission)
● apply parking brake (manual transmission)
● switch off ignition● remove key from the ignition switch
● open the driver's door
If the door is already open, switch off
ignition to activate easy exit.
To stop movement, press one of the
memory or power seat controls.
This function can be activated or
deactivated in the vehicle
personalisation.
Select the relevant setting in the
Vehicle menu in the Info-Display.
Info-Display 3 119.
Vehicle personalisation 3 123.
Safety function
If the driver's seat encounters
resistance during movement, the
recall may stop. After removing the
obstruction, press and hold the
appropriate memory position button
for two seconds. Try recalling the
memory position again. If the recall
does not operate, consult a
workshop.Overload
If the seat setting is electrically
overloaded, the power supply is
automatically cut-off for a short time.
Note
After an accident in which airbags have been deployed, the memory
function for each position button will
be deactivated.
Armrest
The armrest can be slid forwards by
10 cm. Under the armrest there is a
storage compartment.
Armrest storage 3 72.
Page 56 of 305
54Seats, restraintsHeating
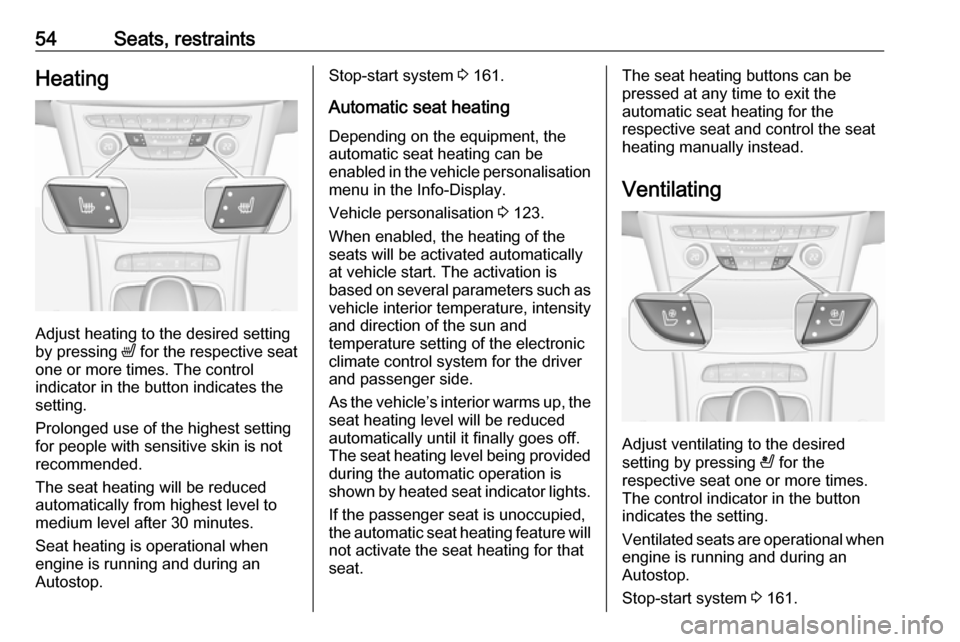
Adjust heating to the desired setting
by pressing ß for the respective seat
one or more times. The control
indicator in the button indicates the
setting.
Prolonged use of the highest setting
for people with sensitive skin is not
recommended.
The seat heating will be reduced
automatically from highest level to
medium level after 30 minutes.
Seat heating is operational when
engine is running and during an
Autostop.
Stop-start system 3 161.
Automatic seat heating Depending on the equipment, the
automatic seat heating can be
enabled in the vehicle personalisation
menu in the Info-Display.
Vehicle personalisation 3 123.
When enabled, the heating of the
seats will be activated automatically
at vehicle start. The activation is
based on several parameters such as vehicle interior temperature, intensity
and direction of the sun and
temperature setting of the electronic
climate control system for the driver
and passenger side.
As the vehicle’s interior warms up, the seat heating level will be reduced
automatically until it finally goes off. The seat heating level being provided
during the automatic operation is
shown by heated seat indicator lights.
If the passenger seat is unoccupied,
the automatic seat heating feature will not activate the seat heating for that
seat.The seat heating buttons can be
pressed at any time to exit the
automatic seat heating for the
respective seat and control the seat
heating manually instead.
Ventilating
Adjust ventilating to the desired
setting by pressing A for the
respective seat one or more times.
The control indicator in the button
indicates the setting.
Ventilated seats are operational when
engine is running and during an
Autostop.
Stop-start system 3 161.
Page 92 of 305

90Instruments and controlsInstruments and
controlsControls ....................................... 91
Steering wheel adjustment ........91
Steering wheel controls .............91
Heated steering wheel ...............92
Horn ........................................... 92
Windscreen wiper/washer .........92
Rear window wiper/washer .......94
Outside temperature ..................95
Clock ......................................... 95
Power outlets ............................. 97
Power connector .......................98
Ashtrays .................................... 99
Warning lights, gauges and indi‐ cators ......................................... 101
Instrument cluster ....................101
Speedometer ........................... 104
Odometer ................................ 105
Trip odometer .......................... 105
Tachometer ............................. 106
Fuel gauge .............................. 106
Engine coolant temperature gauge ..................................... 106
Service display ........................ 107
Control indicators ....................108Turn signal............................... 108
Seat belt reminder ...................108
Airbag and belt tensioners .......109
Airbag deactivation ..................109
Charging system .....................109
Malfunction indicator light ........110
Brake and clutch system .........110
Electric parking brake ..............110
Electric parking brake fault ......110
Antilock brake system (ABS) ...111
Gear shifting ............................ 111
Following distance ...................111
Lane keep assist .....................111
Electronic Stability Control off . 111
Electronic Stability Control and Traction Control system .........111
Traction Control system off .....112
Preheating ............................... 112
Tyre pressure monitoring system .................................... 112
Engine oil pressure ..................112
Low fuel ................................... 112
Immobiliser .............................. 113
Exterior light ............................ 113
High beam ............................... 113
High beam assist .....................113
LED headlights ........................ 113
Fog light ................................... 113
Rear fog light ........................... 113
Cruise control .......................... 113Adaptive cruise control ............113
Vehicle detected ahead ...........113
Vehicle detected ahead ...........113
Speed limiter ........................... 114
Traffic sign assistant ................114
Door open ................................ 114
Information displays ...................114
Driver Information Centre ........114
Info display .............................. 119
Vehicle messages ......................122
Warning chimes .......................122
Battery voltage ........................ 123
Vehicle personalisation ..............123
Telematics service .....................129
OnStar ..................................... 129
Page 96 of 305
94Instruments and controls
Keep the sensor free from dust, dirt
and ice.
Rain sensor function can be activated or deactivated in the Vehicle
personalisation.
Select the relevant setting in Settings,
I Vehicle in the Info-Display.
Info-Display 3 119.
Vehicle personalisation 3 123.
Windscreen washer
Pull lever. Washer fluid is sprayed
onto the windscreen and the wiper
wipes a few times.
Washer fluid 3 228.
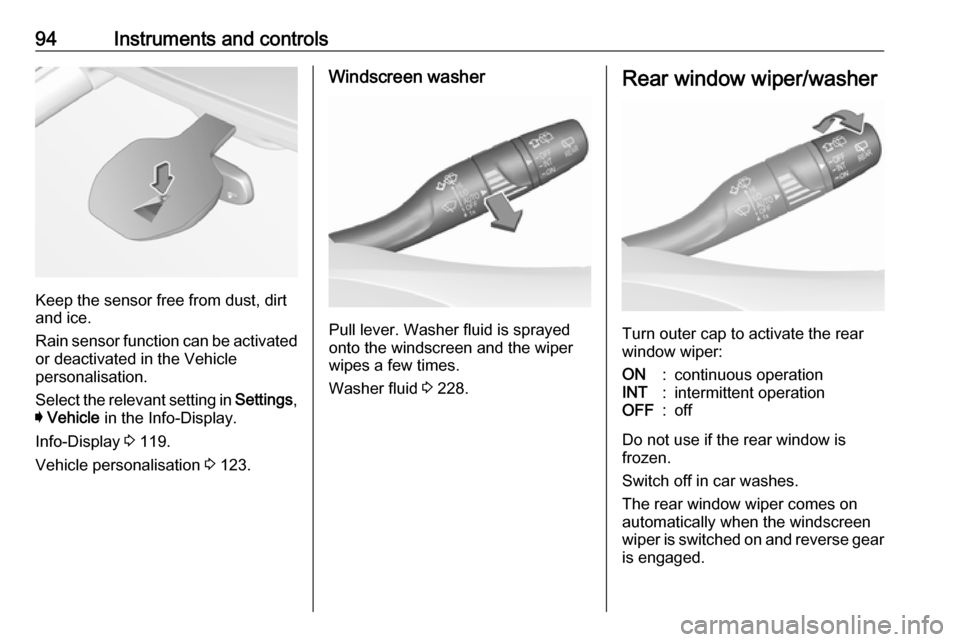
Rear window wiper/washer
Turn outer cap to activate the rear
window wiper:
ON:continuous operationINT:intermittent operationOFF:off
Do not use if the rear window is
frozen.
Switch off in car washes.
The rear window wiper comes on
automatically when the windscreen
wiper is switched on and reverse gear
is engaged.
Page 97 of 305
Instruments and controls95Activation or deactivation of this
function can be changed in the menu Settings in the Info-Display.
Vehicle personalisation 3 123.
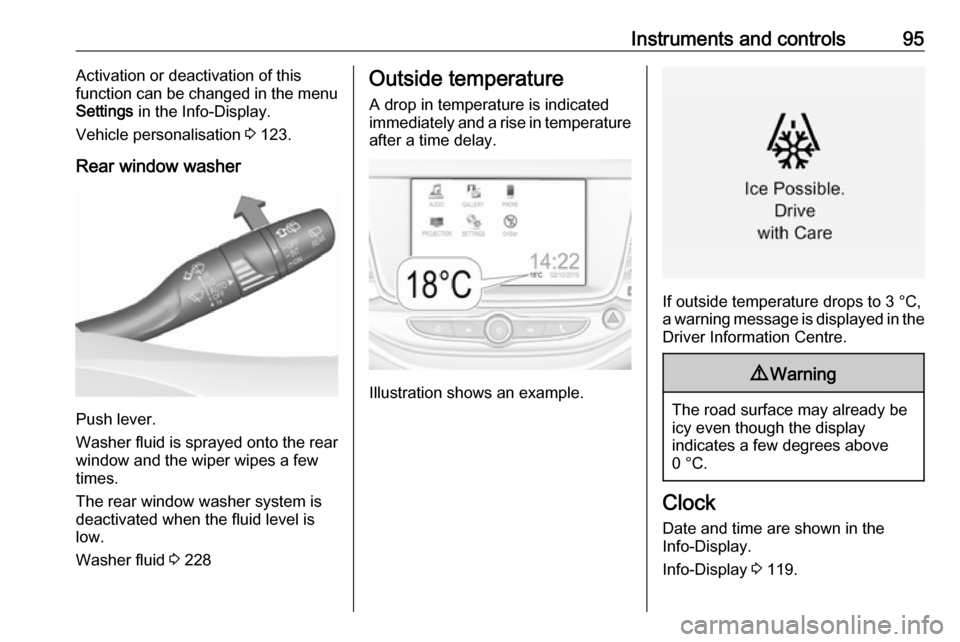
Rear window washer
Push lever.
Washer fluid is sprayed onto the rear
window and the wiper wipes a few
times.
The rear window washer system is
deactivated when the fluid level is
low.
Washer fluid 3 228
Outside temperature
A drop in temperature is indicated
immediately and a rise in temperature
after a time delay.
Illustration shows an example.
If outside temperature drops to 3 °C,
a warning message is displayed in the Driver Information Centre.
9 Warning
The road surface may already be
icy even though the display
indicates a few degrees above
0 °C.
Clock
Date and time are shown in the
Info-Display.
Info-Display 3 119.
Page 98 of 305
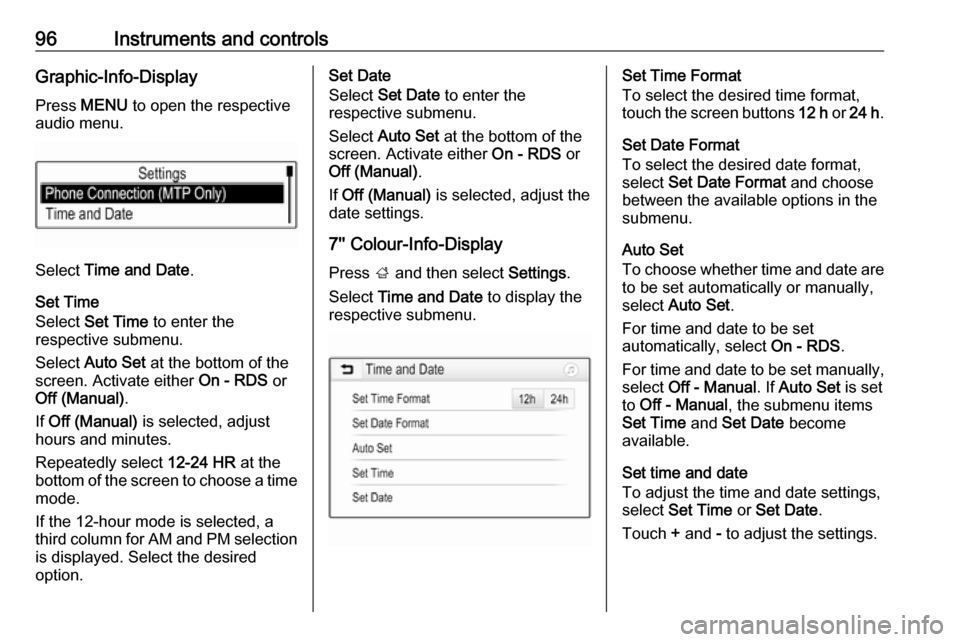
96Instruments and controlsGraphic-Info-DisplayPress MENU to open the respective
audio menu.
Select Time and Date .
Set Time
Select Set Time to enter the
respective submenu.
Select Auto Set at the bottom of the
screen. Activate either On - RDS or
Off (Manual) .
If Off (Manual) is selected, adjust
hours and minutes.
Repeatedly select 12-24 HR at the
bottom of the screen to choose a time mode.
If the 12-hour mode is selected, a
third column for AM and PM selection
is displayed. Select the desired
option.
Set Date
Select Set Date to enter the
respective submenu.
Select Auto Set at the bottom of the
screen. Activate either On - RDS or
Off (Manual) .
If Off (Manual) is selected, adjust the
date settings.
7'' Colour-Info-Display
Press ; and then select Settings.
Select Time and Date to display the
respective submenu.Set Time Format
To select the desired time format,
touch the screen buttons 12 h or 24 h .
Set Date Format
To select the desired date format,
select Set Date Format and choose
between the available options in the
submenu.
Auto Set
To choose whether time and date are
to be set automatically or manually,
select Auto Set .
For time and date to be set
automatically, select On - RDS.
For time and date to be set manually, select Off - Manual . If Auto Set is set
to Off - Manual , the submenu items
Set Time and Set Date become
available.
Set time and date
To adjust the time and date settings, select Set Time or Set Date .
Touch + and - to adjust the settings.
Page 99 of 305
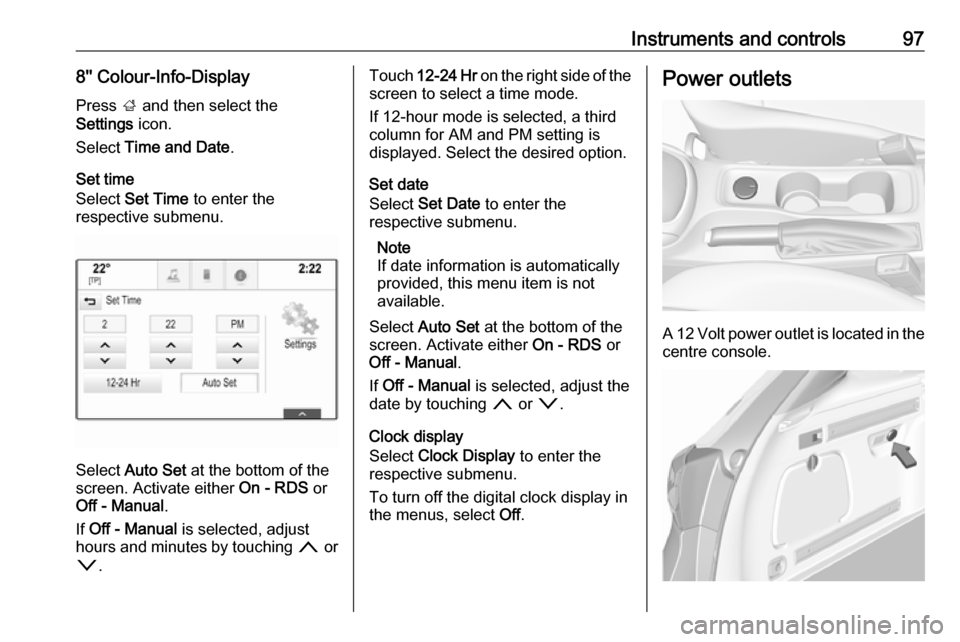
Instruments and controls978'' Colour-Info-Display
Press ; and then select the
Settings icon.
Select Time and Date .
Set time
Select Set Time to enter the
respective submenu.
Select Auto Set at the bottom of the
screen. Activate either On - RDS or
Off - Manual .
If Off - Manual is selected, adjust
hours and minutes by touching n or
o .
Touch 12-24 Hr on the right side of the
screen to select a time mode.
If 12-hour mode is selected, a third
column for AM and PM setting is
displayed. Select the desired option.
Set date
Select Set Date to enter the
respective submenu.
Note
If date information is automatically
provided, this menu item is not
available.
Select Auto Set at the bottom of the
screen. Activate either On - RDS or
Off - Manual .
If Off - Manual is selected, adjust the
date by touching n or o.
Clock display
Select Clock Display to enter the
respective submenu.
To turn off the digital clock display in
the menus, select Off.Power outlets
A 12 Volt power outlet is located in the
centre console.
Page 107 of 305
Instruments and controls105Odometer
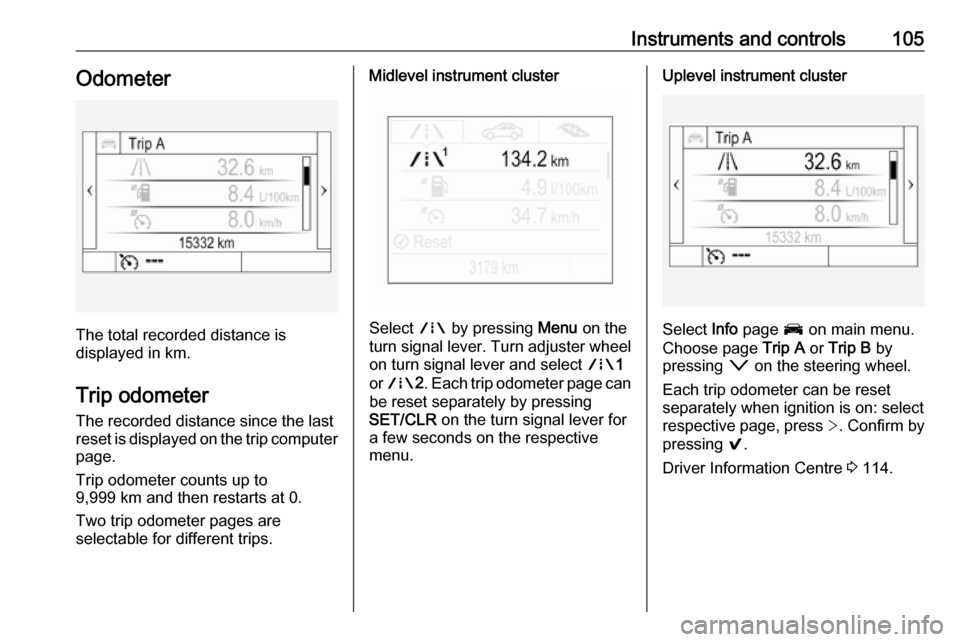
The total recorded distance is
displayed in km.
Trip odometer The recorded distance since the last
reset is displayed on the trip computer
page.
Trip odometer counts up to
9,999 km and then restarts at 0.
Two trip odometer pages are
selectable for different trips.
Midlevel instrument cluster
Select ; by pressing Menu on the
turn signal lever. Turn adjuster wheel
on turn signal lever and select ;1
or ; 2. Each trip odometer page can
be reset separately by pressing
SET/CLR on the turn signal lever for
a few seconds on the respective
menu.
Uplevel instrument cluster
Select Info page J on main menu.
Choose page Trip A or Trip B by
pressing o on the steering wheel.
Each trip odometer can be reset separately when ignition is on: select
respective page, press >. Confirm by
pressing 9.
Driver Information Centre 3 114.