buttons OPEL ASTRA K 2017 Manual user
[x] Cancel search | Manufacturer: OPEL, Model Year: 2017, Model line: ASTRA K, Model: OPEL ASTRA K 2017Pages: 305, PDF Size: 9.11 MB
Page 13 of 305

In brief111Power windows .....................41
2 Exterior mirrors .....................39
3 Central locking system ..........24
4 Side air vents ...................... 153
5 Cruise control .....................180
Speed limiter ....................... 182
Adaptive cruise control .......184
Forward collision alert .........191
6 Turn and lane-change
signals, headlight flash,
low/high beam, high beam
assist ................................... 140
Exit lighting ......................... 143
Parking lights ...................... 141
Buttons for Driver
Information Centre ..............114
7 Instruments ........................ 104
Driver Information Centre .... 114
8 Buttons for Driver
Information Centre ..............114
9 Forward collision alert
indicator ............................. 19110Windscreen wiper and
washer, rear wiper and
washer ................................. 92
11 Centre air vents .................. 153
12 Info-Display ........................ 119
13 Anti-theft alarm system
status LED ........................... 36
14 Hazard warning flashers ....139
15 Glovebox .............................. 71
16 CD player
17 Controls for Info-Display
operation ............................. 119
18 Climate control system ........ 146
19 Fuse box ............................ 245
Power connector ..................98
20 Traction Control system .....177
Electronic Stability Control . 178
Sport mode ........................ 179
Parking assist/Advanced
parking assist .....................198
Lane keep assist ................213
Eco button for stop-start
system ................................. 161
21 Manual transmission ..........170Automatic transmission ......167
Manual transmission
automated ........................... 171
22 Power outlet .......................... 97
23 Parking brake ......................175
24 Power button ....................... 157
25 Ignition switch .....................156
26 Steering wheel adjustment ..91
27 Horn ..................................... 92
28 Bonnet release lever ..........225
29 Storage compartment ...........72
30 Light switch ........................ 134
Headlight range
adjustment ......................... 135
Front/rear fog lights ............140
Instrument illumination .......142
Page 23 of 305
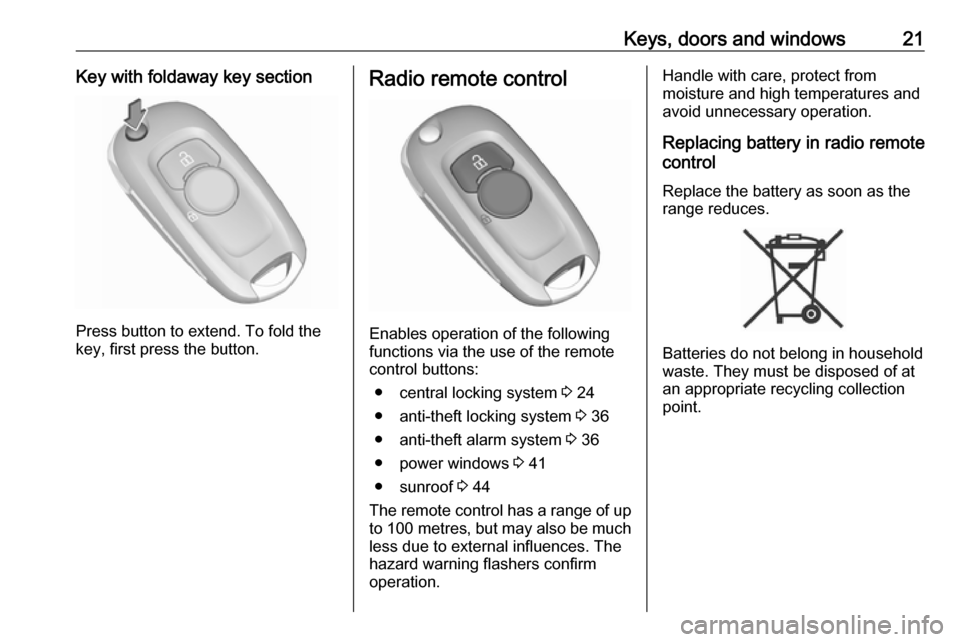
Keys, doors and windows21Key with foldaway key section
Press button to extend. To fold the
key, first press the button.
Radio remote control
Enables operation of the following
functions via the use of the remote control buttons:
● central locking system 3 24
● anti-theft locking system 3 36
● anti-theft alarm system 3 36
● power windows 3 41
● sunroof 3 44
The remote control has a range of up
to 100 metres , but may also be much
less due to external influences. The
hazard warning flashers confirm
operation.
Handle with care, protect from
moisture and high temperatures and
avoid unnecessary operation.
Replacing battery in radio remote
control
Replace the battery as soon as the
range reduces.
Batteries do not belong in household
waste. They must be disposed of at
an appropriate recycling collection
point.
Page 29 of 305
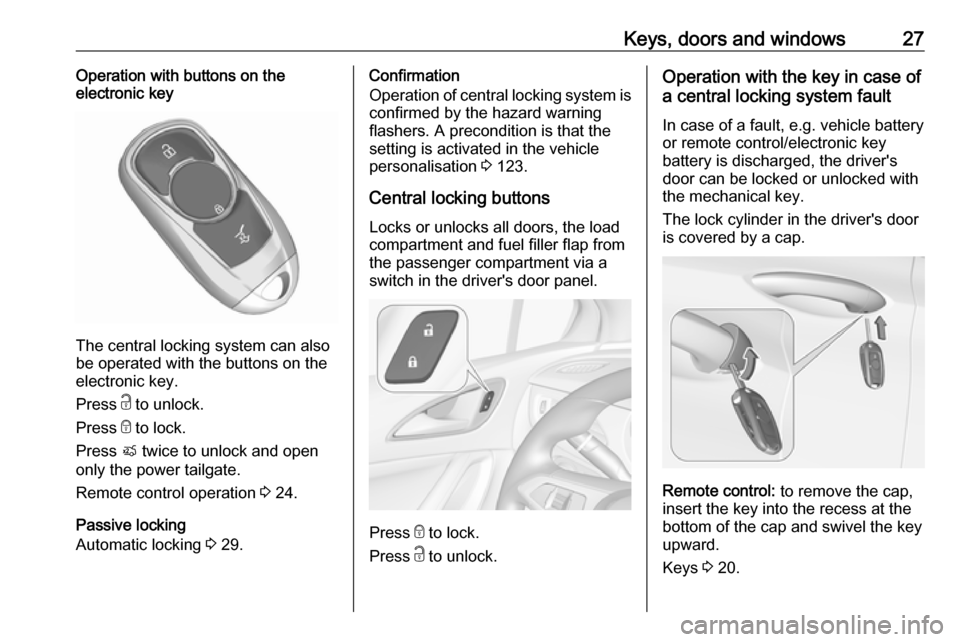
Keys, doors and windows27Operation with buttons on the
electronic key
The central locking system can also
be operated with the buttons on the
electronic key.
Press c to unlock.
Press e to lock.
Press X twice to unlock and open
only the power tailgate.
Remote control operation 3 24.
Passive locking
Automatic locking 3 29.
Confirmation
Operation of central locking system is
confirmed by the hazard warning
flashers. A precondition is that the
setting is activated in the vehicle
personalisation 3 123.
Central locking buttons Locks or unlocks all doors, the load
compartment and fuel filler flap from
the passenger compartment via a
switch in the driver's door panel.
Press e to lock.
Press c to unlock.
Operation with the key in case of
a central locking system fault
In case of a fault, e.g. vehicle battery
or remote control/electronic key
battery is discharged, the driver's
door can be locked or unlocked with
the mechanical key.
The lock cylinder in the driver's door
is covered by a cap.
Remote control: to remove the cap,
insert the key into the recess at the
bottom of the cap and swivel the key
upward.
Keys 3 20.
Page 56 of 305
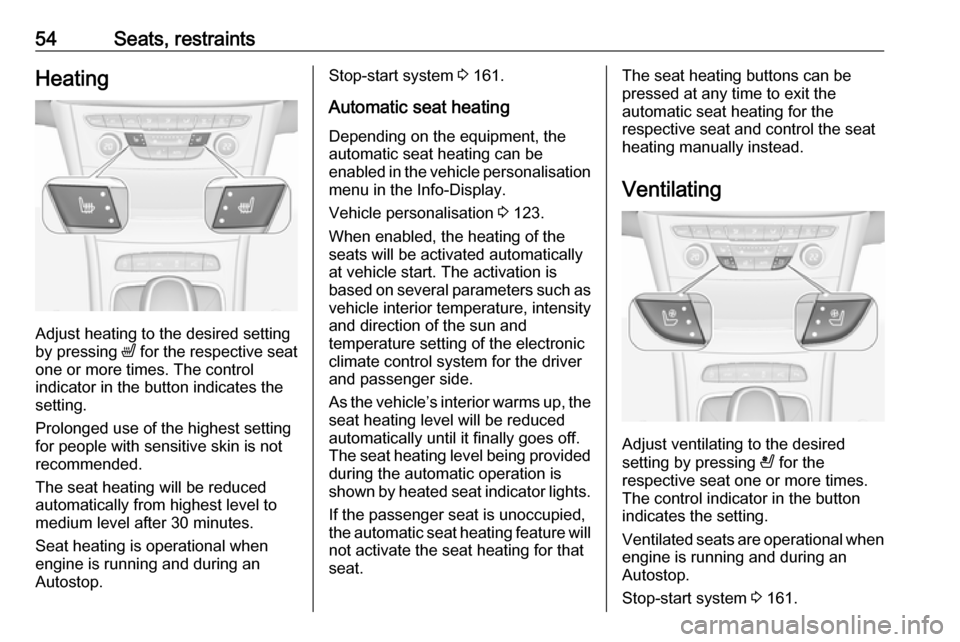
54Seats, restraintsHeating
Adjust heating to the desired setting
by pressing ß for the respective seat
one or more times. The control
indicator in the button indicates the
setting.
Prolonged use of the highest setting
for people with sensitive skin is not
recommended.
The seat heating will be reduced
automatically from highest level to
medium level after 30 minutes.
Seat heating is operational when
engine is running and during an
Autostop.
Stop-start system 3 161.
Automatic seat heating Depending on the equipment, the
automatic seat heating can be
enabled in the vehicle personalisation
menu in the Info-Display.
Vehicle personalisation 3 123.
When enabled, the heating of the
seats will be activated automatically
at vehicle start. The activation is
based on several parameters such as vehicle interior temperature, intensity
and direction of the sun and
temperature setting of the electronic
climate control system for the driver
and passenger side.
As the vehicle’s interior warms up, the seat heating level will be reduced
automatically until it finally goes off. The seat heating level being provided
during the automatic operation is
shown by heated seat indicator lights.
If the passenger seat is unoccupied,
the automatic seat heating feature will not activate the seat heating for that
seat.The seat heating buttons can be
pressed at any time to exit the
automatic seat heating for the
respective seat and control the seat
heating manually instead.
Ventilating
Adjust ventilating to the desired
setting by pressing A for the
respective seat one or more times.
The control indicator in the button
indicates the setting.
Ventilated seats are operational when
engine is running and during an
Autostop.
Stop-start system 3 161.
Page 98 of 305
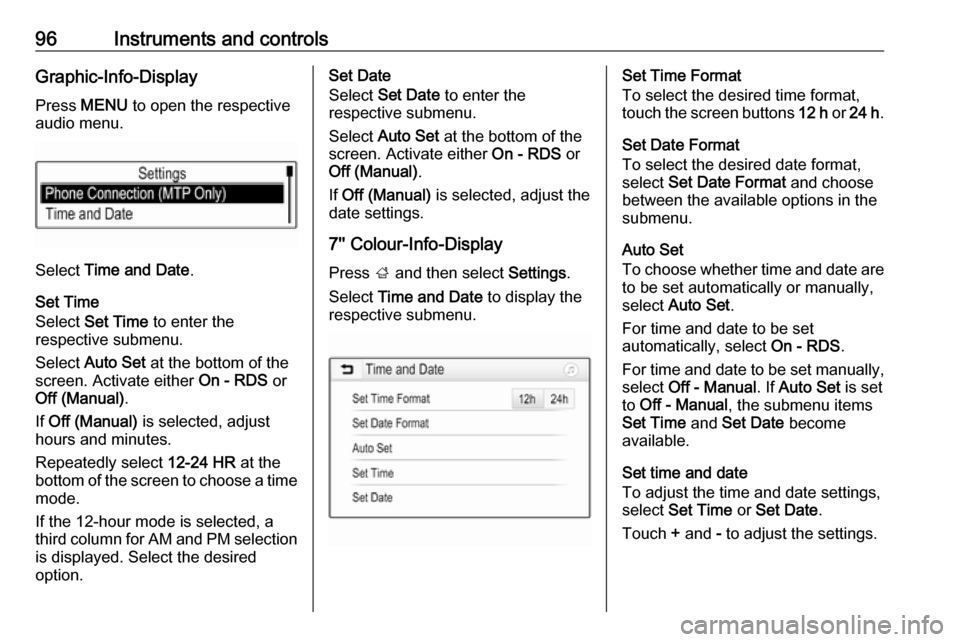
96Instruments and controlsGraphic-Info-DisplayPress MENU to open the respective
audio menu.
Select Time and Date .
Set Time
Select Set Time to enter the
respective submenu.
Select Auto Set at the bottom of the
screen. Activate either On - RDS or
Off (Manual) .
If Off (Manual) is selected, adjust
hours and minutes.
Repeatedly select 12-24 HR at the
bottom of the screen to choose a time mode.
If the 12-hour mode is selected, a
third column for AM and PM selection
is displayed. Select the desired
option.
Set Date
Select Set Date to enter the
respective submenu.
Select Auto Set at the bottom of the
screen. Activate either On - RDS or
Off (Manual) .
If Off (Manual) is selected, adjust the
date settings.
7'' Colour-Info-Display
Press ; and then select Settings.
Select Time and Date to display the
respective submenu.Set Time Format
To select the desired time format,
touch the screen buttons 12 h or 24 h .
Set Date Format
To select the desired date format,
select Set Date Format and choose
between the available options in the
submenu.
Auto Set
To choose whether time and date are
to be set automatically or manually,
select Auto Set .
For time and date to be set
automatically, select On - RDS.
For time and date to be set manually, select Off - Manual . If Auto Set is set
to Off - Manual , the submenu items
Set Time and Set Date become
available.
Set time and date
To adjust the time and date settings, select Set Time or Set Date .
Touch + and - to adjust the settings.
Page 117 of 305
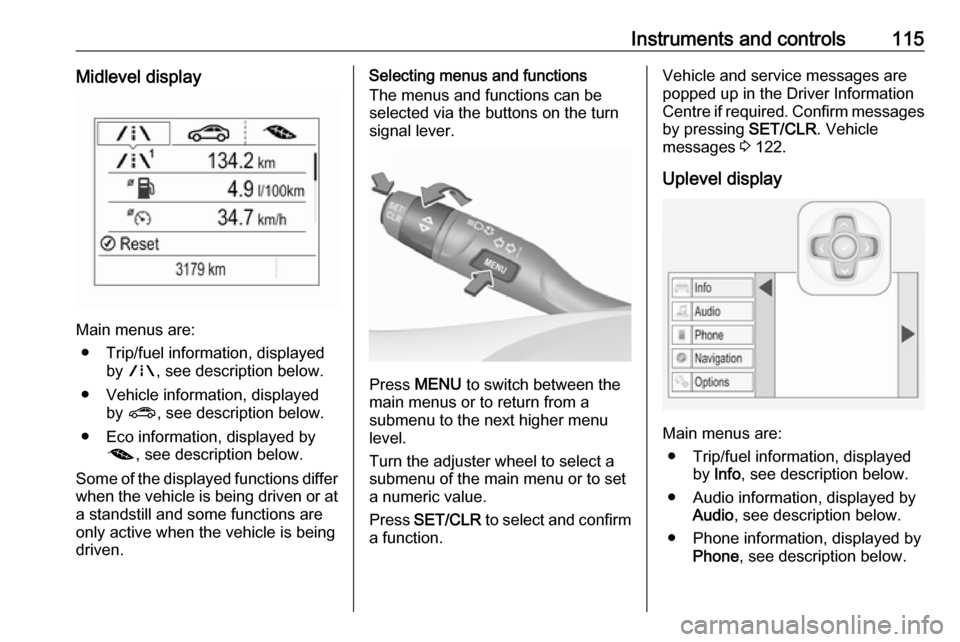
Instruments and controls115Midlevel display
Main menus are:● Trip/fuel information, displayed by ; , see description below.
● Vehicle information, displayed by ? , see description below.
● Eco information, displayed by @ , see description below.
Some of the displayed functions differ
when the vehicle is being driven or at a standstill and some functions are
only active when the vehicle is being
driven.
Selecting menus and functions
The menus and functions can be
selected via the buttons on the turn
signal lever.
Press MENU to switch between the
main menus or to return from a
submenu to the next higher menu
level.
Turn the adjuster wheel to select a
submenu of the main menu or to set
a numeric value.
Press SET/CLR to select and confirm
a function.
Vehicle and service messages are
popped up in the Driver Information
Centre if required. Confirm messages
by pressing SET/CLR. Vehicle
messages 3 122.
Uplevel display
Main menus are: ● Trip/fuel information, displayed by Info , see description below.
● Audio information, displayed by Audio , see description below.
● Phone information, displayed by Phone , see description below.
Page 118 of 305
116Instruments and controls● Navigation information,displayed by Navigation, see
description below.
● Vehicle information, displayed by
Options , see description below.
Some of the displayed functions differ
when the vehicle is being driven or at
a standstill and some functions are
only active when the vehicle is being
driven.
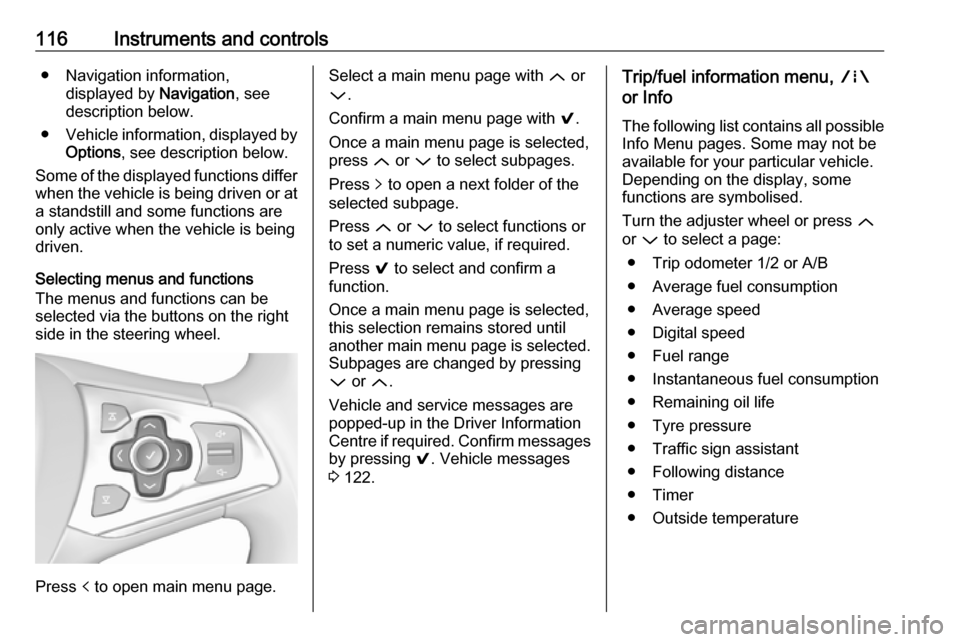
Selecting menus and functions
The menus and functions can be
selected via the buttons on the right
side in the steering wheel.
Press p to open main menu page.
Select a main menu page with Q or
P .
Confirm a main menu page with 9.
Once a main menu page is selected, press Q or P to select subpages.
Press q to open a next folder of the
selected subpage.
Press Q or P to select functions or
to set a numeric value, if required.
Press 9 to select and confirm a
function.
Once a main menu page is selected, this selection remains stored until
another main menu page is selected.
Subpages are changed by pressing
P or Q.
Vehicle and service messages are
popped-up in the Driver Information Centre if required. Confirm messages by pressing 9. Vehicle messages
3 122.Trip/fuel information menu, ;
or Info
The following list contains all possible Info Menu pages. Some may not be
available for your particular vehicle.
Depending on the display, some
functions are symbolised.
Turn the adjuster wheel or press Q
or P to select a page:
● Trip odometer 1/2 or A/B
● Average fuel consumption
● Average speed
● Digital speed
● Fuel range
● Instantaneous fuel consumption
● Remaining oil life
● Tyre pressure
● Traffic sign assistant
● Following distance
● Timer
● Outside temperature
Page 123 of 305
Instruments and controls121For further information, see
Infotainment manual.
Vehicle personalisation 3 123.
8'' Colour-Info-Display
Selecting menus and settings
There are three options to operate the display:
● via buttons below the display● by touching the touchscreen with
the finger
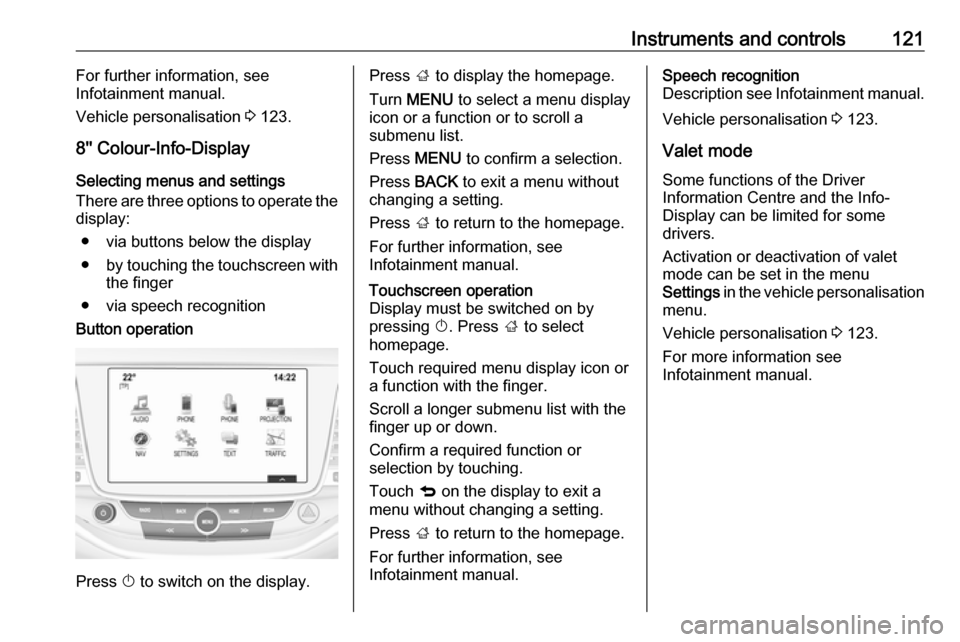
● via speech recognitionButton operation
Press X to switch on the display.
Press ; to display the homepage.
Turn MENU to select a menu display
icon or a function or to scroll a
submenu list.
Press MENU to confirm a selection.
Press BACK to exit a menu without
changing a setting.
Press ; to return to the homepage.
For further information, see
Infotainment manual.Touchscreen operation
Display must be switched on by
pressing X. Press ; to select
homepage.
Touch required menu display icon or a function with the finger.
Scroll a longer submenu list with the
finger up or down.
Confirm a required function or
selection by touching.
Touch q on the display to exit a
menu without changing a setting.
Press ; to return to the homepage.
For further information, see
Infotainment manual.Speech recognition
Description see Infotainment manual.
Vehicle personalisation 3 123.
Valet mode
Some functions of the Driver
Information Centre and the Info-
Display can be limited for some
drivers.
Activation or deactivation of valet
mode can be set in the menu
Settings in the vehicle personalisation
menu.
Vehicle personalisation 3 123.
For more information see
Infotainment manual.
Page 132 of 305
130Instruments and controlsDepending on the equipment of the
vehicle, the following services are
available:
● Emergency services and support
in the case of a vehicle
breakdown
● Wi-Fi hotspot
● Smartphone application
● Remote control, e.g. location of the vehicle, activation of horn and
lights, control of central locking
system
● Stolen vehicle assistance
● Vehicle diagnostics
● Destination download
Note
The OnStar module of the vehicle is
deactivated after ten days without an
ignition cycle. Functions requiring a
data connection will be available
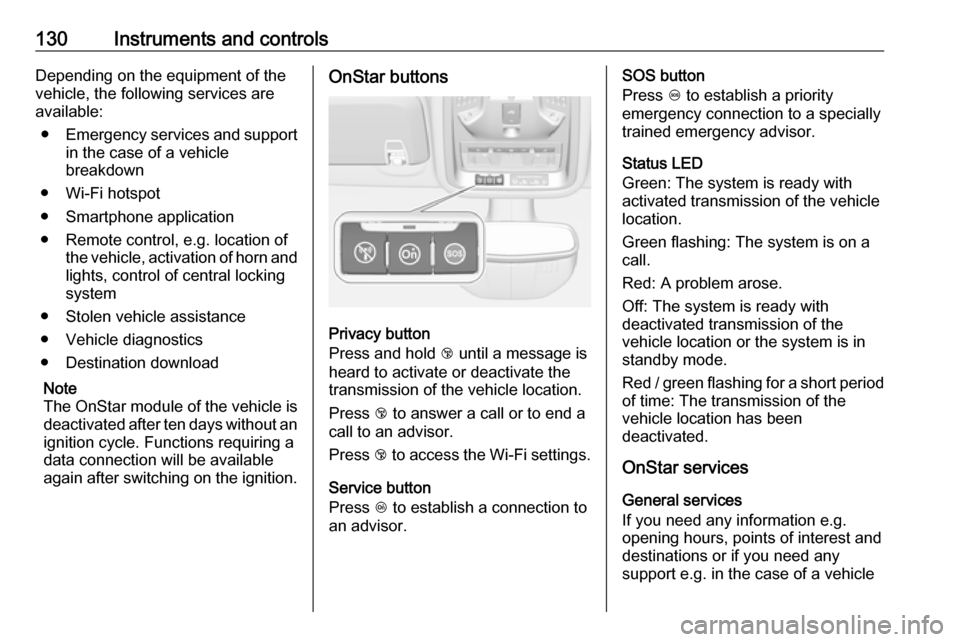
again after switching on the ignition.OnStar buttons
Privacy button
Press and hold j until a message is
heard to activate or deactivate the
transmission of the vehicle location.
Press j to answer a call or to end a
call to an advisor.
Press j to access the Wi-Fi settings.
Service button
Press Z to establish a connection to
an advisor.
SOS button
Press [ to establish a priority
emergency connection to a specially
trained emergency advisor.
Status LED
Green: The system is ready with
activated transmission of the vehicle
location.
Green flashing: The system is on a
call.
Red: A problem arose.
Off: The system is ready with
deactivated transmission of the
vehicle location or the system is in
standby mode.
Red / green flashing for a short period of time: The transmission of the
vehicle location has been
deactivated.
OnStar services
General services
If you need any information e.g.
opening hours, points of interest and
destinations or if you need any
support e.g. in the case of a vehicle
Page 153 of 305
Climate control151If V is pressed while the engine is
in an Autostop, the engine will restart
automatically.
If l is pressed with the fan switched
on while the engine is in an
Autostop, the engine will restart
automatically.
Stop-start system 3 161.
System on or off ON/OFF
Cooling, fan and automatic mode can
be switched off by pressing ON/OFF.
When the system is deactivated, the
LED in the button ON/OFF is off.
Activation by pressing ON/OFF, A/C
or AUTO . The LED in the button
illuminates to indicate activation.
Manual settingsClimate control system settings can
be changed by activating the buttons
and rotary knobs as described below.
Changing a setting will deactivate the
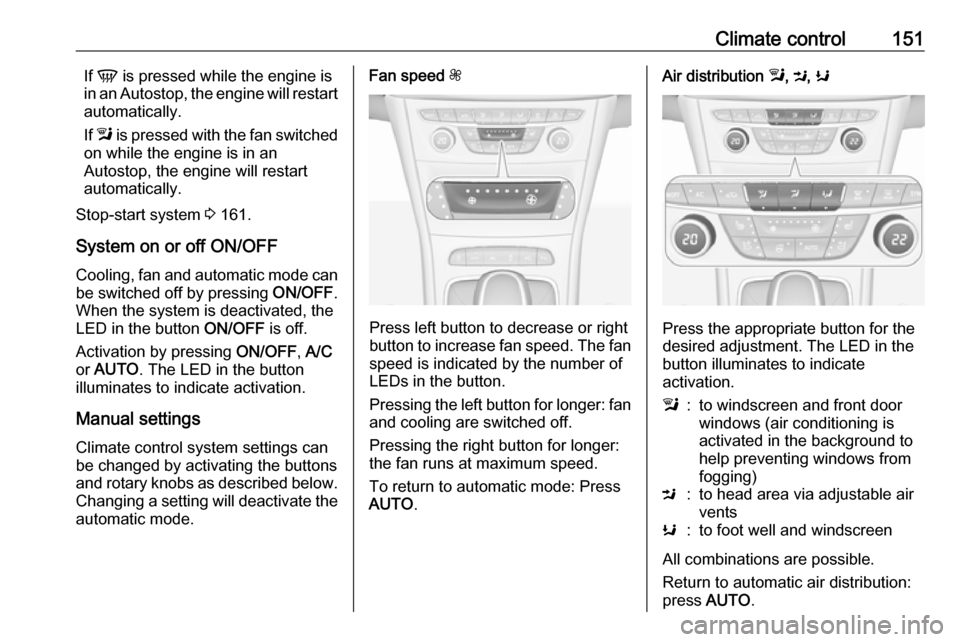
automatic mode.Fan speed Z
Press left button to decrease or right
button to increase fan speed. The fan speed is indicated by the number of
LEDs in the button.
Pressing the left button for longer: fan and cooling are switched off.
Pressing the right button for longer:
the fan runs at maximum speed.
To return to automatic mode: Press
AUTO .
Air distribution l, M , K
Press the appropriate button for the
desired adjustment. The LED in the
button illuminates to indicate
activation.
l:to windscreen and front door
windows (air conditioning is
activated in the background to
help preventing windows from
fogging)M:to head area via adjustable air ventsK:to foot well and windscreen
All combinations are possible.
Return to automatic air distribution:
press AUTO .