stop start OPEL ASTRA K 2017 Manual user
[x] Cancel search | Manufacturer: OPEL, Model Year: 2017, Model line: ASTRA K, Model: OPEL ASTRA K 2017Pages: 305, PDF Size: 9.11 MB
Page 13 of 305

In brief111Power windows .....................41
2 Exterior mirrors .....................39
3 Central locking system ..........24
4 Side air vents ...................... 153
5 Cruise control .....................180
Speed limiter ....................... 182
Adaptive cruise control .......184
Forward collision alert .........191
6 Turn and lane-change
signals, headlight flash,
low/high beam, high beam
assist ................................... 140
Exit lighting ......................... 143
Parking lights ...................... 141
Buttons for Driver
Information Centre ..............114
7 Instruments ........................ 104
Driver Information Centre .... 114
8 Buttons for Driver
Information Centre ..............114
9 Forward collision alert
indicator ............................. 19110Windscreen wiper and
washer, rear wiper and
washer ................................. 92
11 Centre air vents .................. 153
12 Info-Display ........................ 119
13 Anti-theft alarm system
status LED ........................... 36
14 Hazard warning flashers ....139
15 Glovebox .............................. 71
16 CD player
17 Controls for Info-Display
operation ............................. 119
18 Climate control system ........ 146
19 Fuse box ............................ 245
Power connector ..................98
20 Traction Control system .....177
Electronic Stability Control . 178
Sport mode ........................ 179
Parking assist/Advanced
parking assist .....................198
Lane keep assist ................213
Eco button for stop-start
system ................................. 161
21 Manual transmission ..........170Automatic transmission ......167
Manual transmission
automated ........................... 171
22 Power outlet .......................... 97
23 Parking brake ......................175
24 Power button ....................... 157
25 Ignition switch .....................156
26 Steering wheel adjustment ..91
27 Horn ..................................... 92
28 Bonnet release lever ..........225
29 Storage compartment ...........72
30 Light switch ........................ 134
Headlight range
adjustment ......................... 135
Front/rear fog lights ............140
Instrument illumination .......142
Page 20 of 305
18In briefStarting the engine
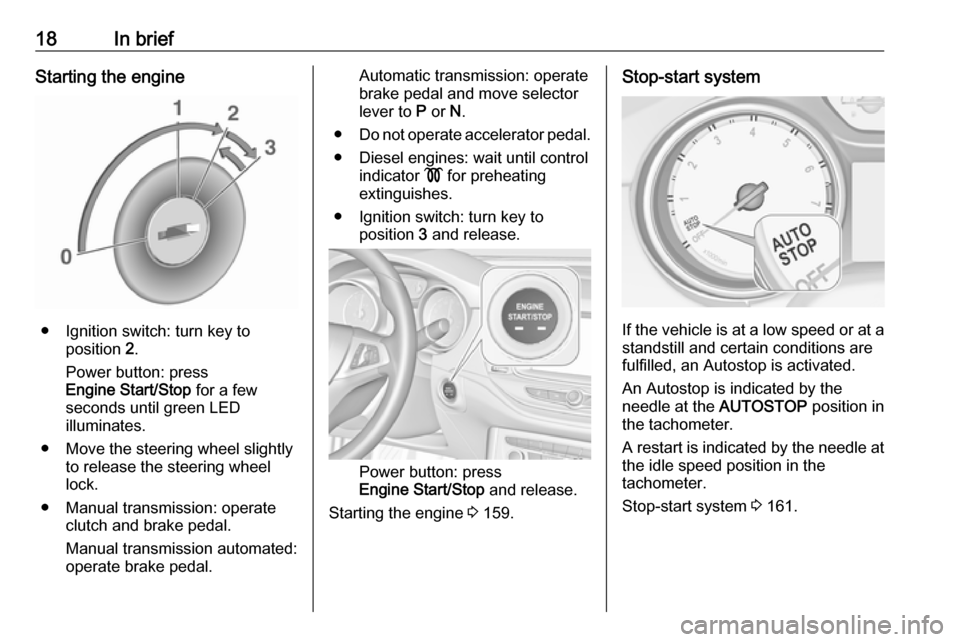
● Ignition switch: turn key toposition 2.
Power button: press
Engine Start/Stop for a few
seconds until green LED
illuminates.
● Move the steering wheel slightly to release the steering wheel
lock.
● Manual transmission: operate clutch and brake pedal.
Manual transmission automated:
operate brake pedal.
Automatic transmission: operate
brake pedal and move selector
lever to P or N.
● Do not operate accelerator pedal.
● Diesel engines: wait until control indicator ! for preheating
extinguishes.
● Ignition switch: turn key to position 3 and release.
Power button: press
Engine Start/Stop and release.
Starting the engine 3 159.
Stop-start system
If the vehicle is at a low speed or at a
standstill and certain conditions are
fulfilled, an Autostop is activated.
An Autostop is indicated by the
needle at the AUTOSTOP position in
the tachometer.
A restart is indicated by the needle at
the idle speed position in the
tachometer.
Stop-start system 3 161.
Page 35 of 305
Keys, doors and windows339Danger
Do not touch any vehicle parts
below the vehicle during
handsfree operation. There is a
risk of injury from hot engine parts.
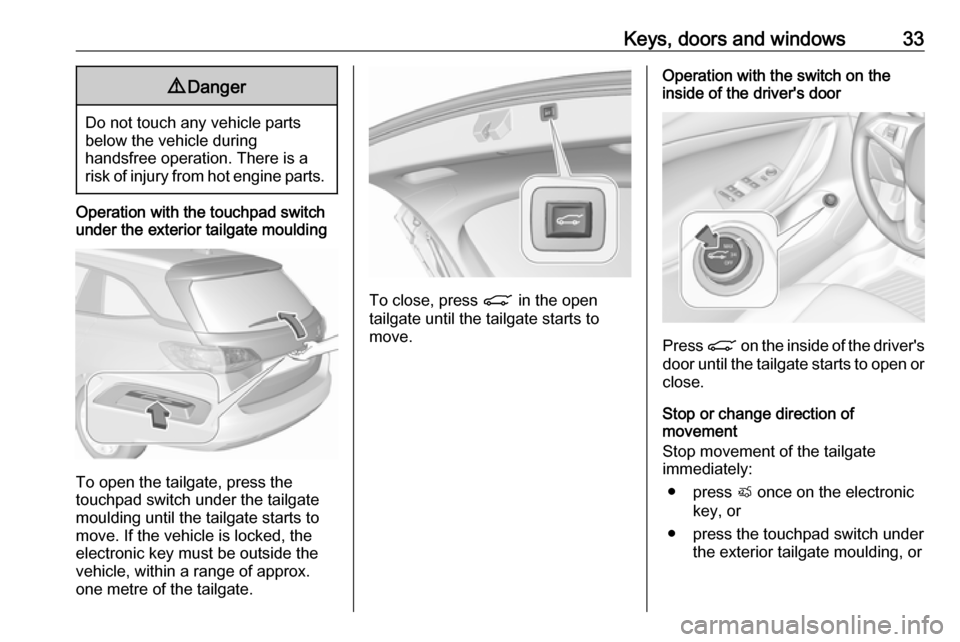
Operation with the touchpad switch
under the exterior tailgate moulding
To open the tailgate, press the
touchpad switch under the tailgate
moulding until the tailgate starts to
move. If the vehicle is locked, the
electronic key must be outside the
vehicle, within a range of approx.
one metre of the tailgate.
To close, press C in the open
tailgate until the tailgate starts to
move.
Operation with the switch on the
inside of the driver's door
Press C on the inside of the driver's
door until the tailgate starts to open or close.
Stop or change direction of
movement
Stop movement of the tailgate
immediately:
● press X once on the electronic
key, or
● press the touchpad switch under the exterior tailgate moulding, or
Page 56 of 305
54Seats, restraintsHeating
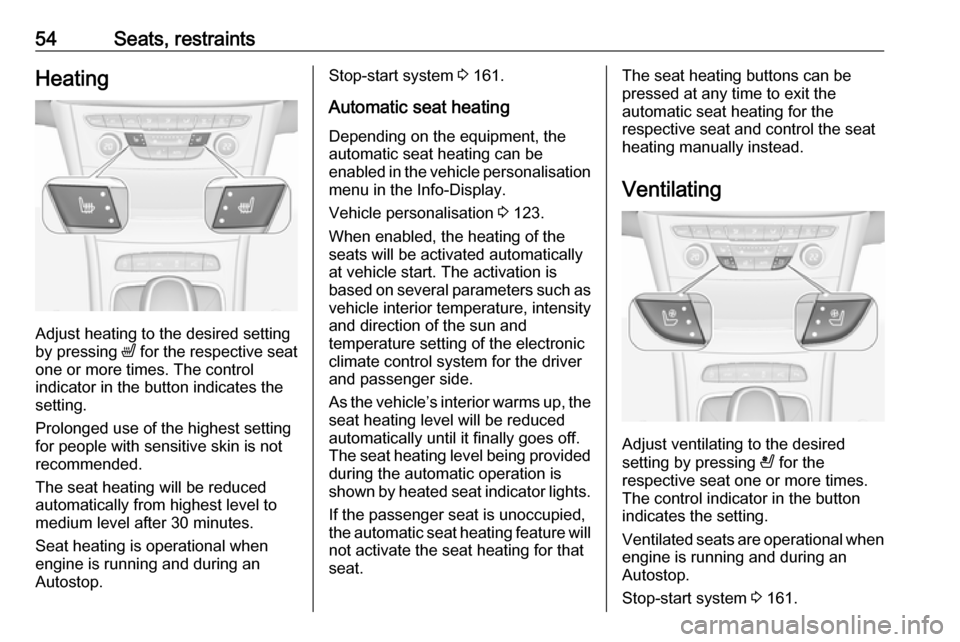
Adjust heating to the desired setting
by pressing ß for the respective seat
one or more times. The control
indicator in the button indicates the
setting.
Prolonged use of the highest setting
for people with sensitive skin is not
recommended.
The seat heating will be reduced
automatically from highest level to
medium level after 30 minutes.
Seat heating is operational when
engine is running and during an
Autostop.
Stop-start system 3 161.
Automatic seat heating Depending on the equipment, the
automatic seat heating can be
enabled in the vehicle personalisation
menu in the Info-Display.
Vehicle personalisation 3 123.
When enabled, the heating of the
seats will be activated automatically
at vehicle start. The activation is
based on several parameters such as vehicle interior temperature, intensity
and direction of the sun and
temperature setting of the electronic
climate control system for the driver
and passenger side.
As the vehicle’s interior warms up, the seat heating level will be reduced
automatically until it finally goes off. The seat heating level being provided
during the automatic operation is
shown by heated seat indicator lights.
If the passenger seat is unoccupied,
the automatic seat heating feature will not activate the seat heating for that
seat.The seat heating buttons can be
pressed at any time to exit the
automatic seat heating for the
respective seat and control the seat
heating manually instead.
Ventilating
Adjust ventilating to the desired
setting by pressing A for the
respective seat one or more times.
The control indicator in the button
indicates the setting.
Ventilated seats are operational when
engine is running and during an
Autostop.
Stop-start system 3 161.
Page 57 of 305

Seats, restraints55Massage
Press c to switch on the back
massage function.
To switch off, press c again.
After ten minutes the massage
function is switched off automatically.
Rear seats
Armrest
Fold armrest down.
Heating
Activate seat heating by pressing ß
for the respective rear outer seat.
Activation is indicated by the LED in
the button.
Press ß once more to deactivate seat
heating.
Prolonged use for people with
sensitive skin is not recommended.
Seat heating is operational when engine is running and during an
Autostop.
Stop-start system 3 161.
Page 94 of 305
92Instruments and controlsHeated steering wheel
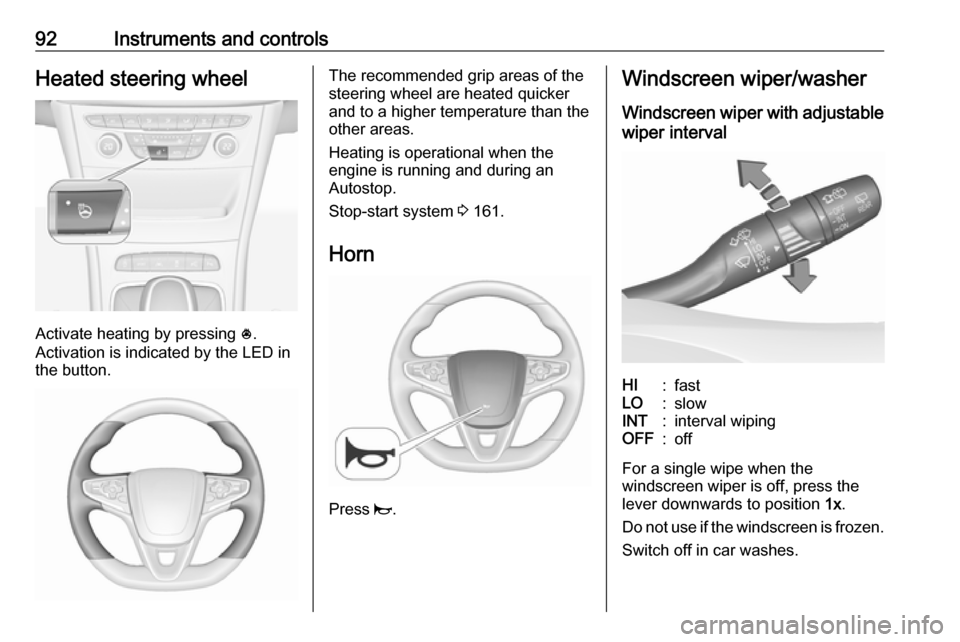
Activate heating by pressing *.
Activation is indicated by the LED in
the button.
The recommended grip areas of the
steering wheel are heated quicker
and to a higher temperature than the
other areas.
Heating is operational when the
engine is running and during an
Autostop.
Stop-start system 3 161.
Horn
Press j.
Windscreen wiper/washer
Windscreen wiper with adjustable
wiper intervalHI:fastLO:slowINT:interval wipingOFF:off
For a single wipe when the
windscreen wiper is off, press the
lever downwards to position 1x.
Do not use if the windscreen is frozen.
Switch off in car washes.
Page 100 of 305
98Instruments and controlsSports Tourer: A 12 Volt power outlet
is located at the left sidewall in the
load compartment.
Do not exceed the maximum power
consumption of 120 watts.
With ignition off, the power outlet is
deactivated. Additionally, the power outlet is deactivated in the event of
low vehicle battery voltage.
Electrical accessories that are
connected must comply with the
electromagnetic compatibility
requirements laid down in
DIN VDE 40 839.
Do not connect any current-delivering
accessories, e.g. electrical charging
devices or batteries.
Do not damage the outlets by using
unsuitable plugs.
Stop-start system 3 161.USB charging port
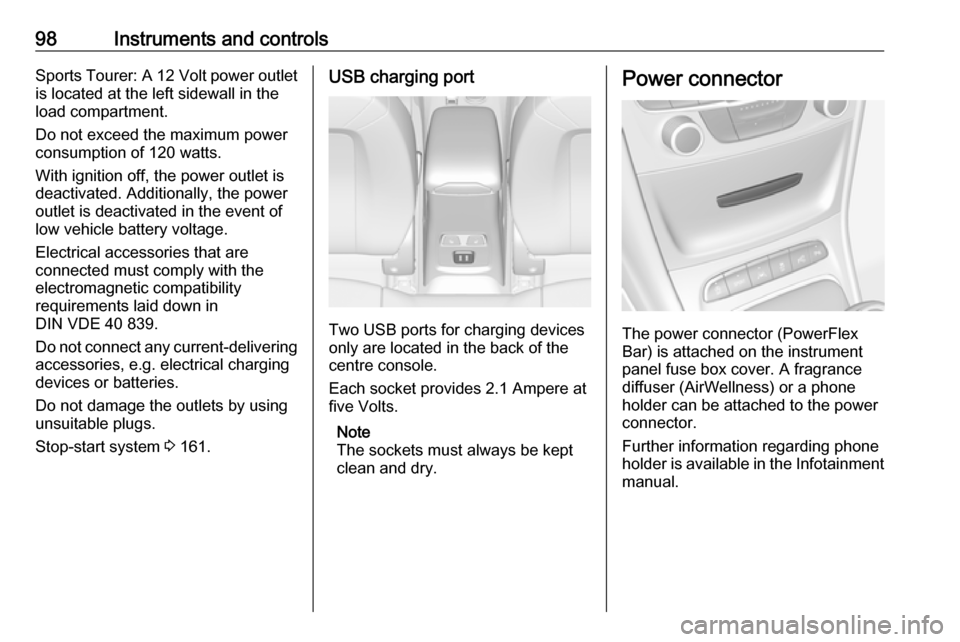
Two USB ports for charging devices
only are located in the back of the
centre console.
Each socket provides 2.1 Ampere at
five Volts.
Note
The sockets must always be kept
clean and dry.
Power connector
The power connector (PowerFlex
Bar) is attached on the instrument
panel fuse box cover. A fragrance
diffuser (AirWellness) or a phone
holder can be attached to the power
connector.
Further information regarding phone
holder is available in the Infotainment
manual.
Page 112 of 305

110Instruments and controlsIlluminates when the engine is
running
Stop, switch off engine. Vehiclebattery is not charging. Engine
cooling may be interrupted. The
brake servo unit may cease to be
effective. Seek the assistance of a
workshop.
Malfunction indicator light
Z illuminates or flashes yellow.
Illuminates when the ignition is
switched on and extinguishes shortly
after the engine starts.
Illuminates when the engine is
running
Fault in the emission control system.
The permitted emission limits may be
exceeded.
On diesel engines the cleaning
process of the diesel particle filter is
potentially not possible.
Seek the assistance of a workshop
immediately.Flashes when the engine is
running
Fault that could lead to catalytic
converter damage. Ease up on the accelerator until the flashing stops.
Seek the assistance of a workshop
immediately.
Brake and clutch system
R illuminates red.
The brake and clutch fluid level is too
low, when manual parking brake is
not applied 3 228.9 Warning
Stop. Do not continue your
journey. Consult a workshop.
Illuminates when the manual parking
brake is applied and ignition is
switched on 3 175.
Electric parking brake
m illuminates or flashes red.
Illuminates
Electric parking brake is applied
3 175.
Flashes
Electric parking brake is not fully applied or released. Depress the brake pedal and attempt to reset the
system by first releasing then
applying the electric parking brake. If
m remains flashing, do not drive and
seek the assistance of a workshop.
Electric parking brake fault j illuminates or flashes yellow.
Illuminates
Electric parking brake is operating
with degraded performance 3 175.
Flashes
Electric parking brake is in service
mode. Stop vehicle, apply and
release the electric parking brake to
reset.
Page 114 of 305
112Instruments and controlsTraction Control system offk illuminates yellow.
The system is deactivated.
Preheating ! illuminates yellow.
Preheating of Diesel engine is
activated. Only activates when
outside temperature is low. Start the
engine when control indicator
extinguishes.
Tyre pressure monitoring system
w illuminates or flashes yellow.
Illuminates
Tyre pressure loss. Stop immediately
and check tyre pressure.
Flashes
Fault in system or tyre without
pressure sensor mounted (e.g. spare
wheel). After 60 to 90 seconds the
control indicator illuminates
continuously. Consult a workshop.Engine oil pressure
I illuminates red.
Illuminates when the ignition is
switched on and extinguishes shortly
after the engine starts.
Illuminates when the engine is
runningCaution
Engine lubrication may be
interrupted. This may result in
damage to the engine and/or
locking of the drive wheels.
1. Depress clutch.
2. Select neutral gear.
3. Move out of the flow of traffic as quickly as possible without
impeding other vehicles.
4. Switch off ignition.
9 Warning
When the engine is off,
considerably more force is needed
to brake and steer.
During an Autostop, the brake
servo unit will still be operational.
Do not remove key until vehicle is stationary, otherwise the steeringwheel lock could engage
unexpectedly.
Check oil level before seeking
assistance of a workshop 3 226.
Low fuel
Y illuminates or flashes yellow.
Illuminates
Level in fuel tank is too low.
Flashes
Fuel used up. Refuel immediately.
Never run the tank dry.
Refuelling 3 215.
Catalytic converter 3 166.
Page 119 of 305

Instruments and controls117On Midlevel display the pages
Remaining Oil Life, Tyre Pressure,
Traffic Sign Assistant and Following
Distance are displayed in the Vehicle
information menu, select ?.
Trip odometer 1/2 or A/B
Trip odometer displays the current
distance since a certain reset.
Trip odometer counts up to a distance
of 9,999 km then restarts at 0.
To reset on Midlevel display, press
SET/CLR for a few seconds.
To reset on Uplevel display, press >
and confirm with 9.
The information of trip odometer page 1/A and 2/B can be reset separately
while the respective display is active.
Average Fuel Consumption
Display of average consumption. The measurement can be reset at any
time and starts with a default value.
To reset on Midlevel display, press SET/CLR for a few seconds, on
Uplevel display, press > and confirm
with 9.Average speed
Display of average speed. The
measurement can be reset at any
time.
To reset on Midlevel display, press
SET/CLR for a few seconds, on
Uplevel display, press > and confirm
with 9.
Digital speed
Digital display of the instantaneous
speed.
Fuel range
Range is calculated from current fuel
level and current consumption. The
display shows average values.
After refuelling, the range is updated
automatically after a brief delay.
When the level in the fuel tank is low,
a message appears on the display
and the control indicator Y in the fuel
gauge illuminates.
When the fuel tank must be refuelled
immediately, a warning message
appears and remains on the display.
Additionally, the control indicator Y in
the fuel gauge flashes 3 112.Instantaneous Fuel Consumption
Display of the instantaneous
consumption.
Remaining Oil Life
Indicates an estimate of the oil's
useful life. The number in percentage means the remainder of current oil life
3 107.
Tyre Pressure
Checks tyre pressure of all wheels
during driving 3 252.
Traffic sign assistant
Displays the detected traffic signs for
the current route section 3 209.
Following Distance
Displays the distance in seconds to a preceding moving vehicle 3 194. If
Adaptive cruise control is active this
page shows the following distance
setting instead.
Timer
To start and stop, press 9. To reset,
press > and confirm reset.