Light sensor OPEL ASTRA K 2017 User Guide
[x] Cancel search | Manufacturer: OPEL, Model Year: 2017, Model line: ASTRA K, Model: OPEL ASTRA K 2017Pages: 305, PDF Size: 9.11 MB
Page 197 of 305

Driving and operating195Active emergency braking
Active emergency braking can help to reduce the damage and injury from
crashes with vehicles and obstacles
directly ahead, when a collision can no longer be avoided either by
manual braking or by steering. Before the active emergency braking
applies, the driver is warned by the
forward collision alert 3 191.
The feature uses various inputs (e.g.
camera sensor, radar sensor, brake
pressure, vehicle speed) to calculate
the probability of a frontal collision.9 Warning
This system is not intended to
replace the driver responsibility for driving the vehicle and looking
ahead. Its function is limited to
supplemental use only to reduce
the vehicle speed before a
collision.
The system may not react for
pedestrians or animals. After a
sudden lane change, the system
needs a certain time to detect the
next preceding vehicle.
The driver shall always be ready to take action and apply the brakes
and steer to avoid collisions.
Functionality
If equipped only with front camera the active emergency braking operates in
forward gear above walking speed up to 85 km/h.
With radar sensor active emergency
braking operates in forward gear
above walking speed at all speeds.
A precondition is that forward collision
alert with front camera system is not
deactivated by pressing V on the
steering wheel 3 191or, with radar
sensor, that it is not deactivated in the
vehicle personalisation menu 3 123.
The system includes: ● brake preparation system
● emergency automatic braking
● forward looking brake assist
● intelligent brake assist (only with radar sensor)
Brake preparation system
When approaching a vehicle ahead
so quickly that a collision is likely, the brake preparation system slightlypressurizes the brakes. This reduces
the response time, when a manual or automatic braking is requested.
The brake system is prepared so that
braking can occur more rapidly.
If equipped only with front camera the system operates up to a speed of 80
km/h.
Emergency automatic braking After activation of brake preparation
system and just before the imminent
collision, this function automatically
applies limited braking to reduce the
impact speed of the collision or
prohibit a crash. Depending on the
situation, the vehicle may
automatically brake moderately or
hard. This front automatic braking can
Page 209 of 305

Driving and operating207Side blind spot alert does not operatewhen the left or right corners of the
rear bumper are covered with mud,
dirt, snow, ice, slush, or in heavy
rainstorms. Cleaning instructions
3 269.
In the event of a fault in the system or
if the system does not work due to
temporary conditions, the symbols in
the mirrors will be permanently
illuminated and a message is
displayed in the Driver Information
Centre. Seek the assistance of a
workshop.
Rear view camera
The rear view camera assists the
driver when reversing by displaying a
view of the area behind the vehicle.
The view of the camera is displayed
in the Colour-Info-Display.9 Warning
The rear view camera does not
replace driver vision. Note that
objects that are outside the
camera's field of view and the
advanced parking assist sensors,
e.g. below the bumper or
underneath the vehicle, are not
displayed.
Do not reverse the vehicle by only looking at the Info-Display and
check the surrounding area
behind and around the vehicle
before reversing.
Activation
Rear view camera is automatically
activated when reverse gear is
engaged.
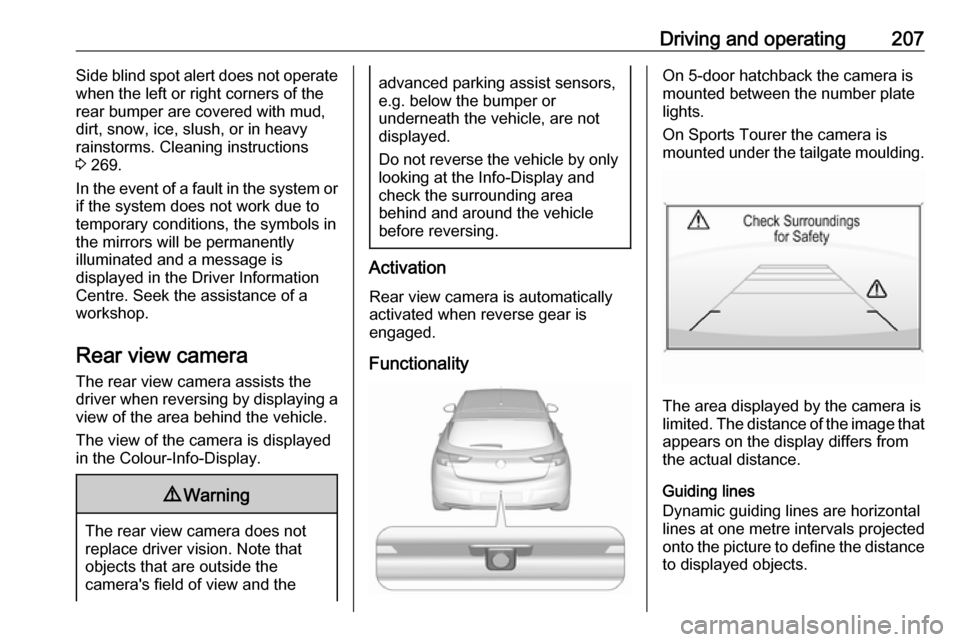
Functionality
On 5-door hatchback the camera is
mounted between the number plate
lights.
On Sports Tourer the camera is
mounted under the tailgate moulding.
The area displayed by the camera is
limited. The distance of the image that
appears on the display differs from
the actual distance.
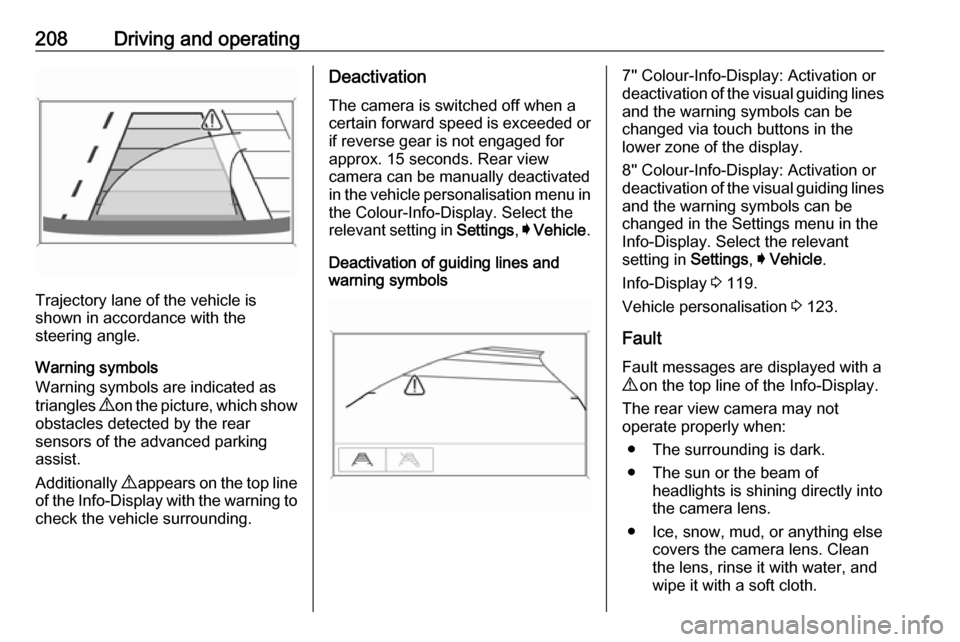
Guiding lines
Dynamic guiding lines are horizontal
lines at one metre intervals projected
onto the picture to define the distance
to displayed objects.
Page 210 of 305

208Driving and operating
Trajectory lane of the vehicle is
shown in accordance with the
steering angle.
Warning symbols
Warning symbols are indicated as
triangles 9 on the picture, which show
obstacles detected by the rear
sensors of the advanced parking
assist.
Additionally 9 appears on the top line
of the Info-Display with the warning to
check the vehicle surrounding.
Deactivation
The camera is switched off when a
certain forward speed is exceeded or
if reverse gear is not engaged for
approx. 15 seconds. Rear view
camera can be manually deactivated
in the vehicle personalisation menu in
the Colour-Info-Display. Select the
relevant setting in Settings, I Vehicle .
Deactivation of guiding lines and
warning symbols7'' Colour-Info-Display: Activation or
deactivation of the visual guiding lines and the warning symbols can be
changed via touch buttons in the
lower zone of the display.
8'' Colour-Info-Display: Activation or
deactivation of the visual guiding lines
and the warning symbols can be
changed in the Settings menu in the
Info-Display. Select the relevant
setting in Settings, I Vehicle .
Info-Display 3 119.
Vehicle personalisation 3 123.
Fault
Fault messages are displayed with a
9 on the top line of the Info-Display.
The rear view camera may not
operate properly when:
● The surrounding is dark.
● The sun or the beam of headlights is shining directly into
the camera lens.
● Ice, snow, mud, or anything else covers the camera lens. Clean
the lens, rinse it with water, and
wipe it with a soft cloth.
Page 246 of 305

244Vehicle careNo.Circuit18Diesel exhaust system19Diesel exhaust system20–21DC/AC Converter22ABS23Washer system for windscreen
and rear window24–25Diesel fuel heating26Transmission control module27Power tailgate module28–29Heated rear window30Mirror defrost31–32DC transformer/LED display/
Electrical heater/Climate
control/Glow plug controllerNo.Circuit33Anti theft warning34Horn35Power outlet load compartment36Right high beam (Halogen)/
Right low beam (LED)37Left high beam (Halogen)38LED headlight/Automatic head‐
light range adjustment39Front fog light40OnStar41Water in fuel sensor/Water
pump42Manual headlight range adjust‐
ment43Fuel pump44Rear view camera/Inside rear
view mirror/Trailer module45LED headlight left/Automatic
headlight range adjustment leftNo.Circuit46Instrument cluster47Steering column lock48Rear wiper49–50LED headlight right/Automatic
headlight range adjustment
right51Left low beam (LED)52Engine control module/Trans‐
mission control module53–54Windscreen wiper55Diesel exhaust system56–57–
After having changed defective fuses,
close the fuse box cover and press
until it engages.
If the fuse box cover is not closed
correctly, malfunction may occur.
Page 256 of 305

254Vehicle careThe Tyre load menu only appears
when the vehicle is at a standstill and the parking brake is applied. On
vehicles with automatic transmission
the selector lever must be in P.
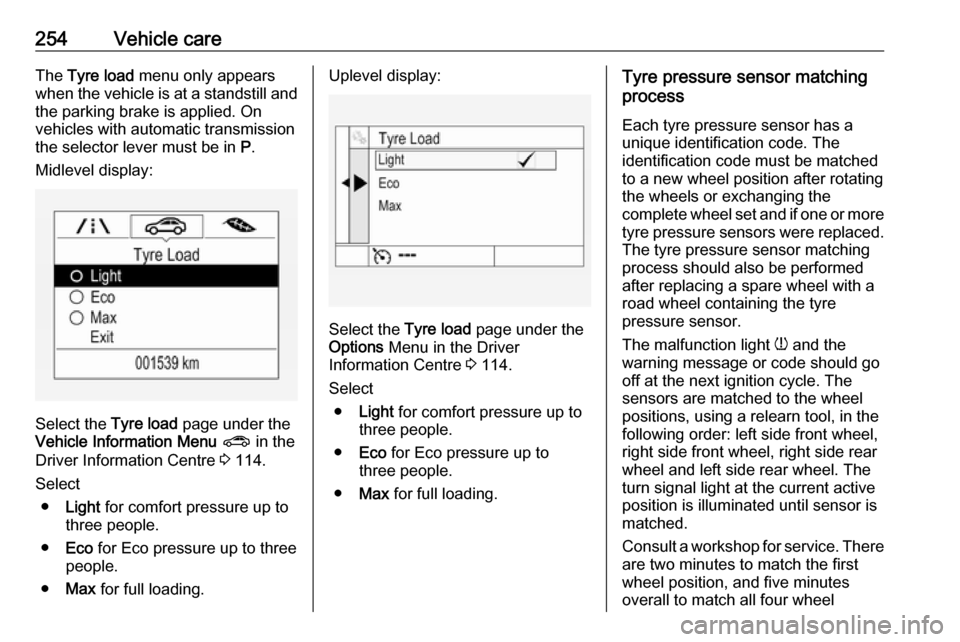
Midlevel display:
Select the Tyre load page under the
Vehicle Information Menu ? in the
Driver Information Centre 3 114.
Select ● Light for comfort pressure up to
three people.
● Eco for Eco pressure up to three
people.
● Max for full loading.
Uplevel display:
Select the Tyre load page under the
Options Menu in the Driver
Information Centre 3 114.
Select ● Light for comfort pressure up to
three people.
● Eco for Eco pressure up to
three people.
● Max for full loading.
Tyre pressure sensor matching
process
Each tyre pressure sensor has a
unique identification code. The
identification code must be matched
to a new wheel position after rotating the wheels or exchanging the
complete wheel set and if one or more tyre pressure sensors were replaced.
The tyre pressure sensor matching
process should also be performed
after replacing a spare wheel with a
road wheel containing the tyre
pressure sensor.
The malfunction light w and the
warning message or code should go
off at the next ignition cycle. The
sensors are matched to the wheel
positions, using a relearn tool, in the following order: left side front wheel,
right side front wheel, right side rear
wheel and left side rear wheel. The
turn signal light at the current active
position is illuminated until sensor is
matched.
Consult a workshop for service. There are two minutes to match the first
wheel position, and five minutes
overall to match all four wheel