engine light OPEL ASTRA K 2017 Owner's Guide
[x] Cancel search | Manufacturer: OPEL, Model Year: 2017, Model line: ASTRA K, Model: OPEL ASTRA K 2017Pages: 305, PDF Size: 9.11 MB
Page 176 of 305
174Driving and operatingIn the event of a fault, a warning
message is displayed in the Driver
Information Centre. Vehicle
messages 3 122.
Continued driving is restricted or not
possible, depending on the fault.
Have the cause of the fault remedied
by a workshop.Brakes
The brake system comprises two
independent brake circuits.
If a brake circuit fails, the vehicle can
still be braked using the other brake
circuit. However, braking effect is
achieved only when the brake pedal
is depressed firmly. Considerably
more force is needed for this. The
braking distance is extended. Seek the assistance of a workshop before
continuing the journey.
When the engine is not running, the
support of the brake servo unit
disappears once the brake pedal has
been depressed once or twice.
Braking effect is not reduced, but
braking requires significantly greater
force. It is especially important to bear this in mind when being towed.
Control indicator R 3 110.
Antilock brake system
Antilock brake system (ABS)
prevents the wheels from locking.ABS starts to regulate brake pressure as soon as a wheel shows a tendency to lock. The vehicle remains
steerable, even during hard braking.
ABS control is made apparent
through a pulse in the brake pedal
and the noise of the regulation
process.
For optimum braking, keep the brake
pedal fully depressed throughout the
braking process, despite the fact that
the pedal is pulsating. Do not reduce
the pressure on the pedal.
After starting off, the system performs
a self-test which may be audible.
Control indicator u 3 111.
Adaptive brake light During full braking, all three brake
lights flash for the duration of ABS
control.
Page 178 of 305

176Driving and operating3 110. The electric parking brake
operates automatically with
adequate force.
Before leaving the vehicle, check
the electric parking brake status.
Control indicator m 3 110.
The electric parking brake can always
be activated, even if the ignition is off.
Do not operate electric parking brake
system too often without engine
running as this will discharge the
vehicle battery.
Releasing
Switch on ignition. Keep foot brake
pedal depressed and then push
switch m.
Drive away function
Vehicles with manual transmission:
Depressing the clutch pedal and then
slightly releasing the clutch pedal and slightly depressing the accelerator
pedal releases the electric parking
brake automatically. This is not
possible when switch m is pulled at
the same time.
Vehicles with automatic transmission
or manual transmission automated:
Engaging D and then depressing the
accelerator pedal releases the
electric parking brake automatically.
This is not possible when switch m is
pulled at the same time.
Dynamic braking when vehicle is
moving
When the vehicle is moving and the
switch m is kept pulled, the electric
parking brake system will decelerate
the vehicle, but will not apply
statically.
As soon as the switch m is released,
dynamic braking will be stopped.
Automatic applying
If the vehicle is equipped with
automatic transmission and adaptive
cruise control is active, electric
parking brake is applied automatically when vehicle is stopped by the
system for more than two minutes.
Parking brake releases automatically
after moving off.Functionality check
When the vehicle is not moving, the
electric parking brake might be
applied automatically. This is done to
check the system.
Fault
Failure mode of electric parking brake
is indicated by a control indicator j
and by a vehicle message which is
displayed in the Driver Information
Centre. Vehicle messages 3 122.
Apply electric parking brake: pull and
hold the switch m for more than
five seconds. If control indicator m
illuminates, electric parking brake is
applied.
Release electric parking brake: push and hold the switch m for more than
two seconds. If control indicator m
extinguishes, electric parking brake is
released.
Control indicator m flashes: electric
parking brake is not fully applied or
released. When continuously
flashing, release electric parking
brake and retry applying.
Page 217 of 305
Driving and operating215Fuel
Fuel for petrol engines Only use unleaded fuel that complies
with European standard EN 228 or
E DIN 51626-1 or equivalent.
The engine is capable of running with fuel that contains up to 10% ethanol(e.g. named E10).
Use fuel with the recommended
octane rating. A lower octane rating
can reduce engine power and torque
and slightly increases fuel
consumption.Caution
Do not use fuel or fuel additives
that contain metallic compounds
such as manganese-based
additives. This may cause engine
damage.
Caution
Use of fuel that does not comply to EN 228 or E DIN 51626-1 or
equivalent can lead to deposits or
engine damage.
Caution
Use of fuel with a lower octane
rating than the lowest possible
rating could lead to uncontrolled combustion and engine damage.
The engine specific requirements
regarding octane rating are given in
the engine data overview 3 280. A
country specific label at the fuel filler
flap can supersede the requirement.
Fuel for diesel engines Only use diesel fuel that complies
with EN 590.
In countries outside the European
Union use Euro-Diesel fuel with a
sulphur concentration below 50 ppm.
Caution
Use of fuel that does not comply to EN 590 or similar can lead to
engine powerloss, increased wear
or engine damage.
Do not use marine diesel oils, heating
oils, Aquazole and similar diesel-
water emulsions. Diesel fuels must
not be diluted with fuels for petrol
engines.
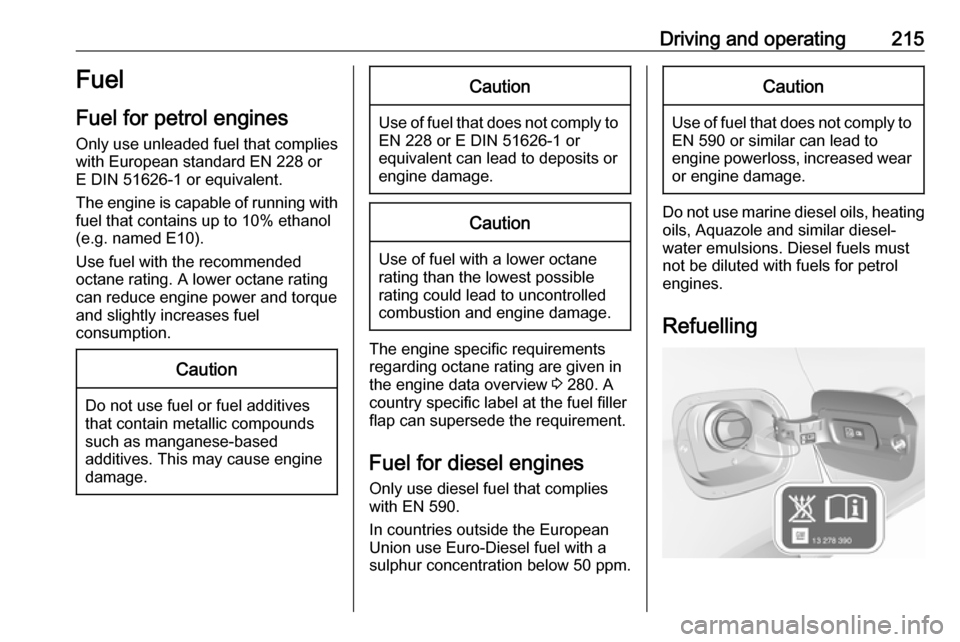
Refuelling
Page 220 of 305

218Driving and operatingDriving characteristics andtowing tips
Before attaching a trailer, lubricate the coupling ball. However, do not do
so if a stabiliser, which acts on the coupling ball, is being used to reduce snaking movements.
During trailer towing do not exceed a
speed of 80 km/h. A maximum speed
of 100 km/h is only appropriate if an
oscillation damper is used and the
permissible gross trailer weight does
not exceed the vehicle’s curb weight.
For trailers with low driving stability
and caravan trailers, the use of an
oscillation damper is strongly
recommended.
If the trailer starts snaking, drive more slowly, do not attempt to correct the
steering and brake sharply if
necessary.
When driving downhill, drive in the
same gear as if driving uphill and
drive at a similar speed.
Adjust tyre pressure to the value
specified for full load 3 288.Trailer towing
Trailer loads The permissible trailer loads are
vehicle and engine-dependent
maximum values which must not be
exceeded. The actual trailer load is
the difference between the actual
gross weight of the trailer and the
actual coupling socket load with the
trailer coupled.
The permissible trailer loads are
specified in the vehicle documents. In general, they are valid for gradients
up to 12%.
The permissible trailer load applies
up to the specified incline and at sea
level. Since engine power decreases
as altitude increases due to the air
becoming thinner, therefore reducing
climbing ability, the permissible gross
train weight also decreases by 10%
for every 1000 metres of altitude. The gross train weight does not have to be
reduced when driving on roads with
slight inclines (less than 8%, e.g.
motorways).The permissible gross train weight must not be exceeded. This weight is specified on the identification plate
3 275.
Vertical coupling load
The vertical coupling load is the load
exerted by the trailer on the coupling
ball. It can be varied by changing the
weight distribution when loading the
trailer.
The maximum permissible vertical
coupling load (75 kg) is specified on
the towing equipment identification
plate and in the vehicle documents.
Always aim for the maximum load,
especially in the case of heavy
trailers. The vertical coupling load
should never fall below 25 kg.
Rear axle load
When the trailer is coupled and the
towing vehicle fully loaded, the
permissible rear axle load (see
identification plate or vehicle
documents) may be exceeded by
40 kg. If the permissible rear axle load is exceeded, a maximum speed of100 km/h applies.
Page 225 of 305

Vehicle care223Vehicle careGeneral Information...................223
Accessories and vehicle modifications .......................... 223
Vehicle storage ........................224
End-of-life vehicle recovery .....224
Vehicle checks ........................... 225
Performing work ......................225
Bonnet ..................................... 225
Engine oil ................................. 226
Engine coolant ......................... 227
Washer fluid ............................ 228
Brakes ..................................... 228
Brake fluid ............................... 228
Vehicle battery ......................... 229
Diesel fuel system bleeding .....230
Wiper blade replacement ........231
Bulb replacement .......................231
Halogen headlights ..................231
Fog lights ................................. 233
Tail lights ................................. 234
Side turn signal lights ..............240
Number plate light ...................241
Interior lights ............................ 241
Instrument panel illumination ...241Electrical system ........................242
Fuses ....................................... 242
Engine compartment fuse box . 243
Instrument panel fuse box .......245
Load compartment fuse box ....247
Vehicle tools .............................. 249
Tools ........................................ 249
Wheels and tyres .......................250
Winter tyres ............................. 250
Tyre designations ....................250
Tyre pressure .......................... 251
Tyre pressure monitoring system .................................... 252
Tread depth ............................. 256
Changing tyre and wheel size . 256 Wheel covers ........................... 256
Tyre chains .............................. 257
Tyre repair kit .......................... 257
Wheel changing .......................260
Spare wheel ............................ 263
Jump starting ............................. 265
Towing ....................................... 267
Towing the vehicle ...................267
Towing another vehicle ...........268
Appearance care .......................269
Exterior care ............................ 269
Interior care ............................. 271General Information
Accessories and vehiclemodifications
We recommend the use of genuine
parts and accessories and factory
approved parts specific for your
vehicle type. We cannot assess or guarantee reliability of other products
- even if they have a regulatory or
otherwise granted approval.
Any modification, conversion or other
changes made to standard vehicle
specifications (including, without
limitation, software modifications,
modifications of the electronic control units) may invalidate the warranty
offered by Opel. Furthermore, such
changes may impact fuel
consumption, CO 2 emissions and
other emissions of the vehicle and
cause the vehicle to no longer
conform to the type approval,
impacting the validity of your vehicle
registration.
Page 233 of 305
Vehicle care231Wiper blade replacement
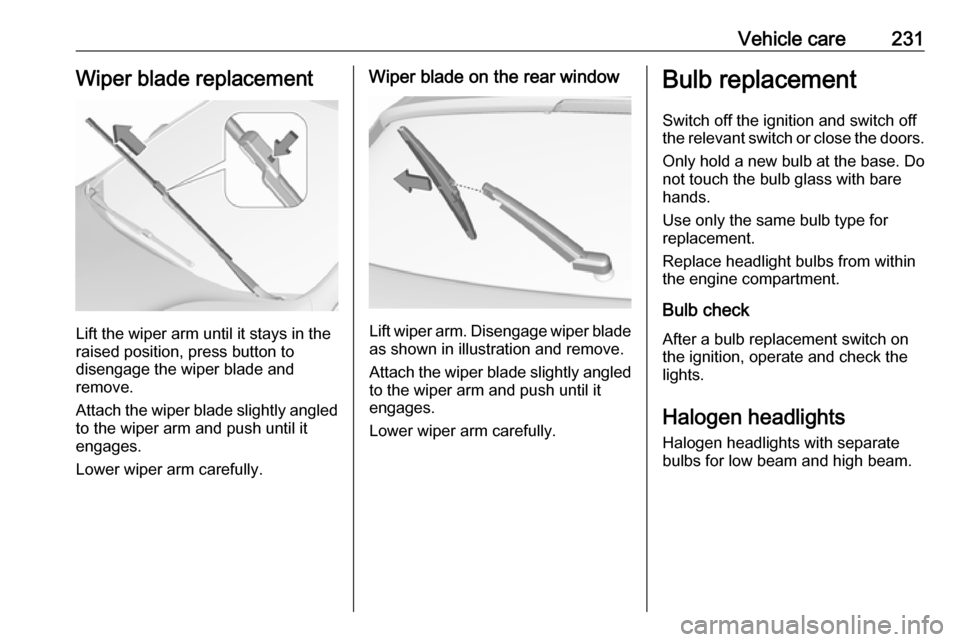
Lift the wiper arm until it stays in the
raised position, press button to
disengage the wiper blade and
remove.
Attach the wiper blade slightly angled
to the wiper arm and push until it
engages.
Lower wiper arm carefully.
Wiper blade on the rear window
Lift wiper arm. Disengage wiper blade as shown in illustration and remove.
Attach the wiper blade slightly angled
to the wiper arm and push until it
engages.
Lower wiper arm carefully.
Bulb replacement
Switch off the ignition and switch off
the relevant switch or close the doors.
Only hold a new bulb at the base. Do not touch the bulb glass with bare
hands.
Use only the same bulb type for
replacement.
Replace headlight bulbs from within
the engine compartment.
Bulb check
After a bulb replacement switch on
the ignition, operate and check the
lights.
Halogen headlights Halogen headlights with separate
bulbs for low beam and high beam.
Page 246 of 305

244Vehicle careNo.Circuit18Diesel exhaust system19Diesel exhaust system20–21DC/AC Converter22ABS23Washer system for windscreen
and rear window24–25Diesel fuel heating26Transmission control module27Power tailgate module28–29Heated rear window30Mirror defrost31–32DC transformer/LED display/
Electrical heater/Climate
control/Glow plug controllerNo.Circuit33Anti theft warning34Horn35Power outlet load compartment36Right high beam (Halogen)/
Right low beam (LED)37Left high beam (Halogen)38LED headlight/Automatic head‐
light range adjustment39Front fog light40OnStar41Water in fuel sensor/Water
pump42Manual headlight range adjust‐
ment43Fuel pump44Rear view camera/Inside rear
view mirror/Trailer module45LED headlight left/Automatic
headlight range adjustment leftNo.Circuit46Instrument cluster47Steering column lock48Rear wiper49–50LED headlight right/Automatic
headlight range adjustment
right51Left low beam (LED)52Engine control module/Trans‐
mission control module53–54Windscreen wiper55Diesel exhaust system56–57–
After having changed defective fuses,
close the fuse box cover and press
until it engages.
If the fuse box cover is not closed
correctly, malfunction may occur.
Page 261 of 305
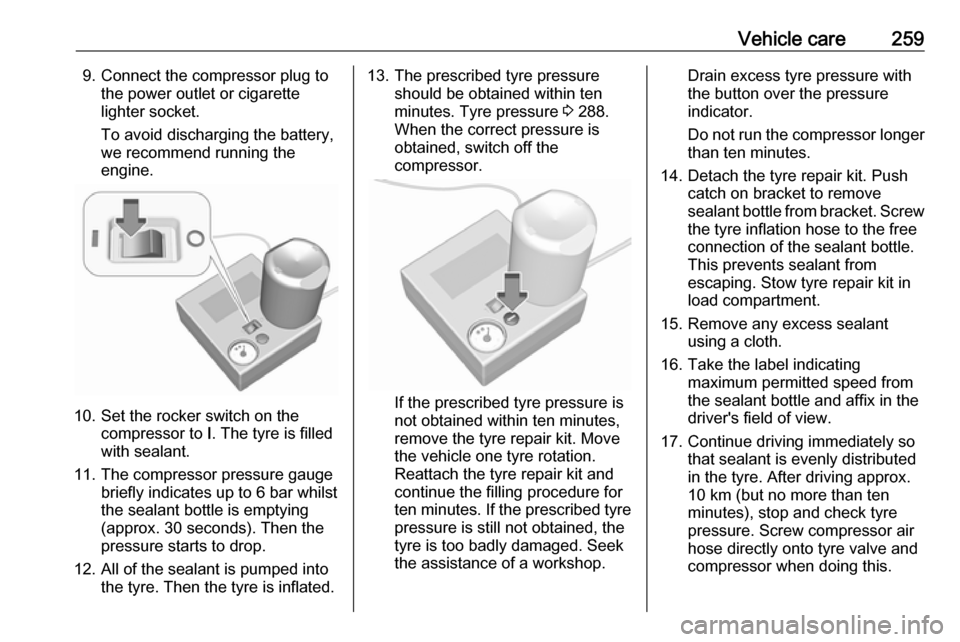
Vehicle care2599. Connect the compressor plug tothe power outlet or cigarette
lighter socket.
To avoid discharging the battery,
we recommend running the
engine.
10. Set the rocker switch on the compressor to I. The tyre is filled
with sealant.
11. The compressor pressure gauge briefly indicates up to 6 bar whilstthe sealant bottle is emptying
(approx. 30 seconds). Then the
pressure starts to drop.
12. All of the sealant is pumped into the tyre. Then the tyre is inflated.
13. The prescribed tyre pressure should be obtained within ten
minutes. Tyre pressure 3 288.
When the correct pressure is
obtained, switch off the
compressor.
If the prescribed tyre pressure is
not obtained within ten minutes,
remove the tyre repair kit. Move
the vehicle one tyre rotation.
Reattach the tyre repair kit and
continue the filling procedure for
ten minutes. If the prescribed tyre
pressure is still not obtained, the
tyre is too badly damaged. Seek
the assistance of a workshop.
Drain excess tyre pressure with
the button over the pressure indicator.
Do not run the compressor longer
than ten minutes.
14. Detach the tyre repair kit. Push catch on bracket to remove
sealant bottle from bracket. Screw the tyre inflation hose to the free
connection of the sealant bottle.
This prevents sealant from
escaping. Stow tyre repair kit in
load compartment.
15. Remove any excess sealant using a cloth.
16. Take the label indicating maximum permitted speed from
the sealant bottle and affix in the
driver's field of view.
17. Continue driving immediately so that sealant is evenly distributed
in the tyre. After driving approx.
10 km (but no more than ten
minutes), stop and check tyre
pressure. Screw compressor air
hose directly onto tyre valve and
compressor when doing this.
Page 269 of 305
Vehicle care2673. Allow both engines to idle forapprox. three minutes with the
leads connected.
4. Switch on electrical consumers (e.g. headlights, heated rear
window) of the vehicle receiving
the jump start.
5. Reverse above sequence exactly when removing leads.Towing
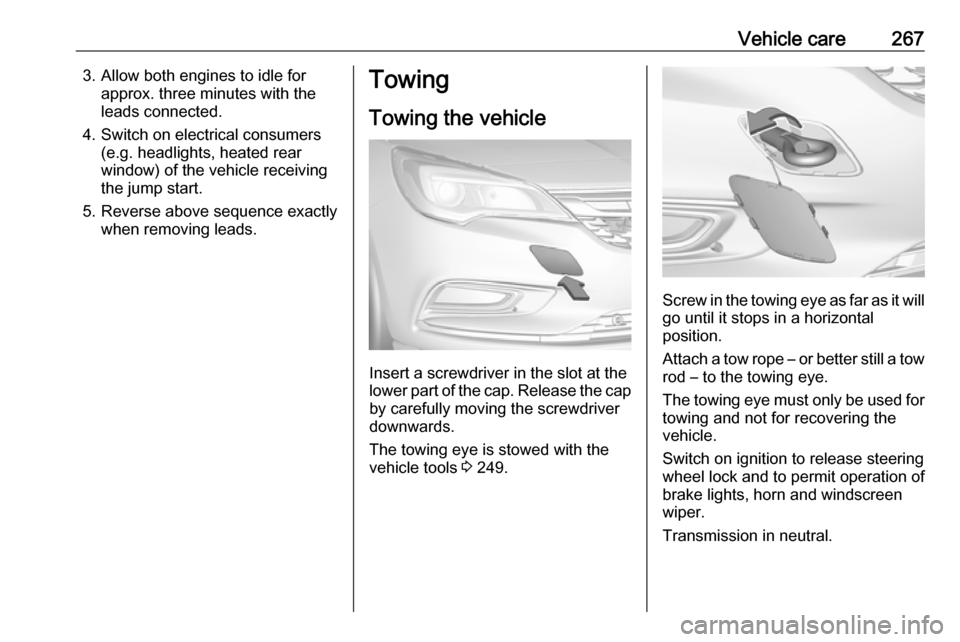
Towing the vehicle
Insert a screwdriver in the slot at the
lower part of the cap. Release the cap
by carefully moving the screwdriver
downwards.
The towing eye is stowed with the
vehicle tools 3 249.
Screw in the towing eye as far as it will
go until it stops in a horizontal
position.
Attach a tow rope – or better still a tow
rod – to the towing eye.
The towing eye must only be used for
towing and not for recovering the
vehicle.
Switch on ignition to release steering wheel lock and to permit operation of
brake lights, horn and windscreen
wiper.
Transmission in neutral.
Page 301 of 305

299Control indicators........................ 108
Control of the vehicle .................156
Controls ........................................ 91
Convex shape .............................. 39
Coolant and antifreeze ...............273
Cruise control ....................113, 180
Cupholders .................................. 71
Curtain airbag system .................. 62
Curve lighting.............................. 136
D
Danger, Warnings and Cautions ...4
Daytime running lights ...............136
Declaration of conformity ............292
Diesel fuel system bleeding .......230
Diesel particle filter ....................166
Door open .................................. 114
Doors ............................................ 30
Driver assistance systems ..........180
Driver Information Centre ...........114
Driving characteristics and towing tips .............................. 218
Driving hints ................................ 156
E Electric adjustment ......................39
Electrical system......................... 242
Electric parking brake .........110, 175
Electric parking brake fault .........110
Electronic climate control system 148Electronic driving programmes .
........................................ 169, 173
Electronic key system ...................22
Electronic Stability Control.......... 178
Electronic Stability Control and Traction Control system ..........111
Electronic Stability Control off..... 111
End-of-life vehicle recovery .......224
Engine compartment fuse box ...243
Engine coolant ........................... 227
Engine coolant temperature gauge ..................................... 106
Engine data ............................... 280
Engine exhaust .......................... 165
Engine identification ...................276
Engine oil ................... 226, 273, 277
Engine oil pressure ....................112
Entry lighting .............................. 143
Event data recorders ..................296
Exit lighting ................................ 143
Exterior care .............................. 269
Exterior light ............................... 113
Exterior lighting ....................13, 134
Exterior mirrors ............................. 39
F
Fault ................................... 169, 173
First aid kit ................................... 86
Fixed air vents ........................... 153
Fog light ..................................... 113Fog lights ................................... 233
Folding mirrors ............................. 39
Following distance ......................111
Following distance indication ......194
Forward collision alert................. 191
Fragrance diffuser ........................98
Front airbag system .....................61
Front fog lights ........................... 140
Front seats.................................... 47
Front storage ................................ 72
Fuel............................................. 215
Fuel consumption - CO 2-
Emissions ............................... 216
Fuel for diesel engines ..............215
Fuel for petrol engines ...............215
Fuel gauge ................................. 106 Fuses ......................................... 242
G
Gauges ....................................... 104
Gear shifting ............................... 111
General information ...................217
Glovebox ..................................... 71
H
Halogen headlights ....................231
Hand brake ......................... 174, 175
Hazard warning flashers ............139
Headlight flash ........................... 135
Headlight range adjustment ......135
Headlights................................... 134