check OPEL ASTRA K 2017 Owner's Manual
[x] Cancel search | Manufacturer: OPEL, Model Year: 2017, Model line: ASTRA K, Model: OPEL ASTRA K 2017Pages: 305, PDF Size: 9.11 MB
Page 19 of 305
![OPEL ASTRA K 2017 Owners Manual In brief17Automatic transmissionP:park positionR:reverseN:neutral modeD:automatic modeM:manual mode<:upshift]:downshift
The selector lever can only be movedout of P when the ignition is on and
the br OPEL ASTRA K 2017 Owners Manual In brief17Automatic transmissionP:park positionR:reverseN:neutral modeD:automatic modeM:manual mode<:upshift]:downshift
The selector lever can only be movedout of P when the ignition is on and
the br](/img/37/18779/w960_18779-18.png)
In brief17Automatic transmissionP:park positionR:reverseN:neutral modeD:automatic modeM:manual mode<:upshift]:downshift
The selector lever can only be movedout of P when the ignition is on and
the brake pedal is applied. To engage
P or R, press the release button.
Automatic transmission 3 167.
Manual transmission automatedN:neutral positionD:automatic modeM:manual mode<:upshift]:downshiftR:reverse
Engage reverse only when vehicle is stationary.
Manual transmission automated
3 171.
Starting off
Check before starting off ● tyre pressure and condition 3 251, 3 288
● Engine oil level and fluid levels 3 226.
● All windows, mirrors, exterior lighting and number plates are
free from dirt, snow and ice and
are operational.
● Proper position of mirrors, seats, and seat belts 3 39, 3 47,
3 57.
● Brake function at low speed, particularly if the brakes are wet.
Page 37 of 305
Keys, doors and windows35The tailgate can only be held open if
a minimum height is exceeded
(minimum opening angle from 30°).
The opening height cannot be
programmed below that height.
Safety function
If the power tailgate encounters an
obstacle during opening or closing,
the direction of movement will
automatically be reversed slightly.
Multiple obstacles in one power cycle
will deactivate the function. In this
case, close or open the tailgate
manually.
The power tailgate has pinch sensors
on the side edges. If the sensors
detect obstacles between tailgate and chassis, the tailgate will open, until it
is activated again or closed manually.
The safety function is indicated by a
warning chime.
Remove all obstacles before
resuming normal power operation.
If the vehicle is equipped with factory- fitted towing equipment and a trailer
is electrically connected, the power
tailgate can only be opened with thetouchpad switch or closed with G in
the open tailgate. Ensure that there are no obstacles in the moving area.
Overload
If the power tailgate is repeatedly
operated at short intervals, the
function is disabled for some time.
Move tailgate manually into end
position to reset the system.
General hints for operating
tailgate9 Danger
Do not drive with the tailgate open
or ajar, e.g. when transporting
bulky objects, since toxic exhaust
gases, which cannot be seen or
smelled, could enter the vehicle.
This can cause unconsciousness
and even death.
Caution
Before opening the tailgate, check overhead obstructions, e.g. a
garage door, to avoid damage to
the tailgate. Always check the
moving area above and behind the
tailgate.
Note
The installation of certain heavy
accessories onto the tailgate may
affect its ability to remain open.
Note
The operation of the power tailgate
is disabled under low vehicle battery
conditions. In this case, the tailgate
may not even by manually operable.
Note
With the power tailgate disabled and all doors unlocked, the tailgate can
only be operated manually. In this
event, manually closing the tailgate
requires significantly greater force.
Note
At low outside temperatures the
tailgate may not open fully by itself.
In this case lift the tailgate manually
to its normal end position.
Page 40 of 305

38Keys, doors and windowsStatus after system is armed:LED flashes
slowly:system is armed
Seek the assistance of a workshop in the event of faults.
Deactivation Radio remote control: Unlocking the
vehicle by pressing c deactivates the
anti-theft alarm system.
Electronic key system: Unlocking the
vehicle by pressing the button on any
exterior door handle deactivates the
anti-theft alarm system.
The electronic key must be outside
the vehicle, within a range of approx. one metre of the relevant door side.
The system is not deactivated by
unlocking the driver's door with the
key or with the central locking button
in the passenger compartment.
Alarm When triggered, the alarm horn
sounds and the hazard warning lights flash simultaneously. The number
and duration of alarm signals are
stipulated by legislation.
The anti-theft alarm system can be
deactivated by pressing c, by
pressing the switch on the door
handle with electronic key system or
switching on the ignition.
A triggered alarm, which has not been
interrupted by the driver, will be
indicated by the hazard warning
lights. They will flash quickly three
times the next time the vehicle is
unlocked with the radio remote
control. Additionally a warning
message is displayed in the Driver
Information Centre after switching on
the ignition.Vehicle messages 3 122.
If the vehicle's battery is to be
disconnected (e.g. for maintenance
work), the alarm siren must be
deactivated as follows: switch the
ignition on then off, then disconnect
the vehicle's battery within
15 seconds.
Immobiliser
The system is part of the ignition
switch and checks whether the
vehicle is allowed to be started with the key being used.
The immobiliser is activated
automatically after the key has been
removed from the ignition switch.
If the control indicator d flashes when
the ignition is on, there is a fault in the
system; the engine cannot be started. Switch off the ignition and repeat the
start attempt.
If the control indicator d continues
flashing, attempt to start the engine
using the spare key and seek the
assistance of a workshop.
Page 58 of 305
56Seats, restraintsSeat belts
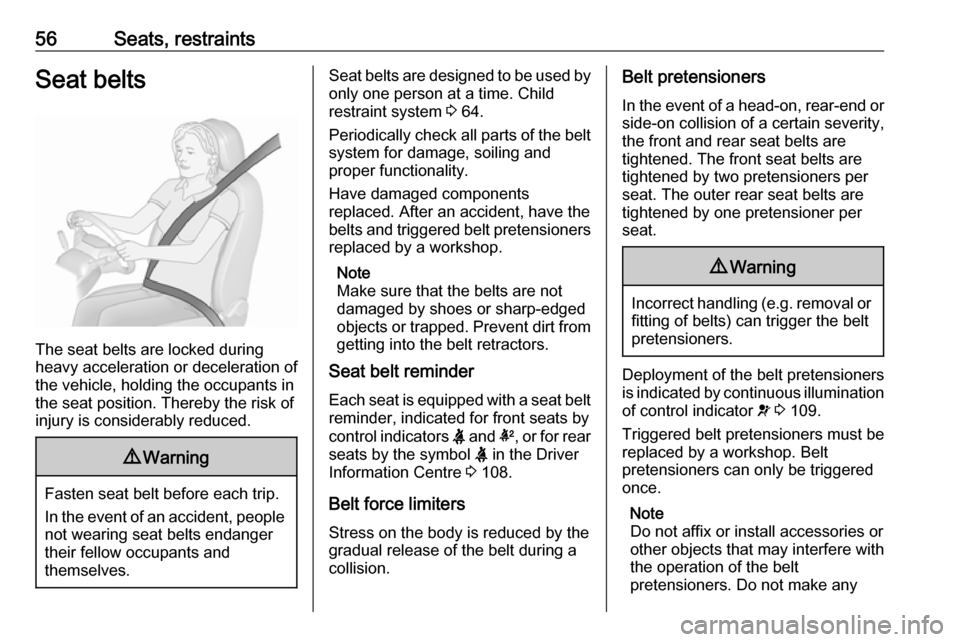
The seat belts are locked during
heavy acceleration or deceleration of
the vehicle, holding the occupants in
the seat position. Thereby the risk of
injury is considerably reduced.
9 Warning
Fasten seat belt before each trip.
In the event of an accident, people
not wearing seat belts endanger their fellow occupants and
themselves.
Seat belts are designed to be used by only one person at a time. Child
restraint system 3 64.
Periodically check all parts of the belt
system for damage, soiling and
proper functionality.
Have damaged components
replaced. After an accident, have the
belts and triggered belt pretensioners replaced by a workshop.
Note
Make sure that the belts are not
damaged by shoes or sharp-edged
objects or trapped. Prevent dirt from
getting into the belt retractors.
Seat belt reminder
Each seat is equipped with a seat belt
reminder, indicated for front seats by
control indicators X and k, or for rear
seats by the symbol X in the Driver
Information Centre 3 108.
Belt force limiters
Stress on the body is reduced by the
gradual release of the belt during a
collision.Belt pretensioners
In the event of a head-on, rear-end or side-on collision of a certain severity,
the front and rear seat belts are
tightened. The front seat belts are
tightened by two pretensioners per
seat. The outer rear seat belts are
tightened by one pretensioner per
seat.9 Warning
Incorrect handling (e.g. removal or
fitting of belts) can trigger the belt
pretensioners.
Deployment of the belt pretensioners
is indicated by continuous illumination
of control indicator v 3 109.
Triggered belt pretensioners must be replaced by a workshop. Belt
pretensioners can only be triggered
once.
Note
Do not affix or install accessories or
other objects that may interfere with
the operation of the belt
pretensioners. Do not make any
Page 68 of 305

66Seats, restraintschild's backbone, which is still very
weak, is under less strain in the event of an accident.
Suitable are restraint systems that
comply with valid UN ECE
regulations. Check local laws and
regulations for mandatory use of child restraint systems.
The following child restraints are
recommended for the following
weight classes:
Maxi Cosi Cabriofix for children up to 13 kg for group 0, group 0+ and Duo
Plus for children from 13 kg to 18 kg in group I.
Ensure that the child restraint system
to be installed is compatible with the
vehicle type.
Ensure that the mounting location of
the child restraint system within the
vehicle is correct, see following
tables.
Allow children to enter and exit the vehicle only on the side facing away
from the traffic.
When the child restraint system is not in use, secure the seat with a seat beltor remove it from the vehicle.Note
Do not affix anything on the child
restraint systems and do not cover
them with any other materials.
A child restraint system which has
been subjected to stress in an
accident must be replaced.
Page 91 of 305

Storage89detrimental effect on vehicle
handling due to the vehicle's
higher centre of gravity.
Distribute the load evenly and
secure it properly with retaining
straps. Adjust the tyre pressure
and vehicle speed according to
the load conditions. Check and
retighten the straps frequently.
Do not drive faster than
120 km/h.
The permissible roof load is
75 kg. The roof load is the
combined weight of the roof rack and the load.
Page 109 of 305
Instruments and controls107Caution
If engine coolant temperature is
too high, stop vehicle, switch off
engine. Danger to engine. Check
coolant level.
Service display
The engine oil life system informs
when to change the engine oil and
filter. Based on driving conditions, the interval at which an engine oil and
filter change will be indicated can vary
considerably.
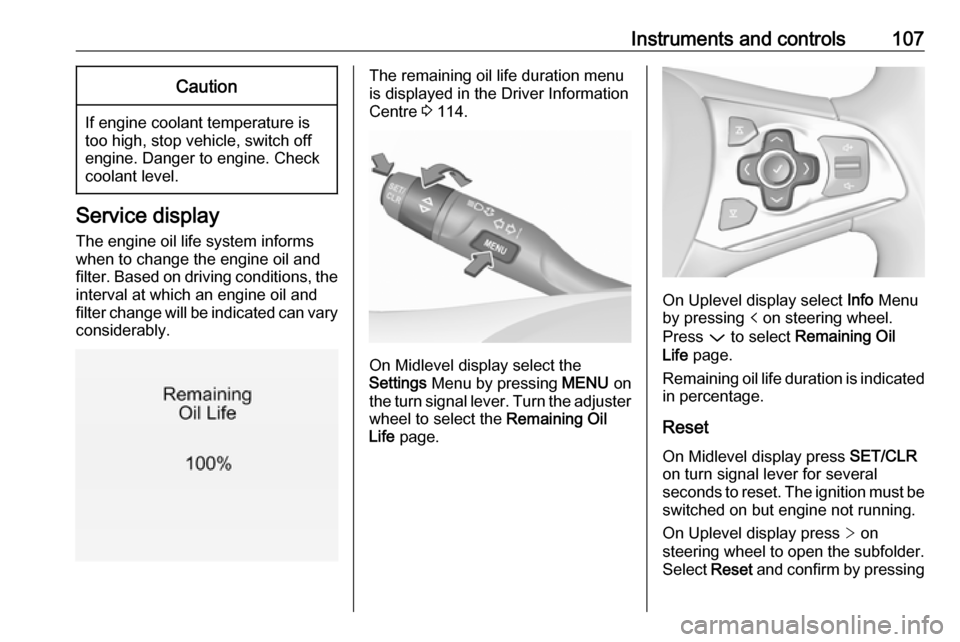
The remaining oil life duration menu
is displayed in the Driver Information
Centre 3 114.
On Midlevel display select the
Settings Menu by pressing MENU on
the turn signal lever. Turn the adjuster wheel to select the Remaining Oil
Life page.
On Uplevel display select Info Menu
by pressing p on steering wheel.
Press P to select Remaining Oil
Life page.
Remaining oil life duration is indicated
in percentage.
Reset
On Midlevel display press SET/CLR
on turn signal lever for several
seconds to reset. The ignition must be
switched on but engine not running.
On Uplevel display press > on
steering wheel to open the subfolder. Select Reset and confirm by pressing
Page 114 of 305
112Instruments and controlsTraction Control system offk illuminates yellow.
The system is deactivated.
Preheating ! illuminates yellow.
Preheating of Diesel engine is
activated. Only activates when
outside temperature is low. Start the
engine when control indicator
extinguishes.
Tyre pressure monitoring system
w illuminates or flashes yellow.
Illuminates
Tyre pressure loss. Stop immediately
and check tyre pressure.
Flashes
Fault in system or tyre without
pressure sensor mounted (e.g. spare
wheel). After 60 to 90 seconds the
control indicator illuminates
continuously. Consult a workshop.Engine oil pressure
I illuminates red.
Illuminates when the ignition is
switched on and extinguishes shortly
after the engine starts.
Illuminates when the engine is
runningCaution
Engine lubrication may be
interrupted. This may result in
damage to the engine and/or
locking of the drive wheels.
1. Depress clutch.
2. Select neutral gear.
3. Move out of the flow of traffic as quickly as possible without
impeding other vehicles.
4. Switch off ignition.
9 Warning
When the engine is off,
considerably more force is needed
to brake and steer.
During an Autostop, the brake
servo unit will still be operational.
Do not remove key until vehicle is stationary, otherwise the steeringwheel lock could engage
unexpectedly.
Check oil level before seeking
assistance of a workshop 3 226.
Low fuel
Y illuminates or flashes yellow.
Illuminates
Level in fuel tank is too low.
Flashes
Fuel used up. Refuel immediately.
Never run the tank dry.
Refuelling 3 215.
Catalytic converter 3 166.
Page 119 of 305

Instruments and controls117On Midlevel display the pages
Remaining Oil Life, Tyre Pressure,
Traffic Sign Assistant and Following
Distance are displayed in the Vehicle
information menu, select ?.
Trip odometer 1/2 or A/B
Trip odometer displays the current
distance since a certain reset.
Trip odometer counts up to a distance
of 9,999 km then restarts at 0.
To reset on Midlevel display, press
SET/CLR for a few seconds.
To reset on Uplevel display, press >
and confirm with 9.
The information of trip odometer page 1/A and 2/B can be reset separately
while the respective display is active.
Average Fuel Consumption
Display of average consumption. The measurement can be reset at any
time and starts with a default value.
To reset on Midlevel display, press SET/CLR for a few seconds, on
Uplevel display, press > and confirm
with 9.Average speed
Display of average speed. The
measurement can be reset at any
time.
To reset on Midlevel display, press
SET/CLR for a few seconds, on
Uplevel display, press > and confirm
with 9.
Digital speed
Digital display of the instantaneous
speed.
Fuel range
Range is calculated from current fuel
level and current consumption. The
display shows average values.
After refuelling, the range is updated
automatically after a brief delay.
When the level in the fuel tank is low,
a message appears on the display
and the control indicator Y in the fuel
gauge illuminates.
When the fuel tank must be refuelled
immediately, a warning message
appears and remains on the display.
Additionally, the control indicator Y in
the fuel gauge flashes 3 112.Instantaneous Fuel Consumption
Display of the instantaneous
consumption.
Remaining Oil Life
Indicates an estimate of the oil's
useful life. The number in percentage means the remainder of current oil life
3 107.
Tyre Pressure
Checks tyre pressure of all wheels
during driving 3 252.
Traffic sign assistant
Displays the detected traffic signs for
the current route section 3 209.
Following Distance
Displays the distance in seconds to a preceding moving vehicle 3 194. If
Adaptive cruise control is active this
page shows the following distance
setting instead.
Timer
To start and stop, press 9. To reset,
press > and confirm reset.
Page 121 of 305
Instruments and controls119Turn the adjuster wheel or press Q
or P to select a page and follow the
instructions given in the submenus:
● Units
● Info pages
● Speed warning
● Tyre loading
● Software information
Units
Press SET/CLR or > while units is
displayed. Select imperial or metric
units by turning adjuster wheel or
pressing P. Confirm by pressing
SET/CLR or 9.
Info pages
Press > while Info pages is displayed.
A list of all items in the Info Menu is
displayed. Select the functions to be
displayed in the Info page by pressing
9 . Selected pages have a 9 in a
checkbox. Non-viewable functions
have a blank checkbox. See Info
Menu above.Speed warning
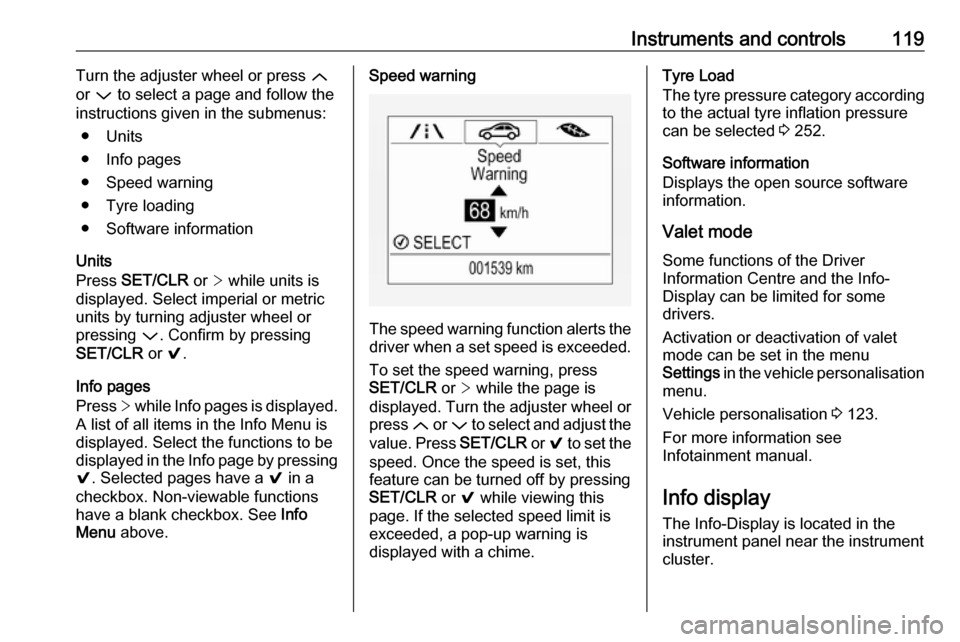
The speed warning function alerts the
driver when a set speed is exceeded.
To set the speed warning, press
SET/CLR or > while the page is
displayed. Turn the adjuster wheel or
press Q or P to select and adjust the
value. Press SET/CLR or 9 to set the
speed. Once the speed is set, this
feature can be turned off by pressing
SET/CLR or 9 while viewing this
page. If the selected speed limit is
exceeded, a pop-up warning is
displayed with a chime.
Tyre Load
The tyre pressure category according
to the actual tyre inflation pressure
can be selected 3 252.
Software information
Displays the open source software
information.
Valet mode
Some functions of the Driver
Information Centre and the Info-
Display can be limited for some
drivers.
Activation or deactivation of valet
mode can be set in the menu
Settings in the vehicle personalisation
menu.
Vehicle personalisation 3 123.
For more information see
Infotainment manual.
Info display
The Info-Display is located in the
instrument panel near the instrument
cluster.