trap OPEL ASTRA K 2018 Owner's Manual
[x] Cancel search | Manufacturer: OPEL, Model Year: 2018, Model line: ASTRA K, Model: OPEL ASTRA K 2018Pages: 313, PDF Size: 9.35 MB
Page 33 of 313

Keys, doors and windows31Sports Tourer
After unlocking, push the touchpad
switch under the tailgate moulding
and open the tailgate manually.
Central locking system 3 24.
Closing
Use one of the interior handles.
Do not push the touchpad switch whilst closing as this will unlock the
tailgate again.
Central locking system 3 24.
Power tailgate
9 Warning
Take care when operating the
power tailgate. Risk of injury,
particularly to children.
Keep a close watch on the
movable tailgate when operating.
Ensure that nothing becomes
trapped during operating and no
one is standing within the moving
area.
The power tailgate can be operated
by:
● Pressing X twice on the
electronic key. To prevent
unintended opening of the
tailgate, X must be pressed
longer than during locking or unlocking.
● Handsfree operation with motion sensor below the rear bumper.
● The touchpad switch under the exterior tailgate moulding and
C in the open tailgate.
● The switch C on the inside of
the driver's door.
On vehicles with automatic
transmission, the tailgate can only be operated when the vehicle is
stationary and with selector lever in P.
Page 43 of 313
Keys, doors and windows41Automatic anti-dazzle
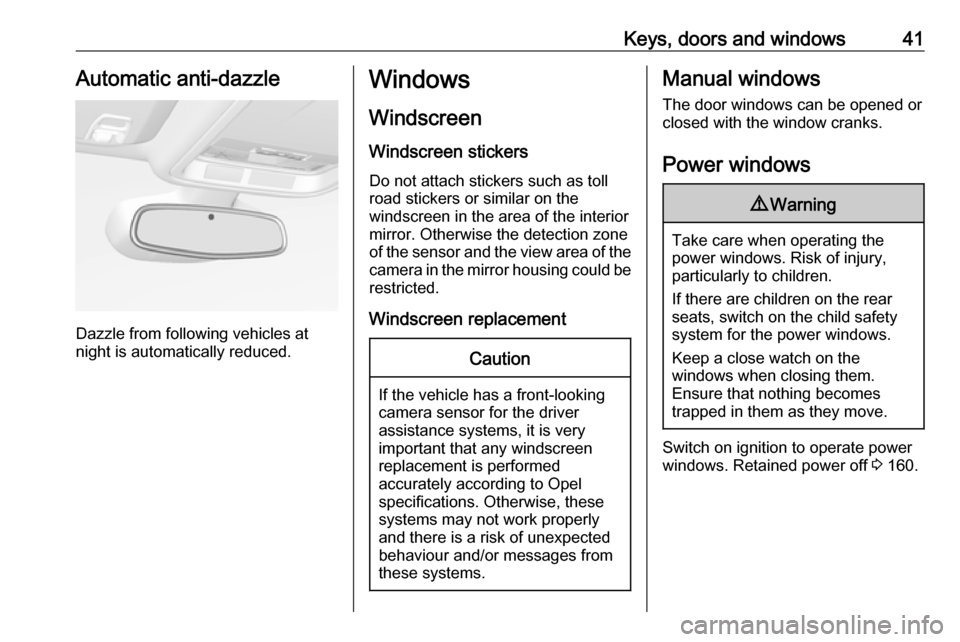
Dazzle from following vehicles at
night is automatically reduced.
Windows
Windscreen Windscreen stickers
Do not attach stickers such as toll
road stickers or similar on the
windscreen in the area of the interior
mirror. Otherwise the detection zone
of the sensor and the view area of the camera in the mirror housing could be
restricted.
Windscreen replacementCaution
If the vehicle has a front-looking
camera sensor for the driver
assistance systems, it is very
important that any windscreen
replacement is performed
accurately according to Opel
specifications. Otherwise, these
systems may not work properly
and there is a risk of unexpected
behaviour and/or messages from
these systems.
Manual windows
The door windows can be opened or
closed with the window cranks.
Power windows9 Warning
Take care when operating the
power windows. Risk of injury,
particularly to children.
If there are children on the rear seats, switch on the child safety
system for the power windows.
Keep a close watch on the
windows when closing them.
Ensure that nothing becomes
trapped in them as they move.
Switch on ignition to operate power
windows. Retained power off 3 160.
Page 46 of 313
44Keys, doors and windowsRoof
Sunroof9 Warning
Take care when operating the
sunroof. Risk of injury, particularly to children.
Keep a close watch on the
movable parts when operating
them. Ensure that nothing
becomes trapped in them as they
move.
Switch on ignition to operate the sunroof.
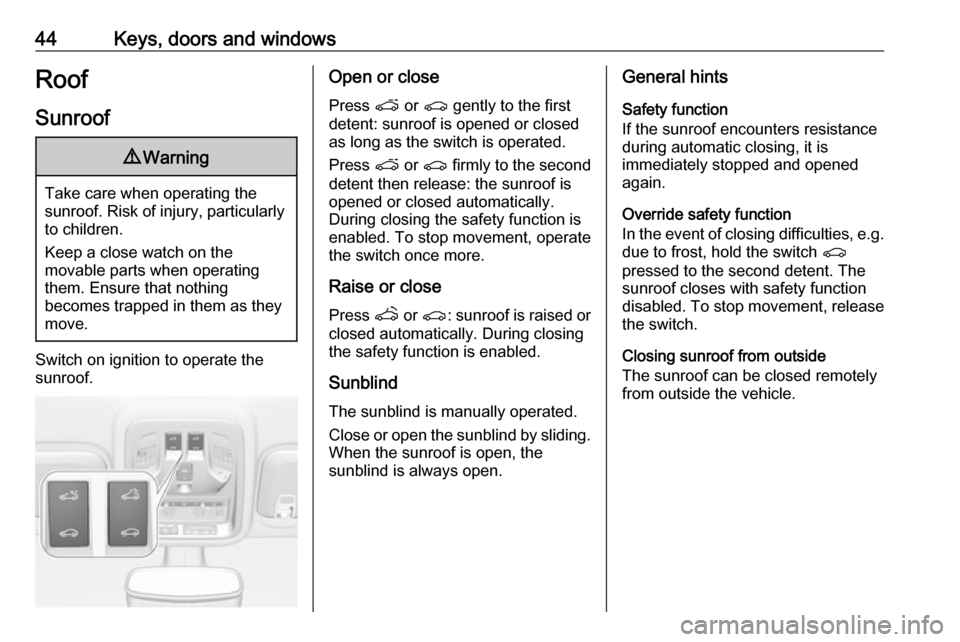
Open or close
Press p or r gently to the first
detent: sunroof is opened or closed as long as the switch is operated.
Press p or r firmly to the second
detent then release: the sunroof is
opened or closed automatically.
During closing the safety function is
enabled. To stop movement, operate
the switch once more.
Raise or close Press q or r : sunroof is raised or
closed automatically. During closing
the safety function is enabled.
Sunblind
The sunblind is manually operated.
Close or open the sunblind by sliding. When the sunroof is open, the
sunblind is always open.General hints
Safety function
If the sunroof encounters resistance
during automatic closing, it is
immediately stopped and opened
again.
Override safety function
In the event of closing difficulties, e.g. due to frost, hold the switch r
pressed to the second detent. The
sunroof closes with safety function
disabled. To stop movement, release
the switch.
Closing sunroof from outside
The sunroof can be closed remotely
from outside the vehicle.
Page 52 of 313
50Seats, restraintsLumbar support
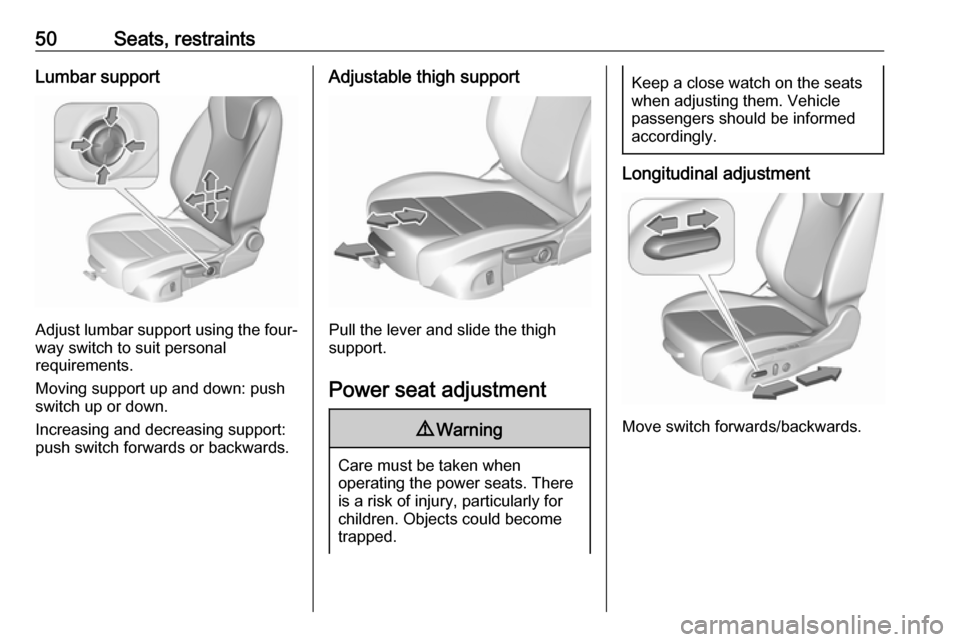
Adjust lumbar support using the four-way switch to suit personal
requirements.
Moving support up and down: push switch up or down.
Increasing and decreasing support:
push switch forwards or backwards.
Adjustable thigh support
Pull the lever and slide the thigh
support.
Power seat adjustment
9 Warning
Care must be taken when
operating the power seats. There
is a risk of injury, particularly for
children. Objects could become
trapped.
Keep a close watch on the seats
when adjusting them. Vehicle
passengers should be informed
accordingly.
Longitudinal adjustment
Move switch forwards/backwards.
Page 58 of 313
56Seats, restraintsHeating
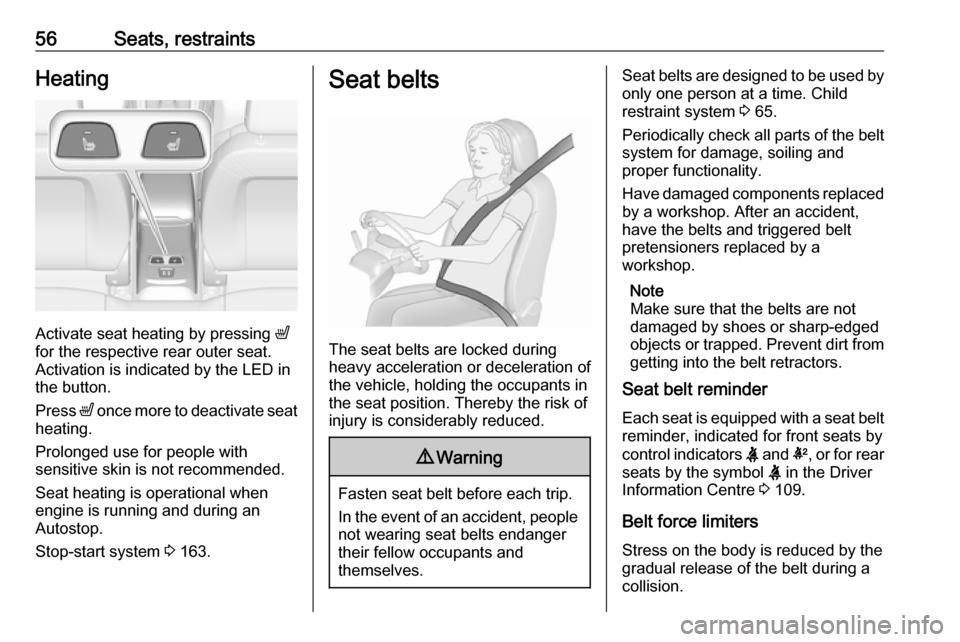
Activate seat heating by pressing ß
for the respective rear outer seat.
Activation is indicated by the LED in
the button.
Press ß once more to deactivate seat
heating.
Prolonged use for people with
sensitive skin is not recommended.
Seat heating is operational when engine is running and during an
Autostop.
Stop-start system 3 163.
Seat belts
The seat belts are locked during
heavy acceleration or deceleration of
the vehicle, holding the occupants in
the seat position. Thereby the risk of
injury is considerably reduced.
9 Warning
Fasten seat belt before each trip.
In the event of an accident, people
not wearing seat belts endanger their fellow occupants and
themselves.
Seat belts are designed to be used by only one person at a time. Child
restraint system 3 65.
Periodically check all parts of the belt
system for damage, soiling and
proper functionality.
Have damaged components replaced by a workshop. After an accident,
have the belts and triggered belt
pretensioners replaced by a
workshop.
Note
Make sure that the belts are not
damaged by shoes or sharp-edged objects or trapped. Prevent dirt from getting into the belt retractors.
Seat belt reminder
Each seat is equipped with a seat belt reminder, indicated for front seats by
control indicators X and k, or for rear
seats by the symbol X in the Driver
Information Centre 3 109.
Belt force limiters
Stress on the body is reduced by the
gradual release of the belt during a
collision.
Page 68 of 313
66Seats, restraintsEither a Top-tether strap or a supportleg must be used in addition to the
ISOFIX mounting brackets.
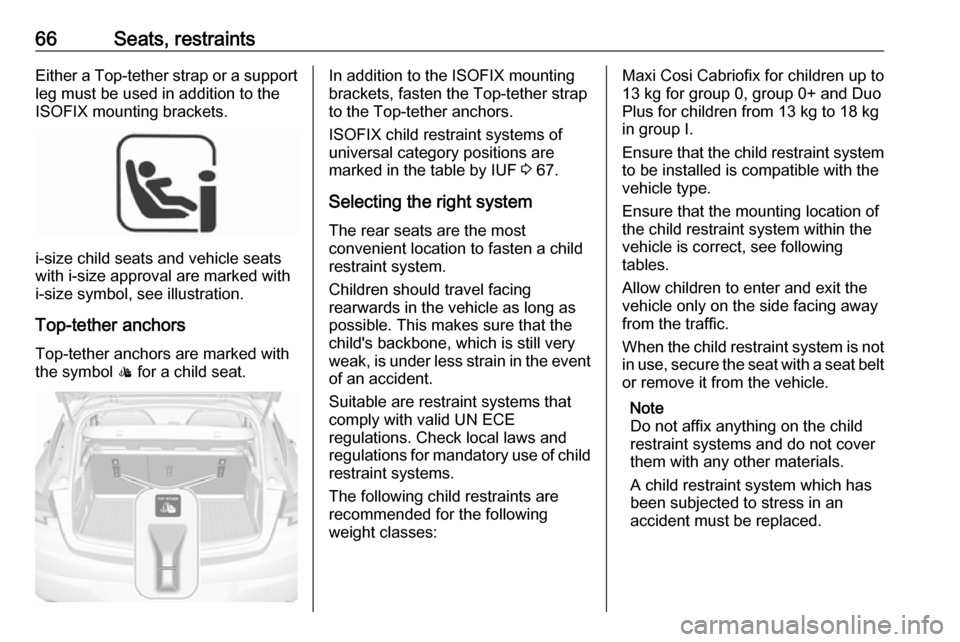
i-size child seats and vehicle seats
with i-size approval are marked with
i-size symbol, see illustration.
Top-tether anchors Top-tether anchors are marked with
the symbol : for a child seat.
In addition to the ISOFIX mounting
brackets, fasten the Top-tether strap
to the Top-tether anchors.
ISOFIX child restraint systems of
universal category positions are
marked in the table by IUF 3 67.
Selecting the right system The rear seats are the most
convenient location to fasten a child
restraint system.
Children should travel facing
rearwards in the vehicle as long as
possible. This makes sure that the child's backbone, which is still very
weak, is under less strain in the event of an accident.
Suitable are restraint systems that
comply with valid UN ECE
regulations. Check local laws and
regulations for mandatory use of child
restraint systems.
The following child restraints are
recommended for the following
weight classes:Maxi Cosi Cabriofix for children up to 13 kg for group 0, group 0+ and Duo
Plus for children from 13 kg to 18 kg
in group I.
Ensure that the child restraint system to be installed is compatible with the
vehicle type.
Ensure that the mounting location of
the child restraint system within the
vehicle is correct, see following
tables.
Allow children to enter and exit the
vehicle only on the side facing away
from the traffic.
When the child restraint system is not in use, secure the seat with a seat beltor remove it from the vehicle.
Note
Do not affix anything on the child
restraint systems and do not cover
them with any other materials.
A child restraint system which has
been subjected to stress in an
accident must be replaced.
Page 83 of 313
Storage81Rear floor storage coverCaution
Vehicle versions with CNG: Do notstow any objects in the
compartment beneath the rear
floor cover.
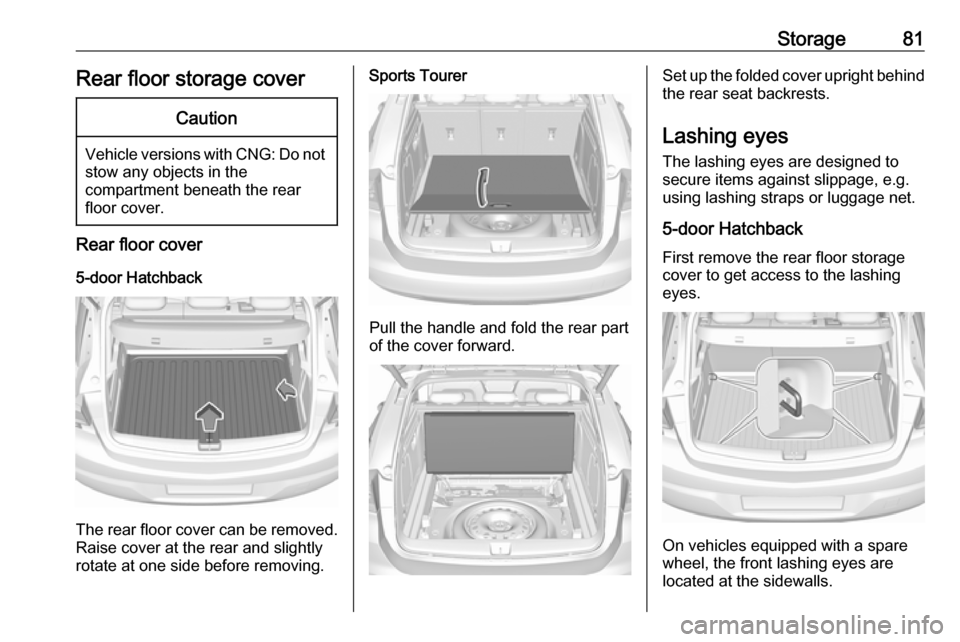
Rear floor cover
5-door Hatchback
The rear floor cover can be removed.
Raise cover at the rear and slightly
rotate at one side before removing.
Sports Tourer
Pull the handle and fold the rear part
of the cover forward.
Set up the folded cover upright behind the rear seat backrests.
Lashing eyes
The lashing eyes are designed to
secure items against slippage, e.g.
using lashing straps or luggage net.
5-door Hatchback
First remove the rear floor storage cover to get access to the lashing
eyes.
On vehicles equipped with a spare
wheel, the front lashing eyes are
located at the sidewalls.
Page 84 of 313
82Storage
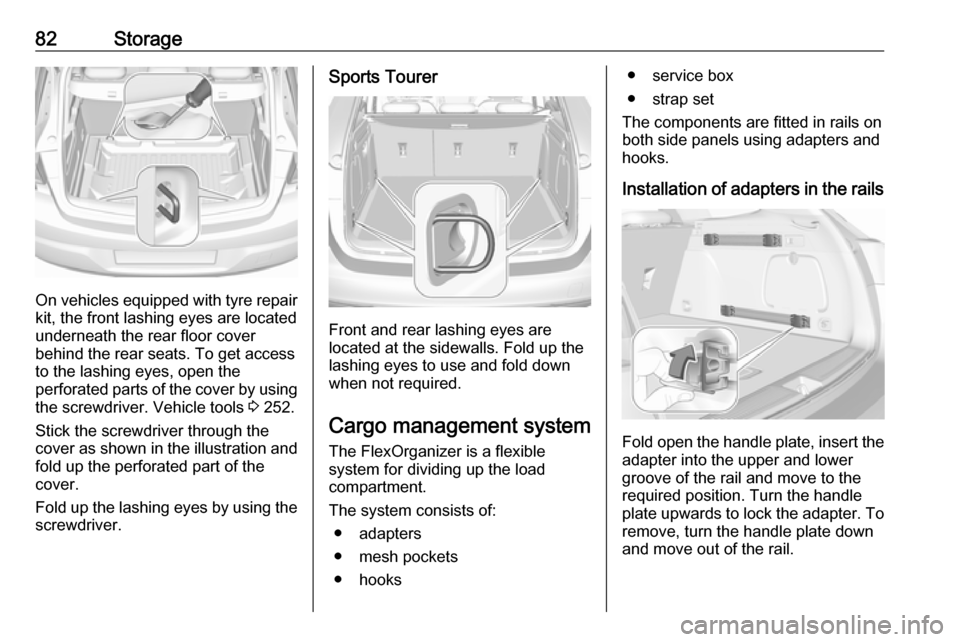
On vehicles equipped with tyre repair
kit, the front lashing eyes are located
underneath the rear floor cover
behind the rear seats. To get access
to the lashing eyes, open the
perforated parts of the cover by using
the screwdriver. Vehicle tools 3 252.
Stick the screwdriver through the cover as shown in the illustration and
fold up the perforated part of the
cover.
Fold up the lashing eyes by using the screwdriver.
Sports Tourer
Front and rear lashing eyes are
located at the sidewalls. Fold up the
lashing eyes to use and fold down
when not required.
Cargo management system The FlexOrganizer is a flexible
system for dividing up the load
compartment.
The system consists of: ● adapters
● mesh pockets
● hooks
● service box
● strap set
The components are fitted in rails on
both side panels using adapters and hooks.
Installation of adapters in the rails
Fold open the handle plate, insert the adapter into the upper and lower
groove of the rail and move to the
required position. Turn the handle
plate upwards to lock the adapter. To
remove, turn the handle plate down
and move out of the rail.
Page 86 of 313
84StorageService box
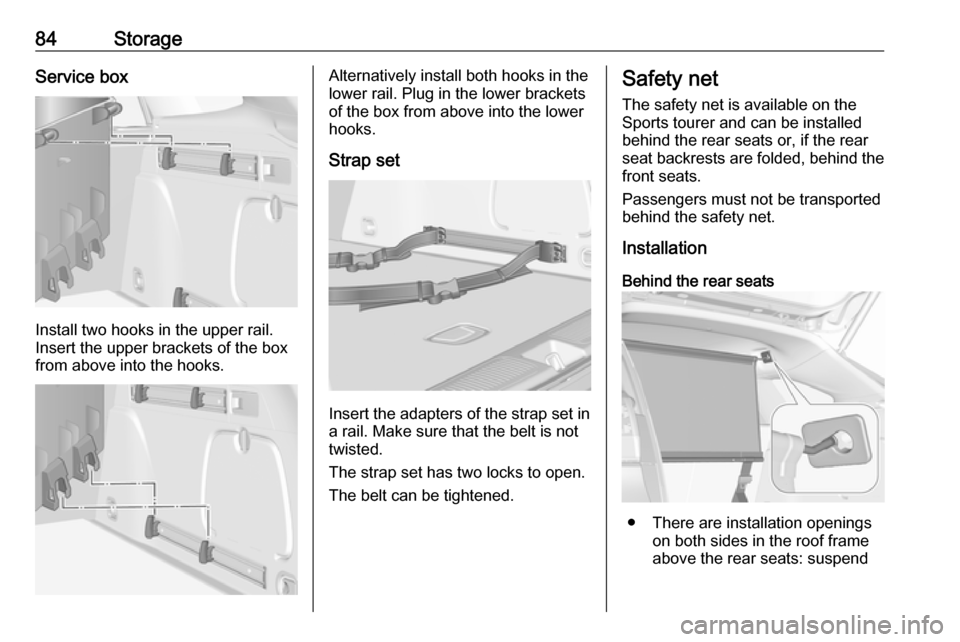
Install two hooks in the upper rail.
Insert the upper brackets of the box
from above into the hooks.
Alternatively install both hooks in the
lower rail. Plug in the lower brackets
of the box from above into the lower
hooks.
Strap set
Insert the adapters of the strap set in
a rail. Make sure that the belt is not
twisted.
The strap set has two locks to open. The belt can be tightened.
Safety net
The safety net is available on the
Sports tourer and can be installed
behind the rear seats or, if the rear
seat backrests are folded, behind the
front seats.
Passengers must not be transported
behind the safety net.
Installation
Behind the rear seats
● There are installation openings on both sides in the roof frame
above the rear seats: suspend
Page 87 of 313
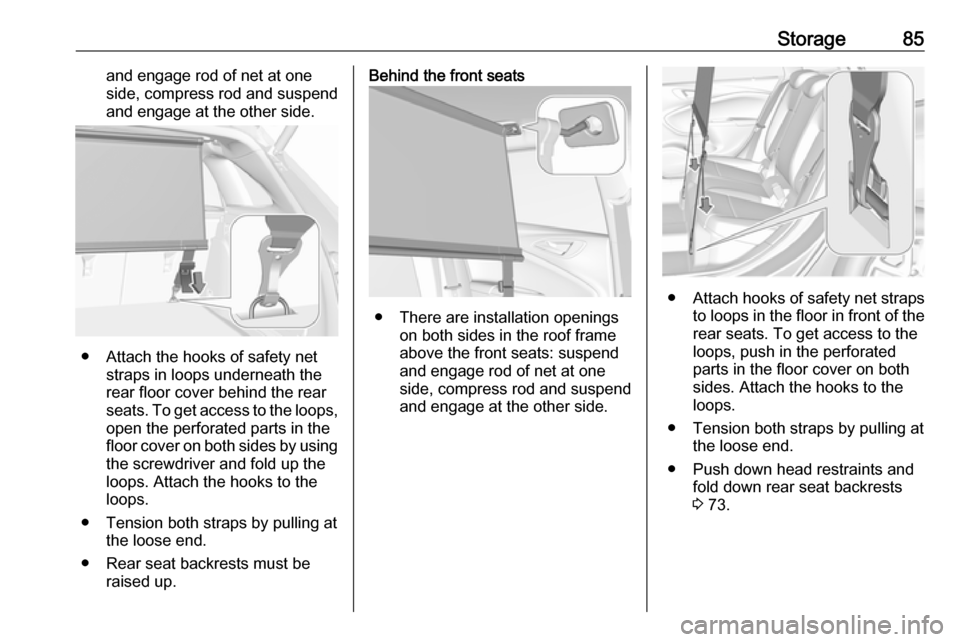
Storage85and engage rod of net at one
side, compress rod and suspend
and engage at the other side.
● Attach the hooks of safety net straps in loops underneath the
rear floor cover behind the rear
seats. To get access to the loops, open the perforated parts in the
floor cover on both sides by using
the screwdriver and fold up the
loops. Attach the hooks to the
loops.
● Tension both straps by pulling at the loose end.
● Rear seat backrests must be raised up.
Behind the front seats
● There are installation openings on both sides in the roof frame
above the front seats: suspend
and engage rod of net at one
side, compress rod and suspend and engage at the other side.
● Attach hooks of safety net straps
to loops in the floor in front of the rear seats. To get access to the
loops, push in the perforated parts in the floor cover on both
sides. Attach the hooks to the
loops.
● Tension both straps by pulling at the loose end.
● Push down head restraints and fold down rear seat backrests
3 73.