change wheel OPEL ASTRA K 2019.5 Manual user
[x] Cancel search | Manufacturer: OPEL, Model Year: 2019.5, Model line: ASTRA K, Model: OPEL ASTRA K 2019.5Pages: 311, PDF Size: 9.52 MB
Page 194 of 311
192Driving and operatingThe radar unit is mounted behind the
radiator grille behind or below the
brand emblem.9 Warning
The radar unit was aligned
carefully during manufacture.
Therefore, in the event of a front-
end impact, do not use the system. The front bumper may appear to
be intact, however the sensor
behind can be out of position and
react incorrectly. After an
accident, consult a workshop to
verify and adjust the radar unit
position.
Settings
Settings can be changed in the
vehicle personalisation menu in the
Info Display.
Select the relevant setting in Settings
I Vehicle in the Info Display.
Info Display 3 119.
Vehicle personalisation 3 123.
Fault
If the adaptive cruise control does not work due to temporary conditions
(e.g. blockage by ice, overheated
brakes or low speed manoeuvres) or
if there is a permanent system error,
then a message is displayed in the
Driver Information Centre.
Vehicle messages 3 122.
Forward collision alert The forward collision alert may help toavoid or reduce the harm caused by
front-end crashes.
If the vehicle is equipped with
conventional cruise control, the
forward collision alert uses the front
camera in the windscreen to detect a
vehicle directly ahead, in your path.
If the vehicle is equipped with
adaptive cruise control, the forward
collision alert uses the radar sensor to detect a vehicle directly ahead, in
your path.
A vehicle ahead is indicated by the
control indicator A.
If a vehicle directly ahead is
approached too quickly, a warning
chime and alert in the Driver
Information Centre is provided.
Additionally the driver gets notified by
a flashing red LED stripe which is
projected on the windscreen in the
driver's field of view.
A precondition is that forward collision
alert with front camera system is not
deactivated by pressing V on the
steering wheel or, with radar sensor,
that it is not deactivated in the vehicle
personalisation menu 3 123.
Page 198 of 311

196Driving and operatingThe feature uses various inputs (e.g.
camera sensor, radar sensor, brake
pressure, vehicle speed) to calculate
the probability of a frontal collision.9 Warning
This system is not intended to
replace the driver responsibility for driving the vehicle and looking
ahead. Its function is limited to
supplemental use only to reduce
the vehicle speed before a
collision.
The system may not react for
pedestrians or animals. After a
sudden lane change, the system
needs a certain time to detect the
next preceding vehicle.
The driver shall always be ready to take action and apply the brakes
and steer to avoid collisions.
Functionality
If equipped only with front camera the active emergency braking operates in
forward gear above walking speed up to 85 km/h.
With radar sensor active emergency
braking operates in forward gear
above walking speed at all speeds.
A precondition is that forward collision
alert with front camera system is not
deactivated by pressing V on the
steering wheel 3 192 or, with radar
sensor, that it is not deactivated in the
vehicle personalisation menu 3 123.
The system includes: ● brake preparation system
● emergency automatic braking
● forward looking brake assist
● intelligent brake assist (only with radar sensor)
Brake preparation system
When approaching a vehicle ahead
so quickly that a collision is likely, the brake preparation system slightlypressurises the brakes. This reduces
the response time, when a manual or automatic braking is requested.
The brake system is prepared so that
braking can occur more rapidly.If equipped only with front camera the system operates up to a speed of
80 km/h.
Emergency automatic braking After activation of brake preparation
system and just before the imminent
collision, this function automatically
applies limited braking to reduce the
impact speed of the collision or
prohibit a crash. Depending on the
situation, the vehicle may
automatically brake moderately or
hard. This front automatic braking can
only occur if a vehicle ahead is
detected, indicated by the vehicle
ahead indicator A 3 192.
If equipped only with front camera the
system operates up to a speed of
60 km/h.
Below a speed of 40 km/h the system can apply full braking.
Emergency automatic braking may
slow the vehicle to a complete stop to
try to avoid a potential crash. If this
happens, emergency automatic
braking may engage the electric
parking brake to hold the vehicle at a
Page 207 of 311

Driving and operating205●The direction of driving during the
parking manoeuvre.
● The demand to shift into reverse or first gear.
● The demand to stop or to drive slowly.
● For some of the instructions a progress bar is shown in the
Driver Information Centre.
● The successful completion of the
parking manoeuvre indicated bya pop-up symbol and a chime.
● The cancelling of a parking manoeuvre.
Display priorities
Advanced parking assist indication in the Driver Information Centre can beinhibited by vehicle messages with a
higher priority. After approving the
message by pressing SET/CLR on
the indicator lever or 9 on the
steering wheel, advanced parking
assist instructions appear again and
the parking manoeuvre can be
continued.Deactivation
The system is deactivated by:
● a short press of (
● parking manoeuvre successfully ended
● driving faster than 30 km/h during
parking slot search
● driving faster than 8 km/h during parking guidance
● driver interference on steering wheel detected
● exceeding number of maximum gear changes: eight cycles when
parallel parking or five cycles
when perpendicular parking
● switching off the ignition
Deactivation by the driver or by the
system during manoeuvring will be indicated by a message on the
display. Additionally, an acoustic
signal sounds.Fault
A message appears when:
● There is a fault in the system.● The driver did not successfully complete the parking
manoeuvre.
● The system is not operational.
● Any of the deactivation reasons described above apply.
If an object is detected during parking
instructions, a message to stop the
vehicle is indicated. Removing the
object will resume the parking
manoeuvre. If the object is not
removed, the system will be
deactivated. A long press of ( will
activate the system and search for a new parking slot.
Basic notes on parking assist
systems9 Warning
Under certain circumstances,
various reflective surfaces on
objects or clothing as well as
Page 215 of 311
Driving and operating213
Activate alerts by setting J,
deactivate alerts by setting I via
button 9.
Pop-up alert is displayed for approx.
8 seconds in the Driver Information
Centre.
System reset The content of the traffic sign displaycan be cleared in the setting menu of
the traffic sign assistant page by
selecting Reset and confirm by
pressing SET/CLR on the indicator
lever or 9 on the steering wheel
controls.
Alternatively, SET/CLR or 9 can be
pressed for 3 seconds to clear the
content of the page.
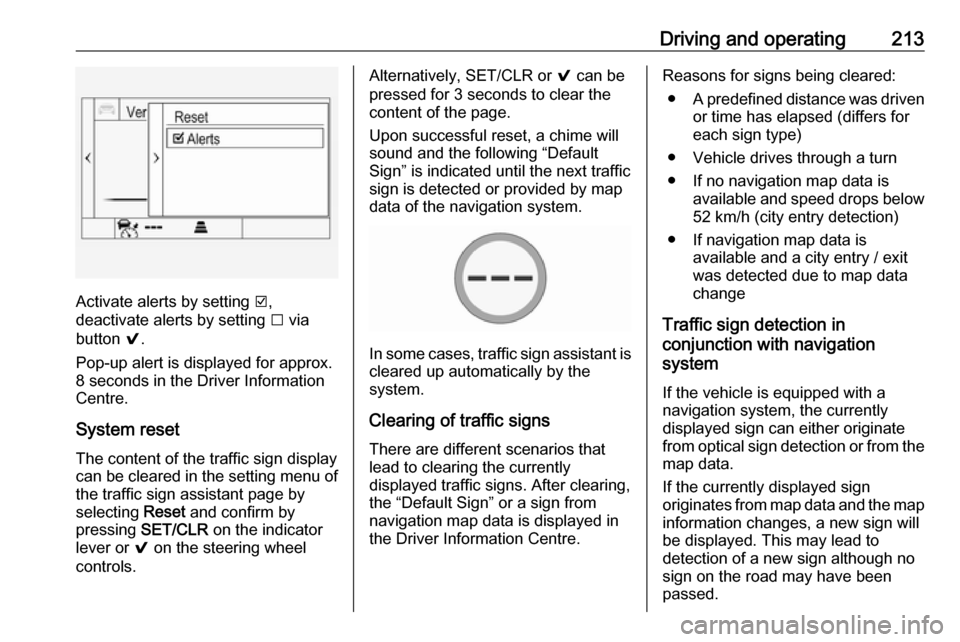
Upon successful reset, a chime will
sound and the following “Default
Sign” is indicated until the next traffic
sign is detected or provided by map
data of the navigation system.
In some cases, traffic sign assistant is
cleared up automatically by the
system.
Clearing of traffic signs
There are different scenarios that
lead to clearing the currently
displayed traffic signs. After clearing,
the “Default Sign” or a sign from
navigation map data is displayed in
the Driver Information Centre.
Reasons for signs being cleared:
● A predefined distance was driven
or time has elapsed (differs for
each sign type)
● Vehicle drives through a turn
● If no navigation map data is available and speed drops below52 km/h (city entry detection)
● If navigation map data is available and a city entry / exit
was detected due to map data
change
Traffic sign detection in
conjunction with navigation
system
If the vehicle is equipped with a
navigation system, the currently
displayed sign can either originate
from optical sign detection or from the
map data.
If the currently displayed sign
originates from map data and the map
information changes, a new sign will
be displayed. This may lead to
detection of a new sign although no
sign on the road may have been
passed.
Page 216 of 311
214Driving and operatingSystem limitations
Traffic sign assistant may not operate properly when:
● Vehicle speed is faster than 200 km/h.
● Driving on winding or hilly roads. ● During nighttime driving.
● The area of the windscreen, where the front camera is
located, is not clean or affected
by foreign items, e.g. stickers.
● Weather limits visibility, such as fog, rain, or snow.
● The sun is shining directly into the camera lens.
● Traffic signs are completely or partially covered or difficult to
discern.
● Traffic signs are incorrectly mounted or damaged.
● Traffic signs do not comply with the Vienna Convention on traffic
signs.
● The navigation map data is outdated.Caution
The system is intended to help thedriver within a defined speed
range to discern certain traffic
signs. Do not ignore traffic signs
which are not displayed by the
system.
The system does not discern any other than the conventional traffic
signs that might give or end a
speed limit.
Do not let this special feature
tempt you into taking risks when
driving.
Always adapt speed to the road
conditions.
The driver assistance systems do not relieve the driver from full
responsibility for vehicle
operation.
Lane keep assist
Lane keep assist helps to avoid
crashes due to unintentional lane
departures. The front camera
observes the lane markings between
which the vehicle is driving. If the
vehicle approaches a lane marking, the steering wheel is gently turned to
position the vehicle back into the lane. Turn steering wheel in same
direction, if system steers not
sufficient. Turn steering wheel gently
into opposite direction, if lane change is intended.
When crossing a lane marking
significantly, lane keep assist starts a
visual and acoustic warning.
Unintended lane departure is
assumed:
● without using the turn lights● using the turn lights in the opposite direction of the lane
departure
● without braking
● without acceleration
● without active steering
Note
The system is switched off during
detection of ambiguous lane
markings, e.g. in construction areas.
Page 217 of 311
Driving and operating215Note
The system may be switched off if it
detects lanes which are too narrow,
too wide or too curved.
Activation
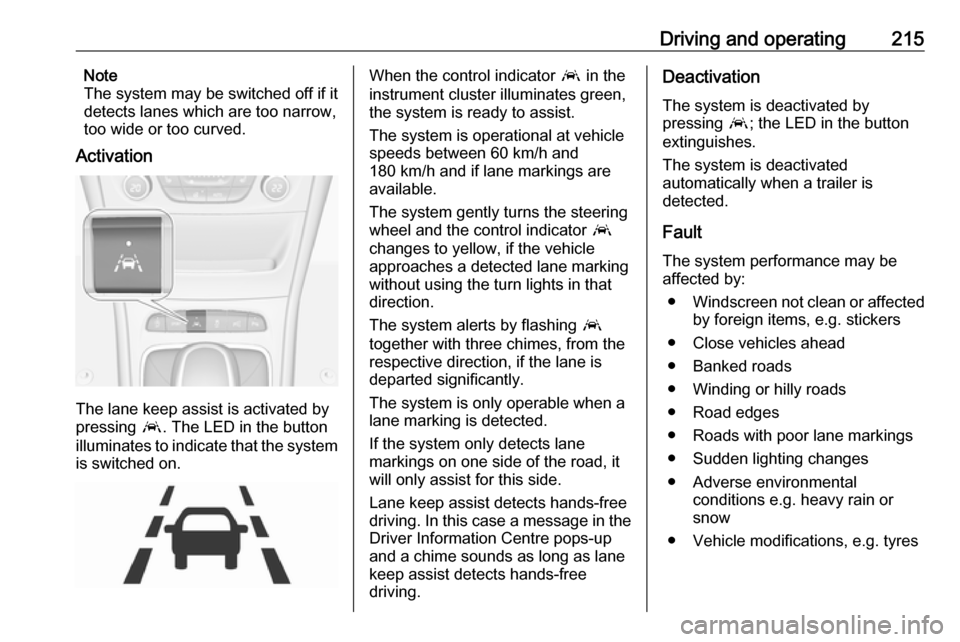
The lane keep assist is activated by
pressing a. The LED in the button
illuminates to indicate that the system
is switched on.
When the control indicator a in the
instrument cluster illuminates green,
the system is ready to assist.
The system is operational at vehicle
speeds between 60 km/h and
180 km/h and if lane markings are
available.
The system gently turns the steering
wheel and the control indicator a
changes to yellow, if the vehicle
approaches a detected lane marking
without using the turn lights in that
direction.
The system alerts by flashing a
together with three chimes, from the
respective direction, if the lane is
departed significantly.
The system is only operable when a
lane marking is detected.
If the system only detects lane
markings on one side of the road, it
will only assist for this side.
Lane keep assist detects hands-free
driving. In this case a message in the
Driver Information Centre pops-up
and a chime sounds as long as lane
keep assist detects hands-free
driving.Deactivation
The system is deactivated by
pressing a; the LED in the button
extinguishes.
The system is deactivated
automatically when a trailer is
detected.
Fault
The system performance may be affected by:
● Windscreen not clean or affected
by foreign items, e.g. stickers
● Close vehicles ahead
● Banked roads
● Winding or hilly roads
● Road edges
● Roads with poor lane markings
● Sudden lighting changes
● Adverse environmental conditions e.g. heavy rain or
snow
● Vehicle modifications, e.g. tyres
Page 229 of 311

Vehicle care227Vehicle careGeneral Information...................227
Accessories and vehicle modifications .......................... 227
Vehicle storage ........................228
End-of-life vehicle recovery .....228
Vehicle checks ........................... 229
Performing work ......................229
Bonnet ..................................... 229
Engine oil ................................. 230
Engine coolant ......................... 231
Washer fluid ............................ 232
Brakes ..................................... 232
Brake fluid ............................... 232
Vehicle battery ......................... 233
Diesel fuel system bleeding .....234
Wiper blade replacement ........234
Bulb replacement .......................235
Halogen headlights ..................235
Front fog lights ......................... 237
Tail lights ................................. 238
Side turn lights ......................... 244
Number plate light ...................244
Interior lights ............................ 245
Electrical system ........................245
Fuses ....................................... 245Engine compartment fuse box . 246
Instrument panel fuse box .......248
Load compartment fuse box ....250
Vehicle tools .............................. 252
Tools ........................................ 252
Wheels and tyres .......................253
Winter tyres ............................. 253
Tyre designations ....................254
Tyre pressure .......................... 254
Tyre pressure monitoring system .................................... 255
Tread depth ............................. 259
Changing tyre and wheel size . 260
Wheel covers ........................... 260
Tyre chains .............................. 261
Tyre repair kit .......................... 261
Wheel changing .......................264
Spare wheel ............................ 265
Jump starting ............................. 270
Towing ....................................... 271
Towing the vehicle ...................271
Towing another vehicle ...........272
Appearance care .......................273
Exterior care ............................ 273
Interior care ............................. 275General Information
Accessories and vehicle modifications
We recommend the use of genuine
parts and accessories and factory
approved parts specific for your
vehicle type. We cannot assess or
guarantee reliability of other products
- even if they have a regulatory or
otherwise granted approval.
Any modification, conversion or other
changes made to standard vehicle
specifications (including, without
limitation, software modifications,
modifications of the electronic control units) may invalidate the warrantyoffered by Opel. Furthermore, such
changes may affect driver assistance
systems, fuel consumption, CO 2
emissions and other emissions of the
vehicle. They may also invalidate the
vehicle operating permit.
Page 268 of 311
266Vehicle care
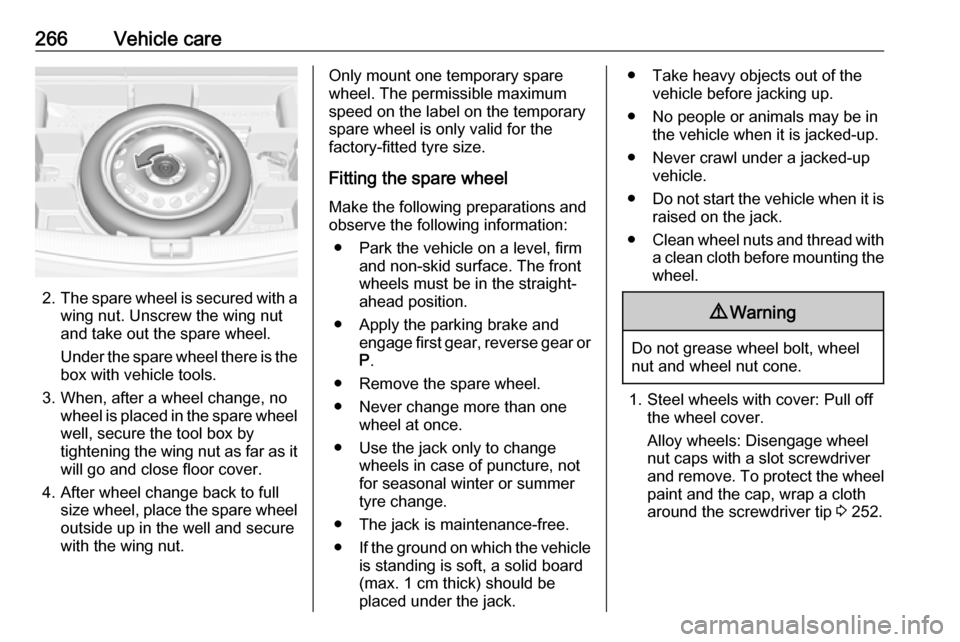
2.The spare wheel is secured with a
wing nut. Unscrew the wing nut
and take out the spare wheel.
Under the spare wheel there is the box with vehicle tools.
3. When, after a wheel change, no wheel is placed in the spare wheel
well, secure the tool box by
tightening the wing nut as far as it will go and close floor cover.
4. After wheel change back to full size wheel, place the spare wheel
outside up in the well and secure
with the wing nut.
Only mount one temporary spare
wheel. The permissible maximum
speed on the label on the temporary
spare wheel is only valid for the
factory-fitted tyre size.
Fitting the spare wheel Make the following preparations and
observe the following information:
● Park the vehicle on a level, firm and non-skid surface. The front
wheels must be in the straight-
ahead position.
● Apply the parking brake and engage first gear, reverse gear or
P .
● Remove the spare wheel.
● Never change more than one wheel at once.
● Use the jack only to change wheels in case of puncture, not
for seasonal winter or summer
tyre change.
● The jack is maintenance-free. ● If the ground on which the vehicle
is standing is soft, a solid board
(max. 1 cm thick) should be
placed under the jack.● Take heavy objects out of the vehicle before jacking up.
● No people or animals may be in the vehicle when it is jacked-up.
● Never crawl under a jacked-up vehicle.
● Do not start the vehicle when it is
raised on the jack.
● Clean wheel nuts and thread with
a clean cloth before mounting the wheel.9 Warning
Do not grease wheel bolt, wheel
nut and wheel nut cone.
1. Steel wheels with cover: Pull off the wheel cover.
Alloy wheels: Disengage wheel
nut caps with a slot screwdriver
and remove. To protect the wheel paint and the cap, wrap a cloth
around the screwdriver tip 3 252.
Page 270 of 311
268Vehicle careAttach wheel wrench and with the
jack correctly aligned rotate wheel wrench until wheel is clear of the
ground.
5. Unscrew the wheel nuts. 6. Change the wheel.
7. Screw on the wheel nuts.
8. Lower the vehicle and remove jack.
9. Install the wheel wrench ensuring that it is located securely and
tighten each nut in a crosswise
sequence. Tightening torque is
140 Nm.
10. Align the valve hole in the wheel cover with the tyre valve before
installing.
Install wheel nut caps.
11. Stow and secure the replaced wheel, the vehicle tools 3 252 and
the adapter for the locking wheel
nuts 3 71.
12. Check the tyre pressure of the installed tyre and the wheel nut
torque as soon as possible.
Have the defective tyre renewed or repaired as soon as possible.Stowing a damaged full size
wheel in the load compartment, 5-
door hatchback
The spare wheel well is not designed
for other tyre sizes than the spare
wheel. A damaged full size wheel
must be stowed in the load
compartment and secured with a
strap.
Vehicle tools 3 252.
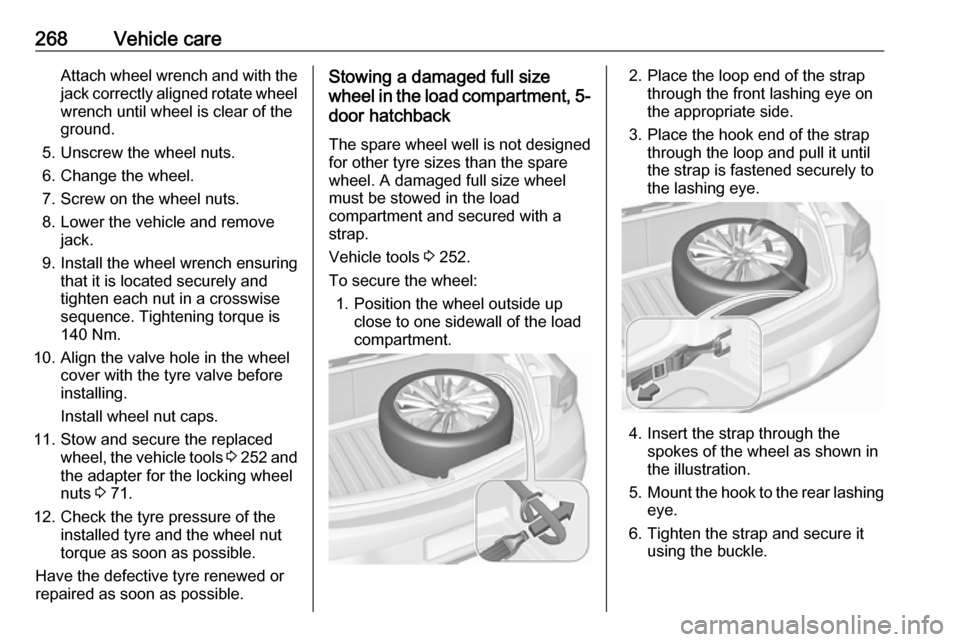
To secure the wheel: 1. Position the wheel outside up close to one sidewall of the load
compartment.2. Place the loop end of the strap through the front lashing eye on
the appropriate side.
3. Place the hook end of the strap through the loop and pull it until
the strap is fastened securely to
the lashing eye.
4. Insert the strap through the spokes of the wheel as shown in
the illustration.
5. Mount the hook to the rear lashing
eye.
6. Tighten the strap and secure it using the buckle.
Page 304 of 311

302Customer informationFault memories in the vehicle can be
reset by a service company when
carrying out servicing or repairs or at
your request.
Comfort and infotainment
functions
Comfort settings and custom settings can be stored in the vehicle and
changed or reset at any time.
Depending on the equipment level in
question, these include
● seat and steering wheel position settings
● chassis and air conditioning settings
● custom settings such as interior lighting
You can input your own data in the
infotainment functions for your
vehicle as part of the selected
features.Depending on the equipment level in
question, these include
● multimedia data such as music, videos or photos for playback in
an integrated multimedia system
● address book data for use with an
integrated hands-free system or
an integrated navigation system
● input destinations
● data on the use of online services
This data for comfort and
infotainment functions can be stored
locally in the vehicle or be kept on a
device that you have connected to the
vehicle ( e.g. a smartphone, USB stick
or MP3 player). Data that you have
input yourself can be deleted at any
time.
This data can only be transmitted out
of the vehicle at your request,
particularly when using online
services in accordance with the
settings selected by you.Smartphone integration, e.g.
Android Auto or Apple CarPlay
If your vehicle is equipped
accordingly, you can connect your
smartphone or another mobile device to the vehicle so that you can control
it via the controls integrated in the
vehicle. The smartphone image and
sound can be output via the
multimedia system in this case. At the
same time, specific information is
transmitted to your smartphone.
Depending on the type of integration, this includes data such as position
data, day / night mode and other
general vehicle information. For more
information, please see the operating
instructions for the vehicle /
infotainment system.
Integration allows selected
smartphone apps to be used, such as navigation or music playback. No
further integration is possible
between smartphone and vehicle, in
particular active access to vehicle
data. The nature of further data
processing is determined by the
provider of the app used. Whether
you can define settings, and if so