steering wheel OPEL ASTRA K 2020 Manual user
[x] Cancel search | Manufacturer: OPEL, Model Year: 2020, Model line: ASTRA K, Model: OPEL ASTRA K 2020Pages: 305, PDF Size: 27.84 MB
Page 211 of 305
Driving and operating209
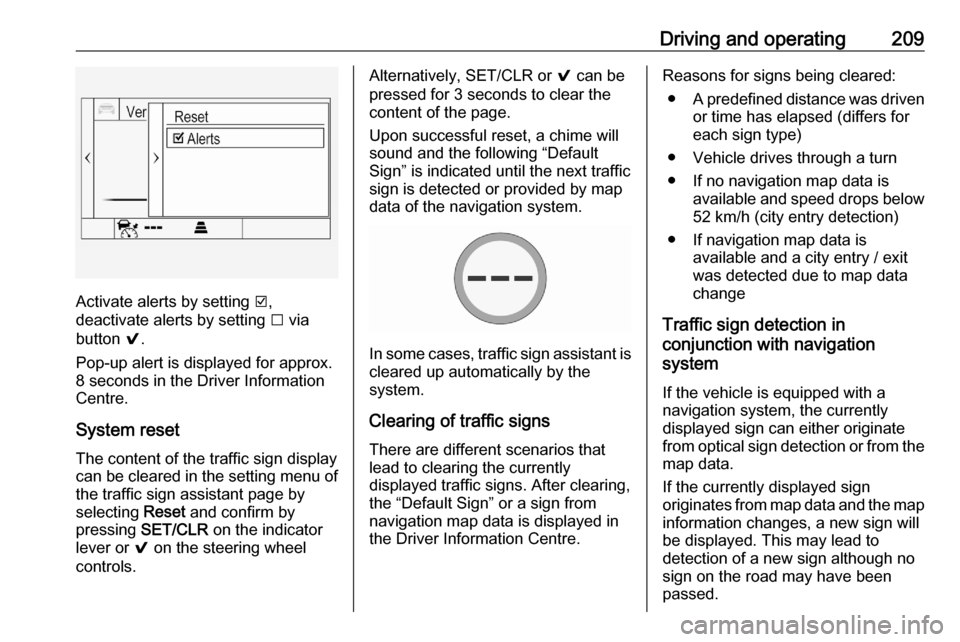
Activate alerts by setting J,
deactivate alerts by setting I via
button 9.
Pop-up alert is displayed for approx.
8 seconds in the Driver Information
Centre.
System reset The content of the traffic sign displaycan be cleared in the setting menu of
the traffic sign assistant page by
selecting Reset and confirm by
pressing SET/CLR on the indicator
lever or 9 on the steering wheel
controls.
Alternatively, SET/CLR or 9 can be
pressed for 3 seconds to clear the
content of the page.
Upon successful reset, a chime will
sound and the following “Default
Sign” is indicated until the next traffic
sign is detected or provided by map
data of the navigation system.
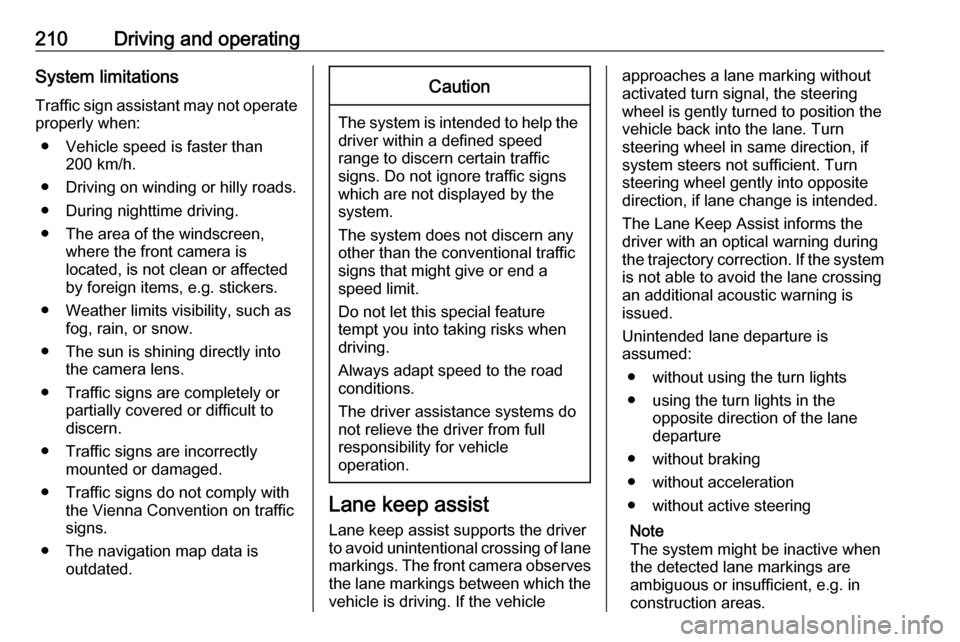
In some cases, traffic sign assistant is
cleared up automatically by the
system.
Clearing of traffic signs
There are different scenarios that
lead to clearing the currently
displayed traffic signs. After clearing,
the “Default Sign” or a sign from
navigation map data is displayed in
the Driver Information Centre.
Reasons for signs being cleared:
● A predefined distance was driven
or time has elapsed (differs for
each sign type)
● Vehicle drives through a turn
● If no navigation map data is available and speed drops below52 km/h (city entry detection)
● If navigation map data is available and a city entry / exit
was detected due to map data
change
Traffic sign detection in
conjunction with navigation
system
If the vehicle is equipped with a
navigation system, the currently
displayed sign can either originate
from optical sign detection or from the
map data.
If the currently displayed sign
originates from map data and the map
information changes, a new sign will
be displayed. This may lead to
detection of a new sign although no
sign on the road may have been
passed.
Page 212 of 305
210Driving and operatingSystem limitations
Traffic sign assistant may not operate properly when:
● Vehicle speed is faster than 200 km/h.
● Driving on winding or hilly roads. ● During nighttime driving.
● The area of the windscreen, where the front camera is
located, is not clean or affected
by foreign items, e.g. stickers.
● Weather limits visibility, such as fog, rain, or snow.
● The sun is shining directly into the camera lens.
● Traffic signs are completely or partially covered or difficult to
discern.
● Traffic signs are incorrectly mounted or damaged.
● Traffic signs do not comply with the Vienna Convention on traffic
signs.
● The navigation map data is outdated.Caution
The system is intended to help thedriver within a defined speed
range to discern certain traffic
signs. Do not ignore traffic signs
which are not displayed by the
system.
The system does not discern any other than the conventional traffic
signs that might give or end a
speed limit.
Do not let this special feature
tempt you into taking risks when
driving.
Always adapt speed to the road
conditions.
The driver assistance systems do not relieve the driver from full
responsibility for vehicle
operation.
Lane keep assist
Lane keep assist supports the driver
to avoid unintentional crossing of lane markings. The front camera observes
the lane markings between which the
vehicle is driving. If the vehicle
approaches a lane marking without
activated turn signal, the steering
wheel is gently turned to position the
vehicle back into the lane. Turn
steering wheel in same direction, if
system steers not sufficient. Turn
steering wheel gently into opposite
direction, if lane change is intended.
The Lane Keep Assist informs the
driver with an optical warning during
the trajectory correction. If the system is not able to avoid the lane crossing
an additional acoustic warning is
issued.
Unintended lane departure is
assumed:
● without using the turn lights
● using the turn lights in the opposite direction of the lane
departure
● without braking
● without acceleration
● without active steering
Note
The system might be inactive when
the detected lane markings are ambiguous or insufficient, e.g. in
construction areas.
Page 213 of 305
Driving and operating211Note
The system may be switched off if it
detects lanes which are too narrow,
too wide or too curved.
Activation
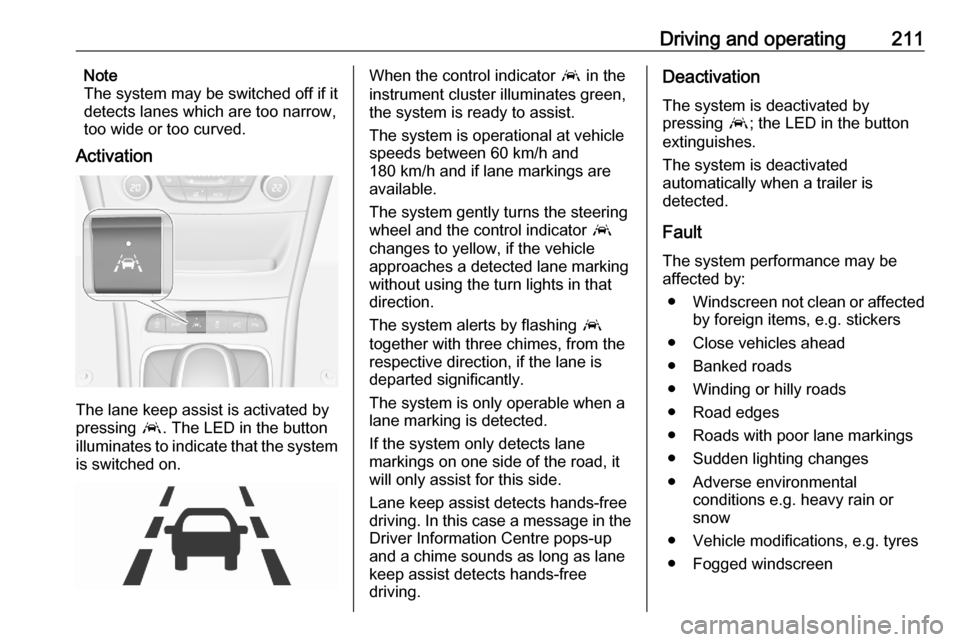
The lane keep assist is activated by
pressing a. The LED in the button
illuminates to indicate that the system
is switched on.
When the control indicator a in the
instrument cluster illuminates green,
the system is ready to assist.
The system is operational at vehicle
speeds between 60 km/h and
180 km/h and if lane markings are
available.
The system gently turns the steering
wheel and the control indicator a
changes to yellow, if the vehicle
approaches a detected lane marking
without using the turn lights in that
direction.
The system alerts by flashing a
together with three chimes, from the
respective direction, if the lane is
departed significantly.
The system is only operable when a
lane marking is detected.
If the system only detects lane
markings on one side of the road, it
will only assist for this side.
Lane keep assist detects hands-free
driving. In this case a message in the
Driver Information Centre pops-up
and a chime sounds as long as lane
keep assist detects hands-free
driving.Deactivation
The system is deactivated by
pressing a; the LED in the button
extinguishes.
The system is deactivated
automatically when a trailer is
detected.
Fault
The system performance may be affected by:
● Windscreen not clean or affected
by foreign items, e.g. stickers
● Close vehicles ahead
● Banked roads
● Winding or hilly roads
● Road edges
● Roads with poor lane markings
● Sudden lighting changes
● Adverse environmental conditions e.g. heavy rain or
snow
● Vehicle modifications, e.g. tyres ● Fogged windscreen
Page 214 of 305
212Driving and operatingManual switch off the lane keep assist
if the system is disturbed by tar
marks, shadows, road cracks,
temporary or construction lane
markings, or other road
imperfections.9 Warning
Always keep your attention on the
road and maintain proper vehicle
position within the lane, otherwise
vehicle damage, injury or death
could occur.
Lane keep assist does not
continuously steer the vehicle.
The system may not keep the
vehicle in the lane or give an alert,
even if a lane marking is detected.
The steering of the lane keep
assist may not be sufficient to
avoid a lane departure.
The system may not detect hands-
off driving due to external
influences like road condition and
surface and weather. The driver has full responsibility to control the
vehicle and is always required to
keep the hands on the steering
wheel while driving.
Using the system while towing a
trailer or on slippery roads could
cause loss of control of the vehicle
and a crash. Switch the system off.Fuel
Fuel for petrol engines
Only use unleaded fuel that complies
with European standard EN 228 or
equivalent.
The engine is capable of running with
fuel that contains up to 10% ethanol
(e.g. named E10).
Use fuel with the recommended
octane rating. A lower octane rating can reduce engine power and torque
and slightly increases fuel
consumption.
Page 223 of 305

Driving and operating221
Stow the coupling ball bar in the bag
and secure by fixing the strap through the rear right lashing eye. Wrap
around twice and tighten the strap to
secure the bag.
Trailer stability assist
If the system detects snaking
movements, engine power is reduced
and the vehicle/trailer combination is selectively braked until the snaking
ceases. While system is working keep
steering wheel as still as possible.
Trailer stability assist is a function of
the Electronic Stability Control 3 174.
Page 246 of 305
244Vehicle careIf the fuse box cover is not closed
correctly, malfunction may occur.
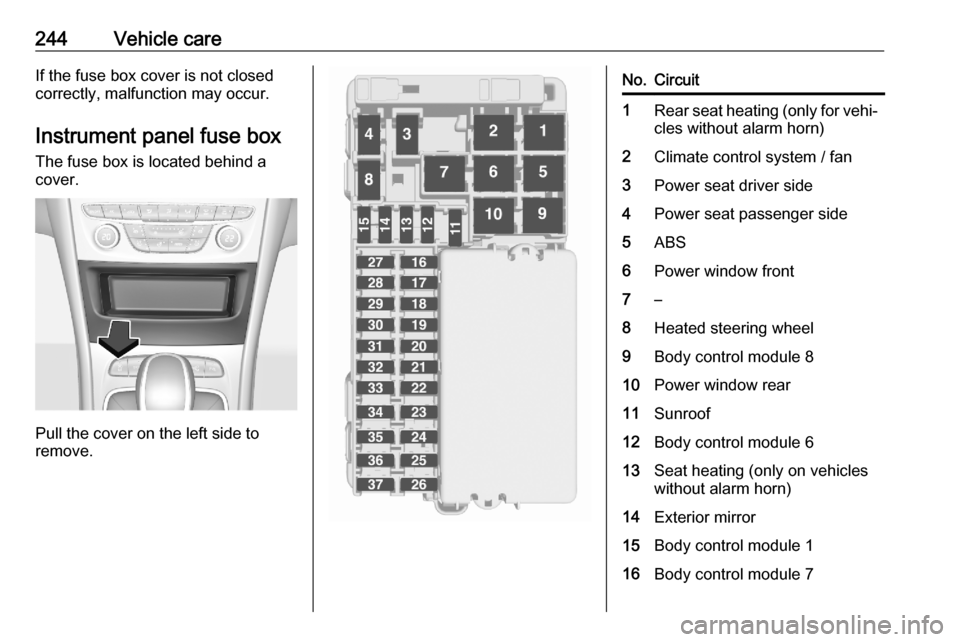
Instrument panel fuse box The fuse box is located behind a
cover.
Pull the cover on the left side to
remove.
No.Circuit1Rear seat heating (only for vehi‐ cles without alarm horn)2Climate control system / fan3Power seat driver side4Power seat passenger side5ABS6Power window front7–8Heated steering wheel9Body control module 810Power window rear11Sunroof12Body control module 613Seat heating (only on vehicles
without alarm horn)14Exterior mirror15Body control module 116Body control module 7
Page 247 of 305
Vehicle care245No.Circuit17Body control module 418Body control module 319Data link connector20Airbag system21Climate control system22Central locking system / tailgate23Electronic key system24Power seat memory function25Airbag system steering wheel26Ignition switch / Steering
column lock27Body control module 228USB socket29Cigarette lighter / Power outlet
front30Selector lever31Rear window wiper32Transmission control moduleNo.Circuit33Anti-theft alarm system / Power
sounder34Parking assist / Side blind spot
alert / Infotainment system /
USB socket35SOS36Info Display / Instrument cluster37Infotainment system / radio
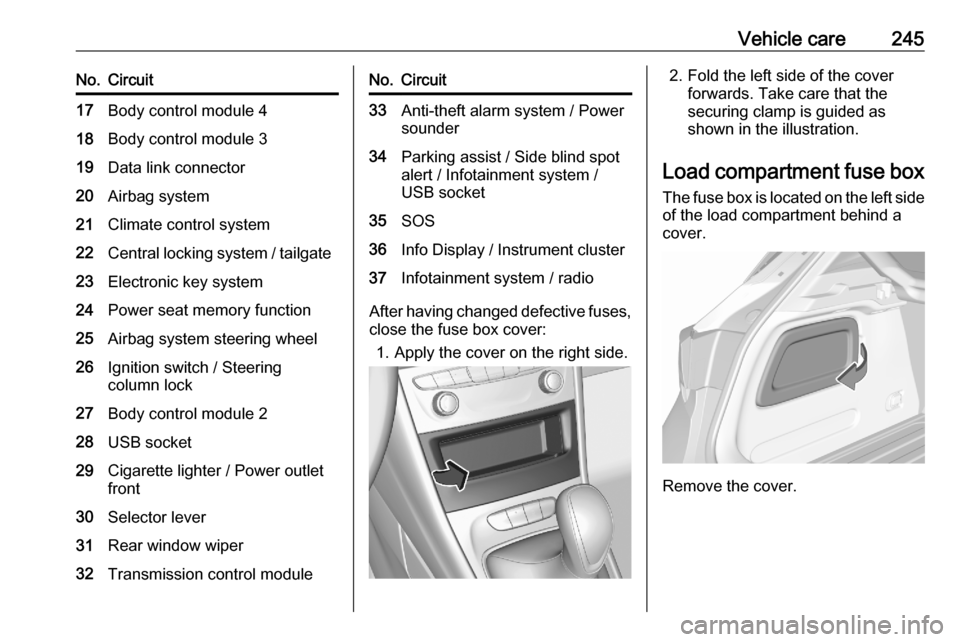
After having changed defective fuses,
close the fuse box cover:
1. Apply the cover on the right side.
2. Fold the left side of the cover forwards. Take care that thesecuring clamp is guided as
shown in the illustration.
Load compartment fuse box The fuse box is located on the left side
of the load compartment behind a
cover.
Remove the cover.
Page 257 of 305
Vehicle care255Tyre chains
Tyre chains are only permitted on the
front wheels.
Always use fine mesh chains that add no more than 10 mm to the tyre tread
and the inboard sides (including chain lock).
9 Warning
Damage may lead to tyre blowout.
Tyre chains are permitted on tyres of
size 195/65 R15, 205/55 R16 and
215/55 R16.
Temporary spare wheel
The use of tyre chains is not permitted on the temporary spare wheel.
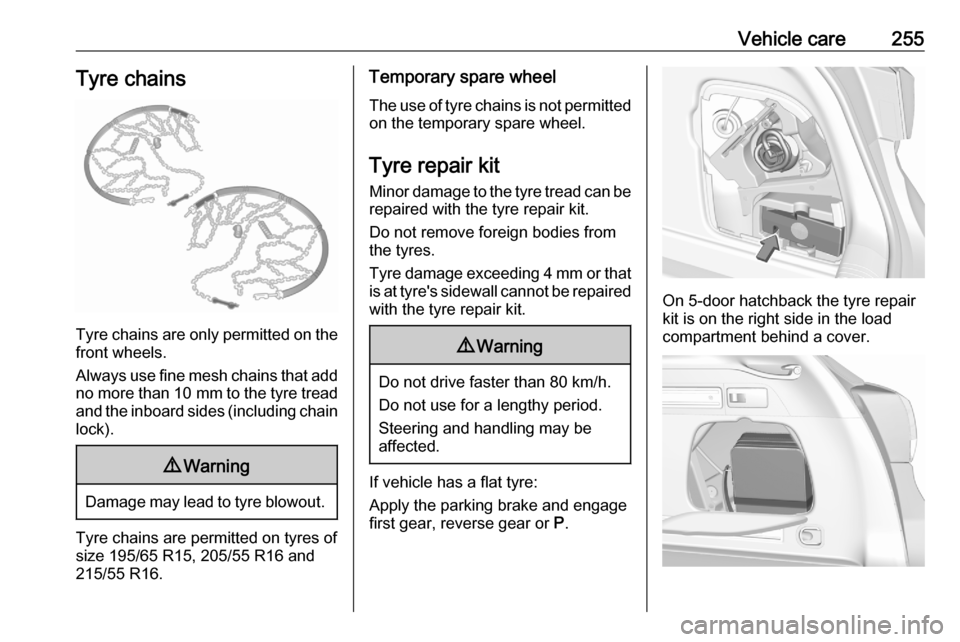
Tyre repair kit Minor damage to the tyre tread can be
repaired with the tyre repair kit.
Do not remove foreign bodies from
the tyres.
Tyre damage exceeding 4 mm or that is at tyre's sidewall cannot be repairedwith the tyre repair kit.9 Warning
Do not drive faster than 80 km/h.
Do not use for a lengthy period.
Steering and handling may be
affected.
If vehicle has a flat tyre:
Apply the parking brake and engage
first gear, reverse gear or P.
On 5-door hatchback the tyre repair
kit is on the right side in the load
compartment behind a cover.
Page 267 of 305
Vehicle care265Route the leads so that they cannot
catch on rotating parts in the engine
compartment.
To start the engine: 1. Start the engine of the vehicle providing the jump.
2. After 5 minutes, start the other engine. Start attempts should be
made for no longer than
15 seconds at an interval of one
minute.
3. Allow both engines to idle for approx. 3 minutes with the leads
connected.
4. Switch on electrical consumers (e.g. headlights, heated rear
window) of the vehicle receiving
the jump start.
5. Reverse above sequence exactly when removing leads.Towing
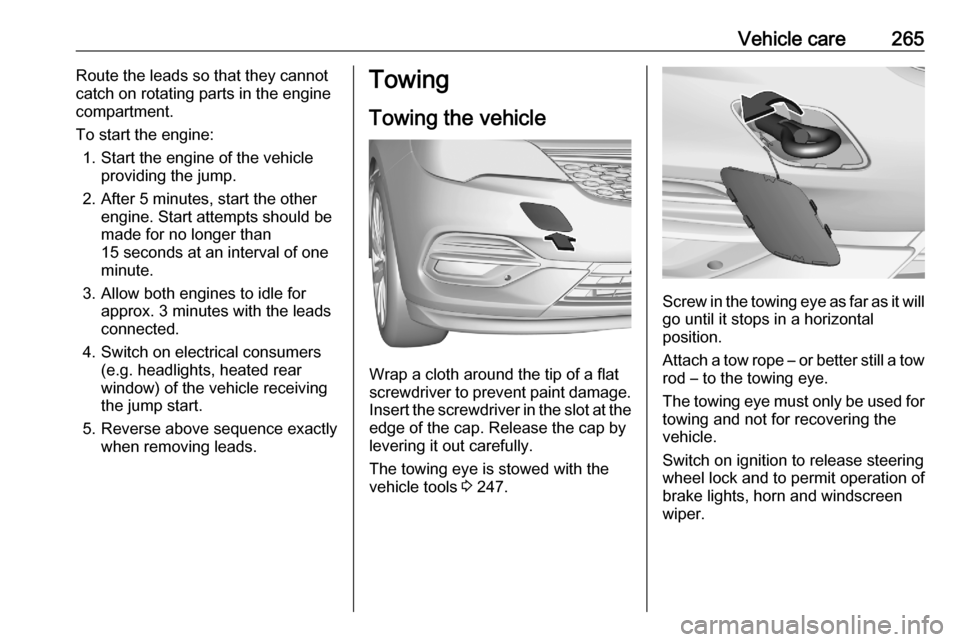
Towing the vehicle
Wrap a cloth around the tip of a flat
screwdriver to prevent paint damage. Insert the screwdriver in the slot at the
edge of the cap. Release the cap by
levering it out carefully.
The towing eye is stowed with the
vehicle tools 3 247.
Screw in the towing eye as far as it will
go until it stops in a horizontal
position.
Attach a tow rope – or better still a tow
rod – to the towing eye.
The towing eye must only be used for
towing and not for recovering the
vehicle.
Switch on ignition to release steering wheel lock and to permit operation of
brake lights, horn and windscreen
wiper.
Page 298 of 305

296Customer informationFault memories in the vehicle can be
reset by a service company when
carrying out servicing or repairs or at
your request.
Comfort and infotainment
functions
Comfort settings and custom settings can be stored in the vehicle and
changed or reset at any time.
Depending on the equipment level in
question, these include
● seat and steering wheel position settings
● chassis and air conditioning settings
● custom settings such as interior lighting
You can input your own data in the
infotainment functions for your
vehicle as part of the selected
features.Depending on the equipment level in
question, these include
● multimedia data such as music, videos or photos for playback in
an integrated multimedia system
● address book data for use with an
integrated hands-free system or
an integrated navigation system
● input destinations
● data on the use of online services
This data for comfort and
infotainment functions can be stored
locally in the vehicle or be kept on a
device that you have connected to the
vehicle ( e.g. a smartphone, USB stick
or MP3 player). Data that you have
input yourself can be deleted at any
time.
This data can only be transmitted out
of the vehicle at your request,
particularly when using online
services in accordance with the
settings selected by you.Smartphone integration, e.g.
Android Auto or Apple CarPlay
If your vehicle is equipped
accordingly, you can connect your
smartphone or another mobile device to the vehicle so that you can control
it via the controls integrated in the
vehicle. The smartphone image and
sound can be output via the
multimedia system in this case. At the
same time, specific information is
transmitted to your smartphone.
Depending on the type of integration, this includes data such as position
data, day / night mode and other
general vehicle information. For more
information, please see the operating
instructions for the vehicle /
infotainment system.
Integration allows selected
smartphone apps to be used, such as navigation or music playback. No
further integration is possible
between smartphone and vehicle, in
particular active access to vehicle
data. The nature of further data
processing is determined by the
provider of the app used. Whether
you can define settings, and if so