display menu OPEL ASTRA K 2020 Owner's Guide
[x] Cancel search | Manufacturer: OPEL, Model Year: 2020, Model line: ASTRA K, Model: OPEL ASTRA K 2020Pages: 305, PDF Size: 27.84 MB
Page 123 of 305
Instruments and controls121Info DisplayThe Info Display is located in theinstrument panel near the instrument
cluster.
Depending on the vehicle
configuration, the vehicle has one of
the following Infotainment systems:
● Multimedia
or
● Multimedia Navi
or
● Multimedia Navi Pro
The Info Display can indicate: ● time 3 97
● outside temperature 3 97
● date 3 97
● Infotainment system, see description in the Infotainment
manual
● climate control settings 3 143
● rear view camera 3 204
● parking assist instructions 3 195
● navigation, see description in the
Infotainment manual● system messages
● settings for vehicle personalisation 3 124
Multimedia Navi Selecting menus and settings
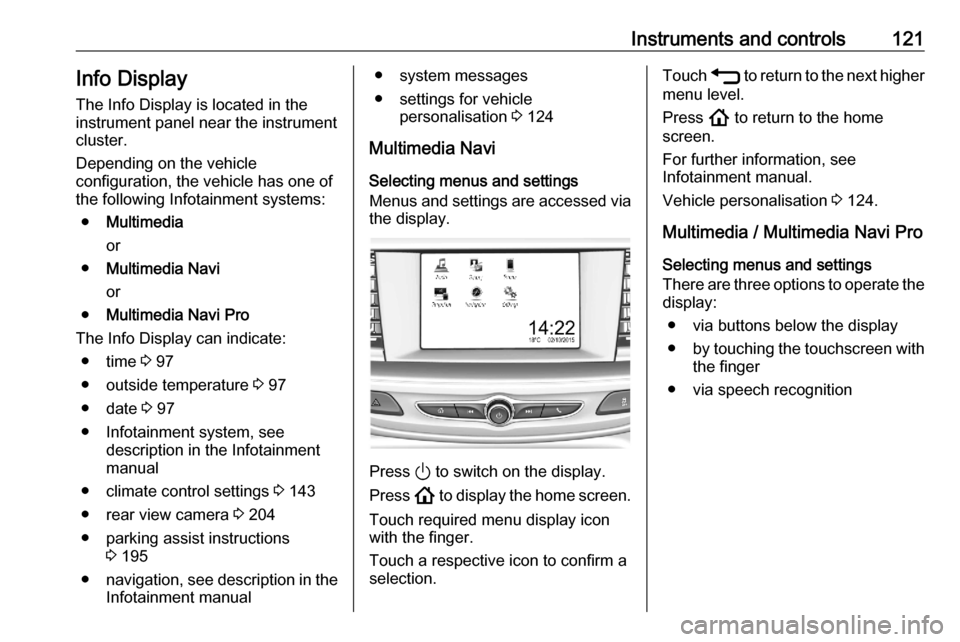
Menus and settings are accessed via the display.
Press ) to switch on the display.
Press ! to display the home screen.
Touch required menu display icon
with the finger.
Touch a respective icon to confirm a
selection.
Touch 1 to return to the next higher
menu level.
Press ! to return to the home
screen.
For further information, see
Infotainment manual.
Vehicle personalisation 3 124.
Multimedia / Multimedia Navi Pro
Selecting menus and settings
There are three options to operate the display:
● via buttons below the display
● by touching the touchscreen with
the finger
● via speech recognition
Page 124 of 305
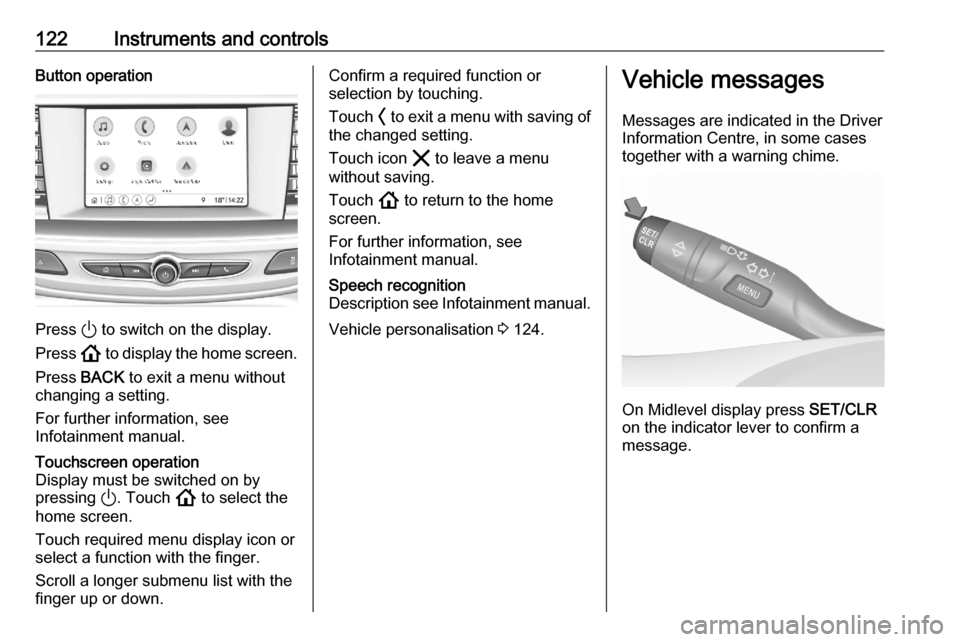
122Instruments and controlsButton operation
Press ) to switch on the display.
Press ! to display the home screen.
Press BACK to exit a menu without
changing a setting.
For further information, see
Infotainment manual.
Touchscreen operation
Display must be switched on by
pressing ). Touch ! to select the
home screen.
Touch required menu display icon or
select a function with the finger.
Scroll a longer submenu list with the
finger up or down.Confirm a required function or
selection by touching.
Touch O to exit a menu with saving of
the changed setting.
Touch icon & to leave a menu
without saving.
Touch ! to return to the home
screen.
For further information, see
Infotainment manual.Speech recognition
Description see Infotainment manual.
Vehicle personalisation 3 124.
Vehicle messages
Messages are indicated in the Driver
Information Centre, in some cases
together with a warning chime.
On Midlevel display press SET/CLR
on the indicator lever to confirm a
message.
Page 126 of 305
124Instruments and controls1. Switch off any electricalconsumers which are not requiredfor a safe drive, e.g. seat heating,
heated rear window or other main consumers.
2. Charge the vehicle battery by driving continuously for a while or
by using a charging device.
The warning message will disappear
after the engine has been started
twice without a voltage drop.
If the vehicle battery cannot be
recharged, have the cause of the fault
remedied by a workshop.Vehicle personalisation
The vehicle's behaviour can be
personalised by changing the settings in the Info Display.
Some of the personal settings for
different drivers can be memorised individually for each vehicle key.
Memorised settings 3 25.
Depending on vehicle equipment and
country-specific regulations some of
the functions described below may
not be available.
Some functions are only displayed or
active when the engine is running.
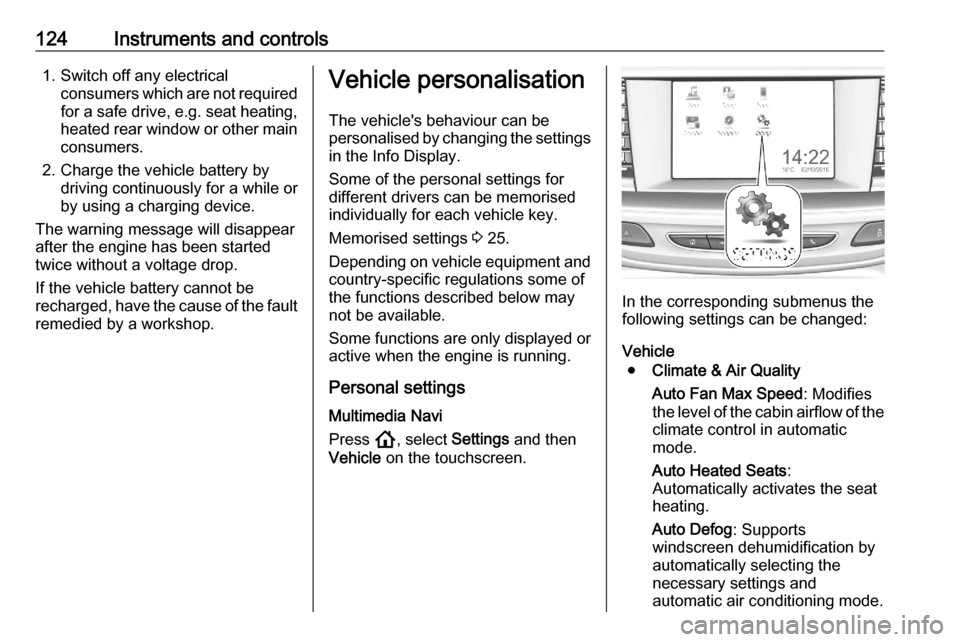
Personal settings Multimedia Navi
Press !, select Settings and then
Vehicle on the touchscreen.
In the corresponding submenus the
following settings can be changed:
Vehicle ● Climate & Air Quality
Auto Fan Max Speed : Modifies
the level of the cabin airflow of the climate control in automatic
mode.
Auto Heated Seats :
Automatically activates the seat
heating.
Auto Defog : Supports
windscreen dehumidification by
automatically selecting the
necessary settings and
automatic air conditioning mode.
Page 135 of 305
Lighting133High beam
Push lever to switch from low to high
beam.
Pull lever to deactivate high beam.
High beam assist 3 131.
Headlight flash To activate the headlight flash, pull
lever.
Pulling lever deactivates high beam.
LED headlights 3 134.
Headlight range adjustment
Manual headlight range
adjustment
Headlight range can be adjusted
manually if vehicle is equipped with
halogen headlights. LED headlights
are adjusted automatically.
Dynamic automatic headlight
levelling 3 134.
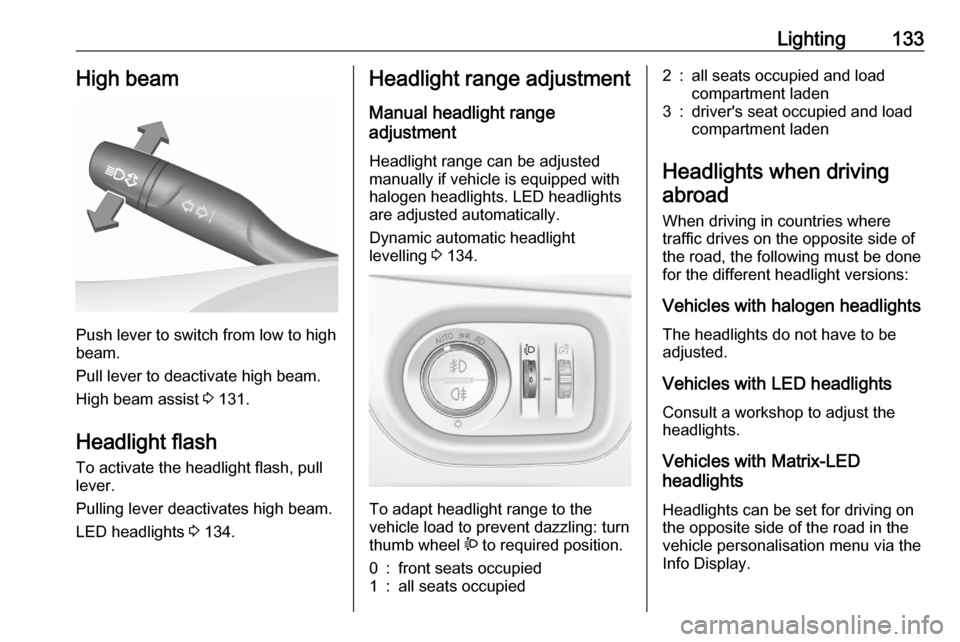
To adapt headlight range to the
vehicle load to prevent dazzling: turn
thumb wheel ? to required position.
0:front seats occupied1:all seats occupied2:all seats occupied and load
compartment laden3:driver's seat occupied and load
compartment laden
Headlights when driving
abroad
When driving in countries where
traffic drives on the opposite side of
the road, the following must be done
for the different headlight versions:
Vehicles with halogen headlights
The headlights do not have to be
adjusted.
Vehicles with LED headlights
Consult a workshop to adjust the headlights.
Vehicles with Matrix-LED
headlights
Headlights can be set for driving on
the opposite side of the road in the
vehicle personalisation menu via the
Info Display.
Page 136 of 305
134LightingSelect the relevant setting in Settings
I Vehicle .
Info Display 3 121.
Vehicle personalisation 3 124.
Every time the ignition is switched on,
f flashes for approx. 4 seconds as a
reminder.
To deactivate, use the same
procedure as described above. f will
not flash when function is
deactivated.
Control indicator f 3 113.
Daytime running lights
Daytime running lights increases
visibility of the vehicle during daylight.
They are switched on automatically
during daytime when engine is
running.
The system switches between
daytime running lights and headlights automatically, depending on the
lighting conditions.
Automatic light control 3 131.LED headlights
LED and Matrix-LED headlights for
low and high beam ensure better
visibility under all conditions.
Matrix-LED headlight contains
beyond that a variety of particular
LEDs in each headlight which
enables the control of different
lighting programmes.
Light distribution and intensity of light
are variably triggered depending on
the lighting conditions, road type and
driving situation. The vehicle adapts
the headlights automatically to the
situation to enable optimal light
performance for the driver. Some
functions of the LED headlights can
be deactivated or activated in the
vehicle personalisation menu. Select
the relevant setting in Settings I
Vehicle in the Info Display.
Vehicle personalisation 3 124.
The following lighting functions are
available with light switch in position
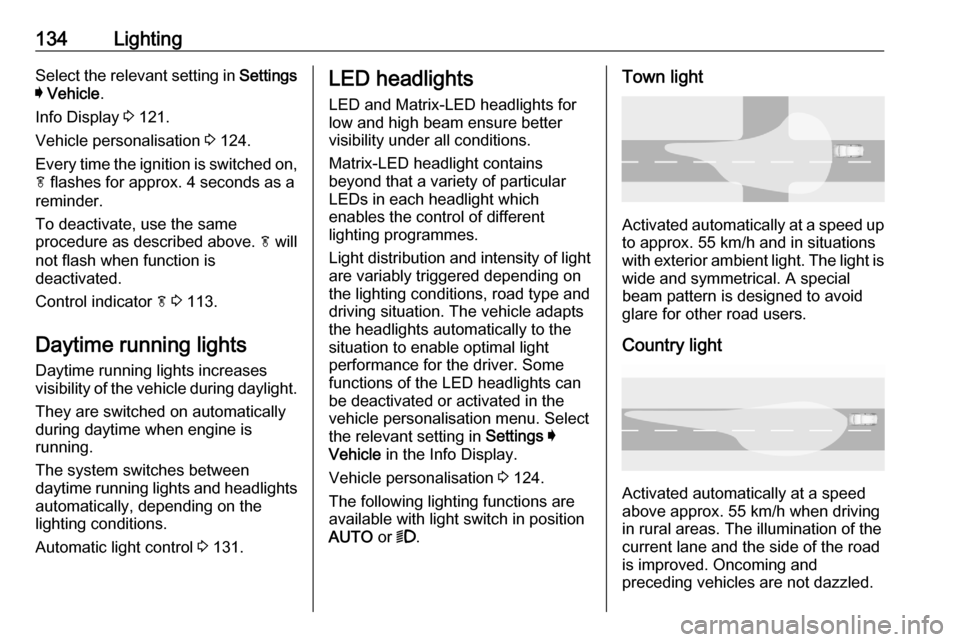
AUTO or 9.Town light
Activated automatically at a speed up
to approx. 55 km/h and in situations
with exterior ambient light. The light is
wide and symmetrical. A special
beam pattern is designed to avoid
glare for other road users.
Country light
Activated automatically at a speed
above approx. 55 km/h when driving
in rural areas. The illumination of the
current lane and the side of the roadis improved. Oncoming and
preceding vehicles are not dazzled.
Page 147 of 305
Climate control145● Press A/C to switch on optimal
cooling and demisting. The LED
in the button illuminates to
indicate activation.
● Set the preselected temperatures for driver and front
passenger using the left and right rotary knob. Recommended
temperature is 22 °C.
The fan speed regulation in automatic mode can be changed in the Settings menu.
Vehicle personalisation 3 124.
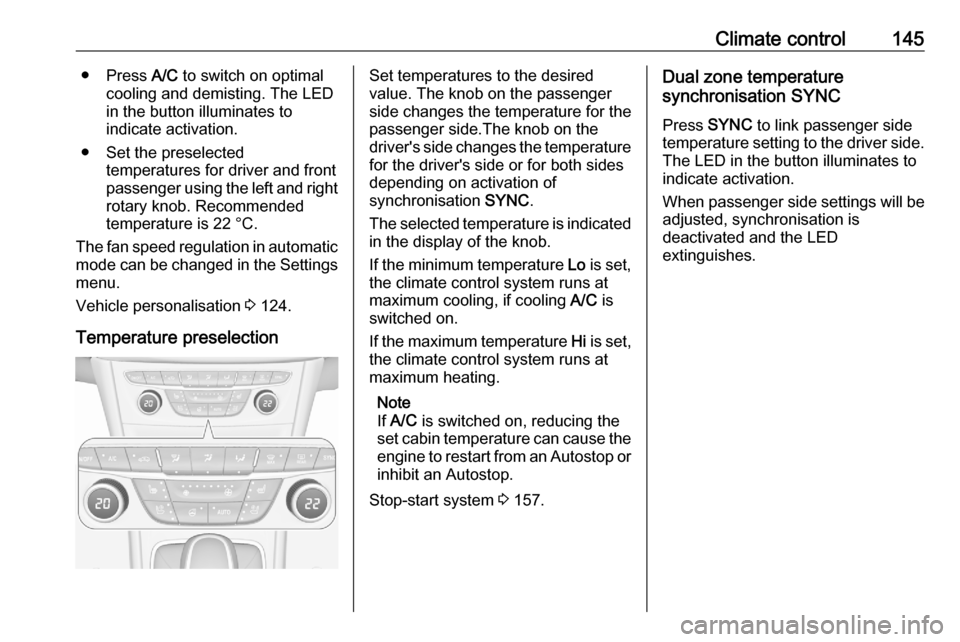
Temperature preselectionSet temperatures to the desired
value. The knob on the passenger
side changes the temperature for the
passenger side.The knob on the driver's side changes the temperature for the driver's side or for both sides
depending on activation of
synchronisation SYNC.
The selected temperature is indicated in the display of the knob.
If the minimum temperature Lo is set,
the climate control system runs at
maximum cooling, if cooling A/C is
switched on.
If the maximum temperature Hi is set,
the climate control system runs at
maximum heating.
Note
If A/C is switched on, reducing the
set cabin temperature can cause the engine to restart from an Autostop or
inhibit an Autostop.
Stop-start system 3 157.Dual zone temperature
synchronisation SYNC
Press SYNC to link passenger side
temperature setting to the driver side.
The LED in the button illuminates to
indicate activation.
When passenger side settings will be
adjusted, synchronisation is
deactivated and the LED
extinguishes.
Page 148 of 305
146Climate controlDemisting and defrosting the
windows $
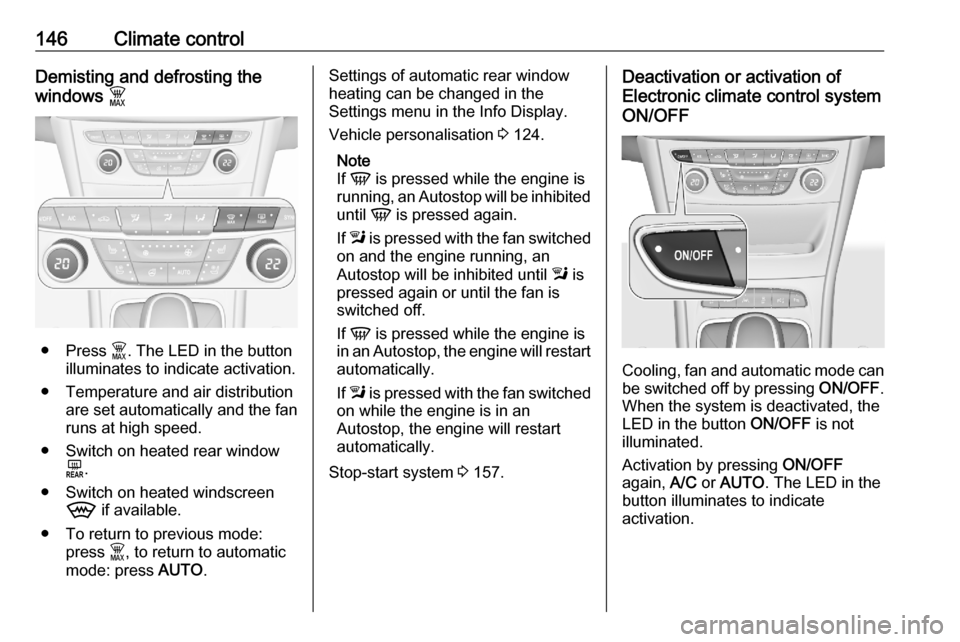
● Press $. The LED in the button
illuminates to indicate activation.
● Temperature and air distribution are set automatically and the fan
runs at high speed.
● Switch on heated rear window f.
● Switch on heated windscreen 9 if available.
● To return to previous mode: press $, to return to automatic
mode: press AUTO.
Settings of automatic rear window
heating can be changed in the
Settings menu in the Info Display.
Vehicle personalisation 3 124.
Note
If V is pressed while the engine is
running, an Autostop will be inhibited
until V is pressed again.
If l is pressed with the fan switched
on and the engine running, an
Autostop will be inhibited until l is
pressed again or until the fan is
switched off.
If V is pressed while the engine is
in an Autostop, the engine will restart automatically.
If l is pressed with the fan switched
on while the engine is in an
Autostop, the engine will restart
automatically.
Stop-start system 3 157.Deactivation or activation of
Electronic climate control system
ON/OFF
Cooling, fan and automatic mode can
be switched off by pressing ON/OFF.
When the system is deactivated, the
LED in the button ON/OFF is not
illuminated.
Activation by pressing ON/OFF
again, A/C or AUTO . The LED in the
button illuminates to indicate
activation.
Page 151 of 305

Climate control149Automatic air recirculationAn air humidity sensor switches
automatically to external air if internal air humidity is too high.
Basic settings
Some settings can be changed in the Settings menu in the Info Display.
Vehicle personalisation 3 124.
Auxiliary heater
Air heater Quickheat is an electric auxiliary air
heater which automatically warms up
the passenger compartment more
quickly.Air vents
Adjustable air vents At least one air vent must be open
while cooling is on.
To open the vent, turn the adjuster
wheel towards the bigger W symbol.
Adjust the air amount at the vent
outlet by turning the adjuster wheel.
Direct the flow of air by tilting and
swivelling the slats.
To close the vent, turn the adjuster
wheel towards the smaller W symbol.
9 Warning
Do not attach any objects to the
slats of the air vents. Risk of
damage and injury in case of an
accident.
Fixed air vents
Additional air vents are located
beneath the windscreen and door windows and in the foot wells.
Page 166 of 305

164Driving and operatingNote
Frozen and again liquefied AdBlue is usable without quality loss.
The typical AdBlue consumption is
approx. two litres per 1000 km, but can also be higher depending on
driving behaviour (e.g. high load or
towing).
AdBlue tank The AdBlue tank level can be found in
the display menu.
Level warnings
Depending on the calculated range of AdBlue, different messages are
displayed in the Driver Information
Centre. The messages and the
restrictions are a legal requirement.
The first possible warning is AdBlue
Range: 2400 km .
This warning will show up once briefly
with the calculated range. Driving is
possible without any restrictions.
The next warning level is entered with
a range below 1750 km. The
message with the current range will
always be displayed when ignition isswitched on and needs to be
confirmed 3 115 . Refill AdBlue before
entering the next warning level.
At an AdBlue range below 900 km,
the following warning messages are
alternately displayed and cannot be
dismissed:
● AdBlue Low Refill Now
● Engine Restart Prevented in 900
km
Additionally, control indicator Y
flashes continuously.
Note
In case of high AdBlue consumption, the Driver Information Centre may
display this warning without the
previous warning stages.
The last warning level is entered
when the AdBlue tank is empty.
Restart of the engine is not possible.
The following warning messages are
alternately displayed and cannot be
dismissed:
● AdBlue Empty Refill Now
● Engine Will Not Restart
Additionally, control indicator Y
flashes continuously.With active prevention of an engine
start, the following message will be
displayed:
Refill AdBlue To Start Vehicle .
The tank must be refilled completely
with AdBlue, otherwise restarting of the engine is not possible 3 283.
High emission warnings If the exhaust emission rises above a
certain value, warnings similar to the
range warnings will be displayed in
the Driver Information Centre.
Requests to have the exhaust system checked and finally the
announcement of the prevention of
an engine restart are displayed.
These restrictions are a legal
requirement.
Consult a workshop for assistance.
Page 188 of 305
186Driving and operatingVehicle path changes
If another vehicle enters your driving
path, adaptive cruise control will first
consider the vehicle when it is
completely in your path. Be ready to
take action and depress the brake
pedal, if you need to brake more
quickly.
Hill and trailer considerations
9 Warning
Do not use adaptive cruise control
on steep hill roads.
System performance on hills depends
on vehicle speed, vehicle load, traffic
conditions and the road gradient. It
may not detect a vehicle in your path
while driving on hills. Full speed range
adaptive control is deactivated
automatically, as the vehicle is
stopping uphill on an incline greater than 10%. In this condition, be
prepared to take control of the
vehicle.
Note that applying the brake
deactivates the system.
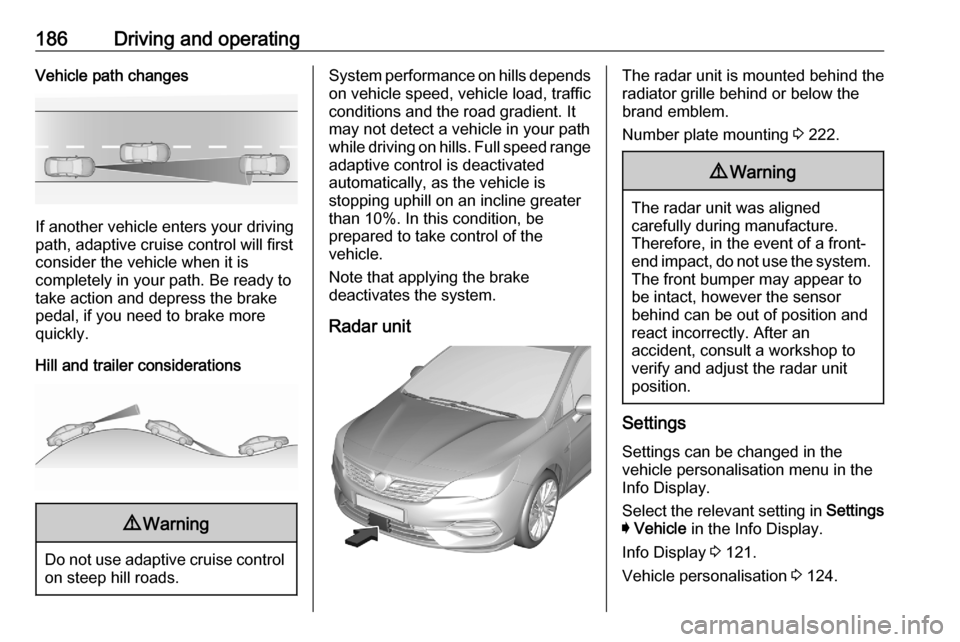
Radar unitThe radar unit is mounted behind the
radiator grille behind or below the
brand emblem.
Number plate mounting 3 222.9 Warning
The radar unit was aligned
carefully during manufacture.
Therefore, in the event of a front-
end impact, do not use the system. The front bumper may appear to
be intact, however the sensor
behind can be out of position and
react incorrectly. After an
accident, consult a workshop to
verify and adjust the radar unit
position.
Settings
Settings can be changed in the
vehicle personalisation menu in the
Info Display.
Select the relevant setting in Settings
I Vehicle in the Info Display.
Info Display 3 121.
Vehicle personalisation 3 124.