Air OPEL ASTRA K 2020 Owner's Manual
[x] Cancel search | Manufacturer: OPEL, Model Year: 2020, Model line: ASTRA K, Model: OPEL ASTRA K 2020Pages: 305, PDF Size: 27.84 MB
Page 5 of 305

Introduction3Vehicle specific dataPlease enter your vehicle's data on
the previous page to keep it easily
accessible.
Refer to the sections "Service and
maintenance", "Technical data", the
vehicle’s identification plate and
national registration documents.
Introduction
Your vehicle is a designed
combination of advanced technology, safety, environmental friendliness
and economy.
This Owner's Manual provides you
with all the necessary information to
enable you to drive your vehicle
safely and efficiently.
Make sure your passengers are
aware of the possible risk of accident
and injury which may result from
improper use of the vehicle.
You must always comply with the
specific laws and regulations of the
country that you are in. These laws
may differ from the information in this Owner's Manual.Disregarding the description given in
this manual may affect your warranty.
When this Owner's Manual refers to a
workshop visit, we recommend your
Opel Service Partner.
For gas vehicles we recommend an
Opel Repairer authorised for
servicing gas vehicles.
All Opel Service Partners provide
first-class service at reasonable
prices. Experienced mechanics
trained by Opel work according to
specific Opel instructions.
The customer literature pack should
always be kept ready to hand in the
vehicle.
Using this manual ● This manual describes all options
and features available for this
model. Certain descriptions,
including those for display and
menu functions, may not apply to
your vehicle due to model
variant, country specifications,
special equipment or
accessories.● The "In brief" section will give you
an initial overview.
● The table of contents at the beginning of this manual and
within each section shows where the information is located.
● The index will enable you to search for specific information.
● This Owner's Manual depicts left-
hand drive vehicles. Operation is similar for right-hand drive
vehicles.
● The Owner's Manual uses the engine identifier code. The
corresponding sales designation
and engineering code can be
found in the section "Technical
data".
● Directional data, e.g. left or right, or front or back, always relate to
the direction of travel.
● Displays may not support your specific language.
● Display messages and interior labelling are written in bold
letters.
Page 10 of 305
8In briefSeat inclination
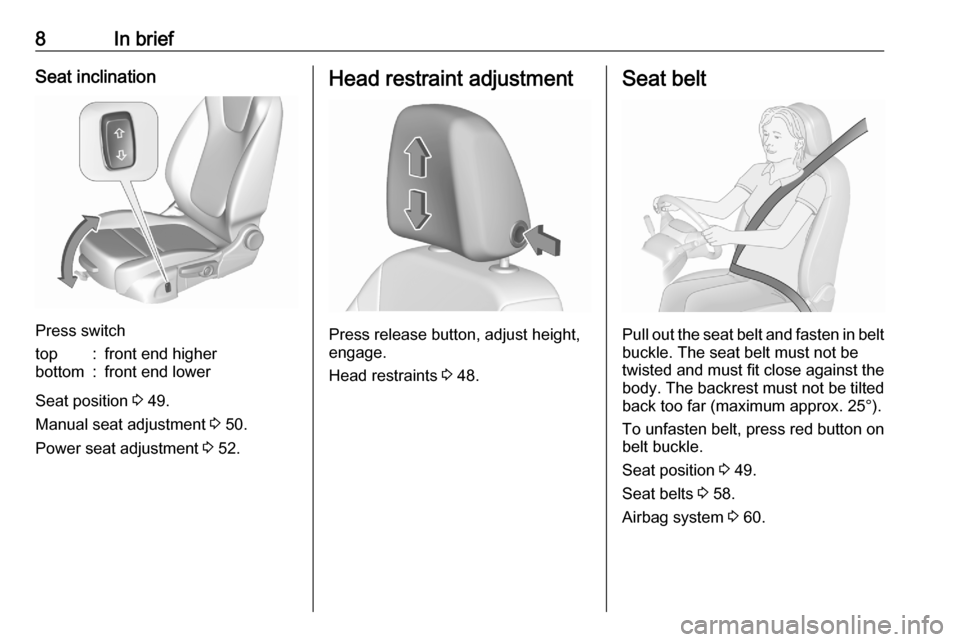
Press switch
top:front end higherbottom:front end lower
Seat position 3 49.
Manual seat adjustment 3 50.
Power seat adjustment 3 52.
Head restraint adjustment
Press release button, adjust height,
engage.
Head restraints 3 48.
Seat belt
Pull out the seat belt and fasten in belt
buckle. The seat belt must not be
twisted and must fit close against the
body. The backrest must not be tilted back too far (maximum approx. 25°).
To unfasten belt, press red button on belt buckle.
Seat position 3 49.
Seat belts 3 58.
Airbag system 3 60.
Page 11 of 305
In brief9Mirror adjustment
Interior mirror
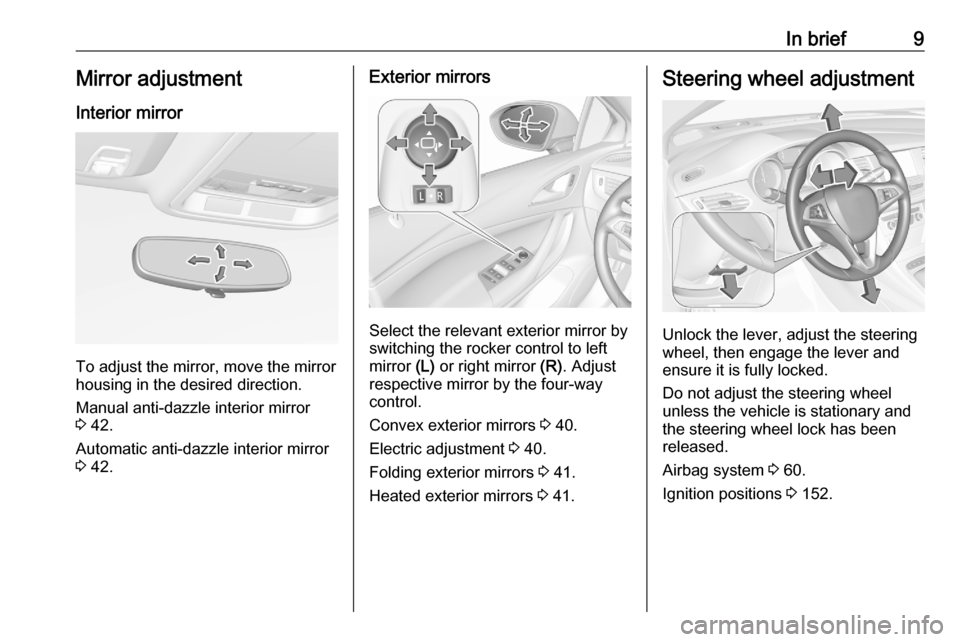
To adjust the mirror, move the mirror
housing in the desired direction.
Manual anti-dazzle interior mirror
3 42.
Automatic anti-dazzle interior mirror 3 42.
Exterior mirrors
Select the relevant exterior mirror by
switching the rocker control to left
mirror (L) or right mirror (R). Adjust
respective mirror by the four-way control.
Convex exterior mirrors 3 40.
Electric adjustment 3 40.
Folding exterior mirrors 3 41.
Heated exterior mirrors 3 41.
Steering wheel adjustment
Unlock the lever, adjust the steering
wheel, then engage the lever and
ensure it is fully locked.
Do not adjust the steering wheel
unless the vehicle is stationary and the steering wheel lock has been
released.
Airbag system 3 60.
Ignition positions 3 152.
Page 13 of 305

In brief111Power windows .....................43
2 Exterior mirrors .....................40
3 Central locking system ..........25
4 Side air vents ...................... 149
5 Cruise control .....................176
Speed limiter ....................... 177
Adaptive cruise control .......179
Forward collision alert .........187
6 Turn lights, headlight
flash, low / high beam,
high beam assist .................136
Exit lighting ......................... 139
Parking lights ...................... 137
Buttons for Driver
Information Centre ..............115
7 Instruments ........................ 104
Driver Information Centre .... 115
8 Buttons for Driver
Information Centre ..............115
9 Windscreen wiper and
washer, rear wiper and
washer ................................. 94
10 Centre air vents ................... 14911Info Display ......................... 121
12 Anti-theft alarm system
status LED ........................... 37
13 Hazard warning flashers ....135
14 Glovebox .............................. 73
15 Controls for Info Display
operation ............................. 121
16 Climate control system ........ 141
17 Fuse box ............................ 244
18 Traction Control system .....173
Electronic Stability Control . 174
Parking assist / Advanced
parking assist .....................195
Lane keep assist ................210
Eco button for stop-start
system ................................. 157
19 Manual transmission ..........169
Automatic transmission ......166
20 Power outlet .......................... 99
21 Parking brake ......................171
22 Power button ....................... 153
23 Ignition switch .....................152
24 Steering wheel adjustment ..93
25 Horn ..................................... 9426Bonnet release lever ..........224
27 Storage compartment ...........74
28 Light switch ........................ 130
Headlight range
adjustment ......................... 133
Front / rear fog lights ..........136
Instrument illumination .......137
Page 18 of 305
16In briefClimate control
Heated rear window
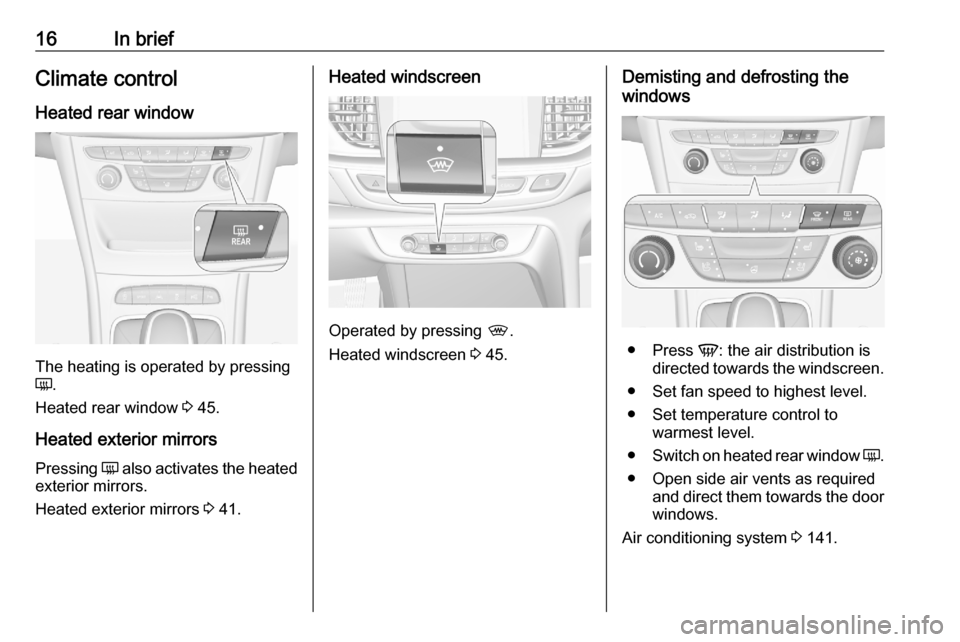
The heating is operated by pressing
Ü .
Heated rear window 3 45.
Heated exterior mirrors
Pressing Ü also activates the heated
exterior mirrors.
Heated exterior mirrors 3 41.
Heated windscreen
Operated by pressing ,.
Heated windscreen 3 45.
Demisting and defrosting the
windows
● Press V: the air distribution is
directed towards the windscreen.
● Set fan speed to highest level.
● Set temperature control to warmest level.
● Switch on heated rear window Ü.
● Open side air vents as required and direct them towards the doorwindows.
Air conditioning system 3 141.
Page 19 of 305
In brief17Demisting and defrosting the
windows, electronic climate
control
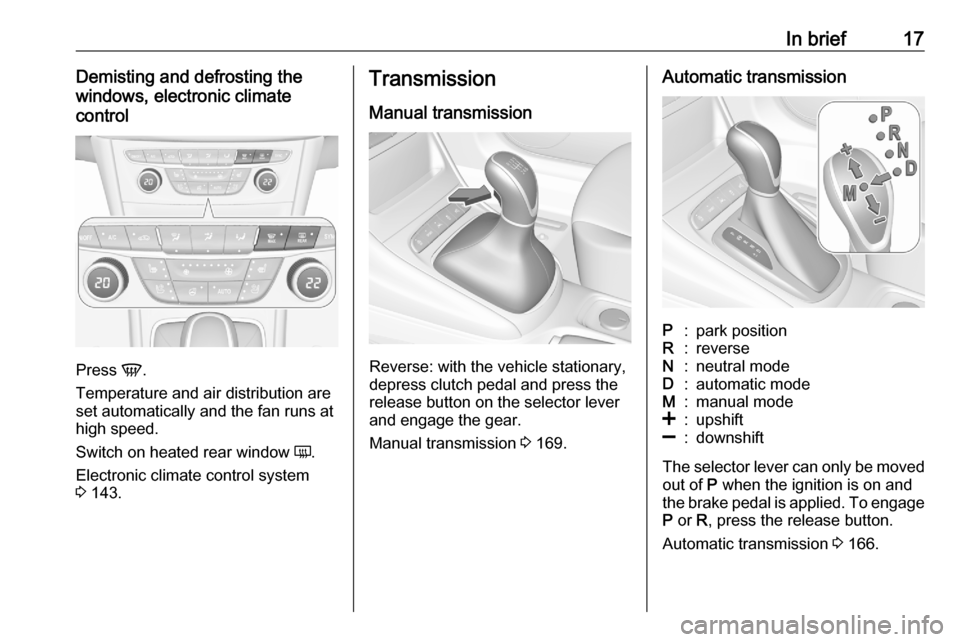
Press V.
Temperature and air distribution are
set automatically and the fan runs at
high speed.
Switch on heated rear window Ü.
Electronic climate control system 3 143.
Transmission
Manual transmission
Reverse: with the vehicle stationary,
depress clutch pedal and press the release button on the selector lever
and engage the gear.
Manual transmission 3 169.
Automatic transmissionP:park positionR:reverseN:neutral modeD:automatic modeM:manual mode<:upshift]:downshift
The selector lever can only be moved
out of P when the ignition is on and
the brake pedal is applied. To engage
P or R, press the release button.
Automatic transmission 3 166.
Page 27 of 305

Keys, doors and windows252. Insert the key blade again forapprox. 6 mm and turn the key to
open the housing. Further
insertion of the key blade can
damage the housing.
3. Remove and replace battery. Use
CR 2032 or equivalent battery.
Pay attention to the installation
position.
4. Close the housing and insert key blade.
Electronic key synchronisation
The electronic key synchronises itself automatically during every startingprocedure.
Fault
If the central locking cannot be
operated or the engine cannot be
started, the cause may be one of the
following:
● Fault in electronic key.
● Electronic key is out of reception range.
● The battery voltage is too low.● Overload of the central locking system by operating at frequent
intervals, the power supply is
interrupted for a short time.
● Interference from higher-power radio waves from other sources.
To rectify the cause of the fault,
change the position of the electronic
key.
Manual unlocking 3 25.
Memorised settings
Whenever the ignition is switched off,
some functions of the following
settings may be automatically
memorised by the remote control unit or the electronic key:
● automatic climate control
● lighting
● Infotainment system
● central locking system
● comfort settings
The saved settings are automatically
used the next time the ignition is
switched on with the memorised key
of the remote control unit 3 152 or
electronic key 3 23.A precondition is that Personalisation
by Driver is activated in the personal
settings of the Info Display. This must
be set for each remote control unit or
electronic key which is used. The
status change is available only after
locking and unlocking the vehicle.
The assigned memory position of the
power seat is automatically recalled
when switching on ignition and Auto
Memory Recall is activated in the
Info Display for the memorised
remote control or electronic key.
Power seat 3 52.
Vehicle personalisation 3 124.
Central locking system Unlocks and locks doors, load
compartment and fuel filler flap.
A pull on an interior door handle
unlocks the respective door. Pulling the handle once more opens the door.
Note
In the event of an accident in which
airbags or belt pretensioners are
deployed, the vehicle is
automatically unlocked.
Page 40 of 305
38Keys, doors and windows● vehicle inclination, e.g. if it israised
● ignition
Activation All doors must be closed and the
electronic key of the electronic key
system must not remain in the
vehicle. Otherwise the system cannot
be activated.
● Radio remote control: activated 30 seconds after locking the
vehicle by pressing e once.
● Electronic key system: activated 30 seconds after locking the
vehicle by pressing the button on any exterior door handle.
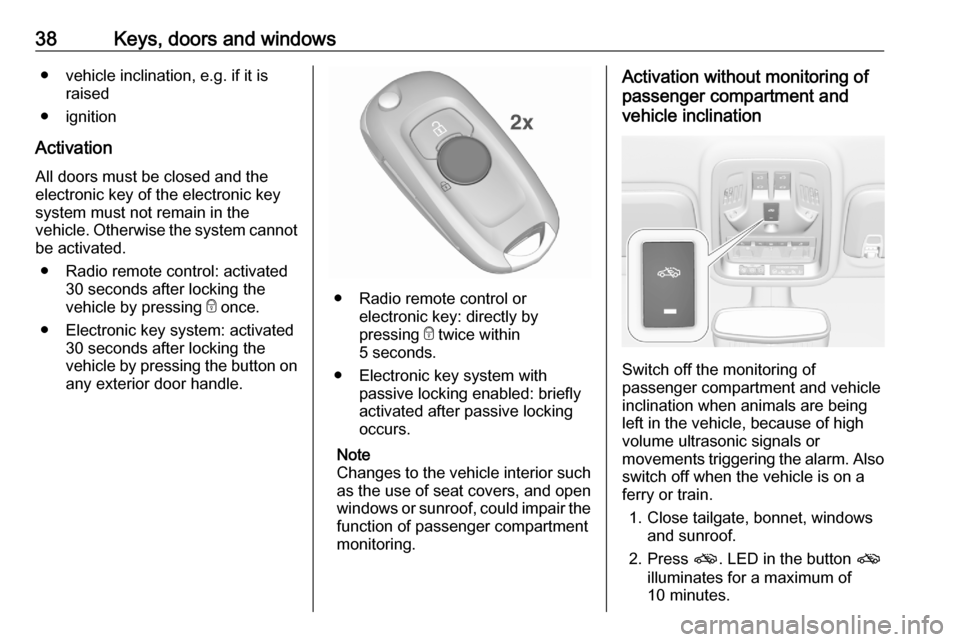
● Radio remote control or electronic key: directly by
pressing e twice within
5 seconds.
● Electronic key system with passive locking enabled: briefly
activated after passive locking
occurs.
Note
Changes to the vehicle interior such
as the use of seat covers, and open
windows or sunroof, could impair the
function of passenger compartment
monitoring.
Activation without monitoring of
passenger compartment and
vehicle inclination
Switch off the monitoring of
passenger compartment and vehicle
inclination when animals are being
left in the vehicle, because of high
volume ultrasonic signals or
movements triggering the alarm. Also switch off when the vehicle is on a
ferry or train.
1. Close tailgate, bonnet, windows and sunroof.
2. Press o. LED in the button o
illuminates for a maximum of
10 minutes.
Page 50 of 305
48Seats, restraintsSeats, restraintsHead restraints............................ 48
Front seats ................................... 49
Seat position .............................. 49
Manual seat adjustment ............50
Power seat adjustment ..............52
Armrest ...................................... 55
Heating ...................................... 56
Ventilating .................................. 56
Massage .................................... 57
Rear seats ................................... 57
Armrest ...................................... 57
Heating ...................................... 58
Seat belts ..................................... 58
Three-point seat belt .................59
Airbag system .............................. 60
Front airbag system ...................64
Side airbag system ....................64
Curtain airbag system ...............65
Airbag deactivation ....................65
Child restraints ............................. 67
Child restraint systems ..............67
Child restraint installation locations ................................... 69Head restraints
Position9 Warning
Only drive with the head restraint
set to the proper position.
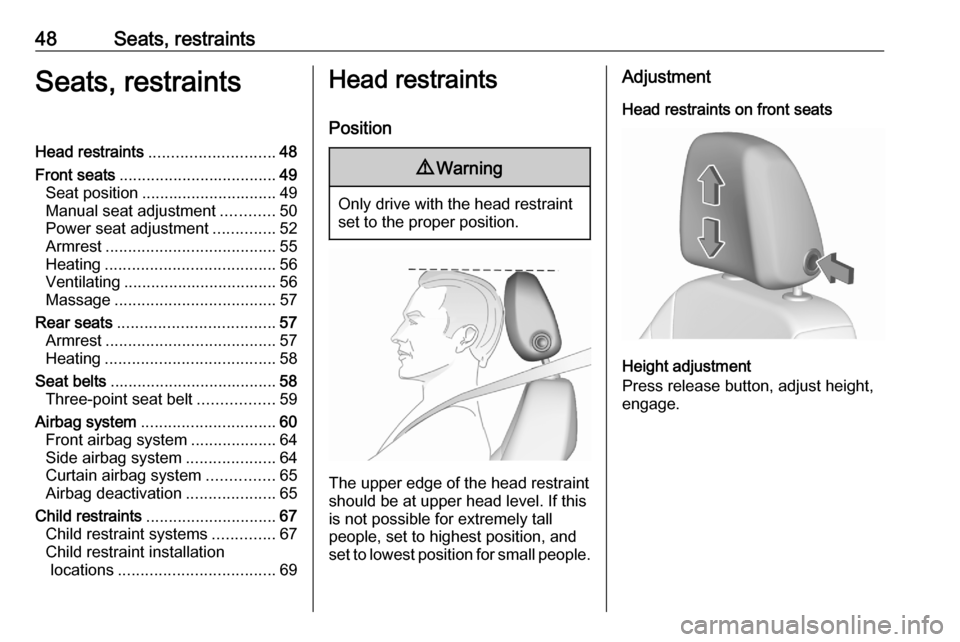
The upper edge of the head restraint
should be at upper head level. If this
is not possible for extremely tall
people, set to highest position, and
set to lowest position for small people.
Adjustment
Head restraints on front seats
Height adjustment
Press release button, adjust height,
engage.
Page 51 of 305
Seats, restraints49Head restraints on rear seats
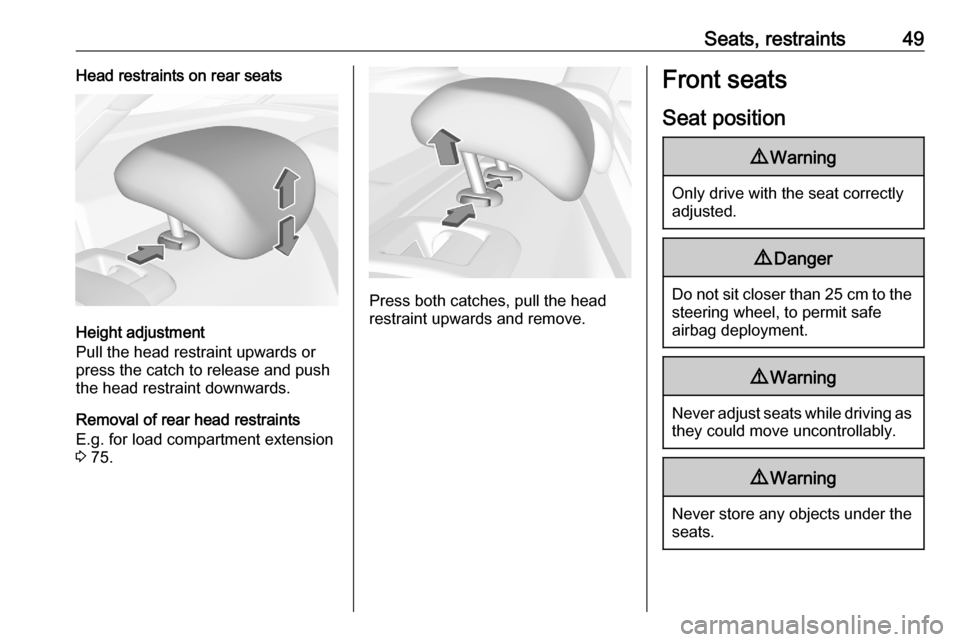
Height adjustment
Pull the head restraint upwards or
press the catch to release and push the head restraint downwards.
Removal of rear head restraints
E.g. for load compartment extension
3 75.
Press both catches, pull the head
restraint upwards and remove.
Front seats
Seat position9 Warning
Only drive with the seat correctly
adjusted.
9 Danger
Do not sit closer than 25 cm to the
steering wheel, to permit safe
airbag deployment.
9 Warning
Never adjust seats while driving as
they could move uncontrollably.
9 Warning
Never store any objects under the
seats.