tyre load OPEL ASTRA K 2020 Owner's Manual
[x] Cancel search | Manufacturer: OPEL, Model Year: 2020, Model line: ASTRA K, Model: OPEL ASTRA K 2020Pages: 305, PDF Size: 27.84 MB
Page 92 of 305
90StorageLoading information
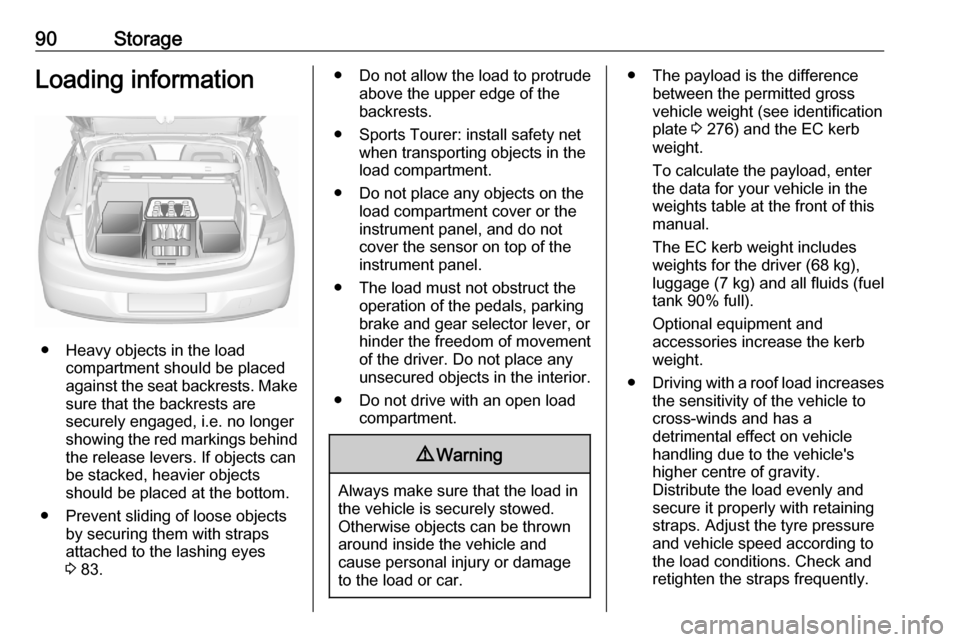
● Heavy objects in the loadcompartment should be placed
against the seat backrests. Make
sure that the backrests are
securely engaged, i.e. no longer
showing the red markings behind
the release levers. If objects can
be stacked, heavier objects
should be placed at the bottom.
● Prevent sliding of loose objects by securing them with straps
attached to the lashing eyes
3 83.
● Do not allow the load to protrude
above the upper edge of the
backrests.
● Sports Tourer: install safety net when transporting objects in the
load compartment.
● Do not place any objects on the load compartment cover or theinstrument panel, and do not
cover the sensor on top of the instrument panel.
● The load must not obstruct the operation of the pedals, parking
brake and gear selector lever, or
hinder the freedom of movement of the driver. Do not place any
unsecured objects in the interior.
● Do not drive with an open load compartment.9Warning
Always make sure that the load in
the vehicle is securely stowed.
Otherwise objects can be thrown
around inside the vehicle and
cause personal injury or damage
to the load or car.
● The payload is the difference between the permitted gross
vehicle weight (see identification
plate 3 276) and the EC kerb
weight.
To calculate the payload, enter
the data for your vehicle in the
weights table at the front of this
manual.
The EC kerb weight includes
weights for the driver (68 kg),
luggage (7 kg) and all fluids (fuel
tank 90% full).
Optional equipment and
accessories increase the kerb
weight.
● Driving with a roof load increases
the sensitivity of the vehicle to
cross-winds and has a
detrimental effect on vehicle
handling due to the vehicle's
higher centre of gravity.
Distribute the load evenly and secure it properly with retaining
straps. Adjust the tyre pressure
and vehicle speed according to
the load conditions. Check and
retighten the straps frequently.
Page 119 of 305

Instruments and controls117Vehicle and service messages are
popped-up in the Driver Information Centre if required. Confirm messages
by pressing Å.
Vehicle messages 3 122.
Main menu
Main menus are:
● Trip / fuel information, displayed by Info .
● Audio information, displayed by Audio .
● Navigation information, displayed by Navigation.
● Phone information, displayed by Phone .
● Vehicle information, displayed by
Options .
Some of the displayed functions differ when the vehicle is being driven or at
a standstill and some functions are
only active when the vehicle is being
driven.
Uplevel instrument cluster can be
displayed as Sport mode or Tour
mode. See Options menu, Display.Info Menu, ; or "
The following list contains all possible Info Menu pages. Some may not be
available for your particular vehicle.
Depending on the display some
functions are symbolised.
● Speed
● Trip 1 / Trip A , containing:
Distance
Fuel Economy / Average Fuel
Economy
Average Speed
● Trip 2 / Trip B , containing:
Distance
Fuel Economy / Average Fuel
Economy
Average Speed
● Fuel / Fuel Information ,
containing:
Fuel Range
Instant Fuel Economy
● Oil Life
● Tyre Pressure
● Timer
● Traffic Sign Memory●Following Distance
● Driver Assistance
● Top Consumers
● Economy Trend
● ECO Index
● AdBlue Level
On Baselevel display, the pages Oil
Life , Tyre Pressure , Following
Distance , Traffic Sign Memory ,
AdBlue Level , Tyre Load and Speed
Warning are displayed in the Vehicle
information menu, select ?.
Speed
Digital display of the instantaneous
speed.
Trip 1/A or 2/B
Two independent pages 1/A and 2/B
display the current distance, average
fuel consumption and average speed
since a certain reset.
The distance indicator counts up to a
distance of 9,999 km then restarts at
0.
To reset on Baselevel, press Å and
confirm reset. On Uplevel display,
press é and confirm with Å. This
Page 120 of 305

118Instruments and controlsonly resets the values on the current
displayed page. The other Trip page
stays unaffected.
Fuel /Fuel InformationFuel Range
Range is calculated from current fuel tank level and current consumption. The display shows average values.
After refuelling, the range is updated
automatically after a brief delay.
When the fuel level in the tank is low,
a message appears on the display
and control indicator Y in the fuel
gauge illuminates.
When the tank must be refuelled
immediately, a warning message
appears and remains on the display.
Additionally, control indicator Y in the
fuel gauge flashes 3 113.Instant Fuel Economy
Display of the instantaneous
consumption.
Oil Life
Indicates an estimate of the oil's
useful life. The number in % means
the remaining of current oil life 3 107.
Tyre Pressure
Checks tyre pressure of all wheels
during driving 3 251.
Timer
Baselevel display: start and stop
timer with Å. To reset, hold Å when
timer is not running.
Uplevel display: To start or stop timer, press Å and Å again. To reset,
press Å, choose Reset and confirm
with Å.
Traffic Sign Memory
Displays the detected traffic signs for
the current route section 3 206.
Following Distance
Displays the distance in seconds to a
preceding moving vehicle 3 189. If
Adaptive cruise control is active this
page shows the following distance
setting instead.
Driver Assistance
Displays the status of several driver
assistance systems:
Adaptive cruise control 3 179.
Forward collision alert 3 187.Lane keep assist 3 210.
AdBlue Level
Displays the level of the AdBlue tank 3 163.
Eco information menu, @
● Top Consumers
● Economy Trend
● ECO Index
On Uplevel display the pages Top
Consumers , Economy Trend and
ECO Index are displayed in the Info
Menu, see above.
Top Consumers
List of top comfort consumers
currently switched on is displayed in
descending order. Fuel saving
potential is indicated.
During sporadic driving conditions,
the engine will activate the heated
rear window automatically to increase
the engine load. In this event, the
heated rear window is indicated as
one of the top consumers, without
activation by the driver.
Page 121 of 305
Instruments and controls119Economy Trend
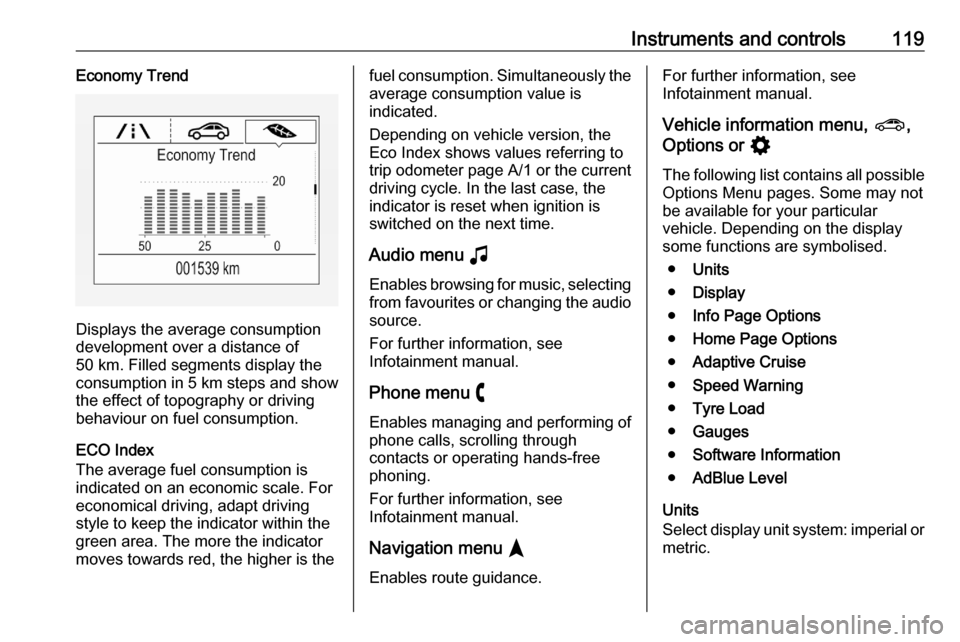
Displays the average consumption
development over a distance of
50 km. Filled segments display the
consumption in 5 km steps and show
the effect of topography or driving
behaviour on fuel consumption.
ECO Index
The average fuel consumption is indicated on an economic scale. For
economical driving, adapt driving
style to keep the indicator within the
green area. The more the indicator
moves towards red, the higher is the
fuel consumption. Simultaneously the
average consumption value is
indicated.
Depending on vehicle version, the
Eco Index shows values referring to
trip odometer page A/1 or the current
driving cycle. In the last case, the
indicator is reset when ignition is
switched on the next time.
Audio menu G
Enables browsing for music, selecting
from favourites or changing the audio source.
For further information, see
Infotainment manual.
Phone menu $
Enables managing and performing of
phone calls, scrolling through
contacts or operating hands-free
phoning.
For further information, see
Infotainment manual.
Navigation menu §
Enables route guidance.For further information, see
Infotainment manual.
Vehicle information menu, ?,
Options or %
The following list contains all possible Options Menu pages. Some may notbe available for your particular
vehicle. Depending on the display
some functions are symbolised.
● Units
● Display
● Info Page Options
● Home Page Options
● Adaptive Cruise
● Speed Warning
● Tyre Load
● Gauges
● Software Information
● AdBlue Level
Units
Select display unit system: imperial or metric.
Page 122 of 305
120Instruments and controlsDisplay
Press é and select Sport or Touring
mode. Sport mode includes more
vehicle information, Tour mode
includes more media information.
This setting is only available with
Uplevel display.
Info Page Options
A list of all pages in the Info Menu is displayed, see above. Select the
pages to be displayed in the Info
Menu. Selected pages have a 0.
Non viewable functions have a blank checkbox.
Home Page Options
Select, which values are shown on
the Driver Information Center home
page, e.g. speed or fuel range.
Adaptive Cruise
Activates or deactivates adaptive
cruise control 3 179.
Speed Warning
The speed warning page allows you
to set a speed that you do not want to
exceed.Speed limit can only be set when
speed warning is enabled. Once the
speed is set, this feature can be
turned off by pressing Å while
viewing this page. If the selected
speed limit is exceeded, a pop-up
warning is displayed with a chime.
Tyre Load
The tyre pressure category according to the actual tyre inflation pressure
can be selected 3 251.
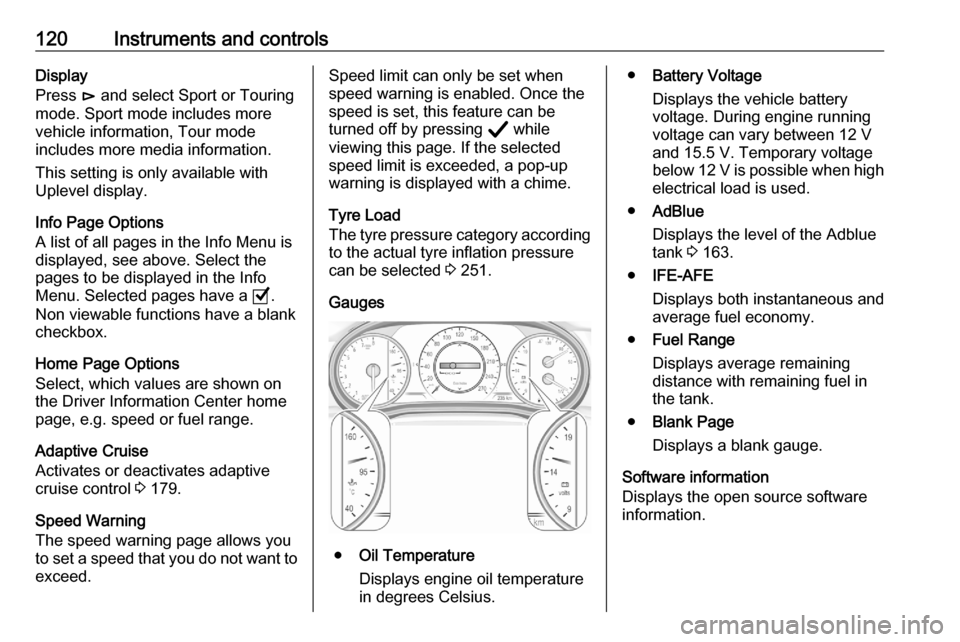
Gauges
● Oil Temperature
Displays engine oil temperature
in degrees Celsius.
● Battery Voltage
Displays the vehicle battery
voltage. During engine running
voltage can vary between 12 V
and 15.5 V. Temporary voltage
below 12 V is possible when high
electrical load is used.
● AdBlue
Displays the level of the Adblue
tank 3 163.
● IFE-AFE
Displays both instantaneous and
average fuel economy.
● Fuel Range
Displays average remaining
distance with remaining fuel in
the tank.
● Blank Page
Displays a blank gauge.
Software information
Displays the open source software
information.
Page 219 of 305

Driving and operating217Driving characteristics and
towing tips
Before attaching a trailer, lubricate
the coupling ball. However, do not do
so if a stabiliser, which acts on the
coupling ball, is being used to reduce snaking movements.
During trailer towing do not exceed a
speed of 80 km/h. A maximum speed
of 100 km/h is only appropriate if an
oscillation damper is used and the
permissible gross trailer weight does
not exceed the vehicle’s curb weight.
For trailers with low driving stability
and caravan trailers, the use of an
oscillation damper is strongly
recommended.
If the trailer starts snaking, drive more slowly, do not attempt to correct the
steering and brake sharply if
necessary.
When driving downhill, drive in the
same gear as if driving uphill and
drive at a similar speed.
Adjust tyre pressure to the value
specified for full load 3 285.Trailer towing
Trailer loads The permissible trailer loads are
vehicle and engine-dependent
maximum values which must not be
exceeded. The actual trailer load is the difference between the actual
gross weight of the trailer and the
actual coupling socket load with the
trailer coupled.
The permissible trailer loads are
specified in the vehicle documents. In general, they are valid for gradients
up to 12%.
The permissible trailer load applies
up to the specified incline and at sea
level. Since engine power decreases
as altitude increases due to the air
becoming thinner, therefore reducing
climbing ability, the permissible gross
train weight also decreases by 10%
for every 1000 m of altitude. The
gross train weight does not have to be reduced when driving on roads with
slight inclines (less than 8%, e.g.
motorways).The permissible gross train weight
must not be exceeded. This weight is
specified on the identification plate
3 276.
Vertical coupling load
The vertical coupling load is the load
exerted by the trailer on the coupling
ball. It can be varied by changing the
weight distribution when loading the
trailer.
The maximum permissible vertical
coupling load is specified on the
towing equipment identification plate
and in the vehicle documents. Always aim for the maximum load, especially in the case of heavy trailers. The
vertical coupling load should never
fall below 25 kg.
Rear axle load When the trailer is coupled and the
towing vehicle fully loaded, the
permissible rear axle load (see
identification plate or vehicle
documents) may be exceeded by 40 kg. If the permissible rear axle load
is exceeded, a maximum speed of
100 km/h applies.
Page 224 of 305

222Vehicle careVehicle careGeneral Information...................222
Accessories and vehicle modifications .......................... 222
Vehicle storage ........................223
End-of-life vehicle recovery .....223
Vehicle checks ........................... 224
Performing work ......................224
Bonnet ..................................... 224
Engine oil ................................. 225
Engine coolant ......................... 226
Washer fluid ............................ 227
Brakes ..................................... 227
Brake fluid ............................... 227
Vehicle battery ......................... 228
Diesel fuel system bleeding .....229
Wiper blade replacement ........230
Bulb replacement .......................230
Halogen headlights ..................230
Front fog lights ......................... 232
Tail lights ................................. 233
Side turn lights ......................... 239
Number plate light ...................240
Interior lights ............................ 240
Electrical system ........................241
Fuses ....................................... 241Engine compartment fuse box . 242
Instrument panel fuse box .......244
Load compartment fuse box ....245
Vehicle tools .............................. 247
Tools ........................................ 247
Wheels and tyres .......................249
Winter tyres ............................. 249
Tyre designations ....................249
Tyre pressure .......................... 249
Tyre pressure monitoring system .................................... 251
Tread depth ............................. 253
Changing tyre and wheel size . 254
Wheel covers ........................... 254
Tyre chains .............................. 255
Tyre repair kit .......................... 255
Wheel changing .......................258
Spare wheel ............................ 259
Jump starting ............................. 263
Towing ....................................... 265
Towing the vehicle ...................265
Towing another vehicle ...........266
Appearance care .......................267
Exterior care ............................ 267
Interior care ............................. 269
Floor mats ............................... 269General Information
Accessories and vehiclemodifications
We recommend the use of genuine
parts and accessories and factory approved parts specific for your
vehicle type. We cannot assess or guarantee reliability of other products - even if they have a regulatory or
otherwise granted approval.
Any modification, conversion or other
changes made to standard vehicle
specifications (including, without
limitation, software modifications,
modifications of the electronic control units) may invalidate the warranty
offered by Opel. Furthermore, such
changes may affect driver assistance
systems, fuel consumption, CO 2
emissions and other emissions of the
vehicle. They may also invalidate the
vehicle operating permit.
Page 225 of 305
Vehicle care223Caution
When transporting the vehicle on
a train or on a recovery vehicle, the
mud flaps might be damaged.
Number plate mounting
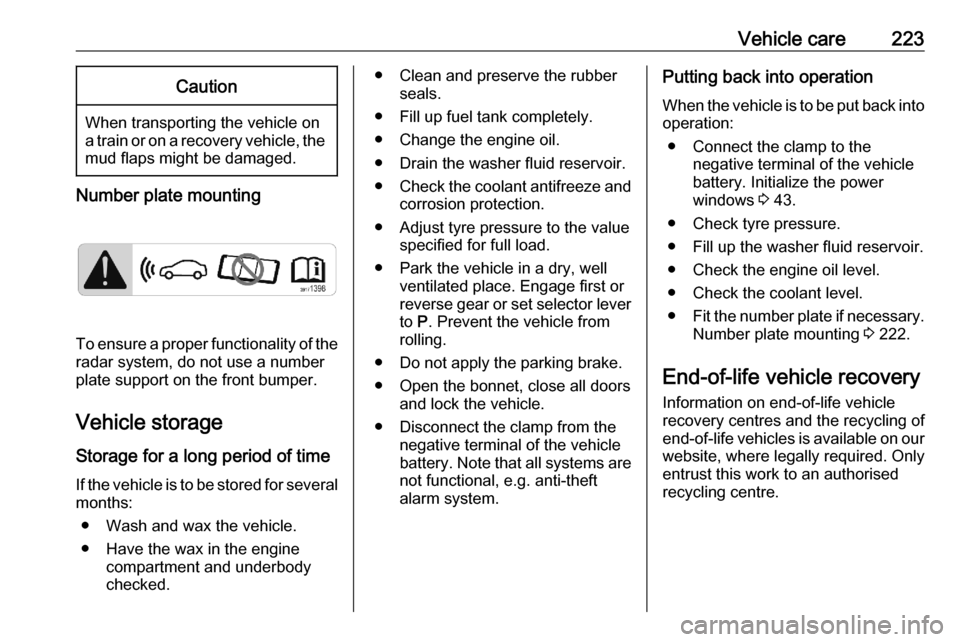
To ensure a proper functionality of the
radar system, do not use a number
plate support on the front bumper.
Vehicle storage Storage for a long period of timeIf the vehicle is to be stored for several
months:
● Wash and wax the vehicle.
● Have the wax in the engine compartment and underbody
checked.
● Clean and preserve the rubber seals.
● Fill up fuel tank completely.
● Change the engine oil.
● Drain the washer fluid reservoir.
● Check the coolant antifreeze and
corrosion protection.
● Adjust tyre pressure to the value specified for full load.
● Park the vehicle in a dry, well ventilated place. Engage first or
reverse gear or set selector lever
to P. Prevent the vehicle from
rolling.
● Do not apply the parking brake.
● Open the bonnet, close all doors and lock the vehicle.
● Disconnect the clamp from the negative terminal of the vehicle
battery. Note that all systems are
not functional, e.g. anti-theft
alarm system.Putting back into operation
When the vehicle is to be put back into
operation:
● Connect the clamp to the negative terminal of the vehicle
battery. Initialize the power
windows 3 43.
● Check tyre pressure.
● Fill up the washer fluid reservoir.
● Check the engine oil level.
● Check the coolant level.
● Fit the number plate if necessary.
Number plate mounting 3 222.
End-of-life vehicle recovery Information on end-of-life vehicle
recovery centres and the recycling of
end-of-life vehicles is available on our website, where legally required. Only
entrust this work to an authorised
recycling centre.
Page 250 of 305
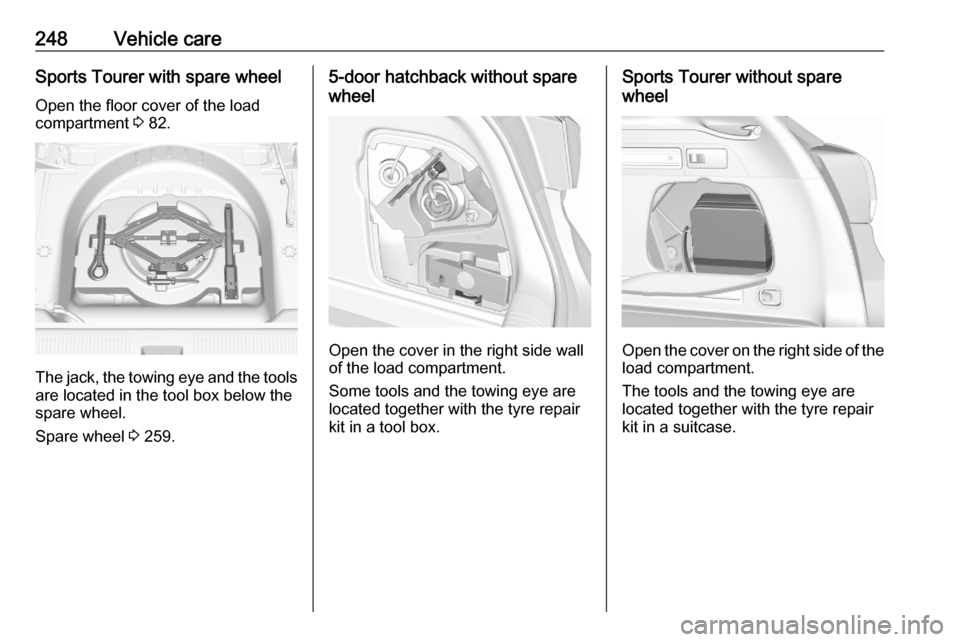
248Vehicle careSports Tourer with spare wheel
Open the floor cover of the load
compartment 3 82.
The jack, the towing eye and the tools
are located in the tool box below the
spare wheel.
Spare wheel 3 259.
5-door hatchback without spare
wheel
Open the cover in the right side wall
of the load compartment.
Some tools and the towing eye are
located together with the tyre repair
kit in a tool box.
Sports Tourer without spare
wheel
Open the cover on the right side of the load compartment.
The tools and the towing eye are
located together with the tyre repair
kit in a suitcase.
Page 251 of 305
Vehicle care249Wheels and tyres
Tyre condition, wheel condition
Drive over edges slowly and at right
angles if possible. Driving over sharp
edges can cause tyre and wheel
damage. Do not trap tyres on the kerb when parking.
Regularly check the wheels for
damage. Seek the assistance of a
workshop in the event of damage or
unusual wear.
Winter tyres
Winter tyres improve driving safety at temperatures below 7 °C and should
therefore be fitted on all wheels.
In accordance with country-specific
regulations, affix the speed sticker in
the driver's field of view.
All tyre sizes are permitted as winter
tyres 3 285.Tyre designations
E.g. 215/50 R 16 95 H215:Tyre width, mm50:Cross-section ratio (tyre height
to tyre width), %R:Belt type: RadialRF:Type: RunFlat16:Wheel diameter, inches95:Load index e.g. 95 is
equivalent to 690 kgH:Speed code letter
Speed code letter:
Q:up to 160 km/hS:up to 180 km/hT:up to 190 km/hH:up to 210 km/hV:up to 240 km/hW:up to 270 km/h
Choose a tyre appropriate for the
maximum speed of this vehicle. Refer to the EEC Certificate of Conformity
provided with the vehicle or other national registration documents.
Optional equipment could reduce the
maximum speed of the vehicle.
Directional tyres
Directional tyres should be mountedso that they rotate in the correct
direction. The proper rotation
direction is indicated by a symbol (e.g. an arrow) on the sidewall.
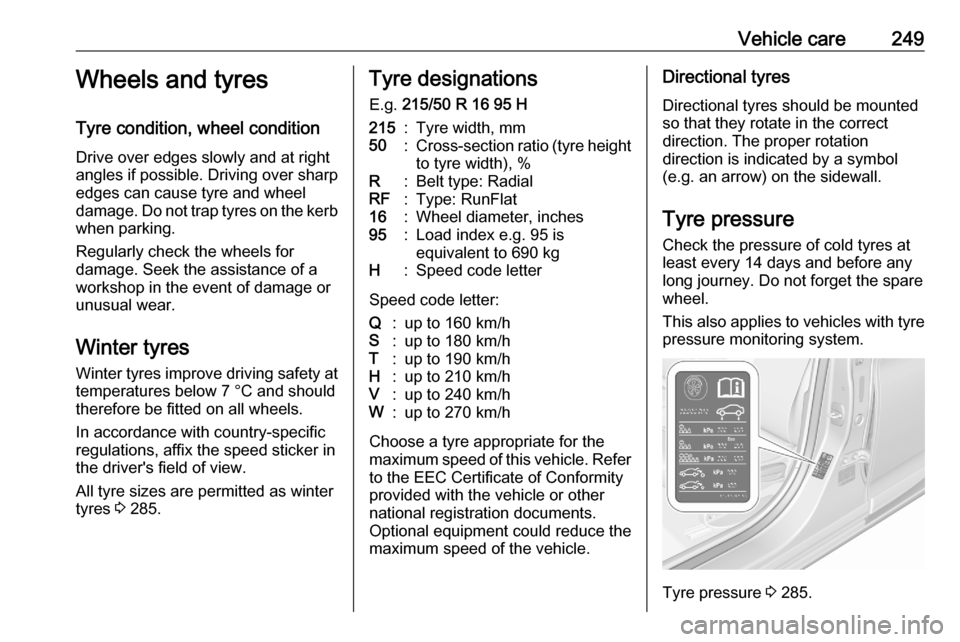
Tyre pressure
Check the pressure of cold tyres at
least every 14 days and before any
long journey. Do not forget the spare
wheel.
This also applies to vehicles with tyre
pressure monitoring system.
Tyre pressure 3 285.