tyre pressure OPEL ASTRA SALOON 2014 Owners Manual
[x] Cancel search | Manufacturer: OPEL, Model Year: 2014, Model line: ASTRA SALOON, Model: OPEL ASTRA SALOON 2014Pages: 245, PDF Size: 7.12 MB
Page 13 of 245
In brief11
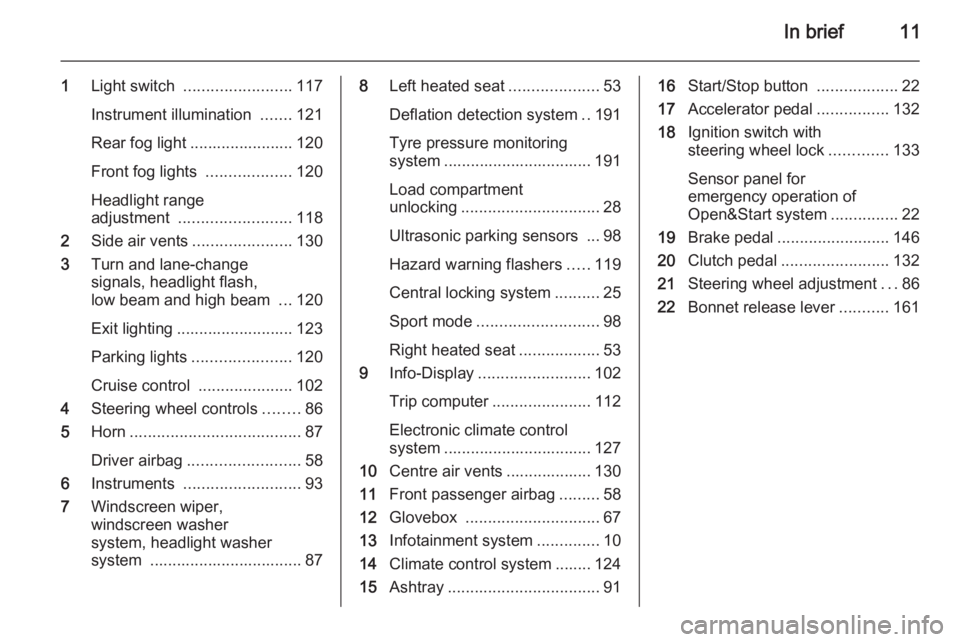
1Light switch ........................ 117
Instrument illumination .......121
Rear fog light ....................... 120
Front fog lights ...................120
Headlight range
adjustment ......................... 118
2 Side air vents ...................... 130
3 Turn and lane-change
signals, headlight flash,
low beam and high beam ...120
Exit lighting .......................... 123
Parking lights ...................... 120
Cruise control .....................102
4 Steering wheel controls ........86
5 Horn ...................................... 87
Driver airbag ......................... 58
6 Instruments .......................... 93
7 Windscreen wiper,
windscreen washer
system, headlight washer
system .................................. 878 Left heated seat ....................53
Deflation detection system ..191
Tyre pressure monitoring
system ................................. 191
Load compartment
unlocking ............................... 28
Ultrasonic parking sensors ... 98
Hazard warning flashers .....119
Central locking system ..........25
Sport mode ........................... 98
Right heated seat ..................53
9 Info-Display ......................... 102
Trip computer ...................... 112
Electronic climate control
system ................................. 127
10 Centre air vents ................... 130
11 Front passenger airbag .........58
12 Glovebox .............................. 67
13 Infotainment system ..............10
14 Climate control system ........ 124
15 Ashtray .................................. 9116Start/Stop button ..................22
17 Accelerator pedal ................132
18 Ignition switch with
steering wheel lock .............133
Sensor panel for
emergency operation of
Open&Start system ...............22
19 Brake pedal ......................... 146
20 Clutch pedal ........................ 132
21 Steering wheel adjustment ...86
22 Bonnet release lever ...........161
Page 19 of 245
In brief17
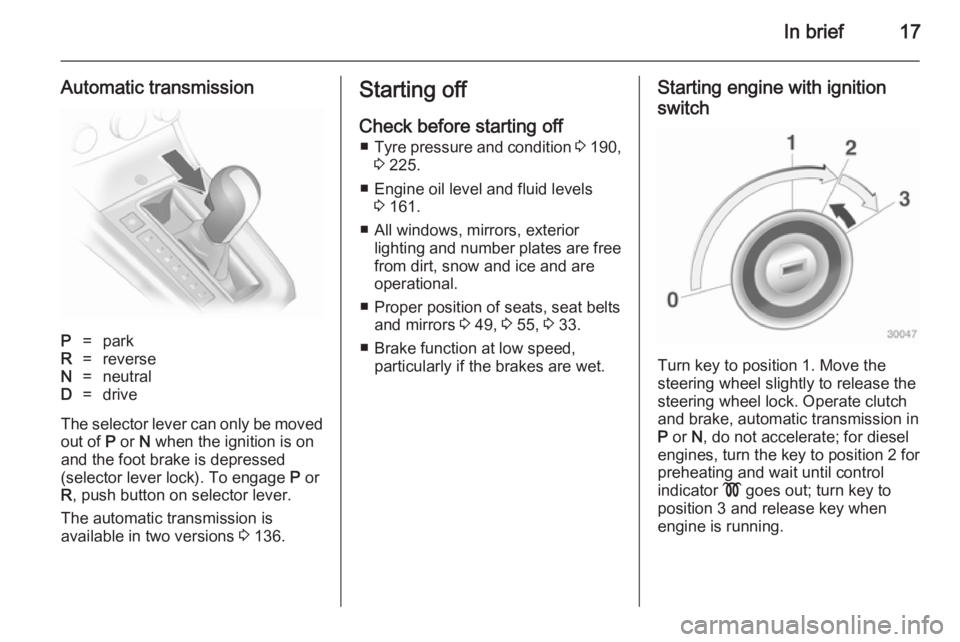
Automatic transmissionP=parkR=reverseN=neutralD=drive
The selector lever can only be movedout of P or N when the ignition is on
and the foot brake is depressed
(selector lever lock). To engage P or
R , push button on selector lever.
The automatic transmission is
available in two versions 3 136.
Starting off
Check before starting off ■ Tyre pressure and condition 3 190,
3 225.
■ Engine oil level and fluid levels 3 161.
■ All windows, mirrors, exterior lighting and number plates are free
from dirt, snow and ice and are
operational.
■ Proper position of seats, seat belts and mirrors 3 49, 3 55, 3 33.
■ Brake function at low speed, particularly if the brakes are wet.Starting engine with ignition
switch
Turn key to position 1. Move the
steering wheel slightly to release the
steering wheel lock. Operate clutch
and brake, automatic transmission in
P or N, do not accelerate; for diesel
engines, turn the key to position 2 for
preheating and wait until control
indicator ! goes out; turn key to
position 3 and release key when
engine is running.
Page 86 of 245
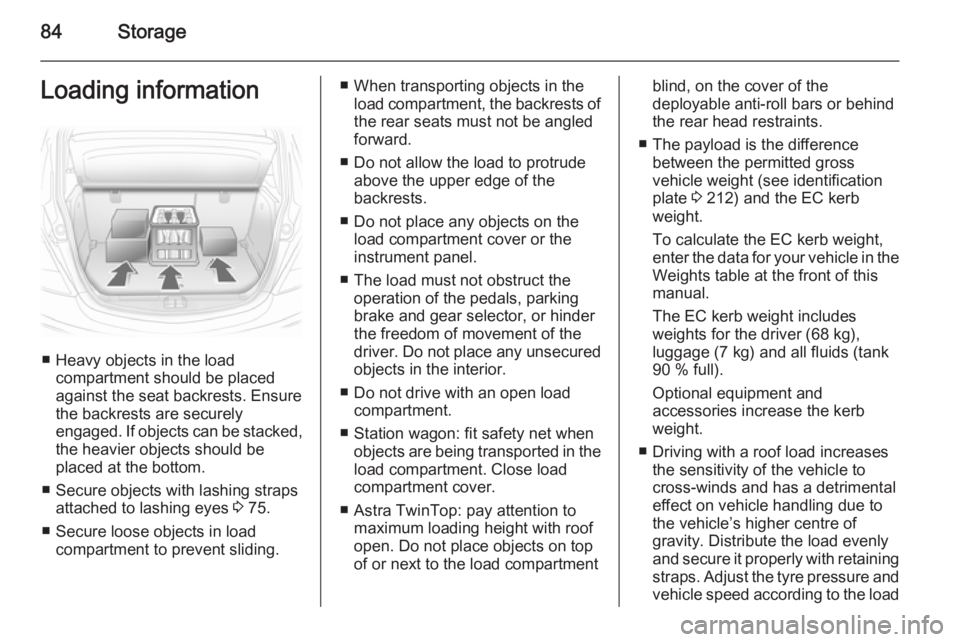
84StorageLoading information
■ Heavy objects in the loadcompartment should be placedagainst the seat backrests. Ensure
the backrests are securely
engaged. If objects can be stacked, the heavier objects should be
placed at the bottom.
■ Secure objects with lashing straps attached to lashing eyes 3 75.
■ Secure loose objects in load compartment to prevent sliding.
■ When transporting objects in theload compartment, the backrests of
the rear seats must not be angled
forward.
■ Do not allow the load to protrude above the upper edge of the
backrests.
■ Do not place any objects on the load compartment cover or theinstrument panel.
■ The load must not obstruct the operation of the pedals, parking
brake and gear selector, or hinder
the freedom of movement of the
driver. Do not place any unsecured objects in the interior.
■ Do not drive with an open load compartment.
■ Station wagon: fit safety net when objects are being transported in theload compartment. Close load
compartment cover.
■ Astra TwinTop: pay attention to maximum loading height with roof
open. Do not place objects on top
of or next to the load compartmentblind, on the cover of the
deployable anti-roll bars or behind
the rear head restraints.
■ The payload is the difference between the permitted gross
vehicle weight (see identification
plate 3 212) and the EC kerb
weight.
To calculate the EC kerb weight,
enter the data for your vehicle in the
Weights table at the front of this
manual.
The EC kerb weight includes
weights for the driver (68 kg),
luggage (7 kg) and all fluids (tank
90 % full).
Optional equipment and
accessories increase the kerb
weight.
■ Driving with a roof load increases the sensitivity of the vehicle to
cross-winds and has a detrimental
effect on vehicle handling due to
the vehicle’s higher centre of
gravity. Distribute the load evenly
and secure it properly with retaining
straps. Adjust the tyre pressure and vehicle speed according to the load
Page 101 of 245
Instruments and controls99
Ultrasonic parking sensors 3 150.
Electronic Stability
Program
v flashes or illuminates yellow.
Illuminates for a few seconds when
the ignition is switched on.
Flashes whilst driving
The system is actively engaged.
Engine output may be reduced and
the vehicle may be braked
automatically to a small degree
3 147.
Illuminates whilst driving The system is switched off or a fault
is present. Continued driving is
possible. Driving stability, however,
may deteriorate depending on road
surface conditions.
Have the cause of the fault remedied
by a workshop.
ESP® Plus
3 147.Engine coolant
temperature
W illuminates red.
Illuminates when the engine is running
Stop, switch off engine.Caution
Coolant temperature too high.
Check coolant level immediately
3 162.
If there is sufficient coolant, consult a workshop.
Preheating and diesel
particle filter
! illuminates or flashes yellow.
Illuminates
Preheating activated. Only activates
when outside temperature is low.
Flashes
in vehicles fitted with a diesel particle
filter.
Control indicator ! flashes if the filter
requires cleaning and previous
driving conditions did not permit
automatic cleaning. Continue driving
and if possible do not allow engine
speed to drop below 2000 rpm.
The control indicator ! goes off as
soon as the self-cleaning operation is complete.
Diesel particle filter 3 135.
Deflation detection system
and tyre pressure
monitoring system
w illuminates or flashes red or yellow.
Control indicator illuminates red Tyre pressure loss. Stop immediately
and check tyre pressure. A maximum speed of 80 km/h is permitted for run- flat tyres 3 189.
Page 102 of 245
100Instruments and controls
Control indicator illuminatesyellow
Fault in system or tyre without
pressure sensor mounted (e.g. spare
wheel). Consult a workshop.
Flashes Flashes three times to indicatesystem initialisation.
Deflation detection system 3 191,
tyre pressure monitoring system 3 191.
Interactive driving system,
continuous damping
control, sport mode
IDS+ illuminates yellow.
Illuminates when the ignition is
switched on and goes out shortly after the engine starts. Illumination whilst
driving indicates a fault in the system.
Have the cause of the fault remedied
by a workshop.
IDS Plus
3 148, CDC 3 149, Sport
mode 3 148.Engine oil pressure
I illuminates red.
Illuminates when the ignition is
switched on and goes out shortly after
the engine starts.
Illuminates when the engine isrunningCaution
Engine lubrication may be
interrupted. This may result in
damage to the engine and/or
locking of the drive wheels.
1. Depress clutch.
2. Select neutral gear, set selector lever to N.
3. Move out of the flow of traffic as quickly as possible without
impeding other vehicles.
4. Switch off ignition.
9 Warning
When the engine is off,
considerably more force is needed
to brake and steer.
Do not remove key until vehicle is stationary, otherwise the steeringwheel lock could engage
unexpectedly.
Check oil level before seeking the
assistance of a workshop 3 161.
Low engine oil level
S illuminates yellow.
Engine oil level is checked
automatically.
Illuminates when the engine isrunning
Low engine oil level. Check engine oil
level and top up as necessary
3 161.
Low fuel Y illuminates or flashes yellow.
Page 113 of 245
Instruments and controls111Lighting
Important exterior lights, including
cables and fuses, are monitored. In
trailer mode, trailer lighting is also
monitored. Trailers with LED lighting
must have an adapter that enables
light monitoring as with conventional
bulbs.
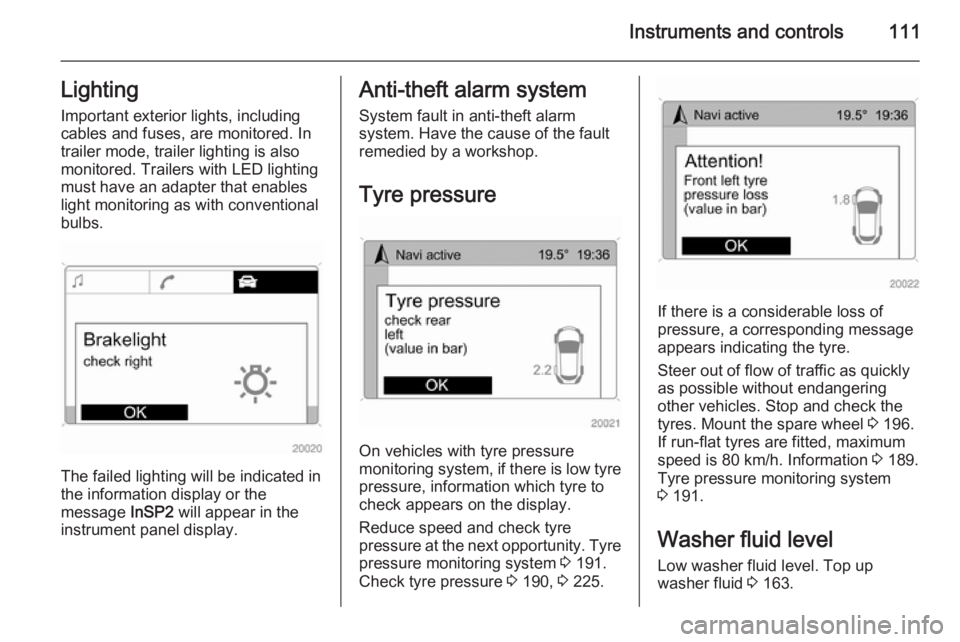
The failed lighting will be indicated in
the information display or the
message InSP2 will appear in the
instrument panel display.
Anti-theft alarm system
System fault in anti-theft alarm
system. Have the cause of the fault
remedied by a workshop.
Tyre pressure
On vehicles with tyre pressure
monitoring system, if there is low tyre pressure, information which tyre to
check appears on the display.
Reduce speed and check tyre
pressure at the next opportunity. Tyre
pressure monitoring system 3 191.
Check tyre pressure 3 190, 3 225.
If there is a considerable loss of
pressure, a corresponding message
appears indicating the tyre.
Steer out of flow of traffic as quickly as possible without endangering
other vehicles. Stop and check the
tyres. Mount the spare wheel 3 196.
If run-flat tyres are fitted, maximum
speed is 80 km/h. Information 3 189.
Tyre pressure monitoring system
3 191.
Washer fluid level
Low washer fluid level. Top up
washer fluid 3 163.
Page 118 of 245
116Instruments and controlsStop watch
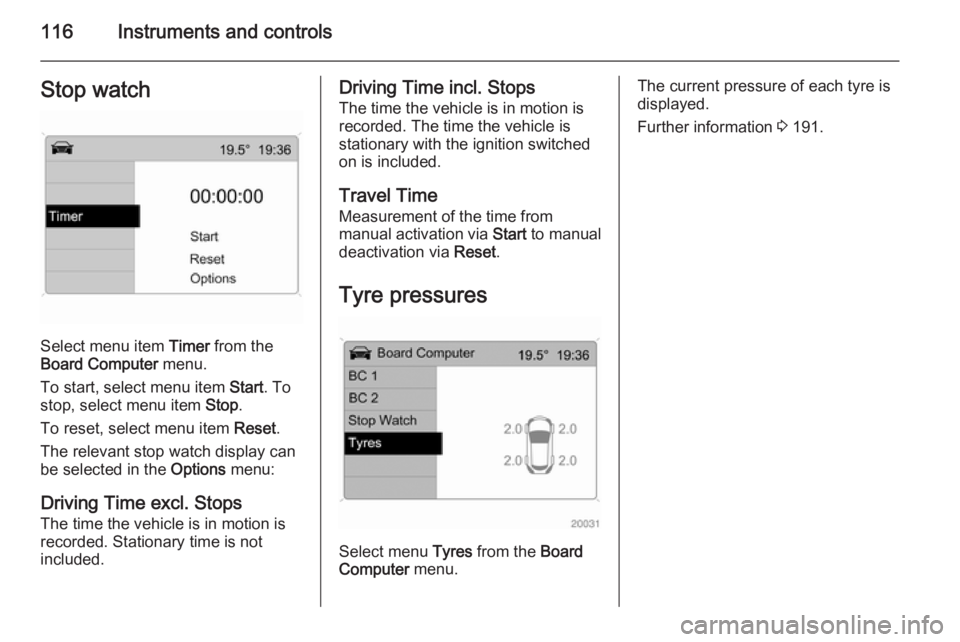
Select menu item Timer from the
Board Computer menu.
To start, select menu item Start. To
stop, select menu item Stop.
To reset, select menu item Reset.
The relevant stop watch display can
be selected in the Options menu:
Driving Time excl. Stops
The time the vehicle is in motion is
recorded. Stationary time is not
included.
Driving Time incl. Stops
The time the vehicle is in motion is
recorded. The time the vehicle is
stationary with the ignition switched
on is included.
Travel Time Measurement of the time from
manual activation via Start to manual
deactivation via Reset.
Tyre pressures
Select menu Tyres from the Board
Computer menu.
The current pressure of each tyre is
displayed.
Further information 3 191.
Page 149 of 245
Driving and operating147
Fault9Warning
If there is a fault in the ABS, the
wheels may be liable to lock due
to braking that is heavier than
normal. The advantages of ABS are no longer available. During
hard braking, the vehicle can no longer be steered and may
swerve.
Have the cause of the fault remedied
by a workshop.
Parking brake Always apply parking brake firmly
without operating the release button,
and apply as firmly as possible on a
downhill or uphill slope.
To release the parking brake, pull the lever up slightly, press the release
button and fully lower the lever.
To reduce the operating forces of the
parking brake, depress the foot brake
at the same time.
Control indicator R 3 98.
Brake assist
If the brake pedal is depressed quickly and forcefully, maximum
brake force is automatically applied
(full braking).
Maintain steady pressure on the brake pedal for as long as full braking
is required. Maximum brake force is
automatically reduced when the
brake pedal is released.
Hill start assist The system helps prevent unintendedmovement when driving away on
inclines.
When releasing the foot brake after
stopping on an incline, the brakes
remain on for a further two seconds.
The brakes release automatically as
soon as the vehicle begins to
accelerate.Ride control systems
Electronic stability
program
Electronic stability program
(ESP® Plus
) improves driving stability
when necessary, regardless of the
type of road surface or tyre grip. It also prevents the drive wheels from
spinning.
As soon as the vehicle starts to
swerve (understeer/oversteer),
engine output is reduced and the
wheels are braked individually. This
considerably improves the driving
stability of the vehicle on slippery road
surfaces.
ESP® Plus
is operational as soon as
control indicator v extinguishes.
When ESP® Plus
comes into action v
flashes.
Page 150 of 245
148Driving and operating9Warning
Do not let this special safety
feature tempt you into taking risks
when driving.
Adapt speed to the road
conditions.
Control indicator v 3 99.
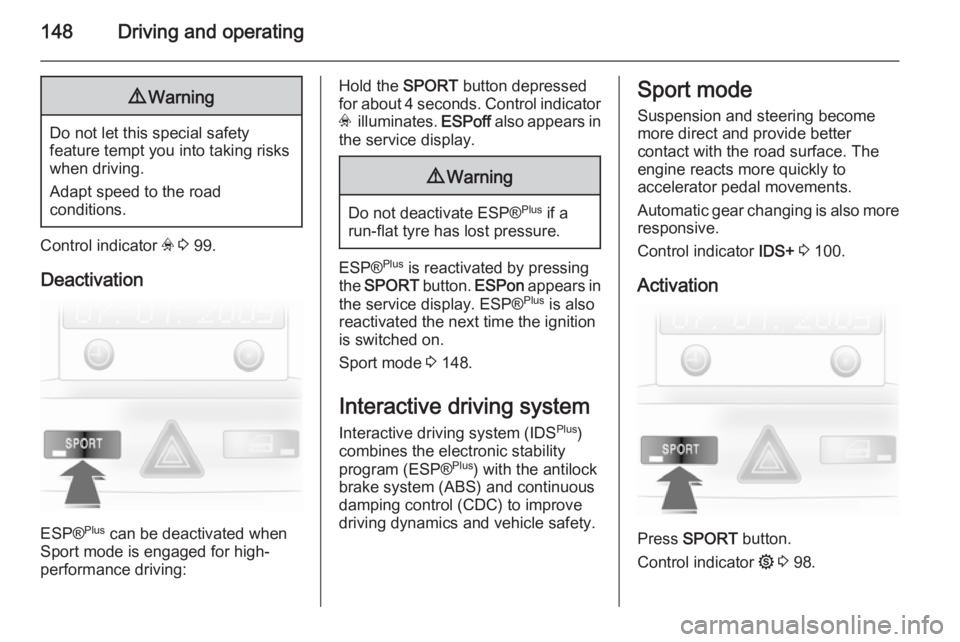
Deactivation
ESP® Plus
can be deactivated when
Sport mode is engaged for high-
performance driving:
Hold the SPORT button depressed
for about 4 seconds. Control indicator v illuminates. ESPoff also appears in
the service display.9 Warning
Do not deactivate ESP® Plus
if a
run-flat tyre has lost pressure.
ESP® Plus
is reactivated by pressing
the SPORT button. ESPon appears in
the service display. ESP® Plus
is also
reactivated the next time the ignition is switched on.
Sport mode 3 148.
Interactive driving system Interactive driving system (IDS Plus
)
combines the electronic stability
program (ESP® Plus
) with the antilock
brake system (ABS) and continuous damping control (CDC) to improve
driving dynamics and vehicle safety.
Sport mode
Suspension and steering become
more direct and provide better
contact with the road surface. The
engine reacts more quickly to
accelerator pedal movements.
Automatic gear changing is also more
responsive.
Control indicator IDS+ 3 100.
Activation
Press SPORT button.
Control indicator 1 3 98.
Page 156 of 245
154Driving and operating
higher fuel consumption and
CO 2 emission levels and a lower
maximum speed.Trailer hitch
General information
Only use towing equipment that has
been approved for your vehicle.
Entrust retrofitting of towing
equipment to a workshop. It may be
necessary to make changes that
affect the cooling system, heat
shields or other equipment.
Do not mount towing equipment to
vehicles with Z 20 LEH engine.
Fitting of towing equipment could
cover the opening of the towing eye.
If this is the case, use the coupling ball bar for towing. Always keep the
coupling ball bar in the vehicle.
Installation dimensions of factory-
fitted towing equipment 3 232.Driving characteristics and
towing tips Before attaching a trailer, lubricate
the coupling ball. However, do not do
so if a stabiliser, which acts on the
coupling ball, is being used to reduce snaking movements.
For trailers with low driving stability
and trailers with a permitted gross
vehicle weight of more than 1300 kg
(Saloon) /1200 kg (Station wagon) a
speed of 80 km/h must not be
exceeded; the use of a stabiliser is
recommended.
If the trailer starts snaking, drive more
slowly, do not attempt to correct the
steering and brake sharply if
necessary.
When driving downhill, drive in the
same gear as if driving uphill and
drive at a similar speed.
Adjust tyre pressure to the value
specified for full load 3 225.