alternator belt OPEL CALIBRA 1988 Service Repair Manual
[x] Cancel search | Manufacturer: OPEL, Model Year: 1988, Model line: CALIBRA, Model: OPEL CALIBRA 1988Pages: 525, PDF Size: 58.26 MB
Page 69 of 525
Wiring diagrams 12•55
12
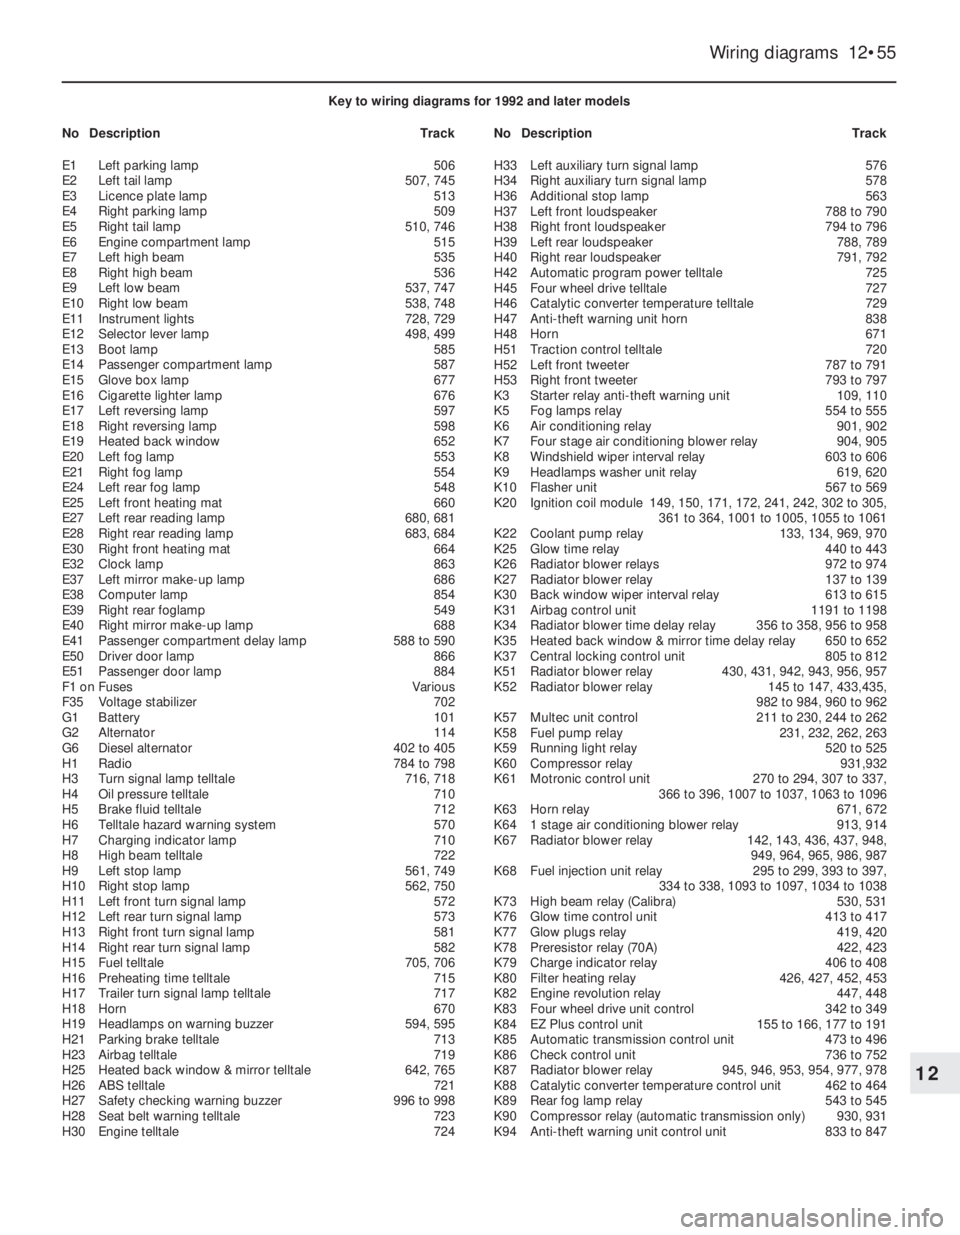
Key to wiring diagrams for 1992 and later models
NoDescriptionTrackNoDescriptionTrack
E1Left parking lamp506
E2Left tail lamp507, 745
E3Licence plate lamp513
E4Right parking lamp509
E5Right tail lamp510, 746
E6Engine compartment lamp515
E7Left high beam 535
E8Right high beam536
E9Left low beam537, 747
E10Right low beam538, 748
E11Instrument lights728, 729
E12Selector lever lamp 498, 499
E13Boot lamp585
E14Passenger compartment lamp587
E15Glove box lamp677
E16Cigarette lighter lamp676
E17Left reversing lamp597
E18Right reversing lamp598
E19Heated back window652
E20Left fog lamp553
E21Right fog lamp554
E24Left rear fog lamp548
E25Left front heating mat660
E27Left rear reading lamp680, 681
E28Right rear reading lamp683, 684
E30Right front heating mat664
E32Clock lamp863
E37Left mirror make-up lamp686
E38Computer lamp854
E39Right rear foglamp549
E40Right mirror make-up lamp688
E41Passenger compartment delay lamp 588 to 590
E50Driver door lamp866
E51Passenger door lamp884
F1 onFusesVarious
F35Voltage stabilizer702
G1Battery101
G2Alternator114
G6Diesel alternator 402 to 405
H1Radio784 to 798
H3Turn signal lamp telltale716, 718
H4Oil pressure telltale710
H5Brake fluid telltale712
H6Telltale hazard warning system570
H7Charging indicator lamp710
H8High beam telltale722
H9Left stop lamp561, 749
H10Right stop lamp562, 750
H11Left front turn signal lamp572
H12Left rear turn signal lamp573
H13Right front turn signal lamp581
H14Right rear turn signal lamp582
H15Fuel telltale705, 706
H16Preheating time telltale715
H17Trailer turn signal lamp telltale717
H18Horn670
H19Headlamps on warning buzzer594, 595
H21Parking brake telltale713
H23Airbag telltale719
H25Heated back window & mirror telltale642, 765
H26ABS telltale721
H27Safety checking warning buzzer996 to 998
H28Seat belt warning telltale723
H30Engine telltale724H33Left auxiliary turn signal lamp576
H34Right auxiliary turn signal lamp578
H36Additional stop lamp563
H37Left front loudspeaker788 to 790
H38Right front loudspeaker794 to 796
H39Left rear loudspeaker788, 789
H40Right rear loudspeaker791, 792
H42Automatic program power telltale725
H45Four wheel drive telltale727
H46Catalytic converter temperature telltale729
H47Anti-theft warning unit horn838
H48Horn671
H51Traction control telltale720
H52Left front tweeter787 to 791
H53Right front tweeter793 to 797
K3Starter relay anti-theft warning unit109, 110
K5Fog lamps relay554 to 555
K6Air conditioning relay901, 902
K7Four stage air conditioning blower relay904, 905
K8Windshield wiper interval relay603 to 606
K9Headlamps washer unit relay619, 620
K10Flasher unit567 to 569
K20Ignition coil module149, 150, 171, 172, 241, 242, 302 to 305,
361 to 364, 1001 to 1005, 1055 to 1061
K22Coolant pump relay133, 134, 969, 970
K25Glow time relay440 to 443
K26Radiator blower relays972 to 974
K27Radiator blower relay137 to 139
K30Back window wiper interval relay613 to 615
K31Airbag control unit1191 to 1198
K34Radiator blower time delay relay356 to 358, 956 to 958
K35Heated back window & mirror time delay relay650 to 652
K37Central locking control unit805 to 812
K51Radiator blower relay430, 431, 942, 943, 956, 957
K52Radiator blower relay145 to 147, 433,435,
982 to 984, 960 to 962
K57Multec unit control211 to 230, 244 to 262
K58Fuel pump relay231, 232, 262, 263
K59Running light relay520 to 525
K60Compressor relay931,932
K61Motronic control unit270 to 294, 307 to 337,
366 to 396, 1007 to 1037, 1063 to 1096
K63Horn relay671, 672
K641 stage air conditioning blower relay913, 914
K67Radiator blower relay142, 143, 436, 437, 948,
949, 964, 965, 986, 987
K68Fuel injection unit relay295 to 299, 393 to 397,
334 to 338, 1093 to 1097, 1034 to 1038
K73High beam relay (Calibra)530, 531
K76Glow time control unit413 to 417
K77Glow plugs relay419, 420
K78Preresistor relay (70A)422, 423
K79Charge indicator relay406 to 408
K80Filter heating relay426, 427, 452, 453
K82Engine revolution relay447, 448
K83Four wheel drive unit control342 to 349
K84EZ Plus control unit155 to 166, 177 to 191
K85Automatic transmission control unit473 to 496
K86Check control unit736 to 752
K87Radiator blower relay945, 946, 953, 954, 977, 978
K88Catalytic converter temperature control unit462 to 464
K89Rear fog lamp relay543 to 545
K90Compressor relay (automatic transmission only)930, 931
K94Anti-theft warning unit control unit833 to 847
Page 88 of 525
5
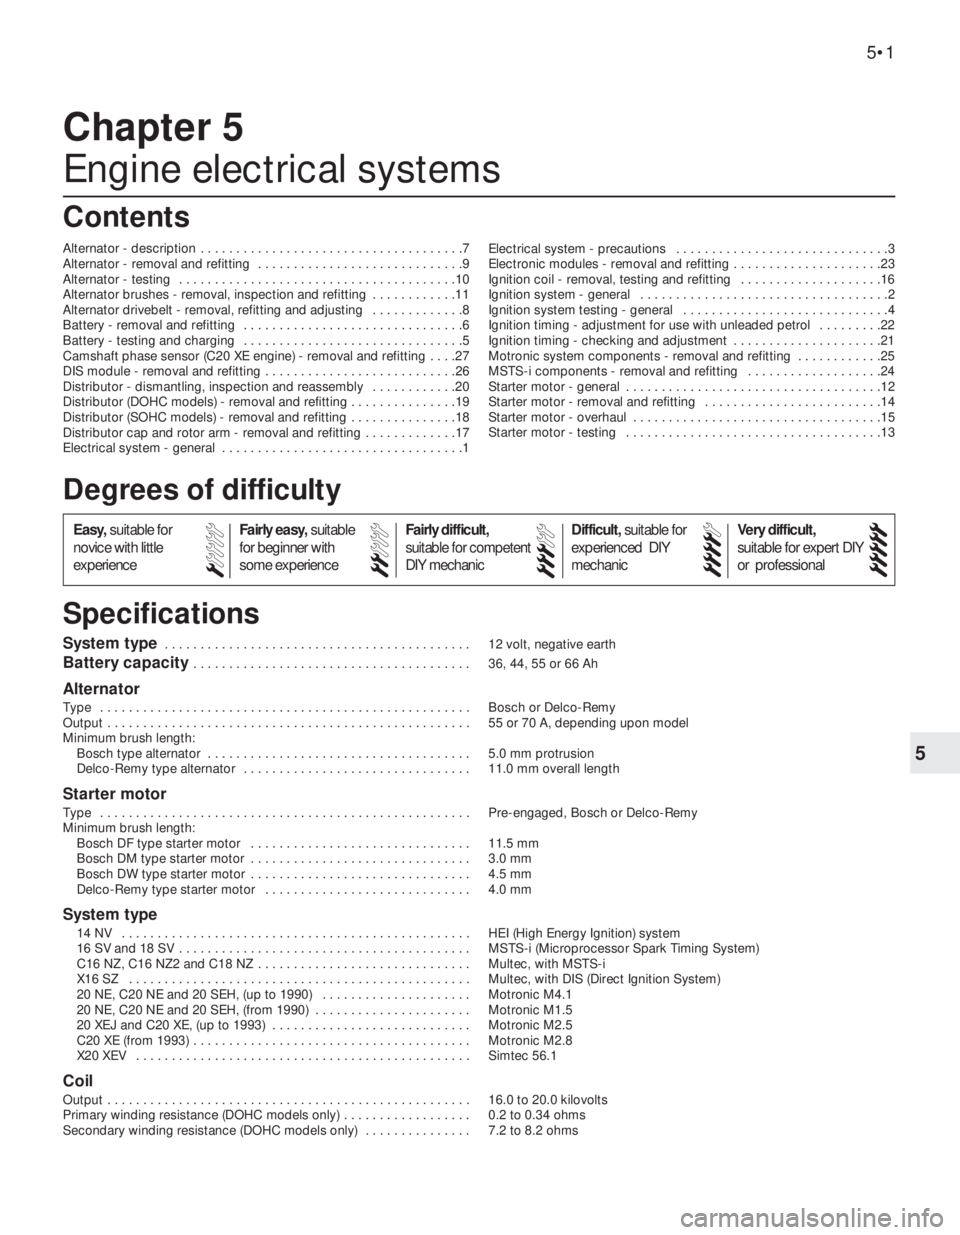
System type . . . . . . . . . . . . . . . . . . . . . . . . . . . . . . . . . . . . . . . . . . . 12 volt, negative earth
Battery capacity . . . . . . . . . . . . . . . . . . . . . . . . . . . . . . . . . . . . . . . 36, 44, 55 or 66 Ah
Alternator
Type . . . . . . . . . . . . . . . . . . . . . . . . . . . . . . . . . . . . . . . . . . . . . . . . . . . . Bosch or Delco-Remy
Output . . . . . . . . . . . . . . . . . . . . . . . . . . . . . . . . . . . . . . . . . . . . . . . . . . . 55 or 70 A, depending upon model
Minimum brush length:
Bosch type alternator . . . . . . . . . . . . . . . . . . . . . . . . . . . . . . . . . . . . . 5.0 mm protrusion
Delco-Remy type alternator . . . . . . . . . . . . . . . . . . . . . . . . . . . . . . . . 11.0 mm overall length
Starter motor
Type . . . . . . . . . . . . . . . . . . . . . . . . . . . . . . . . . . . . . . . . . . . . . . . . . . . . Pre-engaged, Bosch or Delco-Remy
Minimum brush length:
Bosch DF type starter motor . . . . . . . . . . . . . . . . . . . . . . . . . . . . . . . 11.5 mm
Bosch DM type starter motor . . . . . . . . . . . . . . . . . . . . . . . . . . . . . . . 3.0 mm
Bosch DW type starter motor . . . . . . . . . . . . . . . . . . . . . . . . . . . . . . . 4.5 mm
Delco-Remy type starter motor . . . . . . . . . . . . . . . . . . . . . . . . . . . . . 4.0 mm
System type
14 NV . . . . . . . . . . . . . . . . . . . . . . . . . . . . . . . . . . . . . . . . . . . . . . . . . HEI (High Energy Ignition) system
16 SV and 18 SV . . . . . . . . . . . . . . . . . . . . . . . . . . . . . . . . . . . . . . . . . MSTS-i (Microprocessor Spark Timing System)
C16 NZ, C16 NZ2 and C18 NZ . . . . . . . . . . . . . . . . . . . . . . . . . . . . . . Multec, with MSTS-i
X16 SZ . . . . . . . . . . . . . . . . . . . . . . . . . . . . . . . . . . . . . . . . . . . . . . . . Multec, with DIS (Direct Ignition System)
20 NE, C20 NE and 20 SEH, (up to 1990) . . . . . . . . . . . . . . . . . . . . . Motronic M4.1
20 NE, C20 NE and 20 SEH, (from 1990) . . . . . . . . . . . . . . . . . . . . . . Motronic M1.5
20 XEJ and C20 XE, (up to 1993) . . . . . . . . . . . . . . . . . . . . . . . . . . . . Motronic M2.5
C20 XE (from 1993) . . . . . . . . . . . . . . . . . . . . . . . . . . . . . . . . . . . . . . . Motronic M2.8
X20 XEV . . . . . . . . . . . . . . . . . . . . . . . . . . . . . . . . . . . . . . . . . . . . . . . Simtec 56.1
Coil
Output . . . . . . . . . . . . . . . . . . . . . . . . . . . . . . . . . . . . . . . . . . . . . . . . . . . 16.0 to 20.0 kilovolts
Primary winding resistance (DOHC models only) . . . . . . . . . . . . . . . . . . 0.2 to 0.34 ohms
Secondary winding resistance (DOHC models only) . . . . . . . . . . . . . . . 7.2 to 8.2 ohms
Chapter 5
Engine electrical systems
Alternator - description . . . . . . . . . . . . . . . . . . . . . . . . . . . . . . . . . . . . .7
Alternator - removal and refitting . . . . . . . . . . . . . . . . . . . . . . . . . . . . .9
Alternator - testing . . . . . . . . . . . . . . . . . . . . . . . . . . . . . . . . . . . . . . .10
Alternator brushes - removal, inspection and refitting . . . . . . . . . . . .11
Alternator drivebelt - removal, refitting and adjusting . . . . . . . . . . . . .8
Battery - removal and refitting . . . . . . . . . . . . . . . . . . . . . . . . . . . . . . .6
Battery - testing and charging . . . . . . . . . . . . . . . . . . . . . . . . . . . . . . .5
Camshaft phase sensor (C20 XE engine) - removal and refitting . . . .27
DIS module - removal and refitting . . . . . . . . . . . . . . . . . . . . . . . . . . .26
Distributor - dismantling, inspection and reassembly . . . . . . . . . . . .20
Distributor (DOHC models) - removal and refitting . . . . . . . . . . . . . . .19
Distributor (SOHC models) - removal and refitting . . . . . . . . . . . . . . .18
Distributor cap and rotor arm - removal and refitting . . . . . . . . . . . . .17
Electrical system - general . . . . . . . . . . . . . . . . . . . . . . . . . . . . . . . . . .1Electrical system - precautions . . . . . . . . . . . . . . . . . . . . . . . . . . . . . .3
Electronic modules - removal and refitting . . . . . . . . . . . . . . . . . . . . .23
Ignition coil - removal, testing and refitting . . . . . . . . . . . . . . . . . . . .16
Ignition system - general . . . . . . . . . . . . . . . . . . . . . . . . . . . . . . . . . . .2
Ignition system testing - general . . . . . . . . . . . . . . . . . . . . . . . . . . . . .4
Ignition timing - adjustment for use with unleaded petrol . . . . . . . . .22
Ignition timing - checking and adjustment . . . . . . . . . . . . . . . . . . . . .21
Motronic system components - removal and refitting . . . . . . . . . . . .25
MSTS-i components - removal and refitting . . . . . . . . . . . . . . . . . . .24
Starter motor - general . . . . . . . . . . . . . . . . . . . . . . . . . . . . . . . . . . . .12
Starter motor - removal and refitting . . . . . . . . . . . . . . . . . . . . . . . . .14
Starter motor - overhaul . . . . . . . . . . . . . . . . . . . . . . . . . . . . . . . . . . .15
Starter motor - testing . . . . . . . . . . . . . . . . . . . . . . . . . . . . . . . . . . . .13
5•1
Specifications Contents
Easy,suitable for
novice with little
experienceFairly easy,suitable
for beginner with
some experienceFairly difficult,
suitable for competent
DIY mechanic
Difficult,suitable for
experienced DIY
mechanicVery difficult,
suitable for expert DIY
or professional
Degrees of difficulty
54321
Page 89 of 525
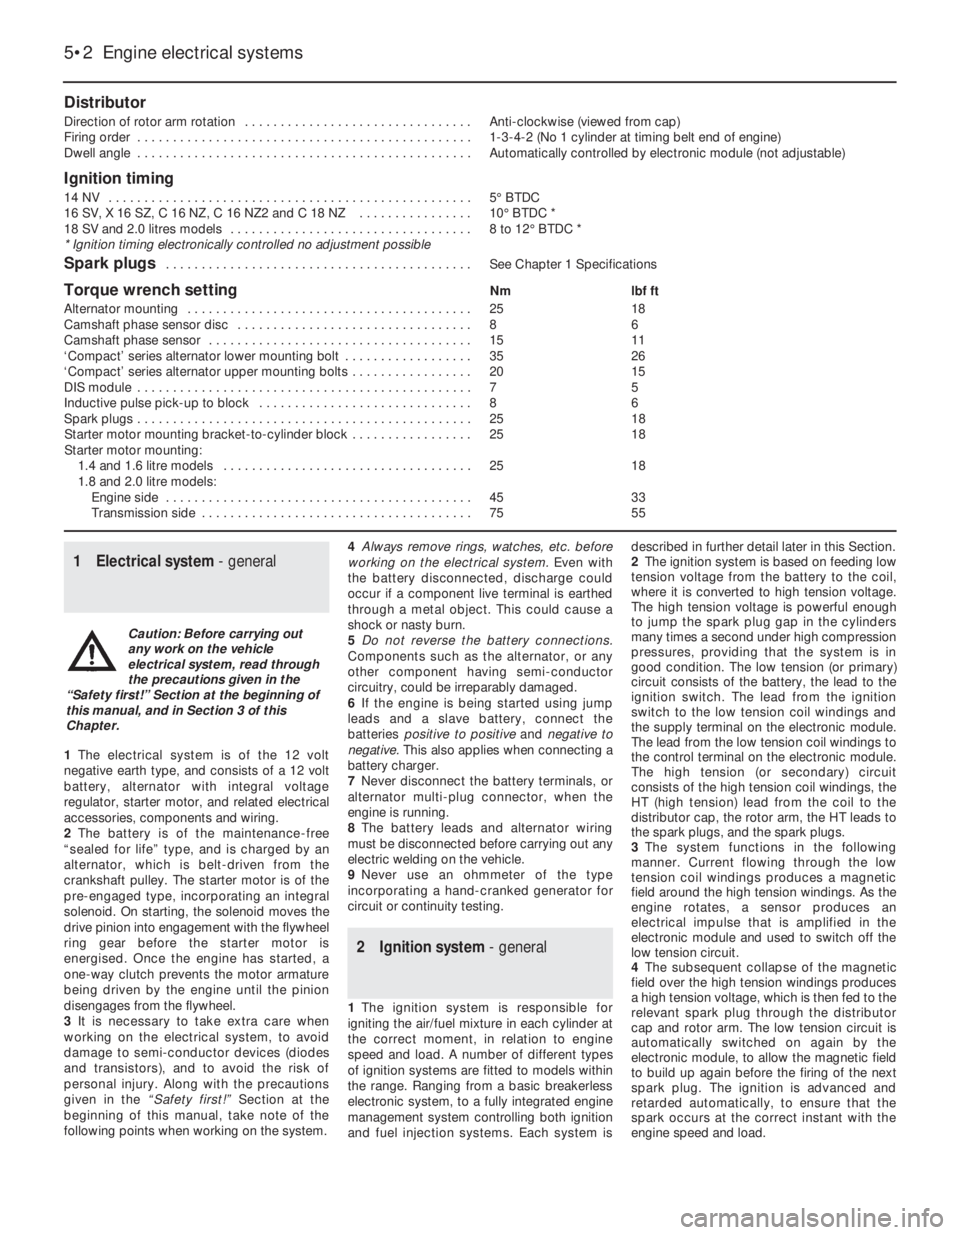
Distributor
Direction of rotor arm rotation . . . . . . . . . . . . . . . . . . . . . . . . . . . . . . . .Anti-clockwise (viewed from cap)
Firing order . . . . . . . . . . . . . . . . . . . . . . . . . . . . . . . . . . . . . . . . . . . . . . .1-3-4-2 (No 1 cylinder at timing belt end of engine)
Dwell angle . . . . . . . . . . . . . . . . . . . . . . . . . . . . . . . . . . . . . . . . . . . . . . .Automatically controlled by electronic module (not adjustable)
Ignition timing
14 NV . . . . . . . . . . . . . . . . . . . . . . . . . . . . . . . . . . . . . . . . . . . . . . . . . . .5°BTDC
16 SV, X 16 SZ, C 16 NZ, C 16 NZ2 and C 18 NZ . . . . . . . . . . . . . . . .10°BTDC *
18 SV and 2.0 litres models . . . . . . . . . . . . . . . . . . . . . . . . . . . . . . . . . .8 to 12°BTDC *
* Ignition timing electronically controlled no adjustment possible
Spark plugs . . . . . . . . . . . . . . . . . . . . . . . . . . . . . . . . . . . . . . . . . . .See Chapter 1 Specifications
Torque wrench settingNmlbf ft
Alternator mounting . . . . . . . . . . . . . . . . . . . . . . . . . . . . . . . . . . . . . . . .2518
Camshaft phase sensor disc . . . . . . . . . . . . . . . . . . . . . . . . . . . . . . . . .86
Camshaft phase sensor . . . . . . . . . . . . . . . . . . . . . . . . . . . . . . . . . . . . .1511
‘Compact’ series alternator lower mounting bolt . . . . . . . . . . . . . . . . . .3526
‘Compact’ series alternator upper mounting bolts . . . . . . . . . . . . . . . . .2015
DIS module . . . . . . . . . . . . . . . . . . . . . . . . . . . . . . . . . . . . . . . . . . . . . . .75
Inductive pulse pick-up to block . . . . . . . . . . . . . . . . . . . . . . . . . . . . . .86
Spark plugs . . . . . . . . . . . . . . . . . . . . . . . . . . . . . . . . . . . . . . . . . . . . . . .2518
Starter motor mounting bracket-to-cylinder block . . . . . . . . . . . . . . . . .2518
Starter motor mounting:
1.4 and 1.6 litre models . . . . . . . . . . . . . . . . . . . . . . . . . . . . . . . . . . .2518
1.8 and 2.0 litre models:
Engine side . . . . . . . . . . . . . . . . . . . . . . . . . . . . . . . . . . . . . . . . . . .4533
Transmission side . . . . . . . . . . . . . . . . . . . . . . . . . . . . . . . . . . . . . .7555
1Electrical system - general
1The electrical system is of the 12 volt
negative earth type, and consists of a 12 volt
battery, alternator with integral voltage
regulator, starter motor, and related electrical
accessories, components and wiring.
2The battery is of the maintenance-free
“sealed for life” type, and is charged by an
alternator, which is belt-driven from the
crankshaft pulley. The starter motor is of the
pre-engaged type, incorporating an integral
solenoid. On starting, the solenoid moves the
drive pinion into engagement with the flywheel
ring gear before the starter motor is
energised. Once the engine has started, a
one-way clutch prevents the motor armature
being driven by the engine until the pinion
disengages from the flywheel.
3It is necessary to take extra care when
working on the electrical system, to avoid
damage to semi-conductor devices (diodes
and transistors), and to avoid the risk of
personal injury. Along with the precautions
given in the “Safety first!” Section at the
beginning of this manual, take note of the
following points when working on the system.4Always remove rings, watches, etc. before
working on the electrical system. Even with
the battery disconnected, discharge could
occur if a component live terminal is earthed
through a metal object. This could cause a
shock or nasty burn.
5Do not reverse the battery connections.
Components such as the alternator, or any
other component having semi-conductor
circuitry, could be irreparably damaged.
6If the engine is being started using jump
leads and a slave battery, connect the
batteries positive to positive and negative to
negative. This also applies when connecting a
battery charger.
7Never disconnect the battery terminals, or
alternator multi-plug connector, when the
engine is running.
8The battery leads and alternator wiring
must be disconnected before carrying out any
electric welding on the vehicle.
9Never use an ohmmeter of the type
incorporating a hand-cranked generator for
circuit or continuity testing.
2Ignition system - general
1The ignition system is responsible for
igniting the air/fuel mixture in each cylinder at
the correct moment, in relation to engine
speed and load. A number of different types
of ignition systems are fitted to models within
the range. Ranging from a basic breakerless
electronic system, to a fully integrated engine
management system controlling both ignition
and fuel injection systems. Each system isdescribed in further detail later in this Section.
2The ignition system is based on feeding low
tension voltage from the battery to the coil,
where it is converted to high tension voltage.
The high tension voltage is powerful enough
to jump the spark plug gap in the cylinders
many times a second under high compression
pressures, providing that the system is in
good condition. The low tension (or primary)
circuit consists of the battery, the lead to the
ignition switch. The lead from the ignition
switch to the low tension coil windings and
the supply terminal on the electronic module.
The lead from the low tension coil windings to
the control terminal on the electronic module.
The high tension (or secondary) circuit
consists of the high tension coil windings, the
HT (high tension) lead from the coil to the
distributor cap, the rotor arm, the HT leads to
the spark plugs, and the spark plugs.
3The system functions in the following
manner. Current flowing through the low
tension coil windings produces a magnetic
field around the high tension windings. As the
engine rotates, a sensor produces an
electrical impulse that is amplified in the
electronic module and used to switch off the
low tension circuit.
4The subsequent collapse of the magnetic
field over the high tension windings produces
a high tension voltage, which is then fed to the
relevant spark plug through the distributor
cap and rotor arm. The low tension circuit is
automatically switched on again by the
electronic module, to allow the magnetic field
to build up again before the firing of the next
spark plug. The ignition is advanced and
retarded automatically, to ensure that the
spark occurs at the correct instant with the
engine speed and load.
5•2Engine electrical systems
Caution: Before carrying out
any work on the vehicle
electrical system, read through
the precautions given in the
“Safety first!” Section at the beginning of
this manual, and in Section 3 of this
Chapter.
Page 92 of 525
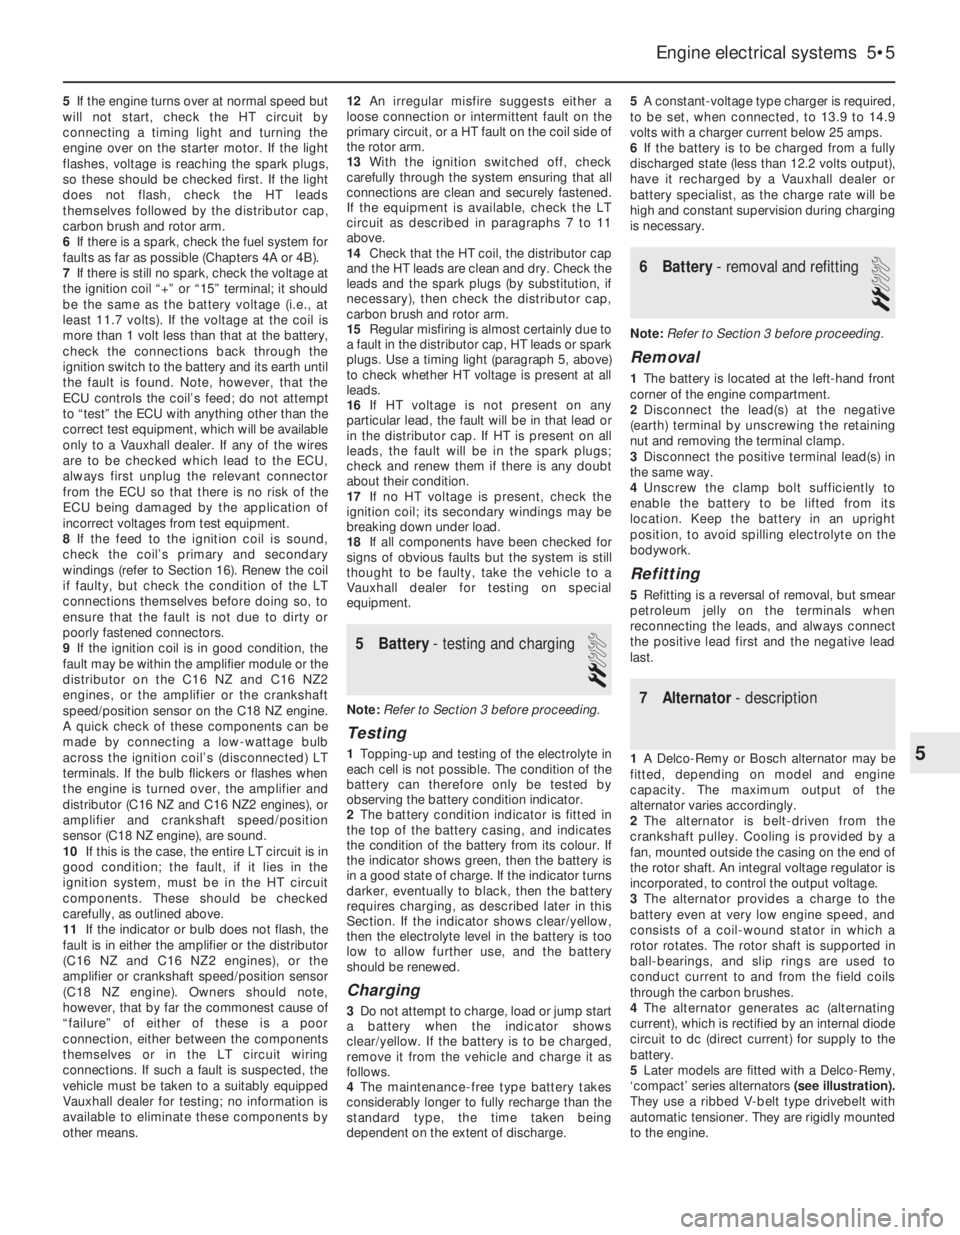
5If the engine turns over at normal speed but
will not start, check the HT circuit by
connecting a timing light and turning the
engine over on the starter motor. If the light
flashes, voltage is reaching the spark plugs,
so these should be checked first. If the light
does not flash, check the HT leads
themselves followed by the distributor cap,
carbon brush and rotor arm.
6If there is a spark, check the fuel system for
faults as far as possible (Chapters 4A or 4B).
7If there is still no spark, check the voltage at
the ignition coil “+” or “15” terminal; it should
be the same as the battery voltage (i.e., at
least 11.7 volts). If the voltage at the coil is
more than 1 volt less than that at the battery,
check the connections back through the
ignition switch to the battery and its earth until
the fault is found. Note, however, that the
ECU controls the coil’s feed; do not attempt
to “test” the ECU with anything other than the
correct test equipment, which will be available
only to a Vauxhall dealer. If any of the wires
are to be checked which lead to the ECU,
always first unplug the relevant connector
from the ECU so that there is no risk of the
ECU being damaged by the application of
incorrect voltages from test equipment.
8If the feed to the ignition coil is sound,
check the coil’s primary and secondary
windings (refer to Section 16). Renew the coil
if faulty, but check the condition of the LT
connections themselves before doing so, to
ensure that the fault is not due to dirty or
poorly fastened connectors.
9If the ignition coil is in good condition, the
fault may be within the amplifier module or the
distributor on the C16 NZ and C16 NZ2
engines, or the amplifier or the crankshaft
speed/position sensor on the C18 NZ engine.
A quick check of these components can be
made by connecting a low-wattage bulb
across the ignition coil’s (disconnected) LT
terminals. If the bulb flickers or flashes when
the engine is turned over, the amplifier and
distributor (C16 NZ and C16 NZ2 engines), or
amplifier and crankshaft speed/position
sensor (C18 NZ engine), are sound.
10If this is the case, the entire LT circuit is in
good condition; the fault, if it lies in the
ignition system, must be in the HT circuit
components. These should be checked
carefully, as outlined above.
11If the indicator or bulb does not flash, the
fault is in either the amplifier or the distributor
(C16 NZ and C16 NZ2 engines), or the
amplifier or crankshaft speed/position sensor
(C18 NZ engine). Owners should note,
however, that by far the commonest cause of
“failure” of either of these is a poor
connection, either between the components
themselves or in the LT circuit wiring
connections. If such a fault is suspected, the
vehicle must be taken to a suitably equipped
Vauxhall dealer for testing; no information is
available to eliminate these components by
other means.12An irregular misfire suggests either a
loose connection or intermittent fault on the
primary circuit, or a HT fault on the coil side of
the rotor arm.
13With the ignition switched off, check
carefully through the system ensuring that all
connections are clean and securely fastened.
If the equipment is available, check the LT
circuit as described in paragraphs 7 to 11
above.
14Check that the HT coil, the distributor cap
and the HT leads are clean and dry. Check the
leads and the spark plugs (by substitution, if
necessary), then check the distributor cap,
carbon brush and rotor arm.
15Regular misfiring is almost certainly due to
a fault in the distributor cap, HT leads or spark
plugs. Use a timing light (paragraph 5, above)
to check whether HT voltage is present at all
leads.
16If HT voltage is not present on any
particular lead, the fault will be in that lead or
in the distributor cap. If HT is present on all
leads, the fault will be in the spark plugs;
check and renew them if there is any doubt
about their condition.
17If no HT voltage is present, check the
ignition coil; its secondary windings may be
breaking down under load.
18If all components have been checked for
signs of obvious faults but the system is still
thought to be faulty, take the vehicle to a
Vauxhall dealer for testing on special
equipment.
5Battery - testing and charging
2
Note: Refer to Section 3 before proceeding.
Testing
1Topping-up and testing of the electrolyte in
each cell is not possible. The condition of the
battery can therefore only be tested by
observing the battery condition indicator.
2The battery condition indicator is fitted in
the top of the battery casing, and indicates
the condition of the battery from its colour. If
the indicator shows green, then the battery is
in a good state of charge. If the indicator turns
darker, eventually to black, then the battery
requires charging, as described later in this
Section. If the indicator shows clear/yellow,
then the electrolyte level in the battery is too
low to allow further use, and the battery
should be renewed.
Charging
3Do not attempt to charge, load or jump start
a battery when the indicator shows
clear/yellow. If the battery is to be charged,
remove it from the vehicle and charge it as
follows.
4The maintenance-free type battery takes
considerably longer to fully recharge than the
standard type, the time taken being
dependent on the extent of discharge.5A constant-voltage type charger is required,
to be set, when connected, to 13.9 to 14.9
volts with a charger current below 25 amps.
6If the battery is to be charged from a fully
discharged state (less than 12.2 volts output),
have it recharged by a Vauxhall dealer or
battery specialist, as the charge rate will be
high and constant supervision during charging
is necessary.
6Battery - removal and refitting
2
Note: Refer to Section 3 before proceeding.
Removal
1The battery is located at the left-hand front
corner of the engine compartment.
2Disconnect the lead(s) at the negative
(earth) terminal by unscrewing the retaining
nut and removing the terminal clamp.
3Disconnect the positive terminal lead(s) in
the same way.
4Unscrew the clamp bolt sufficiently to
enable the battery to be lifted from its
location. Keep the battery in an upright
position, to avoid spilling electrolyte on the
bodywork.
Refitting
5Refitting is a reversal of removal, but smear
petroleum jelly on the terminals when
reconnecting the leads, and always connect
the positive lead first and the negative lead
last.
7Alternator - description
1A Delco-Remy or Bosch alternator may be
fitted, depending on model and engine
capacity. The maximum output of the
alternator varies accordingly.
2The alternator is belt-driven from the
crankshaft pulley. Cooling is provided by a
fan, mounted outside the casing on the end of
the rotor shaft. An integral voltage regulator is
incorporated, to control the output voltage.
3The alternator provides a charge to the
battery even at very low engine speed, and
consists of a coil-wound stator in which a
rotor rotates. The rotor shaft is supported in
ball-bearings, and slip rings are used to
conduct current to and from the field coils
through the carbon brushes.
4The alternator generates ac (alternating
current), which is rectified by an internal diode
circuit to dc (direct current) for supply to the
battery.
5Later models are fitted with a Delco-Remy,
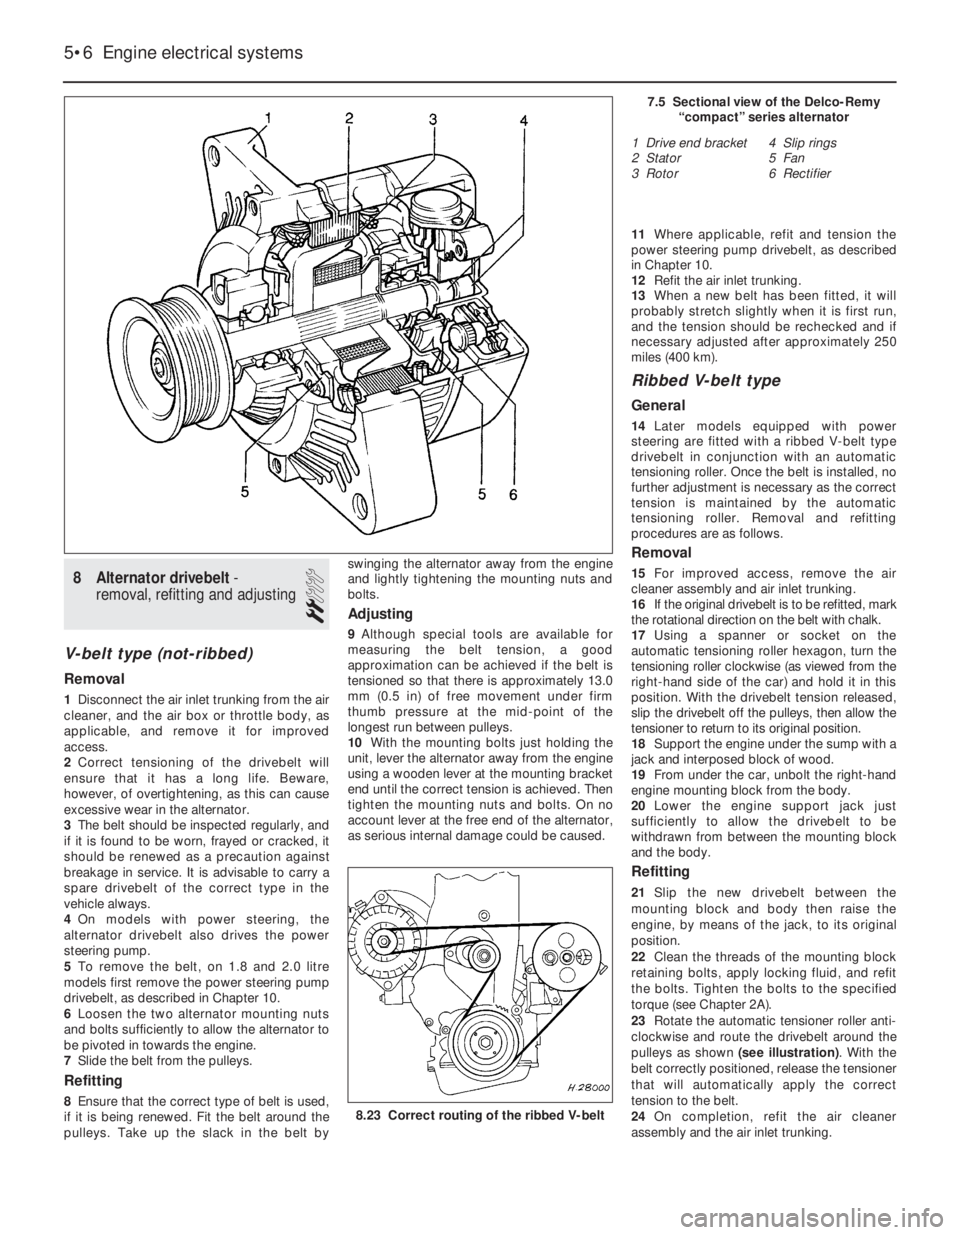
‘compact’ series alternators (see illustration).
They use a ribbed V-belt type drivebelt with
automatic tensioner. They are rigidly mounted
to the engine.
Engine electrical systems 5•5
5
Page 93 of 525
8Alternator drivebelt -
removal, refitting and adjusting
2
V-belt type (not-ribbed)
Removal
1Disconnect the air inlet trunking from the air
cleaner, and the air box or throttle body, as
applicable, and remove it for improved
access.
2Correct tensioning of the drivebelt will
ensure that it has a long life. Beware,
however, of overtightening, as this can cause
excessive wear in the alternator.
3The belt should be inspected regularly, and
if it is found to be worn, frayed or cracked, it
should be renewed as a precaution against
breakage in service. It is advisable to carry a
spare drivebelt of the correct type in the
vehicle always.
4On models with power steering, the
alternator drivebelt also drives the power
steering pump.
5To remove the belt, on 1.8 and 2.0 litre
models first remove the power steering pump
drivebelt, as described in Chapter 10.
6Loosen the two alternator mounting nuts
and bolts sufficiently to allow the alternator to
be pivoted in towards the engine.
7Slide the belt from the pulleys.
Refitting
8Ensure that the correct type of belt is used,
if it is being renewed. Fit the belt around the
pulleys. Take up the slack in the belt byswinging the alternator away from the engine
and lightly tightening the mounting nuts and
bolts.
Adjusting
9Although special tools are available for
measuring the belt tension, a good
approximation can be achieved if the belt is
tensioned so that there is approximately 13.0
mm (0.5 in) of free movement under firm
thumb pressure at the mid-point of the
longest run between pulleys.
10With the mounting bolts just holding the
unit, lever the alternator away from the engine
using a wooden lever at the mounting bracket
end until the correct tension is achieved. Then
tighten the mounting nuts and bolts. On no
account lever at the free end of the alternator,
as serious internal damage could be caused.11Where applicable, refit and tension the
power steering pump drivebelt, as described
in Chapter 10.
12Refit the air inlet trunking.
13When a new belt has been fitted, it will
probably stretch slightly when it is first run,
and the tension should be rechecked and if
necessary adjusted after approximately 250
miles (400 km).
Ribbed V-belt type
General
14Later models equipped with power
steering are fitted with a ribbed V-belt type
drivebelt in conjunction with an automatic
tensioning roller. Once the belt is installed, no
further adjustment is necessary as the correct
tension is maintained by the automatic
tensioning roller. Removal and refitting
procedures are as follows.
Removal
15For improved access, remove the air
cleaner assembly and air inlet trunking.
16If the original drivebelt is to be refitted, mark
the rotational direction on the belt with chalk.
17Using a spanner or socket on the
automatic tensioning roller hexagon, turn the
tensioning roller clockwise (as viewed from the
right-hand side of the car) and hold it in this
position. With the drivebelt tension released,
slip the drivebelt off the pulleys, then allow the
tensioner to return to its original position.
18Support the engine under the sump with a
jack and interposed block of wood.
19From under the car, unbolt the right-hand
engine mounting block from the body.
20Lower the engine support jack just
sufficiently to allow the drivebelt to be
withdrawn from between the mounting block
and the body.
Refitting
21Slip the new drivebelt between the
mounting block and body then raise the
engine, by means of the jack, to its original
position.
22Clean the threads of the mounting block
retaining bolts, apply locking fluid, and refit
the bolts. Tighten the bolts to the specified
torque (see Chapter 2A).
23Rotate the automatic tensioner roller anti-
clockwise and route the drivebelt around the
pulleys as shown (see illustration). With the
belt correctly positioned, release the tensioner
that will automatically apply the correct
tension to the belt.
24On completion, refit the air cleaner
assembly and the air inlet trunking.
5•6Engine electrical systems
7.5 Sectional view of the Delco-Remy
“compact” series alternator
1 Drive end bracket
2 Stator
3 Rotor4 Slip rings
5 Fan
6 Rectifier
8.23 Correct routing of the ribbed V-belt
Page 94 of 525
9Alternator-removal and
refitting
3
Note: Refer to Section 3 before proceeding
Except ‘compact’ series
alternators
Removal
1Disconnect the battery leads.
2Disconnect the air trunking from the air
cleaner, and the air box or throttle body, as
applicable, and remove it for improved
access.
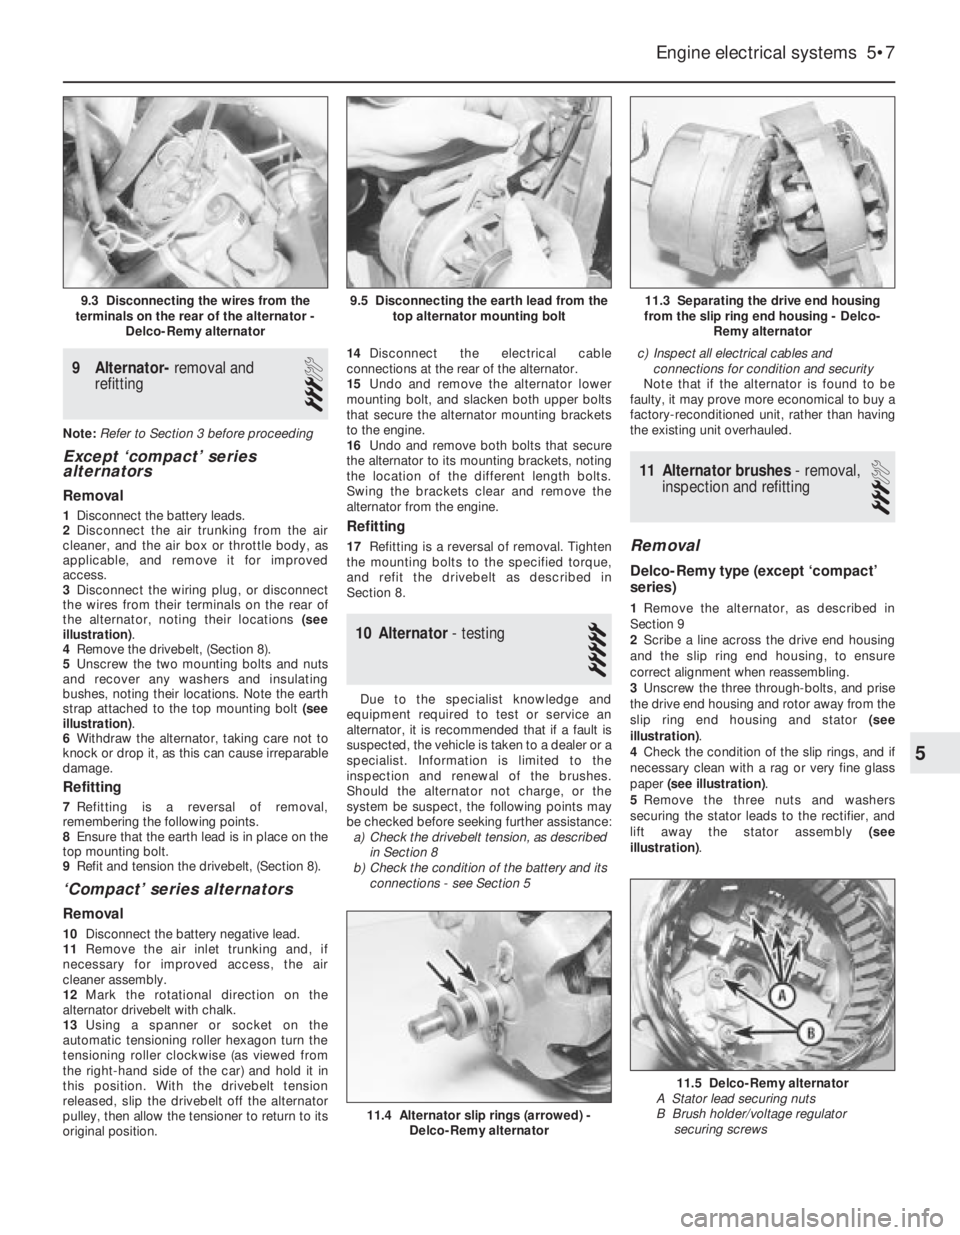
3Disconnect the wiring plug, or disconnect
the wires from their terminals on the rear of
the alternator, noting their locations (see
illustration).
4Remove the drivebelt, (Section 8).
5Unscrew the two mounting bolts and nuts
and recover any washers and insulating
bushes, noting their locations. Note the earth
strap attached to the top mounting bolt (see
illustration).
6Withdraw the alternator, taking care not to
knock or drop it, as this can cause irreparable
damage.
Refitting
7Refitting is a reversal of removal,
remembering the following points.
8Ensure that the earth lead is in place on the
top mounting bolt.
9Refit and tension the drivebelt, (Section 8).
‘Compact’ series alternators
Removal
10Disconnect the battery negative lead.
11Remove the air inlet trunking and, if
necessary for improved access, the air
cleaner assembly.
12Mark the rotational direction on the
alternator drivebelt with chalk.
13Using a spanner or socket on the
automatic tensioning roller hexagon turn the
tensioning roller clockwise (as viewed from
the right-hand side of the car) and hold it in
this position. With the drivebelt tension
released, slip the drivebelt off the alternator
pulley, then allow the tensioner to return to its
original position.14Disconnect the electrical cable
connections at the rear of the alternator.
15Undo and remove the alternator lower
mounting bolt, and slacken both upper bolts
that secure the alternator mounting brackets
to the engine.
16Undo and remove both bolts that secure
the alternator to its mounting brackets, noting
the location of the different length bolts.
Swing the brackets clear and remove the
alternator from the engine.
Refitting
17Refitting is a reversal of removal. Tighten
the mounting bolts to the specified torque,
and refit the drivebelt as described in
Section 8.
10Alternator -testing
5
Due to the specialist knowledge and
equipment required to test or service an
alternator, it is recommended that if a fault is
suspected, the vehicle is taken to a dealer or a
specialist. Information is limited to the
inspection and renewal of the brushes.
Should the alternator not charge, or the
system be suspect, the following points may
be checked before seeking further assistance:
a)Check the drivebelt tension, as described
in Section 8
b)Check the condition of the battery and its
connections -see Section 5c)Inspect all electrical cables and
connections for condition and security
Note that if the alternator is found to be
faulty, it may prove more economical to buy a
factory-reconditioned unit, rather than having
the existing unit overhauled.
11Alternator brushes -removal,
inspection and refitting
3
Removal
Delco-Remy type (except ‘compact’
series)
1Remove the alternator, as described in
Section 9
2Scribe a line across the drive end housing
and the slip ring end housing, to ensure
correct alignment when reassembling.
3Unscrew the three through-bolts, and prise
the drive end housing and rotor away from the
slip ring end housing and stator (see
illustration).
4Check the condition of the slip rings, and if
necessary clean with a rag or very fine glass
paper (see illustration).
5Remove the three nuts and washers
securing the stator leads to the rectifier, and
lift away the stator assembly (see
illustration).
Engine electrical systems 5•7
11.3 Separating the drive end housing
from the slip ring end housing - Delco-
Remy alternator
11.4 Alternator slip rings (arrowed) -
Delco-Remy alternator
11.5 Delco-Remy alternator
A Stator lead securing nuts
B Brush holder/voltage regulator
securing screws
9.5 Disconnecting the earth lead from the
top alternator mounting bolt9.3 Disconnecting the wires from the
terminals on the rear of the alternator -
Delco-Remy alternator
5
Page 102 of 525
3Lift up the edge of the windscreen cowl
panel for access to the sensor.
4Disconnect the sensor wiring plug, and the
vacuum pipe.
5Pull the pressure sensor upwards to release
it from its bracket, and withdraw it from the
vehicle.
Refitting
6Refitting is a reversal of removal. However,
on Multec models no fuel vapour trap is fitted.
It is therefore essential that the sensor
vacuum hose is routed so that it falls steadily
from the sensor to the throttle body. This
precaution prevents any fuel droplets being
trapped in the sensor or hose, and allows
them to drain into the inlet port.
Oil temperature sensor
Removal
7The sensor is screwed into the inlet
manifold side of the cylinder block, next to the
starter motor’s right-hand end.
8The sensor can be reached quite easily
from above, but if it is to be removed from
beneath, ensure that the handbrake is
applied, and that the vehicle is securely
supported on axle stands (see “Jacking and
Vehicle Support”).
9Disconnect the battery negative lead.
10Disconnect the sensor wiring plug.
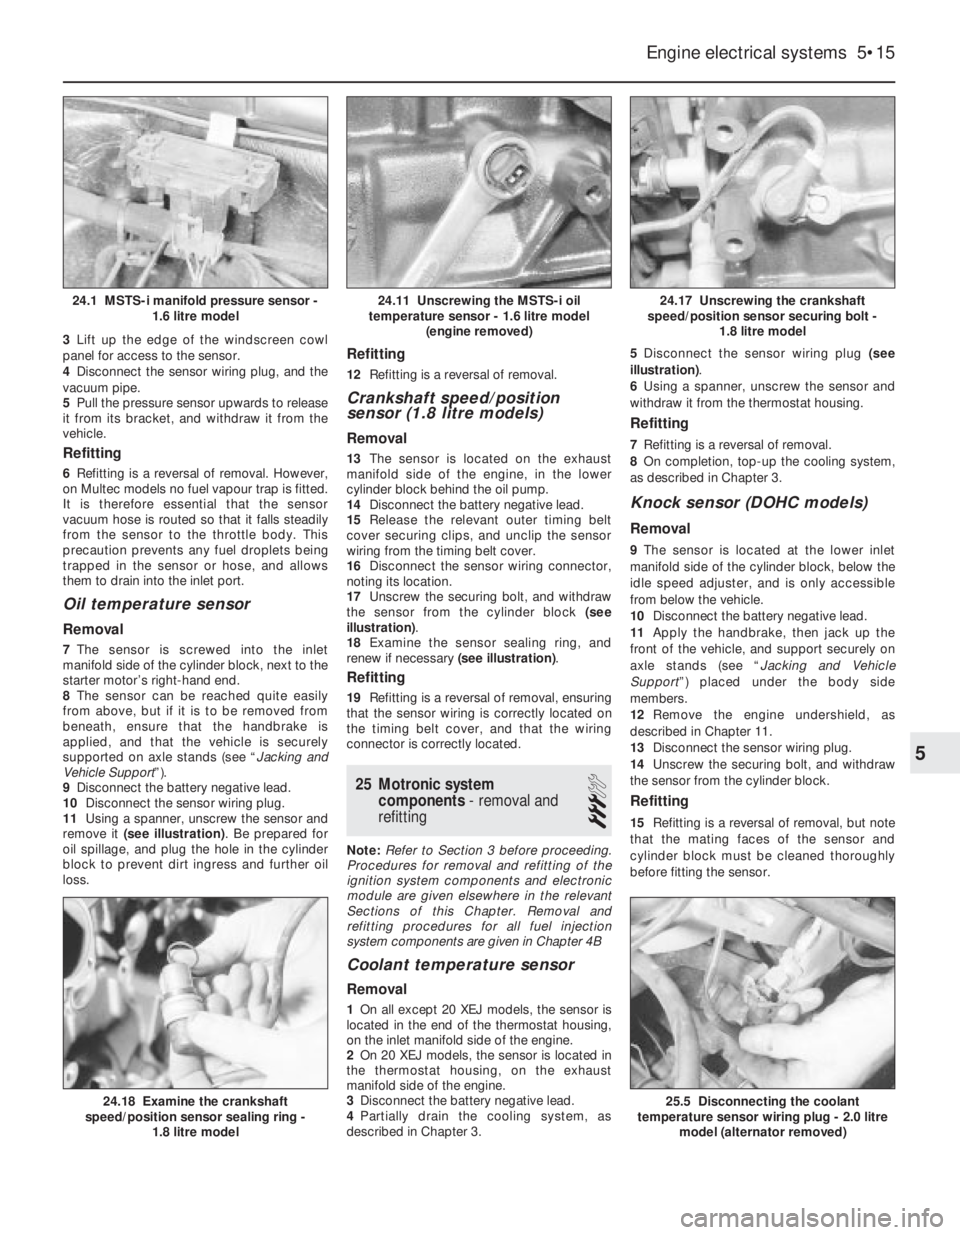
11Using a spanner, unscrew the sensor and
remove it (see illustration). Be prepared for
oil spillage, and plug the hole in the cylinder
block to prevent dirt ingress and further oil
loss.
Refitting
12Refitting is a reversal of removal.
Crankshaft speed/position
sensor (1.8 litre models)
Removal
13The sensor is located on the exhaust
manifold side of the engine, in the lower
cylinder block behind the oil pump.
14Disconnect the battery negative lead.
15Release the relevant outer timing belt
cover securing clips, and unclip the sensor
wiring from the timing belt cover.
16Disconnect the sensor wiring connector,
noting its location.
17Unscrew the securing bolt, and withdraw
the sensor from the cylinder block (see
illustration).
18Examine the sensor sealing ring, and
renew if necessary (see illustration).
Refitting
19Refitting is a reversal of removal, ensuring
that the sensor wiring is correctly located on
the timing belt cover, and that the wiring
connector is correctly located.
25Motronic system
components - removal and
refitting
3
Note: Refer to Section 3 before proceeding.
Procedures for removal and refitting of the
ignition system components and electronic
module are given elsewhere in the relevant
Sections of this Chapter. Removal and
refitting procedures for all fuel injection
system components are given in Chapter 4B
Coolant temperature sensor
Removal
1On all except 20 XEJ models, the sensor is
located in the end of the thermostat housing,
on the inlet manifold side of the engine.
2On 20 XEJ models, the sensor is located in
the thermostat housing, on the exhaust
manifold side of the engine.
3Disconnect the battery negative lead.
4Partially drain the cooling system, as
described in Chapter 3. 5Disconnect the sensor wiring plug (see
illustration).
6Using a spanner, unscrew the sensor and
withdraw it from the thermostat housing.
Refitting
7Refitting is a reversal of removal.
8On completion, top-up the cooling system,
as described in Chapter 3.
Knock sensor (DOHC models)
Removal
9The sensor is located at the lower inlet
manifold side of the cylinder block, below the
idle speed adjuster, and is only accessible
from below the vehicle.
10Disconnect the battery negative lead.
11Apply the handbrake, then jack up the
front of the vehicle, and support securely on
axle stands (see “Jacking and Vehicle
Support”) placed under the body side
members.
12Remove the engine undershield, as
described in Chapter 11.
13Disconnect the sensor wiring plug.
14Unscrew the securing bolt, and withdraw
the sensor from the cylinder block.
Refitting
15Refitting is a reversal of removal, but note
that the mating faces of the sensor and
cylinder block must be cleaned thoroughly
before fitting the sensor.
Engine electrical systems 5•15
24.17 Unscrewing the crankshaft
speed/position sensor securing bolt -
1.8 litre model
25.5 Disconnecting the coolant
temperature sensor wiring plug - 2.0 litre
model (alternator removed)24.18 Examine the crankshaft
speed/position sensor sealing ring -
1.8 litre model
24.11 Unscrewing the MSTS-i oil
temperature sensor - 1.6 litre model
(engine removed)24.1 MSTS-i manifold pressure sensor -
1.6 litre model
5
Page 172 of 525
1
Chapter 1
Routine maintenance and servicing
Air cleaner element - renewal . . . . . . . . . . . . . . . . . . . . . . . . . . . . . . .27
Air inlet temperature control check . . . . . . . . . . . . . . . . . . . . . . . . . .28
Alternator V-belt check . . . . . . . . . . . . . . . . . . . . . . . . . . . . . . . . . . . .22
Automatic transmission check . . . . . . . . . . . . . . . . . . . . . . . . . . . . . .34
Automatic transmission fluid level check . . . . . . . . . . . . . . . . . . . . . . .7
Automatic transmission fluid renewal . . . . . . . . . . . . . . . . . . . . . . . . .38
Bodywork check . . . . . . . . . . . . . . . . . . . . . . . . . . . . . . . . . . . . . . . . .20
Brake fluid renewal . . . . . . . . . . . . . . . . . . . . . . . . . . . . . . . . . . . . . . .14
Brake pad check . . . . . . . . . . . . . . . . . . . . . . . . . . . . . . . . . . . . . . . . .15
Brake shoe check . . . . . . . . . . . . . . . . . . . . . . . . . . . . . . . . . . . . . . . .35
Clutch cable check . . . . . . . . . . . . . . . . . . . . . . . . . . . . . . . . . . . . . . .32
Coolant renewal . . . . . . . . . . . . . . . . . . . . . . . . . . . . . . . . . . . . . . . . .26
Distributor and HT lead check . . . . . . . . . . . . . . . . . . . . . . . . . . . . . .31
Door lock key battery - replacement . . . . . . . . . . . . . . . . . . . . . . . . .24
Driveshaft gaiter check . . . . . . . . . . . . . . . . . . . . . . . . . . . . . . . . . . . . .6
Engine oil and filter - renewal . . . . . . . . . . . . . . . . . . . . . . . . . . . . . . . .3
Exhaust system check . . . . . . . . . . . . . . . . . . . . . . . . . . . . . . . . . . . .11
Fuel filter renewal . . . . . . . . . . . . . . . . . . . . . . . . . . . . . . . . . . . . . . . .29
Handbrake linkage check . . . . . . . . . . . . . . . . . . . . . . . . . . . . . . . . . .16Headlamp alignment . . . . . . . . . . . . . . . . . . . . . . . . . . . . . . . . . . . . . .23
Hose and fluid leak check . . . . . . . . . . . . . . . . . . . . . . . . . . . . . . . . . .4
Idle speed and mixture - adjustment . . . . . . . . . . . . . . . . . . . . . . . . . .9
Ignition timing . . . . . . . . . . . . . . . . . . . . . . . . . . . . . . . . . . . . . . . . . . .13
Intensive maintenance . . . . . . . . . . . . . . . . . . . . . . . . . . . . . . . . . . . . .2
Introduction . . . . . . . . . . . . . . . . . . . . . . . . . . . . . . . . . . . . . . . . . . . . .1
Lock and hinge check . . . . . . . . . . . . . . . . . . . . . . . . . . . . . . . . . . . .21
Manual transmission fluid check . . . . . . . . . . . . . . . . . . . . . . . . . . . .33
Power steering fluid check . . . . . . . . . . . . . . . . . . . . . . . . . . . . . . . . .17
Power steering pump drivebelt check . . . . . . . . . . . . . . . . . . . . . . . .18
Radiator inspection and cleaning . . . . . . . . . . . . . . . . . . . . . . . . . . . . .8
Rear suspension level control system check . . . . . . . . . . . . . . . . . . .19
Road test . . . . . . . . . . . . . . . . . . . . . . . . . . . . . . . . . . . . . . . . . . . . . .25
Spark plug renewal (SOHC) . . . . . . . . . . . . . . . . . . . . . . . . . . . . . . . .30
Spark plug renewal (DOHC) . . . . . . . . . . . . . . . . . . . . . . . . . . . . . . . .37
Steering and suspension check . . . . . . . . . . . . . . . . . . . . . . . . . . . . . .5
Throttle linkage maintenance . . . . . . . . . . . . . . . . . . . . . . . . . . . . . . .10
Timing belt renewal . . . . . . . . . . . . . . . . . . . . . . . . . . . . . . . . . . . . . . .36
Wiring check . . . . . . . . . . . . . . . . . . . . . . . . . . . . . . . . . . . . . . . . . . . .12
1•1
Contents
Easy,suitable for
novice with little
experienceFairly easy,suitable
for beginner with
some experienceFairly difficult,
suitable for competent
DIY mechanic
Difficult,suitable for
experienced DIY
mechanicVery difficult,
suitable for expert DIY
or professional
Degrees of difficulty
54321
Page 175 of 525
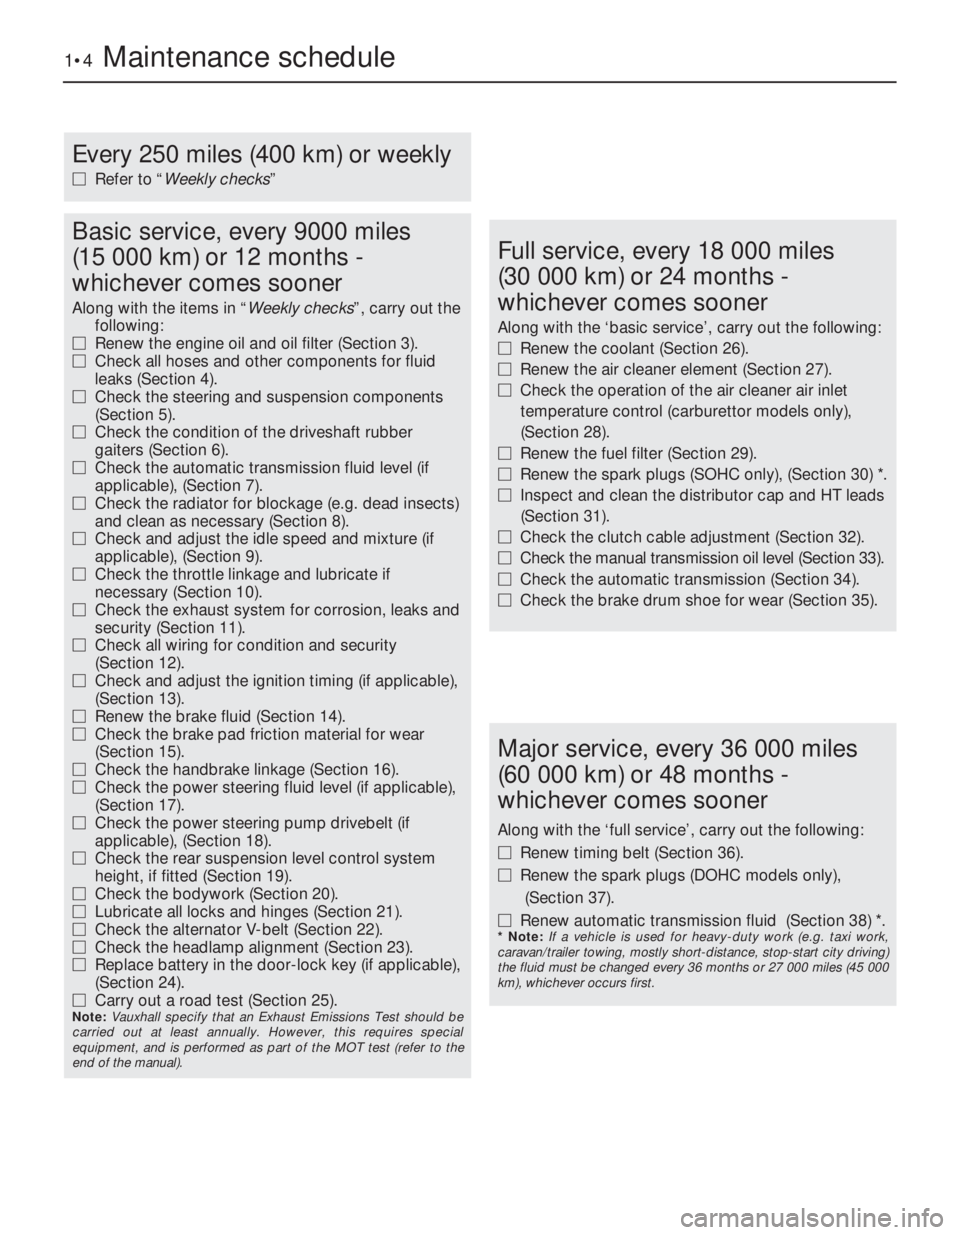
1•4Maintenance schedule
Every 250 miles (400 km) or weekly
MRefer to “Weekly checks”
Basic service, every 9000 miles
(15 000 km) or 12 months -
whichever comes sooner
Along with the items in “Weekly checks”, carry out the
following:
MRenew the engine oil and oil filter (Section 3).
MCheck all hoses and other components for fluid
leaks (Section 4).
MCheck the steering and suspension components
(Section 5).
MCheck the condition of the driveshaft rubber
gaiters (Section 6).
MCheck the automatic transmission fluid level (if
applicable), (Section 7).
MCheck the radiator for blockage (e.g. dead insects)
and clean as necessary (Section 8).
MCheck and adjust the idle speed and mixture (if
applicable), (Section 9).
MCheck the throttle linkage and lubricate if
necessary (Section 10).
MCheck the exhaust system for corrosion, leaks and
security (Section 11).
MCheck all wiring for condition and security
(Section 12).
MCheck and adjust the ignition timing (if applicable),
(Section 13).
MRenew the brake fluid (Section 14).
MCheck the brake pad friction material for wear
(Section 15).
MCheck the handbrake linkage (Section 16).
MCheck the power steering fluid level (if applicable),
(Section 17).
MCheck the power steering pump drivebelt (if
applicable), (Section 18).
MCheck the rear suspension level control system
height, if fitted (Section 19).
MCheck the bodywork (Section 20).
MLubricate all locks and hinges (Section 21).
MCheck the alternator V-belt (Section 22).
MCheck the headlamp alignment (Section 23).
MReplace battery in the door-lock key (if applicable),
(Section 24).
MCarry out a road test (Section 25).
Note: Vauxhall specify that an Exhaust Emissions Test should be
carried out at least annually. However, this requires special
equipment, and is performed as part of the MOT test (refer to the
end of the manual).
Full service, every 18 000 miles
(30 000 km) or 24 months -
whichever comes sooner
Along with the ‘basic service’, carry out the following:
MRenew the coolant (Section 26).
MRenew the air cleaner element (Section 27).
MCheck the operation of the air cleaner air inlet
temperature control (carburettor models only),
(Section 28).
MRenew the fuel filter (Section 29).
MRenew the spark plugs (SOHC only), (Section 30) *.
MInspect and clean the distributor cap and HT leads
(Section 31).
MCheck the clutch cable adjustment (Section 32).
MCheck the manual transmission oil level (Section 33).
MCheck the automatic transmission (Section 34).
MCheck the brake drum shoe for wear (Section 35).
Major service, every 36 000 miles
(60 000 km) or 48 months -
whichever comes sooner
Along with the ‘full service’, carry out the following:
MRenew timing belt (Section 36).
MRenew the spark plugs (DOHC models only),
(Section 37).
MRenew automatic transmission fluid (Section 38) *.
* Note: If a vehicle is used for heavy-duty work (e.g. taxi work,
caravan/trailer towing, mostly short-distance, stop-start city driving)
the fluid must be changed every 36 months or 27 000 miles (45 000
km), whichever occurs first.
Page 183 of 525
14Brake fluid renewal
3
Renew the brake and bleed the system.
Refer to Chapter 9 for full details.
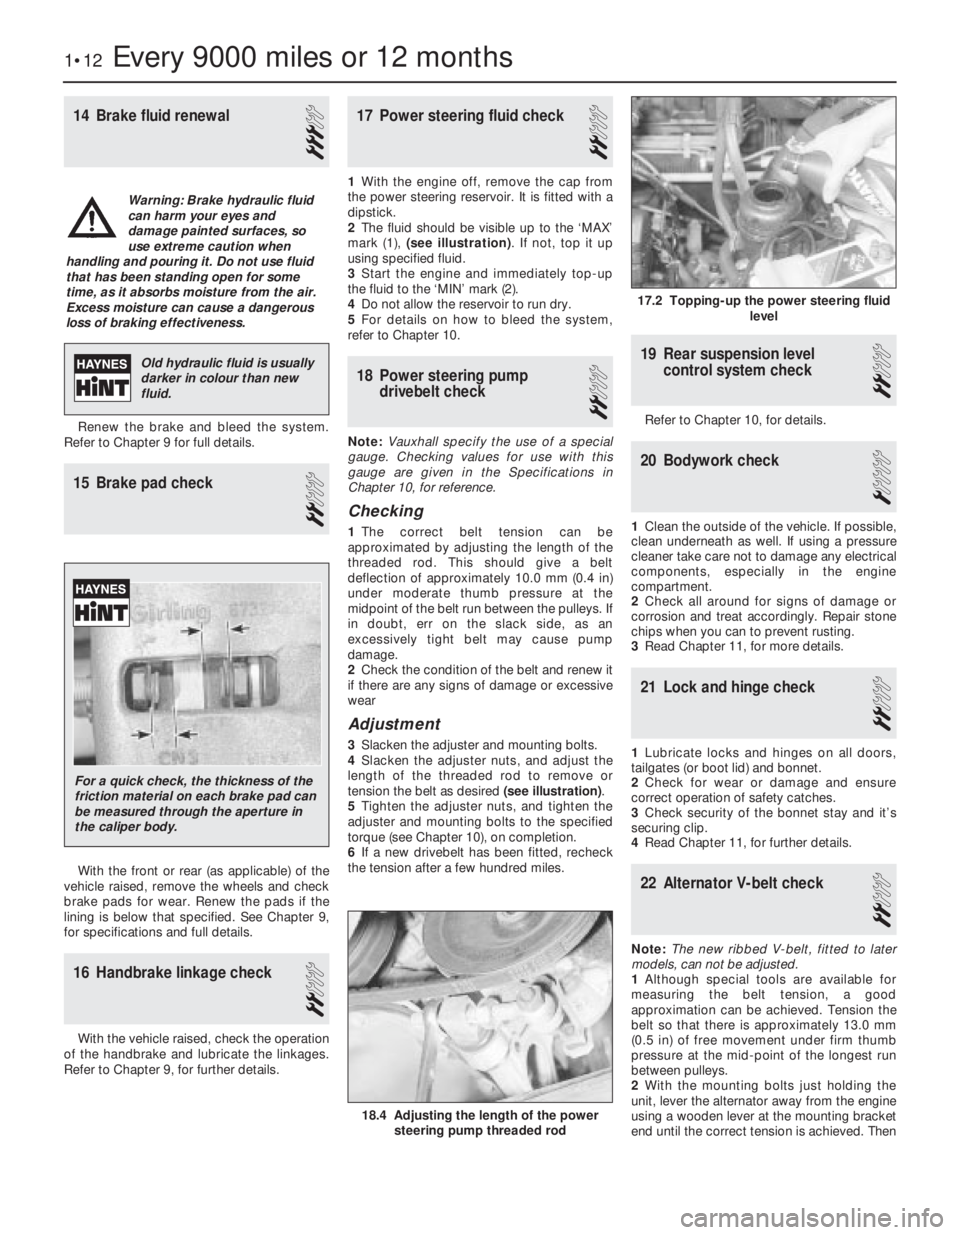
15Brake pad check
2
With the front or rear (as applicable) of the
vehicle raised, remove the wheels and check
brake pads for wear. Renew the pads if the
lining is below that specified. See Chapter 9,
for specifications and full details.
16Handbrake linkage check
2
With the vehicle raised, check the operation
of the handbrake and lubricate the linkages.
Refer to Chapter 9, for further details.
17Power steering fluid check
2
1With the engine off, remove the cap from
the power steering reservoir. It is fitted with a
dipstick.
2The fluid should be visible up to the ‘MAX’
mark (1), (see illustration). If not, top it up
using specified fluid.
3Start the engine and immediately top-up
the fluid to the ‘MIN’ mark (2).
4Do not allow the reservoir to run dry.
5For details on how to bleed the system,
refer to Chapter 10.
18Power steering pump
drivebelt check
2
Note:Vauxhall specify the use of a special
gauge. Checking values for use with this
gauge are given in the Specifications in
Chapter 10, for reference.
Checking
1The correct belt tension can be
approximated by adjusting the length of the
threaded rod. This should give a belt
deflection of approximately 10.0 mm (0.4 in)
under moderate thumb pressure at the
midpoint of the belt run between the pulleys. If
in doubt, err on the slack side, as an
excessively tight belt may cause pump
damage.
2Check the condition of the belt and renew it
if there are any signs of damage or excessive
wear
Adjustment
3Slacken the adjuster and mounting bolts.
4Slacken the adjuster nuts, and adjust the
length of the threaded rod to remove or
tension the belt as desired (see illustration).
5Tighten the adjuster nuts, and tighten the
adjuster and mounting bolts to the specified
torque (see Chapter 10), on completion.
6If a new drivebelt has been fitted, recheck
the tension after a few hundred miles.
19Rear suspension level
control system check
2
Refer to Chapter 10, for details.
20Bodywork check
1
1Clean the outside of the vehicle. If possible,
clean underneath as well. If using a pressure
cleaner take care not to damage any electrical
components, especially in the engine
compartment.
2Check all around for signs of damage or
corrosion and treat accordingly. Repair stone
chips when you can to prevent rusting.
3Read Chapter 11, for more details.
21Lock and hinge check
2
1Lubricate locks and hinges on all doors,
tailgates (or boot lid) and bonnet.
2Check for wear or damage and ensure
correct operation of safety catches.
3Check security of the bonnet stay and it’s
securing clip.
4Read Chapter 11, for further details.
22Alternator V-belt check
2
Note:The new ribbed V-belt, fitted to later
models, can not be adjusted.
1Although special tools are available for
measuring the belt tension, a good
approximation can be achieved. Tension the
belt so that there is approximately 13.0 mm
(0.5 in) of free movement under firm thumb
pressure at the mid-point of the longest run
between pulleys.
2With the mounting bolts just holding the
unit, lever the alternator away from the engine
using a wooden lever at the mounting bracket
end until the correct tension is achieved. Then
1•12Every 9000 miles or 12 months
17.2 Topping-up the power steering fluid
level
18.4 Adjusting the length of the power
steering pump threaded rod
Warning: Brake hydraulic fluid
can harm your eyes and
damage painted surfaces, so
use extreme caution when
handling and pouring it. Do not use fluid
that has been standing open for some
time, as it absorbs moisture from the air.
Excess moisture can cause a dangerous
loss of braking effectiveness.
Old hydraulic fluid is usually
darker in colour than new
fluid.
For a quick check, the thickness of the
friction material on each brake pad can
be measured through the aperture in
the caliper body.