stop start OPEL CASCADA 2014 Manual user
[x] Cancel search | Manufacturer: OPEL, Model Year: 2014, Model line: CASCADA, Model: OPEL CASCADA 2014Pages: 247, PDF Size: 7.45 MB
Page 13 of 247

In brief11
1Power windows .....................31
2 Exterior mirrors .....................28
3 Cruise control .....................151
Speed limiter ....................... 153
Forward collision alert .........154
4 Side air vents ...................... 131
5 Turn and lane-change
signals, headlight flash,
low beam and high beam,
high beam assist .................117
Exit lighting ......................... 121
Parking lights ...................... 118
Buttons for Driver
Information Centre ................94
6 Instruments .......................... 83
7 Steering wheel controls .......76
8 Driver Information Centre ...... 94
9 Windscreen wiper,
windscreen washer
system, headlight washer
system ................................... 78
10 Sport mode ........................ 149
Central locking system ..........21Hazard warning flashers ....117
Control indicator for airbag
deactivation .......................... 88
Control indicator for front
passenger seat belt .............88
Tour mode .......................... 149
11 Info-Display .......................... 98
12 Anti-theft alarm system
status LED ........................... 26
13 Centre air vents .................. 131
14 Glovebox, lockable ...............68
15 Traction Control system .....147
Electronic Stability Control . 148
Parking assist systems .......157
Lane departure warning .....170
Eco button for stop-start
system ................................. 136
16 Climate control system ........ 123
17 AUX input, USB input ..........10
18 Power outlet .......................... 8219Soft top operation switch .....34
Central window switch .........31
20 Selector lever, manual
transmission ....................... 144
Automatic transmission ......141
21 Parking brake, manual or
electric operation ................145
22 Ignition switch with
steering wheel lock ............134
23 Horn ..................................... 77
Driver airbag ........................ 60
24 Bonnet release lever ..........182
25 Storage compartment ..........69
Fuse box ............................ 199
26 Steering wheel adjustment ..76
27 Light switch ........................ 110
Headlight range
adjustment ......................... 113
Front fog lights ...................118
Rear fog light ...................... 118
Instrument illumination .......119
Page 20 of 247
18In brief
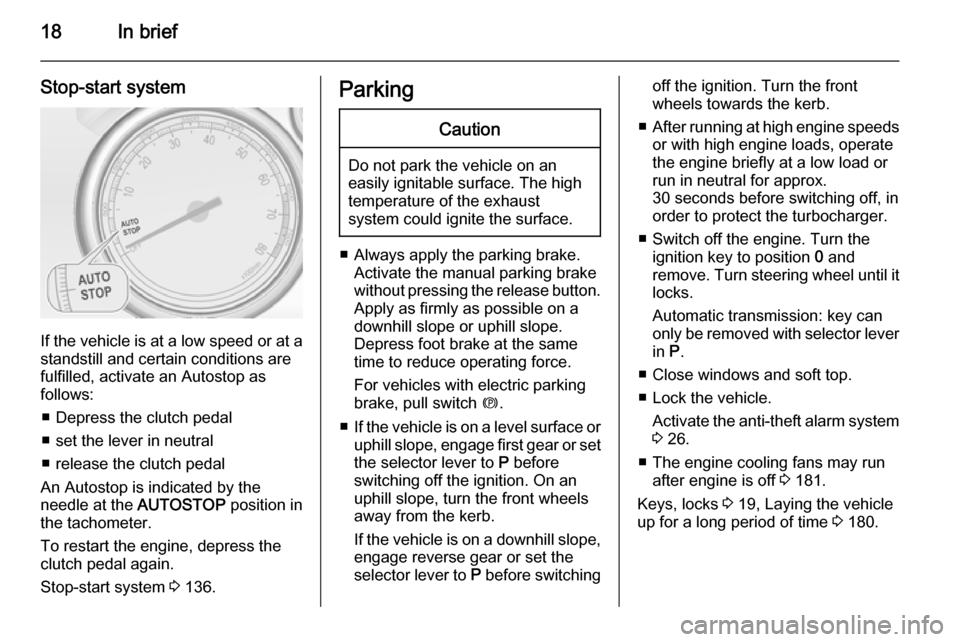
Stop-start system
If the vehicle is at a low speed or at astandstill and certain conditions are
fulfilled, activate an Autostop as
follows:
■ Depress the clutch pedal
■ set the lever in neutral
■ release the clutch pedal
An Autostop is indicated by the
needle at the AUTOSTOP position in
the tachometer.
To restart the engine, depress the
clutch pedal again.
Stop-start system 3 136.
ParkingCaution
Do not park the vehicle on an
easily ignitable surface. The high
temperature of the exhaust
system could ignite the surface.
■ Always apply the parking brake. Activate the manual parking brake
without pressing the release button.
Apply as firmly as possible on a
downhill slope or uphill slope.
Depress foot brake at the same
time to reduce operating force.
For vehicles with electric parking
brake, pull switch m.
■ If the vehicle is on a level surface or
uphill slope, engage first gear or set the selector lever to P before
switching off the ignition. On an
uphill slope, turn the front wheels
away from the kerb.
If the vehicle is on a downhill slope, engage reverse gear or set theselector lever to P before switching
off the ignition. Turn the front
wheels towards the kerb.
■ After running at high engine speeds
or with high engine loads, operate
the engine briefly at a low load or
run in neutral for approx.
30 seconds before switching off, in
order to protect the turbocharger.
■ Switch off the engine. Turn the ignition key to position 0 and
remove. Turn steering wheel until it locks.
Automatic transmission: key can only be removed with selector lever
in P.
■ Close windows and soft top.
■ Lock the vehicle. Activate the anti-theft alarm system3 26.
■ The engine cooling fans may run after engine is off 3 181.
Keys, locks 3 19, Laying the vehicle
up for a long period of time 3 180.
Page 37 of 247
Keys, doors and windows35
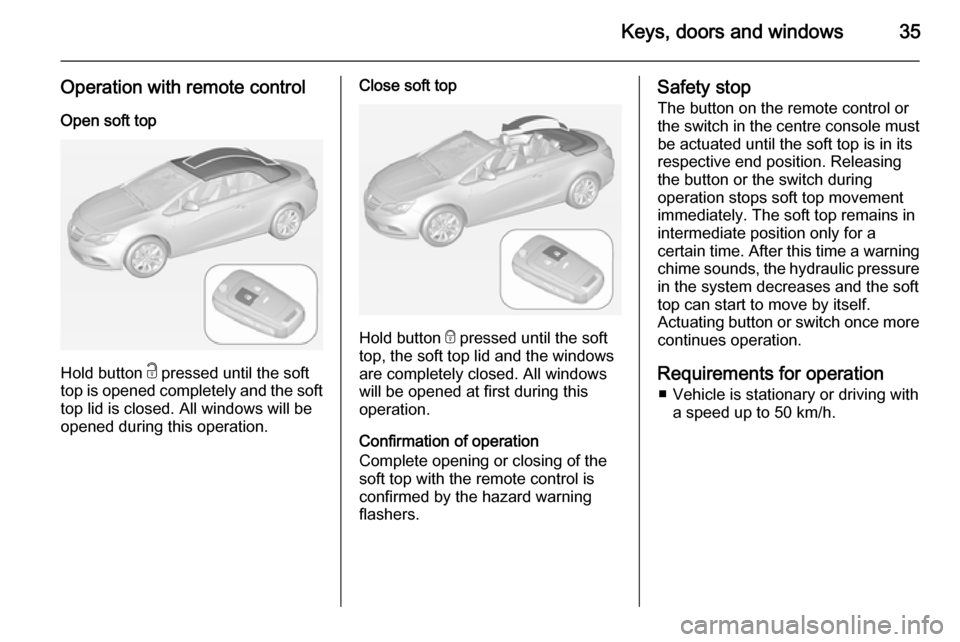
Operation with remote control
Open soft top
Hold button c pressed until the soft
top is opened completely and the soft
top lid is closed. All windows will be
opened during this operation.
Close soft top
Hold button e pressed until the soft
top, the soft top lid and the windows
are completely closed. All windows
will be opened at first during this
operation.
Confirmation of operation
Complete opening or closing of the
soft top with the remote control is confirmed by the hazard warning
flashers.
Safety stop
The button on the remote control or
the switch in the centre console must
be actuated until the soft top is in its
respective end position. Releasing
the button or the switch during
operation stops soft top movement
immediately. The soft top remains in
intermediate position only for a
certain time. After this time a warning chime sounds, the hydraulic pressure
in the system decreases and the soft
top can start to move by itself.
Actuating button or switch once more
continues operation.
Requirements for operation ■ Vehicle is stationary or driving with a speed up to 50 km/h.
Page 38 of 247

36Keys, doors and windows
■ Load compartment partition isfolded out, pass-through flap isclosed 3 71.
■ Soft top lid is engaged in closed position.
■ Boot lid is completely closed.
■ Outside temperature is not lower than -7 °C for opening and -10 °C
for closing.
■ Vehicle battery voltage is sufficient.
■ The system is not overloaded by repeated operation (max. 5
complete cycles in succession).If any of these requirements are not fulfilled, a warning chime sounds
and a message appears in the
Driver Information Centre when the
switch is actuated and the soft top
will not open or close.
■ There must be no objects in front of
the rear window or in the pivot area of the soft top and the soft top lid.
If the automatic drive is not
operational when the soft top is open, execute a manual closing process,
see the following instructions in
"Manual closing in the event of a
system fault".
General hints
Note■ Always actuate the operation switch until the acoustic signal
sounds or the hazard warning
flashers illuminate, to ensure that
the soft top is completely opened
or closed.
■ The soft top can be held in an intermediate position to facilitate
cleaning of hood spaces and
gaskets. Release the switch in the
centre console during operation to
stop soft top movement in
intermediate position for a
maximum of 7 minutes when
ignition is on. After this time a warning chime sounds, the
hydraulic pressure in the system
decreases and the soft top can
start to move by itself.
■ Do not open the soft top if it is wet,
frozen or dirty.
■ Activating the soft top on uneven ground can lead to malfunctions
and damage.
■ Vehicle care 3 220.
Page 55 of 247
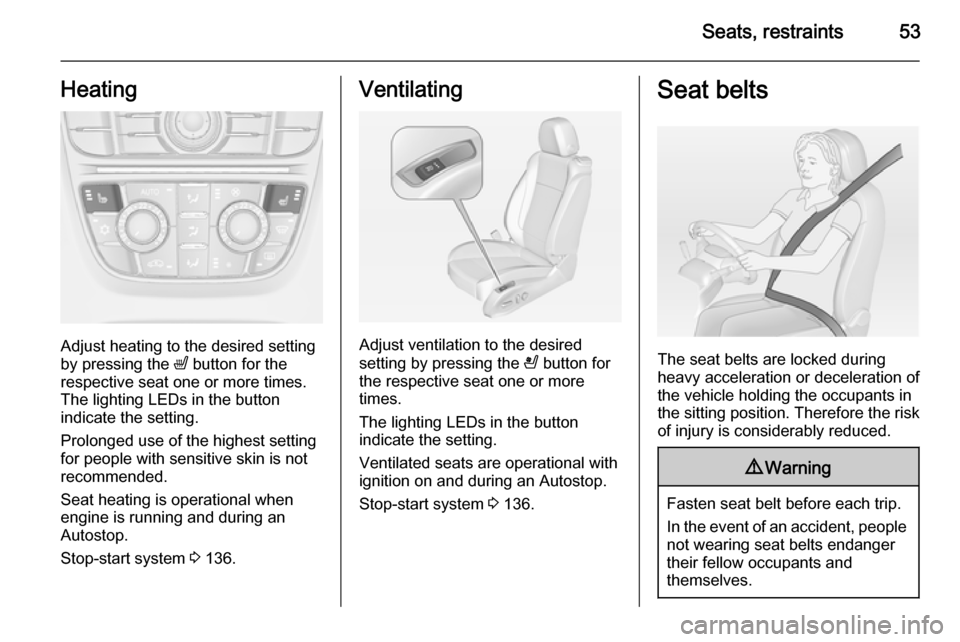
Seats, restraints53Heating
Adjust heating to the desired setting
by pressing the ß button for the
respective seat one or more times.
The lighting LEDs in the button
indicate the setting.
Prolonged use of the highest setting
for people with sensitive skin is not
recommended.
Seat heating is operational when engine is running and during an
Autostop.
Stop-start system 3 136.
Ventilating
Adjust ventilation to the desired
setting by pressing the A button for
the respective seat one or more
times.
The lighting LEDs in the button
indicate the setting.
Ventilated seats are operational with
ignition on and during an Autostop.
Stop-start system 3 136.
Seat belts
The seat belts are locked during
heavy acceleration or deceleration of
the vehicle holding the occupants in
the sitting position. Therefore the risk
of injury is considerably reduced.
9 Warning
Fasten seat belt before each trip.
In the event of an accident, people
not wearing seat belts endanger their fellow occupants and
themselves.
Page 79 of 247
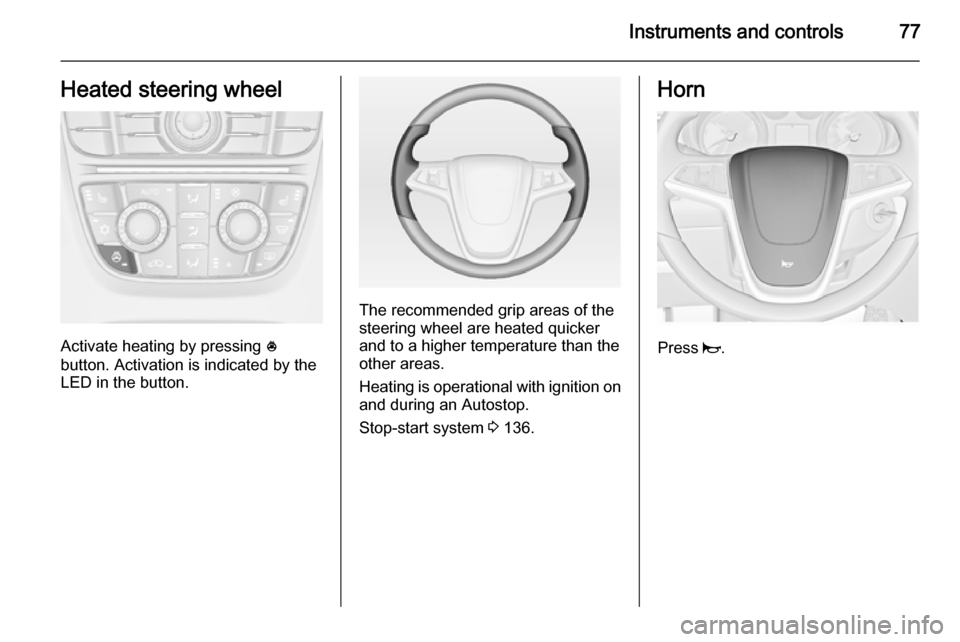
Instruments and controls77Heated steering wheel
Activate heating by pressing *
button. Activation is indicated by the
LED in the button.
The recommended grip areas of the
steering wheel are heated quicker
and to a higher temperature than the
other areas.
Heating is operational with ignition on
and during an Autostop.
Stop-start system 3 136.
Horn
Press j.
Page 84 of 247

82Instruments and controls
Adjust all settings.
Set date
To adjust the time settings, select the
Set Date menu item. Turn the
multifunction knob to adjust the first
setting.
Press the multifunction knob to
confirm the input. The coloured
background moves to the next
setting.
Adjust all settings.
Time format
To choose the desired time format,
select 12 hr / 24 hr Format . Activate
12 Hour or 24 Hour .
Vehicle personalisation 3 102.Power outlets
A 12 Volt power outlet is located in the
front console.
A further 12 Volt power outlet is
located in the rear console. Fold the
cover downwards.
Do not exceed the maximum power
consumption of 120 watts.
With ignition off, the power outlets are
deactivated. Additionally the power
outlets are deactivated in the event of
low vehicle battery voltage.
Electrical accessories that are
connected must comply with the
electromagnetic compatibility
requirements laid down in
DIN VDE 40 839.
Do not connect any current-delivering
accessories, e.g. electrical charging
devices or batteries.
Do not damage the outlet by using
unsuitable plugs.
Stop-start system 3 136.
Page 91 of 247
Instruments and controls89
Illuminates for approx. 60 seconds
after the ignition is switched on. The
front passenger airbag is activated.
* illuminates yellow.
The front passenger airbag is
deactivated 3 61.9 Danger
Risk of fatal injury for a child using
a child restraint system together
with activated front passenger
airbag.
Risk of fatal injury for an adult
person with deactivated front
passenger airbag.
Charging system
p illuminates red.
Illuminates when the ignition is
switched on and extinguishes shortly
after the engine starts.
Illuminates when the engine is
running
Stop, switch off engine. Vehicle
battery is not charging. Engine
cooling may be interrupted. The
brake servo unit may cease to be
effective. Seek the assistance of a
workshop.
Malfunction indicator light
Z illuminates or flashes yellow.
Illuminates when the ignition is
switched on and extinguishes shortly
after the engine starts.
Illuminates when the engine isrunning
Fault in the emission control system. The permitted emission limits may be
exceeded. Seek the assistance of a
workshop immediately.Flashes when the engine is
running
Fault that could lead to catalytic
converter damage. Ease up on the
accelerator until the flashing stops.
Seek the assistance of a workshop
immediately.
Brake and clutch system Brake and clutch fluid level
R illuminates red.
The brake and clutch fluid level is too low 3 185.9 Warning
Stop. Do not continue your
journey. Consult a workshop.
Illuminates after the ignition is
switched on if the manual parking
brake is applied 3 145.
Operate pedal
- illuminates or flashes yellow.
Page 92 of 247

90Instruments and controls
Clutch pedal must be operated to
start the engine. Stop-start system
3 136.
Illuminates
Brake pedal must be operated to release the electric parking brake
3 145.
Flashes
Clutch pedal must be operated to start the engine 3 135.
Electric parking brake
m illuminates or flashes red.
Illuminates Electric parking brake is applied
3 145.Flashes
Electric parking brake is not fully
applied or released. Switch on
ignition, depress brake pedal and attempt to reset the system by first
releasing and then applying the
electric parking brake. If m remains
flashing, do not drive and seek the
assistance of a workshop.
Electric parking brake fault
j illuminates or flashes yellow.
Illuminates
Electric parking brake is operating
with degraded performance 3 145.
Flashes Electric parking brake is in servicemode. Stop vehicle, apply and
release the electric parking brake to
reset.9 Warning
Have the cause of the fault
remedied immediately by a
workshop.
Antilock brake system
(ABS) u illuminates yellow.
Illuminates for a few seconds after the ignition is switched on. The system is
ready for operation when the control
indicator extinguishes.
If the control indicator does not
extinguish after a few seconds, or if it illuminates while driving, there is a
fault in the ABS. The brake system
remains operational but without ABS
regulation.
Antilock brake system 3 144.
Page 93 of 247

Instruments and controls91Upshift[ is indicated as symbol or is popped
up as full page in the Driver
Information Centre when upshifting is recommended for fuel saving
reasons.
EcoFlex drive assistant 3 94.
Power steering
c illuminates yellow.
Illuminates with power steering reduced Power steering is reduced due to
overheating of the system. Control
indicator extinguishes when the
system has cooled down.
Stop-start system 3 136.
Illuminates with power steering
disabled
Failure in the power steering system.
Consult a workshop.
Lane departure warning ) illuminates green or flashes yellow.Illuminates green
System is switched on and ready to
operate.
Flashes yellow
System recognises an unintended
lane change.
Electronic Stability Control
off n illuminates yellow.
The system is deactivated.
Electronic Stability Control
and Traction Control
system b illuminates or flashes yellow.
Flashes The system is actively engaged.
Engine output may be reduced and the vehicle may be braked
automatically to a small degree.Illuminates
A fault in the system is present. A
warning message appears in the
Driver Information Centre. Continued
driving is possible. The system is not
operational. Driving stability,
however, may deteriorate depending
on road surface conditions.
Have the cause of the fault remedied
by a workshop.
Electronic Stability Control 3 148,
Traction Control system 3 147.
Traction Control system off k illuminates yellow.
The system is deactivated.
Preheating
! illuminates yellow.
Preheating is activated. Only
activates when outside temperature
is low.
Diesel particle filter
% illuminates or flashes yellow.