seat adjustment OPEL CASCADA 2015 Owner's Manual
[x] Cancel search | Manufacturer: OPEL, Model Year: 2015, Model line: CASCADA, Model: OPEL CASCADA 2015Pages: 253, PDF Size: 7.58 MB
Page 9 of 253
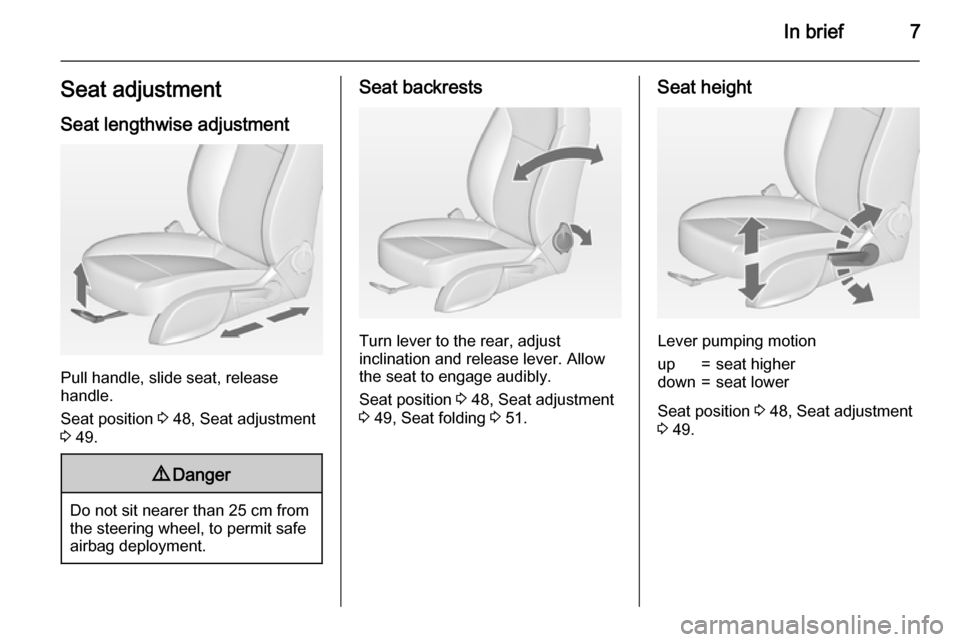
In brief7Seat adjustmentSeat lengthwise adjustment
Pull handle, slide seat, release
handle.
Seat position 3 48, Seat adjustment
3 49.
9 Danger
Do not sit nearer than 25 cm from
the steering wheel, to permit safe
airbag deployment.
Seat backrests
Turn lever to the rear, adjust
inclination and release lever. Allow
the seat to engage audibly.
Seat position 3 48, Seat adjustment
3 49, Seat folding 3 51.
Seat height
Lever pumping motion
up=seat higherdown=seat lower
Seat position 3 48, Seat adjustment
3 49.
Page 10 of 253
8In brief
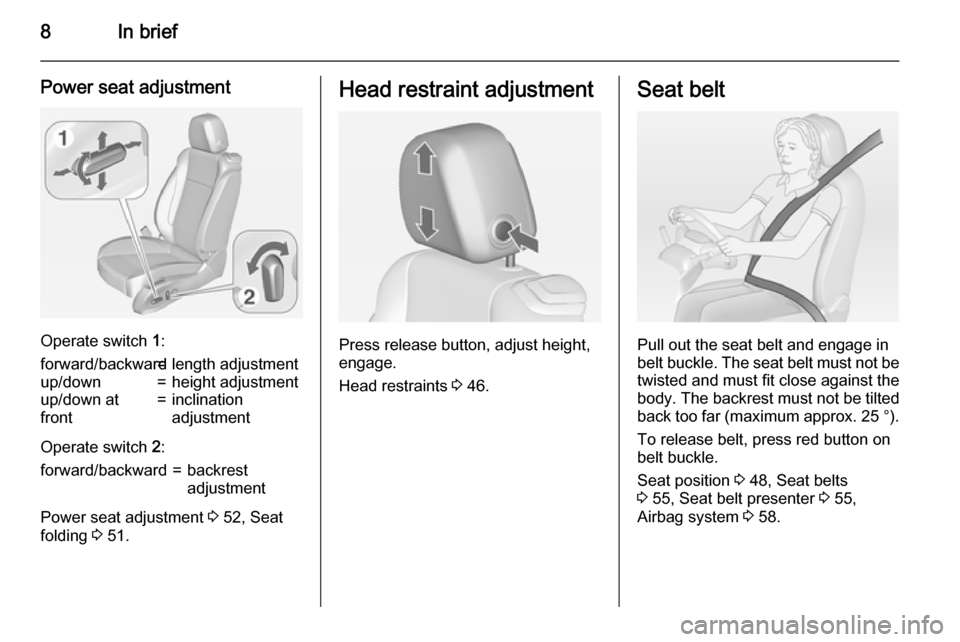
Power seat adjustment
Operate switch 1:
forward/backward=length adjustmentup/down=height adjustmentup/down at
front=inclination
adjustment
Operate switch 2:
forward/backward=backrest
adjustment
Power seat adjustment 3 52, Seat
folding 3 51.
Head restraint adjustment
Press release button, adjust height,
engage.
Head restraints 3 46.
Seat belt
Pull out the seat belt and engage in
belt buckle. The seat belt must not be twisted and must fit close against the
body. The backrest must not be tilted
back too far (maximum approx. 25 ° ).
To release belt, press red button on belt buckle.
Seat position 3 48, Seat belts
3 55, Seat belt presenter 3 55,
Airbag system 3 58.
Page 13 of 253

In brief11
1Power windows .....................32
2 Exterior mirrors .....................30
3 Cruise control .....................151
Speed limiter ....................... 153
Forward collision alert .........154
4 Side air vents ...................... 131
5 Turn and lane-change
signals, headlight flash,
low beam and high beam,
high beam assist .................117
Exit lighting ......................... 121
Parking lights ...................... 118
Buttons for Driver
Information Centre ................96
6 Instruments .......................... 85
7 Steering wheel controls .......78
8 Driver Information Centre ...... 96
9 Windscreen wiper,
windscreen washer
system, headlight washer
system ................................... 80
10 Sport mode ........................ 149
Central locking system ..........22Hazard warning flashers ....117
Control indicator for airbag
deactivation .......................... 90
Control indicator for front
passenger seat belt .............90
Tour mode .......................... 149
11 Info-Display ........................ 100
12 Anti-theft alarm system
status LED ........................... 27
13 Centre air vents .................. 131
14 Glovebox, lockable ...............70
15 Traction Control system .....147
Electronic Stability Control . 148
Parking assist systems .......157
Lane departure warning .....171
Eco button for stop-start
system ................................. 136
16 Climate control system ........ 123
17 AUX input, USB input ..........10
18 Power outlet .......................... 8419Soft top operation switch .....35
Central window switch .........32
20 Selector lever, manual
transmission ....................... 144
Automatic transmission ......141
21 Parking brake, manual or
electric operation ................145
22 Ignition switch with
steering wheel lock ............134
23 Horn ..................................... 79
Driver airbag ........................ 61
24 Bonnet release lever ..........183
25 Storage compartment ..........71
Fuse box ............................ 200
26 Steering wheel adjustment ..78
27 Light switch ........................ 110
Headlight range
adjustment ......................... 113
Front fog lights ...................118
Rear fog light ...................... 118 Instrument illumination .......119
Page 48 of 253
46Seats, restraintsSeats, restraintsHead restraints............................ 46
Front seats ................................... 48
Seat belts ..................................... 55
Airbag system .............................. 58
Child restraints ............................. 64Head restraints
Position9 Warning
Only drive with the head restraint
set to the proper position.
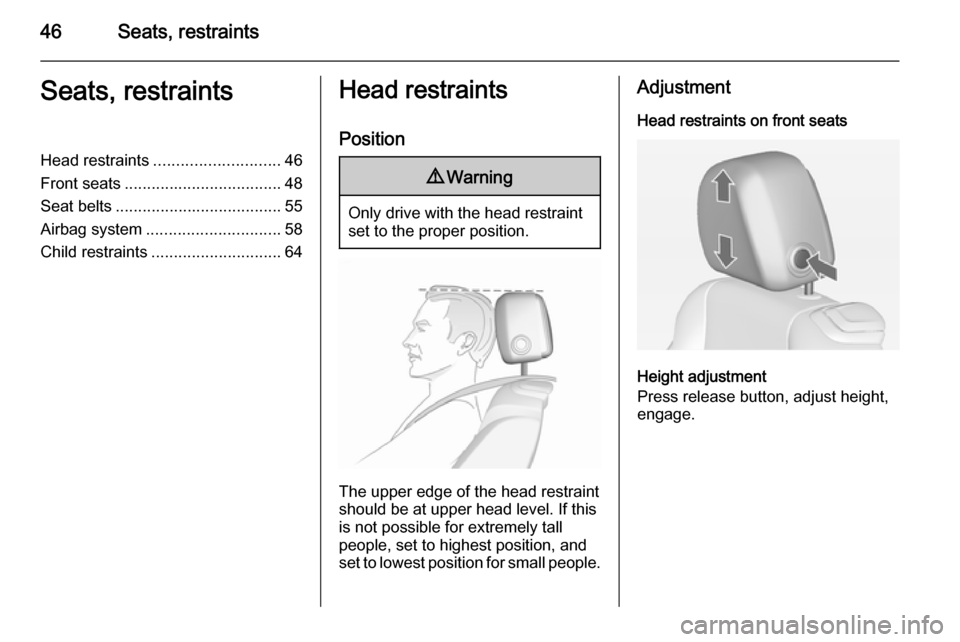
The upper edge of the head restraint
should be at upper head level. If this
is not possible for extremely tall
people, set to highest position, and
set to lowest position for small people.
Adjustment
Head restraints on front seats
Height adjustment
Press release button, adjust height,
engage.
Page 49 of 253
Seats, restraints47
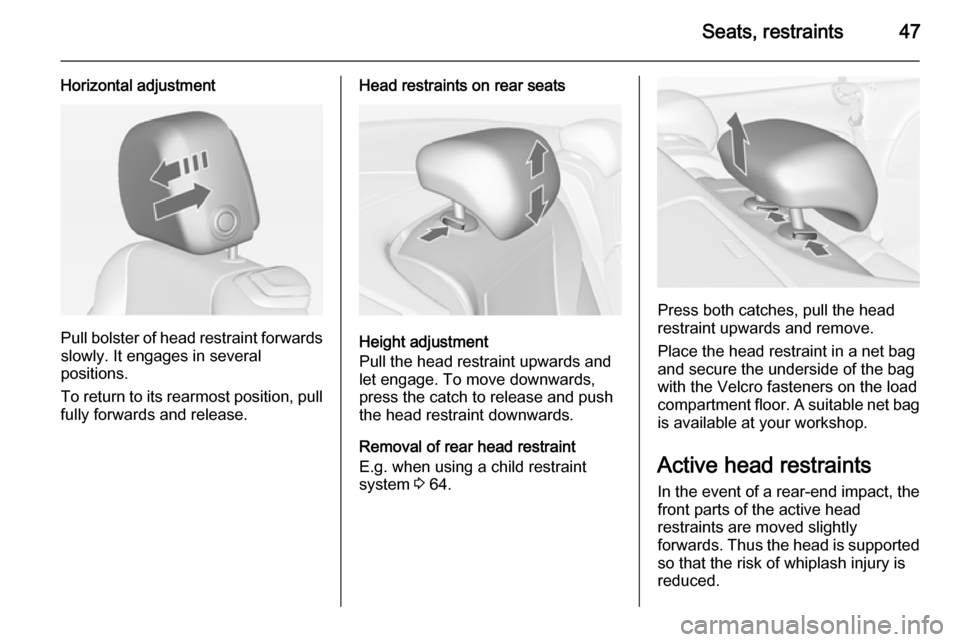
Horizontal adjustment
Pull bolster of head restraint forwardsslowly. It engages in several
positions.
To return to its rearmost position, pull
fully forwards and release.
Head restraints on rear seats
Height adjustment
Pull the head restraint upwards and
let engage. To move downwards, press the catch to release and push
the head restraint downwards.
Removal of rear head restraint
E.g. when using a child restraint
system 3 64.
Press both catches, pull the head
restraint upwards and remove.
Place the head restraint in a net bag
and secure the underside of the bag
with the Velcro fasteners on the load
compartment floor. A suitable net bag
is available at your workshop.
Active head restraints
In the event of a rear-end impact, the front parts of the active head
restraints are moved slightly
forwards. Thus the head is supported
so that the risk of whiplash injury is
reduced.
Page 51 of 253
Seats, restraints49Seat adjustment9Danger
Do not sit nearer than 25 cm from
the steering wheel, to permit safe
airbag deployment.
9 Warning
Never adjust seats while driving as
they could move uncontrollably.
Drive only with engaged seats and
backrests.
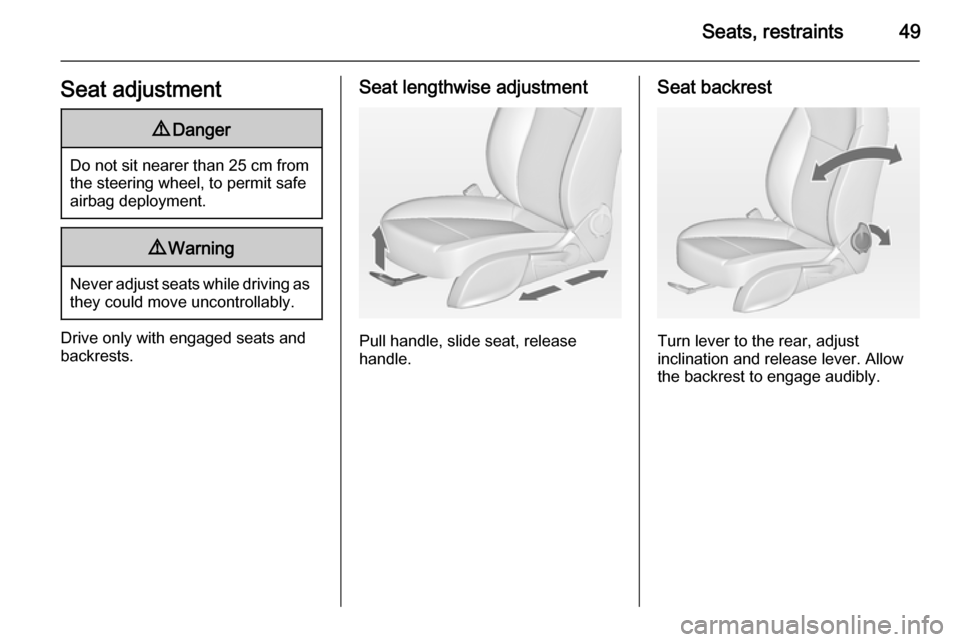
Seat lengthwise adjustment
Pull handle, slide seat, release
handle.
Seat backrest
Turn lever to the rear, adjust
inclination and release lever. Allow
the backrest to engage audibly.
Page 53 of 253
Seats, restraints51
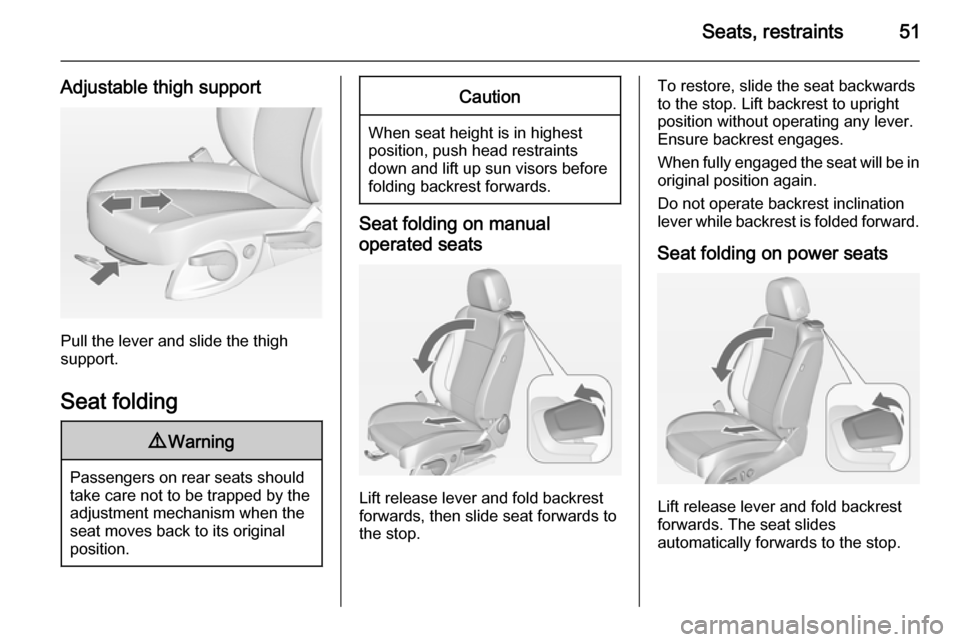
Adjustable thigh support
Pull the lever and slide the thigh
support.
Seat folding
9 Warning
Passengers on rear seats should
take care not to be trapped by the
adjustment mechanism when the
seat moves back to its original
position.
Caution
When seat height is in highest
position, push head restraints
down and lift up sun visors before
folding backrest forwards.
Seat folding on manual
operated seats
Lift release lever and fold backrest
forwards, then slide seat forwards to
the stop.
To restore, slide the seat backwards
to the stop. Lift backrest to upright
position without operating any lever.
Ensure backrest engages.
When fully engaged the seat will be in
original position again.
Do not operate backrest inclination
lever while backrest is folded forward.
Seat folding on power seats
Lift release lever and fold backrest
forwards. The seat slides
automatically forwards to the stop.
Page 54 of 253
52Seats, restraints
To restore, lift backrest to upright
position and engage. The seat slides
automatically backwards to the
original position.
In case the head restraint of the
folded backrest is blocked by the
upper windscreen frame, allow the
seat to move backwards or
downwards slightly 3 52, or set
head restraint to lowest position
3 46.
Safety function
If the power seat encounters
resistance while sliding forwards or
rearwards, it is immediately stopped
and moved in the opposite direction.
Note
Do not sit on the seat while seat is
moving.
Power disconnection
If seat remains in forward position
with opened door for more than
10 minutes, power adjustment is
disconnected. In this event, close and open the door or switch on ignition
and operate power adjustment again.Overload
If the folding function is electrically
overloaded, the power supply is
automatically cut-off for a short time.
Power seat adjustment9 Warning
Care must be taken when
operating the power seats. There
is a risk of injury, particularly for
children. Objects could become
trapped.
Keep a close watch on the seats
when adjusting them. Vehicle
passengers should be informed
accordingly.
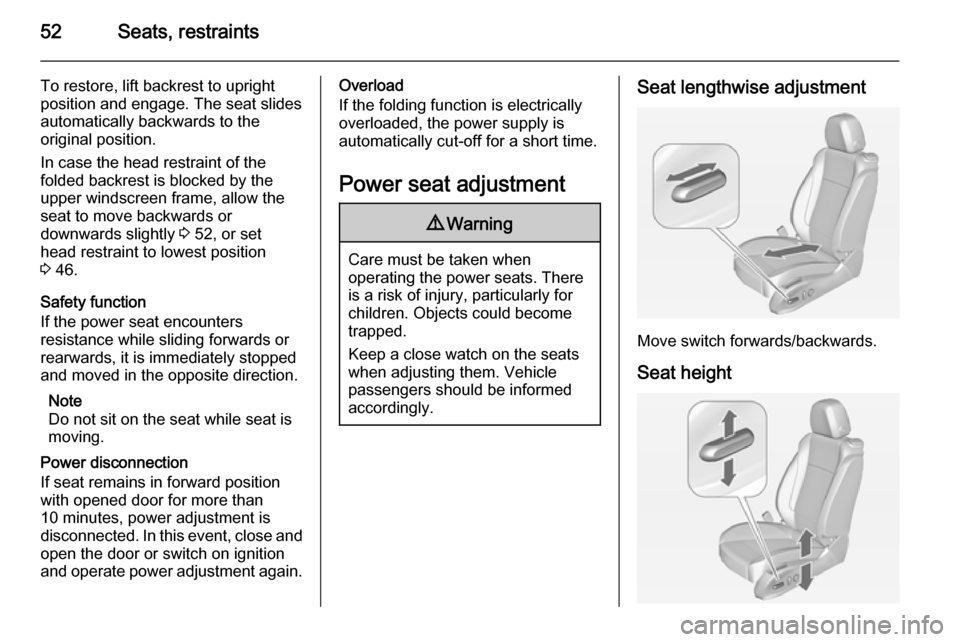
Seat lengthwise adjustment
Move switch forwards/backwards.
Seat height
Page 69 of 253

Seats, restraints67
IL=Suitable for particular ISOFIX restraint systems of the 'specific-vehicle', 'restricted' or 'semi-universal' categories. The
ISOFIX restraint system must be approved for the specific vehicle type.IUF=Suitable for ISOFIX forward-facing child restraint systems of universal category approved for use in this weight class.X=No ISOFIX child restraint system approved in this weight class.*=Move the respective front seat ahead of the child restraint system in one of the foremost adjustment positions.**=Remove respective rear head restraint when using child restraint systems in this size class. 3 46.
ISOFIX size class and seat device
A – ISO/F3=Forward-facing child restraint system for children of maximum size in the weight class 9 to 18 kg.B – ISO/F2=Forward-facing child restraint system for smaller children in the weight class 9 to 18 kg.B1 – ISO/F2X=Forward-facing child restraint system for smaller children in the weight class 9 to 18 kg.C – ISO/R3=Rear-facing child restraint system for children of maximum size in the weight class up to 18 kg.D – ISO/R2=Rear-facing child restraint system for smaller children in the weight class up to 18 kg.E – ISO/R1=Rear-facing child restraint system for young children in the weight class up to 13 kg.
Permissible options for fitting a child restraint system
This table relates to all top-tether child restraint systems.
Weight and age classOn front passenger seatOn rear seatsGroup 0: up to 10 kg
or approx. 10 monthsXUGroup 0+: up to 13 kg
or approx. 2 yearsXUGroup I: 9 to 18 kg
or approx. 8 months to 4 yearsXU 1
Page 115 of 253
Lighting113Headlight range
adjustment
Manual headlight range
adjustment
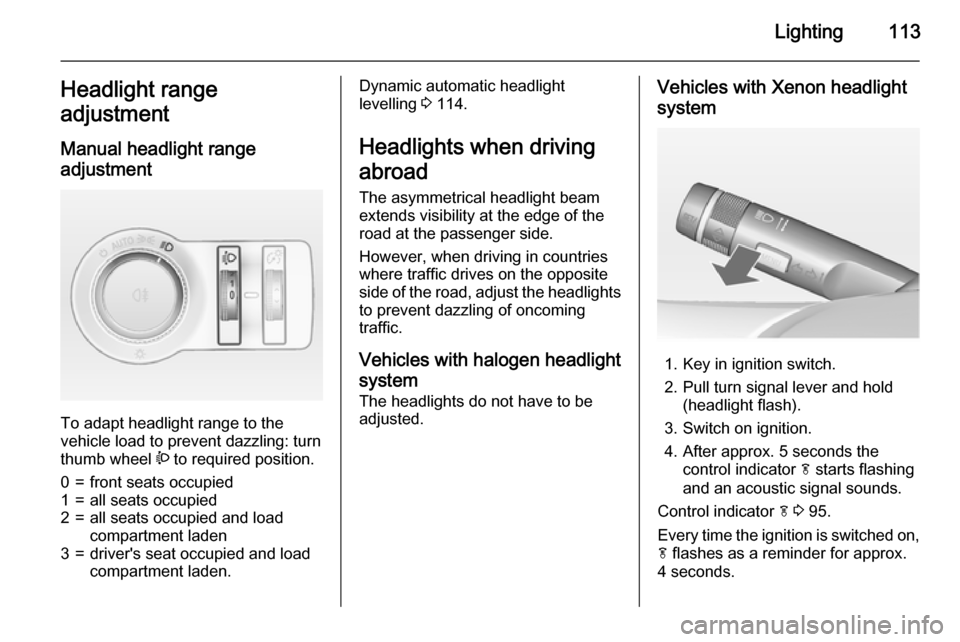
To adapt headlight range to the
vehicle load to prevent dazzling: turn
thumb wheel ? to required position.
0=front seats occupied1=all seats occupied2=all seats occupied and load
compartment laden3=driver's seat occupied and load
compartment laden.Dynamic automatic headlight
levelling 3 114.
Headlights when driving
abroad
The asymmetrical headlight beam
extends visibility at the edge of the
road at the passenger side.
However, when driving in countries
where traffic drives on the opposite
side of the road, adjust the headlights
to prevent dazzling of oncoming
traffic.
Vehicles with halogen headlight system The headlights do not have to beadjusted.Vehicles with Xenon headlight
system
1. Key in ignition switch.
2. Pull turn signal lever and hold (headlight flash).
3. Switch on ignition.
4. After approx. 5 seconds the control indicator f starts flashing
and an acoustic signal sounds.
Control indicator f 3 95.
Every time the ignition is switched on,
f flashes as a reminder for approx.
4 seconds.