warning light OPEL CASCADA 2017 Manual user
[x] Cancel search | Manufacturer: OPEL, Model Year: 2017, Model line: CASCADA, Model: OPEL CASCADA 2017Pages: 263, PDF Size: 7.76 MB
Page 123 of 263
Lighting121In the event of an accident with airbag
deployment the hazard warning
flashers are activated automatically.
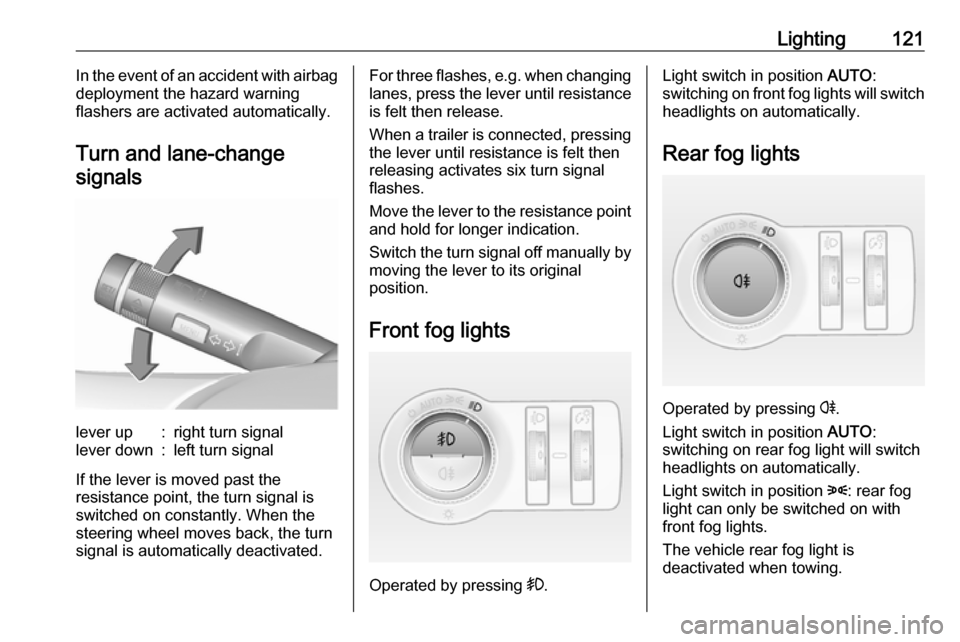
Turn and lane-changesignalslever up:right turn signallever down:left turn signal
If the lever is moved past the
resistance point, the turn signal is
switched on constantly. When the
steering wheel moves back, the turn
signal is automatically deactivated.
For three flashes, e.g. when changing lanes, press the lever until resistance
is felt then release.
When a trailer is connected, pressing the lever until resistance is felt then
releasing activates six turn signal
flashes.
Move the lever to the resistance point
and hold for longer indication.
Switch the turn signal off manually by moving the lever to its original
position.
Front fog lights
Operated by pressing >.
Light switch in position AUTO:
switching on front fog lights will switch headlights on automatically.
Rear fog lights
Operated by pressing r
.
Light switch in position AUTO:
switching on rear fog light will switch
headlights on automatically.
Light switch in position 8: rear fog
light can only be switched on with
front fog lights.
The vehicle rear fog light is
deactivated when towing.
Page 154 of 263
152Driving and operatingABS starts to regulate brake pressureas soon as a wheel shows a tendency to lock. The vehicle remains
steerable, even during hard braking.
ABS control is made apparent
through a pulse in the brake pedal
and the noise of the regulation
process.
For optimum braking, keep the brake
pedal fully depressed throughout the
braking process, despite the fact that
the pedal is pulsating. Do not reduce
the pressure on the pedal.
After starting off the system performs
a self-test which may be audible.
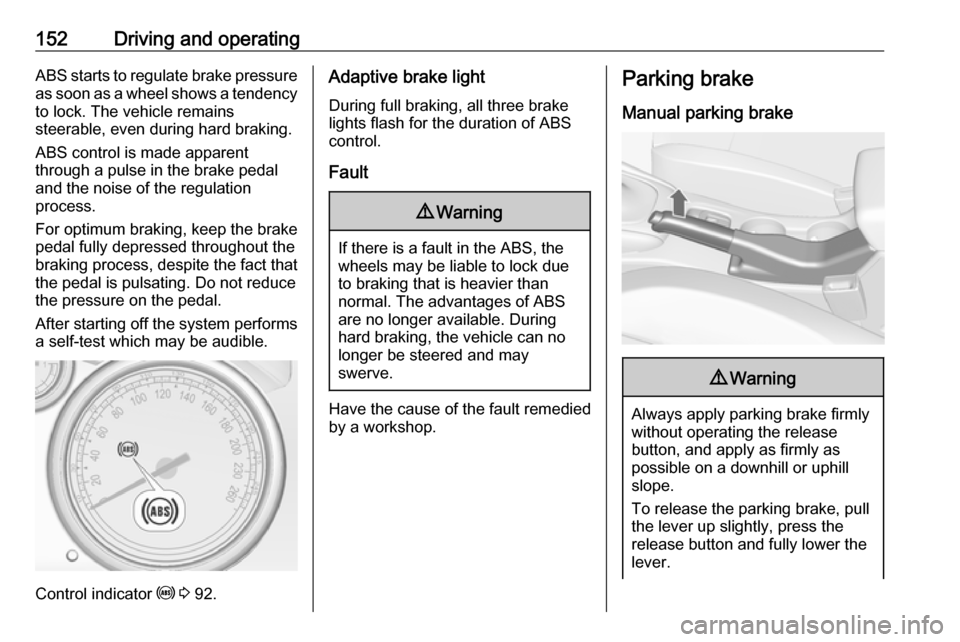
Control indicator u 3 92.
Adaptive brake light
During full braking, all three brake
lights flash for the duration of ABS
control.
Fault9 Warning
If there is a fault in the ABS, the
wheels may be liable to lock due
to braking that is heavier than
normal. The advantages of ABS are no longer available. During
hard braking, the vehicle can no longer be steered and may
swerve.
Have the cause of the fault remedied
by a workshop.
Parking brake
Manual parking brake9 Warning
Always apply parking brake firmly
without operating the release
button, and apply as firmly as
possible on a downhill or uphill
slope.
To release the parking brake, pull
the lever up slightly, press the
release button and fully lower the
lever.
Page 155 of 263
Driving and operating153To reduce the operating forces ofthe parking brake, depress the
brake pedal at the same time.
Control indicator R 3 91.
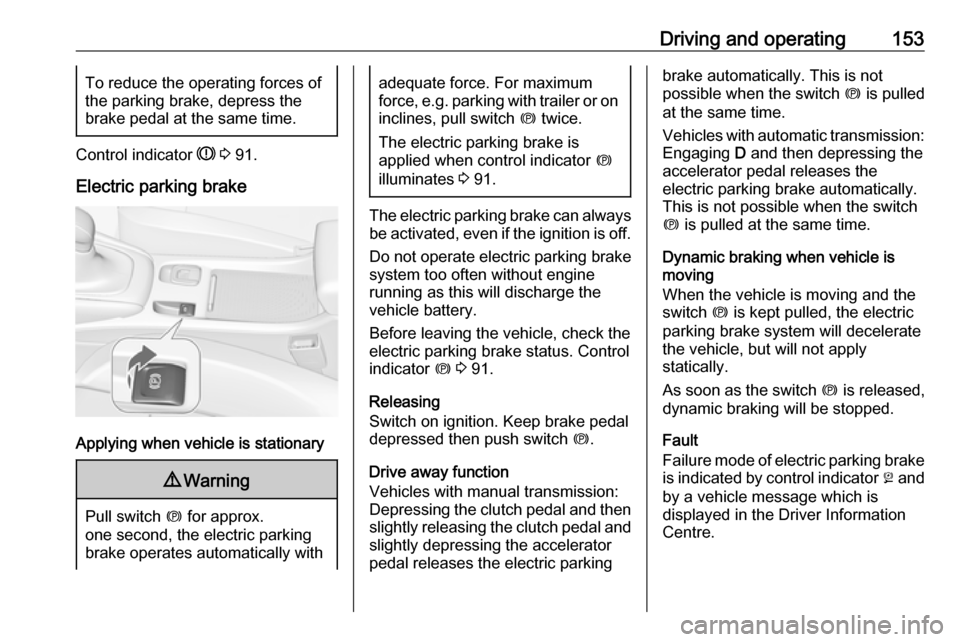
Electric parking brake
Applying when vehicle is stationary
9 Warning
Pull switch m for approx.
one second, the electric parking
brake operates automatically with
adequate force. For maximum
force, e.g. parking with trailer or on
inclines, pull switch m twice.
The electric parking brake is
applied when control indicator m
illuminates 3 91.
The electric parking brake can always
be activated, even if the ignition is off.
Do not operate electric parking brake
system too often without engine
running as this will discharge the
vehicle battery.
Before leaving the vehicle, check the electric parking brake status. Control
indicator m 3 91.
Releasing
Switch on ignition. Keep brake pedal
depressed then push switch m.
Drive away function
Vehicles with manual transmission:
Depressing the clutch pedal and then
slightly releasing the clutch pedal and
slightly depressing the accelerator
pedal releases the electric parking
brake automatically. This is not
possible when the switch m is pulled
at the same time.
Vehicles with automatic transmission: Engaging D and then depressing the
accelerator pedal releases the
electric parking brake automatically. This is not possible when the switch
m is pulled at the same time.
Dynamic braking when vehicle is
moving
When the vehicle is moving and the
switch m is kept pulled, the electric
parking brake system will decelerate
the vehicle, but will not apply
statically.
As soon as the switch m is released,
dynamic braking will be stopped.
Fault
Failure mode of electric parking brake
is indicated by control indicator j and
by a vehicle message which is
displayed in the Driver Information
Centre.
Page 174 of 263
172Driving and operating9Warning
Side blind spot alert does not
replace driver vision.
The system does not detect:
● Vehicles outside the side blind zones which may be rapidly
approaching.
● Pedestrians, cyclists or animals.
Before changing a lane, always
check all mirrors, look over the
shoulder and use the turn signal.
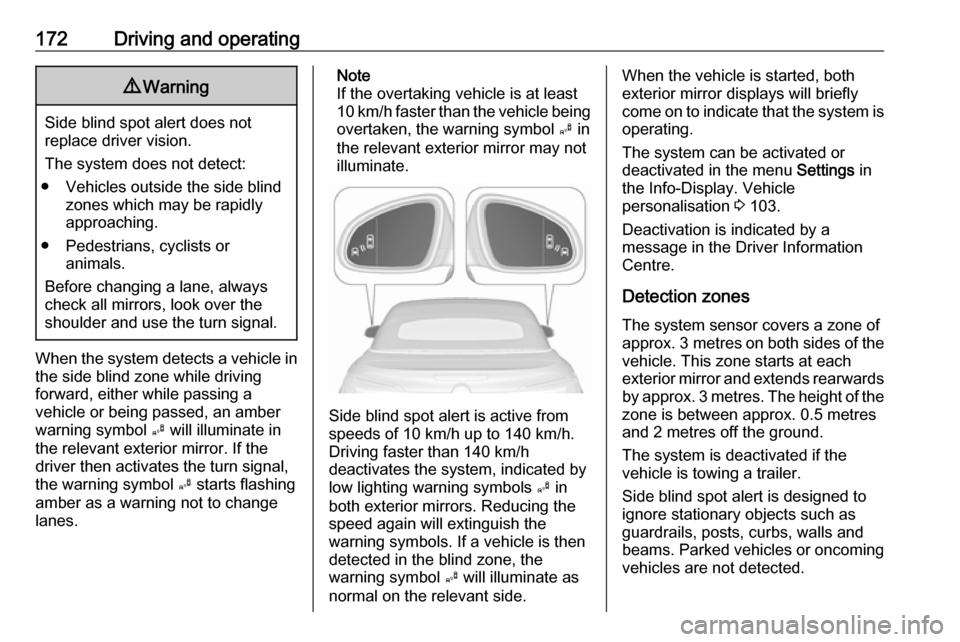
When the system detects a vehicle in the side blind zone while driving
forward, either while passing a
vehicle or being passed, an amber warning symbol B will illuminate in
the relevant exterior mirror. If the
driver then activates the turn signal,
the warning symbol B starts flashing
amber as a warning not to change
lanes.
Note
If the overtaking vehicle is at least
10 km/h faster than the vehicle being
overtaken, the warning symbol B in
the relevant exterior mirror may not
illuminate.
Side blind spot alert is active from
speeds of 10 km/h up to 140 km/h.
Driving faster than 140 km/h
deactivates the system, indicated by
low lighting warning symbols B in
both exterior mirrors. Reducing the speed again will extinguish the
warning symbols. If a vehicle is then
detected in the blind zone, the
warning symbol B will illuminate as
normal on the relevant side.
When the vehicle is started, both exterior mirror displays will briefly
come on to indicate that the system is operating.
The system can be activated or
deactivated in the menu Settings in
the Info-Display. Vehicle
personalisation 3 103.
Deactivation is indicated by a
message in the Driver Information
Centre.
Detection zones The system sensor covers a zone of
approx. 3 metres on both sides of the
vehicle. This zone starts at each
exterior mirror and extends rearwards by approx. 3 metres. The height of the zone is between approx. 0.5 metres
and 2 metres off the ground.
The system is deactivated if the
vehicle is towing a trailer.
Side blind spot alert is designed to ignore stationary objects such as
guardrails, posts, curbs, walls and
beams. Parked vehicles or oncoming
vehicles are not detected.
Page 175 of 263

Driving and operating173Fault
Occasional missed alerts can occur
under normal circumstances.
Side blind spot alert does not operate when the left or right corners of the
rear bumper are covered with mud,
dirt, snow, ice or slush. Cleaning
instructions 3 230.
In the event of a fault in the system or if the system does not work due to
temporary conditions, a message is
displayed in the Driver Information
Centre. Seek the assistance of a
workshop in case of a permanent
fault.
Rear view camera The rear view camera assists the
driver when reversing by displaying a
view of the area behind the vehicle.
The view of the camera is displayed
in the Colour-Info-Display.9 Warning
The rear view camera does not
replace driver vision. Note that
objects that are outside the
camera's field of view and the
advanced parking assist sensors,
e.g. below the bumper or
underneath the vehicle, are not
displayed.
Do not reverse the vehicle by only looking at the Info-Display and
check the surrounding area
behind and around the vehicle
before reversing.
Activation
Rear view camera is automatically
activated when reverse gear is
engaged.
Functionality
The camera is mounted between the
number plate lights and has a viewing angle of 130°.
Page 176 of 263

174Driving and operatingThe area displayed by the camera is
limited. The distance of the image that
appears on the display differs from
the actual distance.
Guiding lines
Dynamic guiding lines are horizontal
lines in 1 metre intervals projected on
the picture to define the distance to
shown objects.
Trajectory lane of the vehicle is
shown in accordance with the
steering angle.
The function can be deactivated in the
Settings menu in the Info-Display.
Vehicle personalisation 3 103.
Warning symbols
Warning symbols are indicated as
triangles 9 on the picture, which show
obstacles detected by the rear sensors of the advanced parking
assist.
Additionally 9 appears on the top line
of the Info-Display with a warning to
check the vehicle surrounding.
The top line of the display can be
cleared by pressing the multifunction
knob.
Display settingsNavi 650 /Navi 950 : Brightness can be
set by first pressing and then turning
the outer ring of the multifunction
knob.
CD 600 : Brightness can be set by first
pressing and then turning the
multifunction knob.
Deactivation The camera is deactivated when acertain forward speed is exceeded or
if reverse gear is not engaged for
approx. 10 seconds.
Activation or deactivation of the rear
view camera can be changed in the Settings menu in the Info-Display.
Vehicle personalisation 3 103.
Fault
Fault messages are displayed with a 9 on the top line of the Info-Display.
The rear view camera may not
operate properly when:
● The surrounding area is dark.● The sun or the beam of headlights is shining directly into
the camera lens.
Page 181 of 263

Driving and operating179
DeactivationThe system is deactivated by
pressing ), the LED in the button
extinguishes.
At speeds below 56 km/h the system
is inoperable.
Fault
The lane departure warning system may not operate properly when:
● the windscreen is not clean
● there are adverse environmental conditions like heavy rain, snow,
direct sunlight or shadows
The system cannot operate when no
lane marking is detected.Fuel
Fuel for petrol engines Only use unleaded fuel that complies
with European standard EN 228 or
E DIN 51626-1 or equivalent.
The engine is capable of running with
fuel that contains up to 10% ethanol
(e.g. named E10).
Use fuel with the recommended
octane rating. A lower octane rating
can reduce engine power and torque
and slightly increases fuel
consumption.Caution
Do not use fuel or fuel additives
that contain metallic compounds
such as manganese-based
additives. This may cause engine
damage.
Page 183 of 263
Driving and operating181
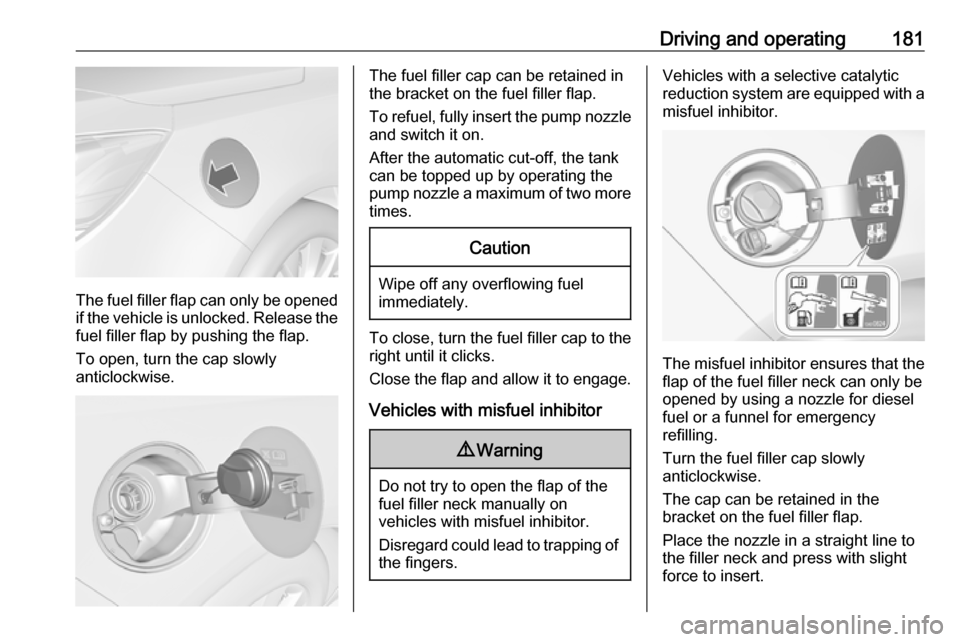
The fuel filler flap can only be opened
if the vehicle is unlocked. Release the
fuel filler flap by pushing the flap.
To open, turn the cap slowly
anticlockwise.
The fuel filler cap can be retained in
the bracket on the fuel filler flap.
To refuel, fully insert the pump nozzle
and switch it on.
After the automatic cut-off, the tank can be topped up by operating the
pump nozzle a maximum of two more
times.Caution
Wipe off any overflowing fuel
immediately.
To close, turn the fuel filler cap to the right until it clicks.
Close the flap and allow it to engage.
Vehicles with misfuel inhibitor
9 Warning
Do not try to open the flap of the
fuel filler neck manually on
vehicles with misfuel inhibitor.
Disregard could lead to trapping of
the fingers.
Vehicles with a selective catalytic
reduction system are equipped with a
misfuel inhibitor.
The misfuel inhibitor ensures that the flap of the fuel filler neck can only be
opened by using a nozzle for diesel
fuel or a funnel for emergency
refilling.
Turn the fuel filler cap slowly
anticlockwise.
The cap can be retained in the
bracket on the fuel filler flap.
Place the nozzle in a straight line to the filler neck and press with slight
force to insert.
Page 192 of 263

190Vehicle care● Check the coolant level.
● Since the durability of AdBlue is limited to two years, fluid should
be exchanged if it is too old. Seek the assistance of a workshop.
● Fit the number plate if necessary.
End-of-life vehicle recovery
Information on end-of-life vehicle
recovery centres and the recycling of
end-of-life vehicles is available on our website, where legally required. Only
entrust this work to an authorised
recycling centre.Vehicle checks
Performing work9 Warning
Only perform engine compartment
checks when the ignition is off.
The cooling fan may start
operating even if the ignition is off.
9 Danger
The ignition system and Xenon
headlights use extremely high
voltage. Do not touch.
Bonnet
Opening
Pull the release lever and return it to
its original position.
Page 215 of 263

Vehicle care213If w flashes for 60-90 seconds then
illuminates continuously, there is a fault in the system. Consult a
workshop.
After inflating, driving may be
required to update the tyre pressure
values in the Driver Information
Centre. During this time w may
illuminate.
If w illuminates at lower temperatures
and extinguishes after driving, this
could be an indicator for approaching
a low tyre pressure condition. Check
tyre pressure.
Vehicle messages 3 102.
If the tyre pressure must be reduced
or increased, switch off ignition.
Only mount wheels with pressure
sensors, otherwise the tyre pressure
will not be displayed and w
illuminates continuously.
A spare wheel or temporary spare
wheel is not equipped with pressure
sensors. The tyre pressure
monitoring system is not operational
for these tyres. Control indicator willuminates. For the further three
wheels the system remains
operational.
The use of commercially-available
liquid tyre repair kits can impair the
function of the system. Factory-
approved repair kits can be used.
Operating electronic devices or being close to facilities using similar wave
frequencies could disrupt the tyre
pressure monitoring system.
Each time the tyres are replaced, tyre pressure sensors must be
dismounted and serviced. For the
screwed sensor: replace valve core
and sealing ring. For clipped sensor:
replace complete valve stem.
Vehicle loading status Adjust tyre pressure to load condition
according to the tyre information label or tyre pressure chart 3 247, and
select the appropriate setting in the Tyre load menu in the Driver
Information Centre 3 95. This setting
is the reference for the tyre pressure
warnings.The menu Tyre Load only appears if
the vehicle is at a standstill and the
parking brake is applied. On vehicles
with automatic transmission, the
selector lever must be in P.
Select:
● Light for comfort pressure up to
3 people
● Eco for Eco pressure up to
3 people
● Max for full loading