change time OPEL CASCADA 2017 Manual user
[x] Cancel search | Manufacturer: OPEL, Model Year: 2017, Model line: CASCADA, Model: OPEL CASCADA 2017Pages: 263, PDF Size: 7.76 MB
Page 24 of 263

22Keys, doors and windowsKey with foldaway key section
Press button to extend. To fold the
key, first press the button.
Car Pass The Car Pass contains security
related vehicle data and should
therefore be kept in a safe place.
When the vehicle is taken to a
workshop, this vehicle data is needed
in order to perform certain operations.
Radio remote control
Used to operate:
● central locking system
● anti-theft locking system
● anti-theft alarm system
● soft top
● power windows
The radio remote control has a range of approx. 20 metres. It can be
restricted by external influences. The
hazard warning flashers confirm
operation.
Handle with care, protect from
moisture and high temperatures and
avoid unnecessary operation.
Fault
If the central locking system cannot
be operated with the radio remote
control, it may be due to the following:
● Range is exceeded.
● Battery voltage is too low.
● Frequent, repeated operation of the radio remote control while not
in range, which will require re-
synchronisation.
● Overload of the central locking system by operating at frequent
intervals, the power supply is
interrupted for a short time.
● Interference from higher-power radio waves from other sources.
Unlocking 3 23.
Basic settings Some settings can be changed in the
Settings menu in the Info-Display.
Vehicle personalisation 3 103.
Radio remote control battery
replacement
Replace the battery as soon as the
range reduces.
Page 26 of 263

24Keys, doors and windowsNote
A short time after unlocking with the
remote control, the doors are
relocked automatically if no door has
been opened.
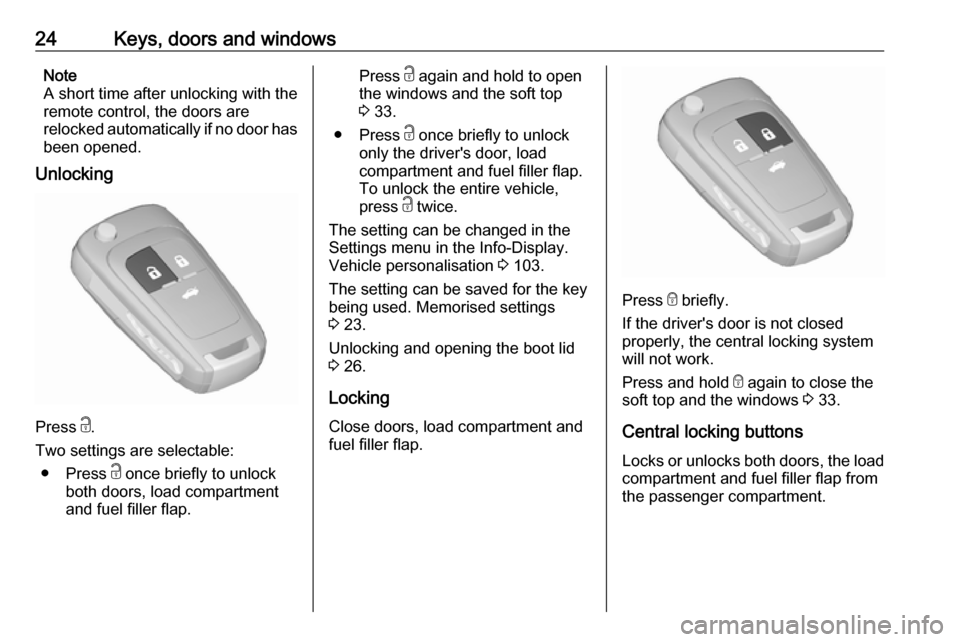
Unlocking
Press c.
Two settings are selectable: ● Press c once briefly to unlock
both doors, load compartment
and fuel filler flap.
Press c again and hold to open
the windows and the soft top 3 33.
● Press c once briefly to unlock
only the driver's door, load
compartment and fuel filler flap.
To unlock the entire vehicle,
press c twice.
The setting can be changed in the
Settings menu in the Info-Display.
Vehicle personalisation 3 103.
The setting can be saved for the key
being used. Memorised settings
3 23.
Unlocking and opening the boot lid
3 26.
Locking
Close doors, load compartment and
fuel filler flap.
Press e briefly.
If the driver's door is not closed
properly, the central locking system will not work.
Press and hold e again to close the
soft top and the windows 3 33.
Central locking buttons Locks or unlocks both doors, the load
compartment and fuel filler flap from
the passenger compartment.
Page 66 of 263

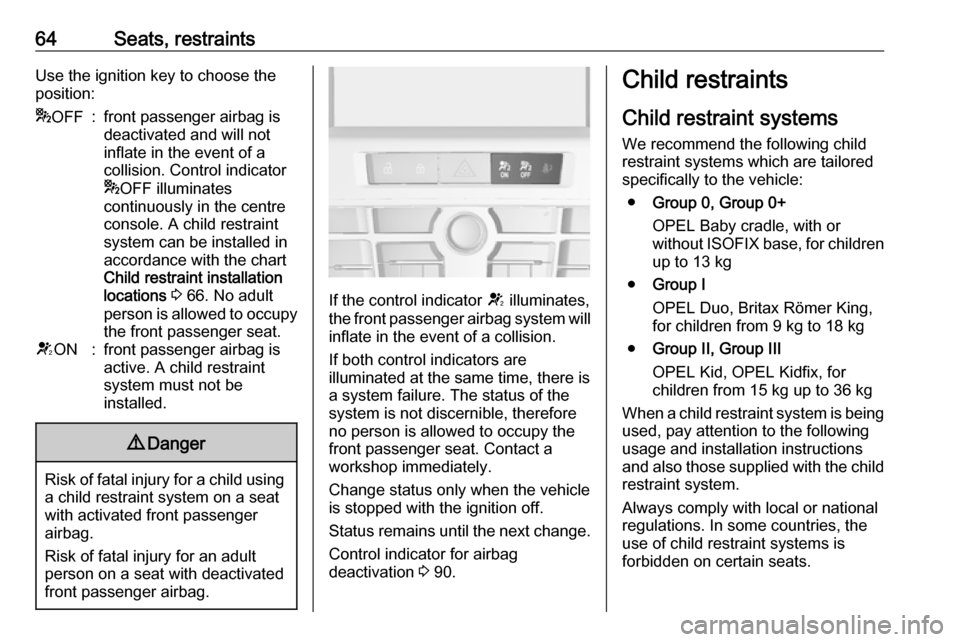
64Seats, restraintsUse the ignition key to choose the
position:* OFF:front passenger airbag is
deactivated and will not
inflate in the event of a
collision. Control indicator
* OFF illuminates
continuously in the centre
console. A child restraint
system can be installed in
accordance with the chart
Child restraint installation
locations 3 66. No adult
person is allowed to occupy the front passenger seat.V ON:front passenger airbag is
active. A child restraint
system must not be
installed.9 Danger
Risk of fatal injury for a child using
a child restraint system on a seat
with activated front passenger
airbag.
Risk of fatal injury for an adult
person on a seat with deactivated
front passenger airbag.
If the control indicator V illuminates,
the front passenger airbag system will inflate in the event of a collision.
If both control indicators are
illuminated at the same time, there is
a system failure. The status of the
system is not discernible, therefore
no person is allowed to occupy the
front passenger seat. Contact a
workshop immediately.
Change status only when the vehicle
is stopped with the ignition off.
Status remains until the next change.
Control indicator for airbag
deactivation 3 90.
Child restraints
Child restraint systems
We recommend the following child
restraint systems which are tailored
specifically to the vehicle:
● Group 0, Group 0+
OPEL Baby cradle, with or
without ISOFIX base, for children
up to 13 kg
● Group I
OPEL Duo, Britax Römer King,
for children from 9 kg to 18 kg
● Group II, Group III
OPEL Kid, OPEL Kidfix, for
children from 15 kg up to 36 kg
When a child restraint system is being
used, pay attention to the following
usage and installation instructions
and also those supplied with the child restraint system.
Always comply with local or national
regulations. In some countries, the
use of child restraint systems is
forbidden on certain seats.
Page 85 of 263

Instruments and controls83
Selectable setting options:● Set time: Changes the time
shown on the display.
● Set date: Changes the date
shown on the display.
● Set time format : Changes
indication of hours between 12 h
and 24 h.
● Set date format : Changes
indication of date between MM/
DD/YYYY and DD.MM.YYYY .
● Display clock : Switches on/off
indication of time on the display.
● RDS clock synchronization : The
RDS signal of most VHF
transmitters automatically sets
the time. RDS time
synchronisation can take a few
minutes. Some transmitters do
not send a correct time signal. In
such cases, it is recommended to
switch off automatic time
synchronisation.
Vehicle personalisation 3 103.
Time and date settings
Navi 950/Navi 650/CD 600
Press Config then select the Time
and Date menu item to display the
respective submenu.Note
If RDS Auto Time Adjust is activated,
time and date are automatically set by the system.
See Infotainment manual for further information.
Set time
To adjust the time settings, select the
Set Time menu item. Turn the
multifunction knob to adjust the first
setting.
Press the multifunction knob to
confirm the input. The coloured
background moves to the next
setting.
Adjust all settings.
Set date
To adjust the time settings, select the Set Date menu item. Turn the
multifunction knob to adjust the first
setting.
Press the multifunction knob to
confirm the input. The coloured
background moves to the next
setting.
Adjust all settings.
Page 90 of 263

88Instruments and controlsThe remaining engine oil life duration
is displayed in percent in the Driver
Information Centre.
Reset Press SET/CLR on turn signal lever
for several seconds to reset. The
remaining engine oil life duration
page must be active. Switch on
ignition, but not the engine.
The system must be reset every time
the engine oil is changed, to ensure
proper functionality. Seek the
assistance of a workshop.
Next service When the system has calculated that
engine oil life has diminished, a
warning message appears in the
Driver Information Centre. Have
engine oil and filter changed by a
workshop within one week or
500 km (whichever occurs first).
Driver Information Centre 3 95.
Service information 3 233.Control indicators
The control indicators described are
not present in all vehicles. The
description applies to all instrument
versions. Depending on the
equipment, the position of the control indicators may vary. When the
ignition is switched on, most control
indicators will illuminate briefly as a
functionality test.
The control indicator colours mean:red:danger, important reminderyellow:warning, information, faultgreen:confirmation of activationblue:confirmation of activationwhite:confirmation of activation
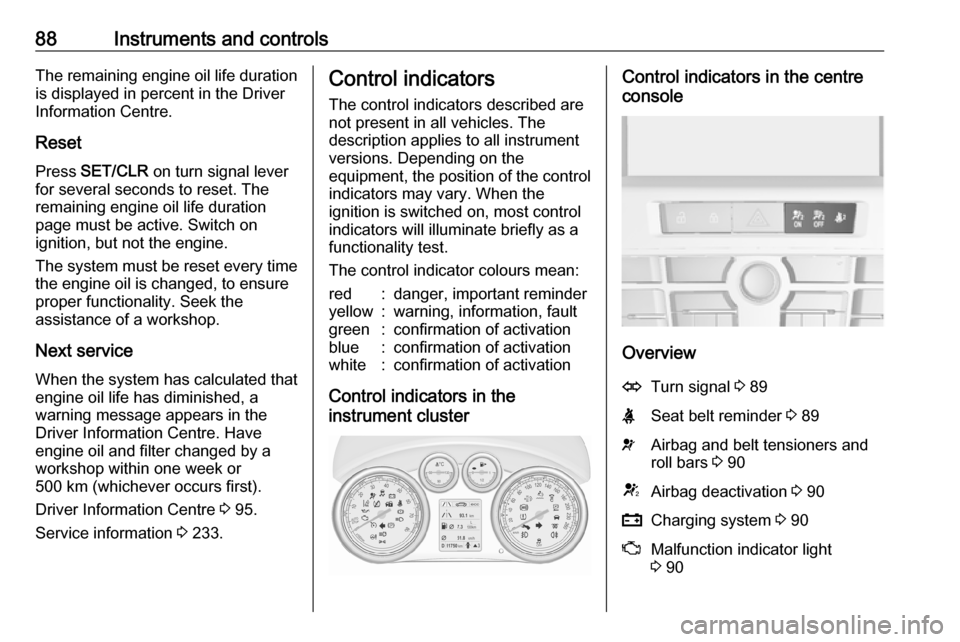
Control indicators in the
instrument cluster
Control indicators in the centre
console
Overview
OTurn signal 3 89XSeat belt reminder 3 89vAirbag and belt tensioners and
roll bars 3 90VAirbag deactivation 3 90pCharging system 3 90ZMalfunction indicator light
3 90
Page 106 of 263

104Instruments and controls
Press CONFIG . The menu Settings is
displayed.
The following settings can be
selected by turning and pressing the
multifunction knob:
● Sport mode settings
● Languages
● Time Date
● Radio settings
● Phone settings
● Vehicle settings
In the corresponding submenus the
following settings can be changed:
Sport mode settings
The driver can select the functions
which will be activated in Sport mode
3 156.
● Sport suspension : Damping
becomes harder.
● Sport powertrain performance :
Accelerator pedal and gear
change characteristics become
more responsive.
● Sport steering : Steering support
is reduced.
● Swap backlight colour main
instr. : Changes the instrument
illumination colour.Languages
Selection of the desired language.
Time Date
See 'Clock' 3 82.
Radio settings
See Infotainment manual for further
information.
Phone settings
See Infotainment manual for further information.
Page 108 of 263

106Instruments and controlsRemote door unlock: Changes
the configuration to unlock only the driver's door or the whole
vehicle whilst unlocking.
Auto relock doors : Activates or
deactivates the automatic relock
function after unlocking without
opening the vehicle.
● Restore factory settings
Restore factory settings : Resets
all settings to the default settings.
Settings in the Colour-Info-
Display
Navi 950/Navi 650/CD 600
Press CONFIG on the Infotainment
system faceplate to enter the
Configuration menu.
Turn the multifunction knob to scroll
upwards or downwards in the list.
Press the multifunction knob
(Navi 950 / Navi 650: press the outer
ring) to select a menu item.
● Sport Mode Profile
● Languages
● Time and Date
● Radio Settings
● Phone Settings
● Navigation Settings
● Display Settings
● Vehicle Settings
In the corresponding submenus the
following settings can be changed:
Sport Mode Profile
● Engine Sport Performance :
Accelerator pedal and gear change characteristics become
more responsive.
● Sport Mode Back Lighting :
Changes the instrument
illumination colour.
● Sport Suspension : Damping
becomes harder.
● Sport Steering : Steering support
is reduced.
Languages
Selection of the desired language.
Time and Date
See Infotainment manual for further information.
Radio Settings
See Infotainment manual for further information.
Phone Settings
See Infotainment manual for further information.
Page 112 of 263

110Instruments and controlsTo connect a mobile device with the
Wi-Fi hotspot:
1. Press j and then select Wi-Fi
settings on the Info-Display. The settings displayed include the Wi-
Fi hotspot name (SSID),
password and connection type.
2. Start a Wi-Fi network search on your mobile device.
3. Select your vehicle hotspot (SSID) when listed.
4. When prompted, enter the password on your mobile device.
Note
To change the SSID or password,
press Z and talk to an advisor or log
in to your account.
To switch off the Wi-Fi hotspot
functionality, press Z to call an
advisor.
Smartphone app
With the myOpel smartphone app,
some vehicle functions can be
operated remotely.The following functions are available:
● Lock or unlock vehicle.
● Honk horn or flash lights.
● Check fuel level, engine oil life and tyre pressure (only with tyre
pressure monitoring system).
● Send navigation destination to the vehicle, if equipped with a
built-in navigation system.
● Locate vehicle on a map.
● Manage Wi-Fi settings.
To operate these functions, download the app from App Store ®
or
Google Play™ Store.
Remote control
If desired, use any phone to call an
advisor, who can remotely operate
specific vehicle functions. Find the
respective OnStar phone number on
our country-specific website.
The following functions are available: ● Lock or unlock vehicle.
● Provide information on the vehicle location.
● Honk horn or flash lights.Stolen vehicle assistance
If the vehicle is stolen, report the theft
to the authorities and request OnStar
stolen vehicle assistance. Use any
phone to call an advisor. Find the
respective OnStar phone number on
our country-specific website.
OnStar can provide support in
locating and recovering the vehicle.Theft alert
When the anti-theft alarm system is
triggered, a notification is sent to
OnStar. You are then informed about
this event by text message or email.Restart prevention
By sending remote signals, OnStar can prevent the vehicle from
restarting once it has been turned off.
On-demand diagnostics
At any time e.g. if the vehicle displays a vehicle message, press Z to
contact an advisor and ask to
complete a real-time diagnostic check
to directly determine the issue.
Depending on the results, the advisor
will provide further support.
Page 113 of 263

Instruments and controls111Diagnostic report
The vehicle automatically transmits
diagnostic data to OnStar which
sends a monthly email report to you
and your preferred workshop.
Note
The workshop notification function
can be disabled in your account.
The report contains the status of key
operating systems of the vehicle like
engine, transmission, airbags, ABS,
and other major systems. It also
provides information on possible
maintenance items and tyre pressure
(only with tyre pressure monitoring
system).
To look at the information in greater
detail, select the link within the email and log in to your account.
Destination download
A desired destination can be directly
downloaded to the navigation system.
Press Z to call an advisor and
describe the destination or point of
interest.The advisor can look up any address
or point of interest and directly send
the destination to the built-in
navigation system.
OnStar settings
OnStar PIN
To have full access to all OnStar
services, a four-digit PIN is required.
The PIN has to be personalised when
first talking to an advisor.
To change the PIN, press Z to call an
advisor.
Account data
An OnStar subscriber has an account
where all the data is stored. To
request a change of the account
information, press Z and talk to an
advisor or log in to your account.
If the OnStar service is used on
another vehicle, press Z and request
that the account be transferred to the
new vehicle.Note
In any case, if the vehicle is disposed of, sold or otherwise transferred,
immediately inform OnStar about
the changes and terminate the
OnStar service on this vehicle.
Vehicle location
The vehicle location is transmitted to OnStar when service is requested ortriggered. A message on the Info-
Display informs about this
transmission.
To activate or deactivate the
transmission of the vehicle location,
press and hold j until an audio
message is heard.
The deactivation is indicated by the
status light flashing red and green for
a short period of time and each time
the vehicle is started.
Note
If the transmission of the vehicle
location is deactivated, some
services are no longer available.
Page 115 of 263

Lighting113LightingExterior lighting.......................... 113
Light switch .............................. 113
Automatic light control .............114
High beam ............................... 115
High beam assist .....................115
Headlight flash ......................... 116
Headlight range adjustment ....116
Headlights when driving abroad .................................... 116
Daytime running lights .............117
Adaptive forward lighting .........117
Hazard warning flashers ..........120
Turn and lane-change signals . 121
Front fog lights ......................... 121
Rear fog lights ......................... 121
Parking lights ........................... 122
Reversing lights .......................122
Misted light covers ...................122
Interior lighting ........................... 122
Instrument panel illumination control ..................................... 122
Interior lights ............................ 123
Reading lights .......................... 123
Sunvisor lights ......................... 123Lighting features ........................124
Entry lighting ............................ 124
Exit lighting .............................. 124
Battery discharge protection ....125Exterior lighting
Light switch
Turn light switch:
7:lights off8:sidelights9:headlights
Control indicator 8 3 94.