headlight OPEL COMBO 2017 Owner's Manual
[x] Cancel search | Manufacturer: OPEL, Model Year: 2017, Model line: COMBO, Model: OPEL COMBO 2017Pages: 195, PDF Size: 4.71 MB
Page 13 of 195

In brief111Fixed air vents ..................... 109
2 Side air vents ...................... 109
3 Light switch .......................... 98
High beam, low beam ...........98
Headlight flash ......................98
Daytime running lights ..........99
Turn and lane-change
signals ................................. 100
4 Instruments ........................... 75
Driver Information Centre ...... 89
5 Windscreen wiper/washer .....70
Rear window wiper/washer ..70
Headlamp washer .................71
Trip odometer reset ............... 75
6 Centre air vents .................. 109
7 Document holder, pocket
for Personal Navigation
Device .................................. 59
8 Headlight range
adjustment ........................... 99
Driver Information Centre
controls ................................ 89Trip computer........................ 95
Instrument illumination ........101
Hazard warning flashers .......99
Front fog lights ...................100
Rear fog light ...................... 100 Heated rear window ..............34
Heated exterior mirrors .........31
Clock ..................................... 71
Airbag deactivation ...............52
9 Front passenger airbag ........51
10 Glovebox .............................. 60
11 Heating and ventilation
system ................................. 105
Air conditioning system .......106
Electronic climate control
system ................................. 107
12 Selector lever, manual
transmission ....................... 118
Manual transmission automated ........................... 119
13 Ignition switch with
steering wheel lock ............11214Steering wheel controls .......69
15 Horn ..................................... 69
Driver airbag ........................ 51
16 Steering wheel adjustment ..69
17 Cruise control .....................127
18 Fuse box ............................. 153
19 Bonnet release lever ..........139
Page 15 of 195
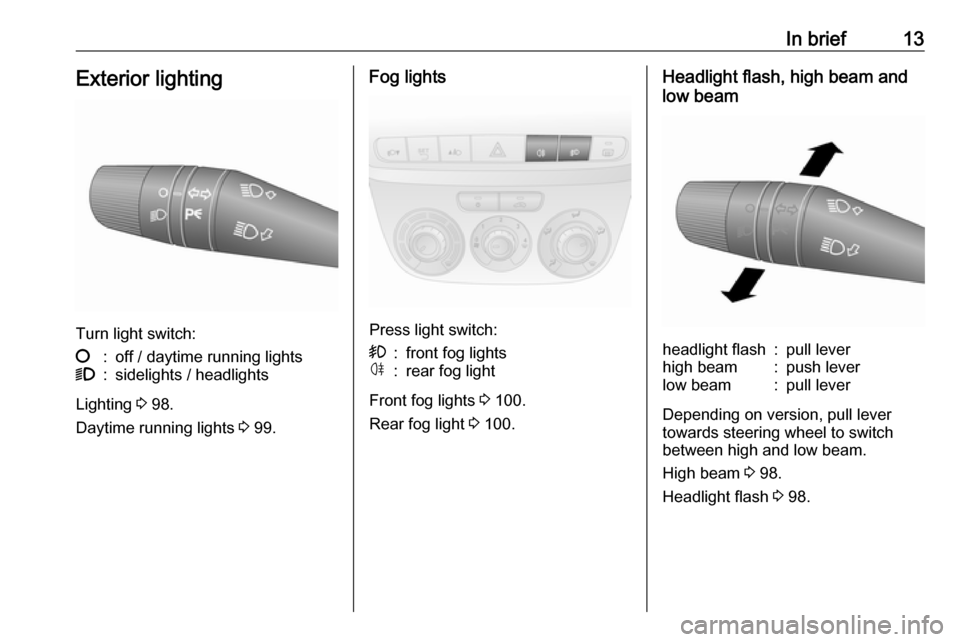
In brief13Exterior lighting
Turn light switch:
§:off / daytime running lights9:sidelights / headlights
Lighting 3 98.
Daytime running lights 3 99.
Fog lights
Press light switch:
>:front fog lightsø:rear fog light
Front fog lights 3 100.
Rear fog light 3 100.
Headlight flash, high beam and
low beamheadlight flash:pull leverhigh beam:push leverlow beam:pull lever
Depending on version, pull lever
towards steering wheel to switch
between high and low beam.
High beam 3 98.
Headlight flash 3 98.
Page 17 of 195
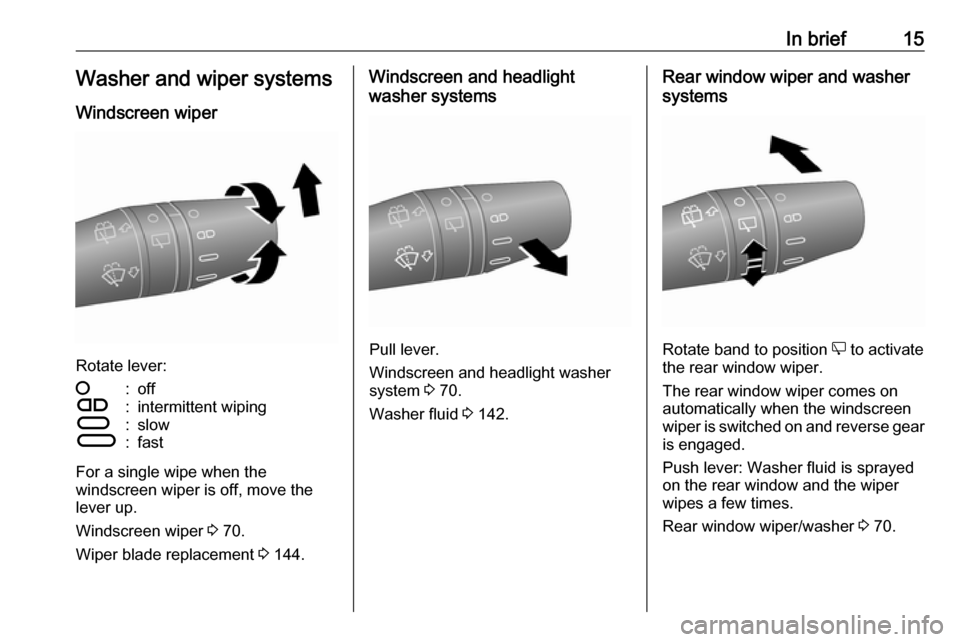
In brief15Washer and wiper systems
Windscreen wiper
Rotate lever:
§:offÇ:intermittent wipingÈ:slowÉ:fast
For a single wipe when the
windscreen wiper is off, move the
lever up.
Windscreen wiper 3 70.
Wiper blade replacement 3 144.
Windscreen and headlight
washer systems
Pull lever.
Windscreen and headlight washer
system 3 70.
Washer fluid 3 142.
Rear window wiper and washer
systems
Rotate band to position e to activate
the rear window wiper.
The rear window wiper comes on
automatically when the windscreen
wiper is switched on and reverse gear
is engaged.
Push lever: Washer fluid is sprayed
on the rear window and the wiper
wipes a few times.
Rear window wiper/washer 3 70.
Page 73 of 195
Instruments and controls71Headlamp washer
With low beam on, washer fluid is sprayed onto the headlights when the
windscreen washer is activated
(depending on version).
Note
Washer fluid is not sprayed onto the
headlights if fluid level is too low.
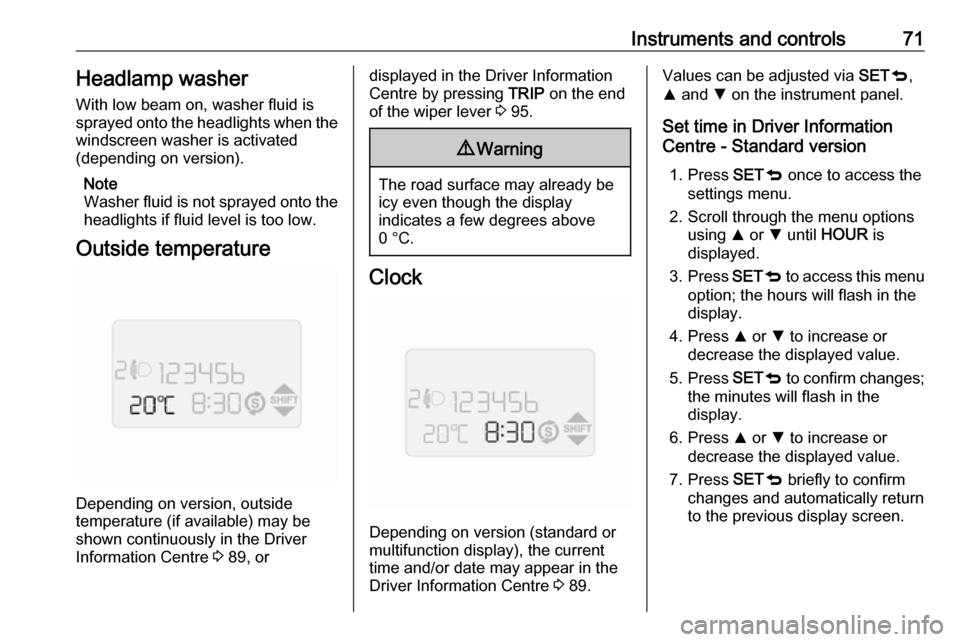
Outside temperature
Depending on version, outside
temperature (if available) may be shown continuously in the DriverInformation Centre 3 89, or
displayed in the Driver Information
Centre by pressing TRIP on the end
of the wiper lever 3 95.9 Warning
The road surface may already be
icy even though the display
indicates a few degrees above
0 °C.
Clock
Depending on version (standard or
multifunction display), the current
time and/or date may appear in the
Driver Information Centre 3 89.
Values can be adjusted via SETq,
R and S on the instrument panel.
Set time in Driver Information
Centre - Standard version
1. Press SETq once to access the
settings menu.
2. Scroll through the menu options using R or S until HOUR is
displayed.
3. Press SETq to access this menu
option; the hours will flash in the display.
4. Press R or S to increase or
decrease the displayed value.
5. Press SETq to confirm changes;
the minutes will flash in the
display.
6. Press R or S to increase or
decrease the displayed value.
7. Press SETq briefly to confirm
changes and automatically return
to the previous display screen.
Page 90 of 195

88Instruments and controlsFlashes
Fault in fuel system. Have the cause
of the fault remedied by a workshop.
The needle in the fuel gauge will point to 0. Fuel gauge 3 76.
Drain fuel filter U illuminates yellow.
Illuminates for a few seconds after the ignition is switched on.
Illuminates when the engine is
running
Indicates the presence of water in the
diesel.
Depending on version, a
corresponding warning message,
e.g. Check diesel fuel filter , may also
be displayed in the Driver Information
Centre 3 89. Seek the assistance of
a workshop immediately.
Immobiliser
d illuminates yellow.If d illuminates when starting, there
is a fault in the immobiliser system.
The engine cannot be started.
Depending on version, a warning
message may also be displayed in
the Driver Information Centre 3 89.
Seek the assistance of a workshop. Immobiliser 3 29.
Stop-start system
Æ illuminates yellow.
A fault is present in the system. Have
the cause of the fault remedied by a
workshop.
Control indicator 9 will illuminate as
an alternative if control indicator Æ is
not present.
Depending on version, a
corresponding warning message,
e.g. Start&Stop unavailable , may also
be displayed in the Driver Information
Centre 3 89.
Generic warning 9 3 80.
Stop-start system 3 114.Exterior light
8 illuminates green.
The exterior lights are on 3 98.
Control indicator 8 also illuminates
when the exit lighting feature has
been switched on 3 104.
Exterior light failure
µ illuminates yellow.
Failure of one or more of the exterior
lights or associated fuse.
Control indicator 9 will illuminate as
an alternative if µ is not present.
Depending on version, a warning
message may also be displayed in
the Driver Information Centre 3 89.
Generic warning 9 3 80.
Bulb replacement 3 145.
High beam
C illuminates blue.
Illuminated when high beam is on and during headlight flash 3 98.
Page 92 of 195
90Instruments and controls
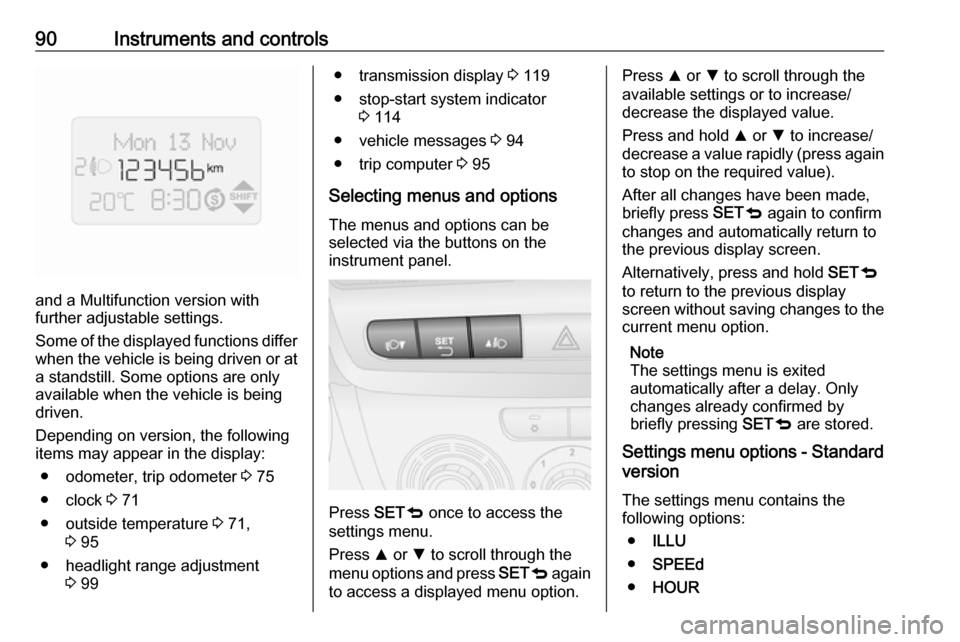
and a Multifunction version with
further adjustable settings.
Some of the displayed functions differ
when the vehicle is being driven or at a standstill. Some options are onlyavailable when the vehicle is being
driven.
Depending on version, the following
items may appear in the display:
● odometer, trip odometer 3 75
● clock 3 71
● outside temperature 3 71,
3 95
● headlight range adjustment 3 99
● transmission display 3 119
● stop-start system indicator 3 114
● vehicle messages 3 94
● trip computer 3 95
Selecting menus and options
The menus and options can be
selected via the buttons on the
instrument panel.
Press SET
q once to access the
settings menu.
Press R or S to scroll through the
menu options and press SETq again
to access a displayed menu option.
Press R or S to scroll through the
available settings or to increase/ decrease the displayed value.
Press and hold R or S to increase/
decrease a value rapidly (press again
to stop on the required value).
After all changes have been made,
briefly press SETq again to confirm
changes and automatically return to
the previous display screen.
Alternatively, press and hold SETq
to return to the previous display
screen without saving changes to the current menu option.
Note
The settings menu is exited
automatically after a delay. Only
changes already confirmed by
briefly pressing SETq are stored.
Settings menu options - Standard
version
The settings menu contains thefollowing options:
● ILLU
● SPEEd
● HOUR
Page 100 of 195
98LightingLightingExterior lighting............................ 98
Light switch ................................ 98
High beam ................................. 98
Headlight flash ........................... 98
Headlight range adjustment ......99
Headlights when driving abroad ...................................... 99
Daytime running lights ...............99
Hazard warning flashers ............99
Turn and lane-change signals . 100
Front fog lights ......................... 100
Rear fog lights ......................... 100
Reversing lights .......................100
Misted light covers ...................101
Interior lighting ........................... 101
Instrument panel illumination control ..................................... 101
Interior lights ............................ 102
Load compartment lighting ......103
Lighting features ........................104
Exit lighting .............................. 104
Battery discharge protection ....104Exterior lighting
Light switch
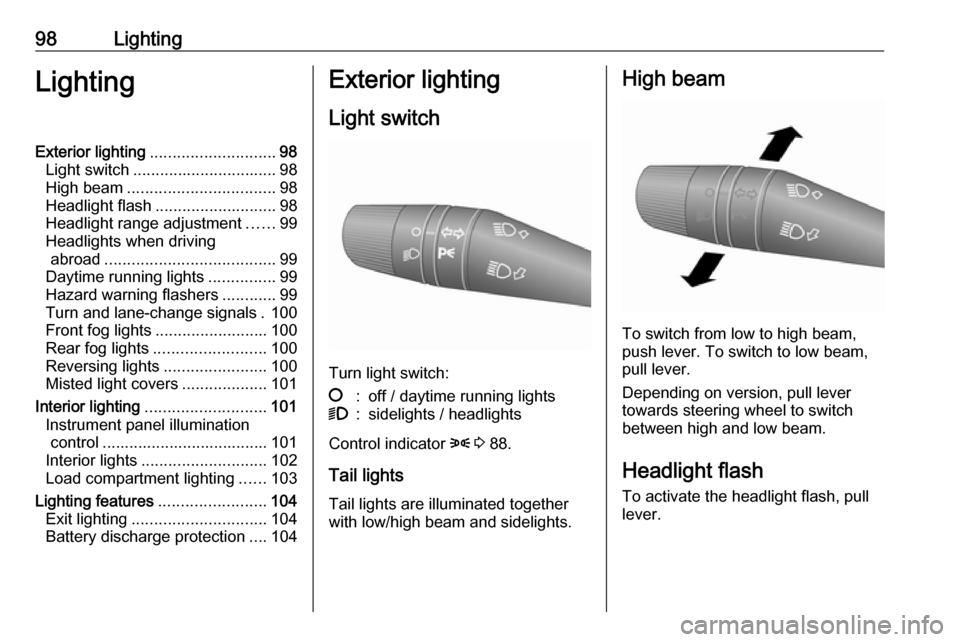
Turn light switch:
§:off / daytime running lights9:sidelights / headlights
Control indicator 8 3 88.
Tail lights Tail lights are illuminated together
with low/high beam and sidelights.
High beam
To switch from low to high beam,
push lever. To switch to low beam,
pull lever.
Depending on version, pull lever
towards steering wheel to switch
between high and low beam.
Headlight flash To activate the headlight flash, pull
lever.
Page 101 of 195

Lighting99Headlight range adjustment
Manual headlight range
adjustment
To adapt headlight range to the
vehicle load to prevent dazzling of
other road users: Press À or Á until
the required setting is displayed in the
Driver Information Centre 3 89.
0:front seats occupied1:all seats occupied2:all seats occupied and load
compartment laden3:driver's seat occupied and load
compartment ladenHeadlights when driving
abroad
The asymmetrical headlight beam
extends visibility at the edge of the
road at the passenger side.
However, when driving in countries
where traffic drives on the opposite
side of the road, adjust the headlights to prevent dazzling of oncoming
traffic.
Have the headlights adjusted by a
workshop.
Daytime running lights Daytime running lights increase
visibility of the vehicle during daylight.
When the function is activated and the ignition is switched on, the
headlights come on automatically and instrument illumination is subdued.
The light switch must be in position
§ . The daytime running lights switch
off when the ignition is switched off.Note
The driver remains responsible for
switching on the low beam when
required, e.g. when driving through
a tunnel or at night.
The daytime running lights function is activated/deactivated via a menu in
the Driver Information Centre 3 89.
When the function is deactivated, the
headlights do not come on
automatically when the ignition is
switched on and the light switch is in
position §.
Hazard warning flashers
Operated by pressing ¨.
Page 102 of 195

100LightingDepending on version, hazard
warning flashers may come on
automatically during hard braking.
Turn and lane-change signalsLever up:right turn signalLever down:left turn signal
If the lever is moved past the
resistance point, the turn signal is
switched on constantly. When the
steering wheel moves back, the turn
signal is automatically deactivated.
For five flashes, e.g. when changing lanes, press the lever until resistance is felt and then release.
Move the lever to the resistance point
and hold for longer indication.
Switch the turn signal off manually by
moving the lever to its original
position.
Front fog lights
Operated by pressing >
.
Switching on front fog lights will
switch sidelights on automatically.
Press > again to turn the front fog
lights off.
Rear fog lights
Operated by pressing ø.
The rear fog light can only be
switched on when both the ignition
and headlights or sidelights (with front
fog lights) are on.
Press ø again to turn the rear fog
light off, or turn off the headlights
and/or the front fog lights.
Reversing lights The reversing lights come on when
the ignition is on and reverse gear is
selected.
Page 103 of 195
Lighting101Misted light covers
The inside of the light housing may
mist up briefly in poor, wet and cold
weather conditions, in heavy rain or after washing. The mist disappears
quickly by itself; to help, switch on the headlights.Interior lighting
Instrument panel
illumination control
When driving at night with the
headlights on, adjust the brightness
of the vehicle's interior lighting
(including instrument panel, climate
control display etc.) via the settings
menu of the Driver Information Centre
3 89.
To adjust brightness:
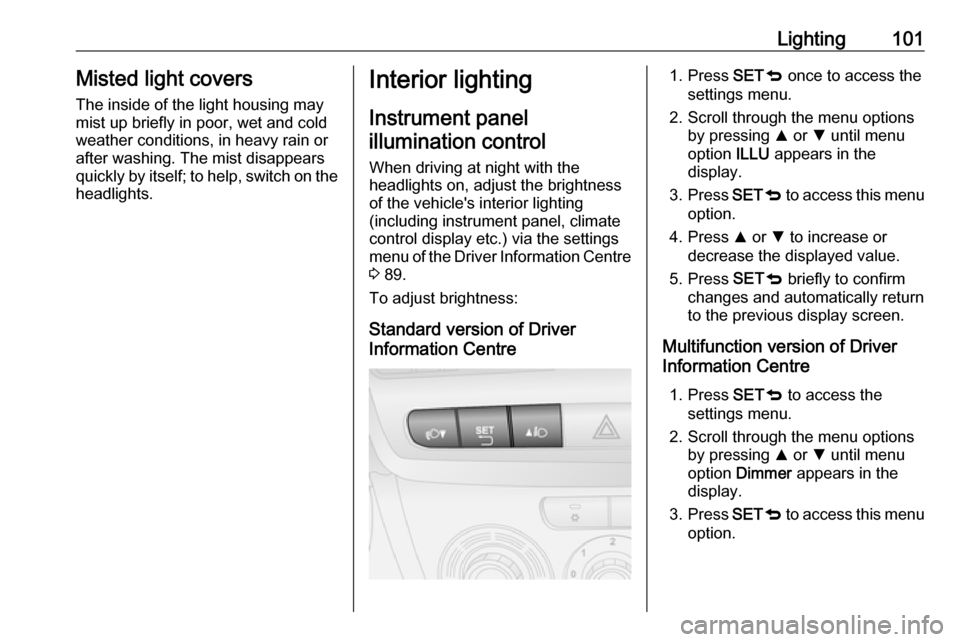
Standard version of Driver
Information Centre1. Press SETq once to access the
settings menu.
2. Scroll through the menu options by pressing R or S until menu
option ILLU appears in the
display.
3. Press SETq to access this menu
option.
4. Press R or S to increase or
decrease the displayed value.
5. Press SETq briefly to confirm
changes and automatically return
to the previous display screen.
Multifunction version of Driver
Information Centre
1. Press SETq to access the
settings menu.
2. Scroll through the menu options by pressing R or S until menu
option Dimmer appears in the
display.
3. Press SETq to access this menu
option.