warning OPEL COMBO D 2017.5 Manual user
[x] Cancel search | Manufacturer: OPEL, Model Year: 2017.5, Model line: COMBO D, Model: OPEL COMBO D 2017.5Pages: 201, PDF Size: 4.76 MB
Page 51 of 201

Seats, restraints499Warning
If handled improperly the airbag
systems can be triggered in an
explosive manner.
Note
The airbag systems and belt
pretensioner control electronics are
located in the centre console area.
Do not put any magnetic objects in
this area.
Do not affix any objects onto the
airbag covers and do not cover them with other materials. Have damaged
covers replaced by a workshop.
Each airbag is triggered only once.
Have deployed airbags replaced by
a workshop. Furthermore, it may be
necessary to have the steering
wheel, the instrument panel, parts of the panelling, the door seals,
handles and the seats replaced.
Do not make any modifications to
the airbag system as this will
invalidate the vehicle type approval.
9 Warning
When the airbags inflate, escaping
hot gases may cause burns.
Control indicator v for airbag systems
3 82.
Fault
If there is a fault in the airbag and belt tensioner system, the control
indicator v illuminates in the
instrument cluster. The system is not
operational.
Depending on version, a
corresponding warning message,
e.g. Airbag failure , may also be
displayed in the Driver Information
Centre 3 90.
Have the cause of the fault remedied
by a workshop.
Control indicator v 3 82.
Child restraint systems on front
passenger seat with airbag
systems
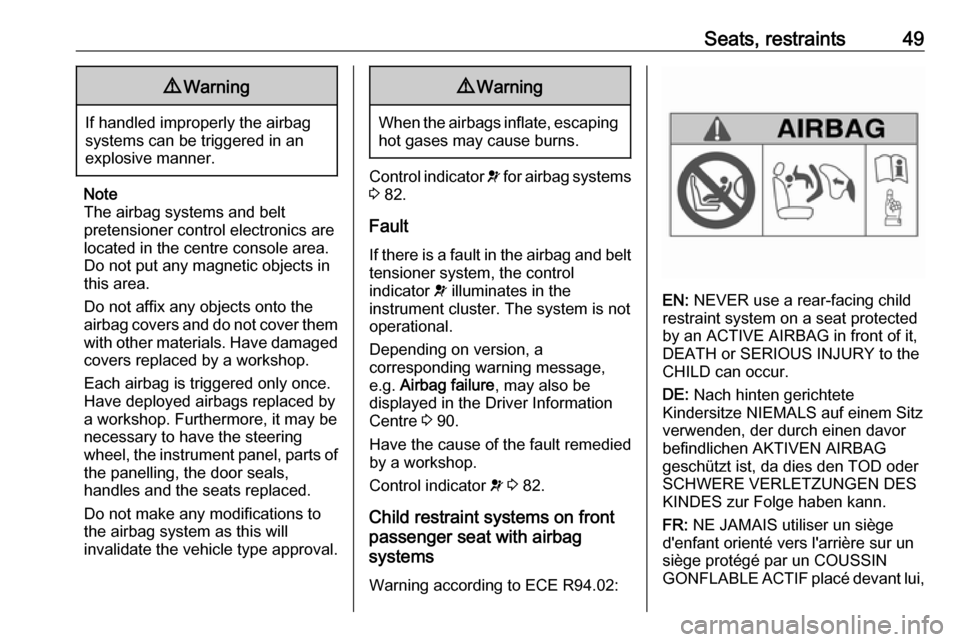
Warning according to ECE R94.02:
EN: NEVER use a rear-facing child
restraint system on a seat protected
by an ACTIVE AIRBAG in front of it,
DEATH or SERIOUS INJURY to the
CHILD can occur.
DE: Nach hinten gerichtete
Kindersitze NIEMALS auf einem Sitz
verwenden, der durch einen davor
befindlichen AKTIVEN AIRBAG
geschützt ist, da dies den TOD oder
SCHWERE VERLETZUNGEN DES
KINDES zur Folge haben kann.
FR: NE JAMAIS utiliser un siège
d'enfant orienté vers l'arrière sur un
siège protégé par un COUSSIN
GONFLABLE ACTIF placé devant lui,
Page 54 of 201

52Seats, restraintsMT: QATT tuża trażżin għat-tfal li
jħares lejn in-naħa ta’ wara fuq sit
protett b’AIRBAG ATTIV quddiemu;
dan jista’ jikkawża l-MEWT jew
ĠRIEĦI SERJI lit-TFAL.
Beyond the warning required by ECE R94.02, for safety reasons never use
a forward-facing child restraint
system on the front passenger seat
with active front airbag.
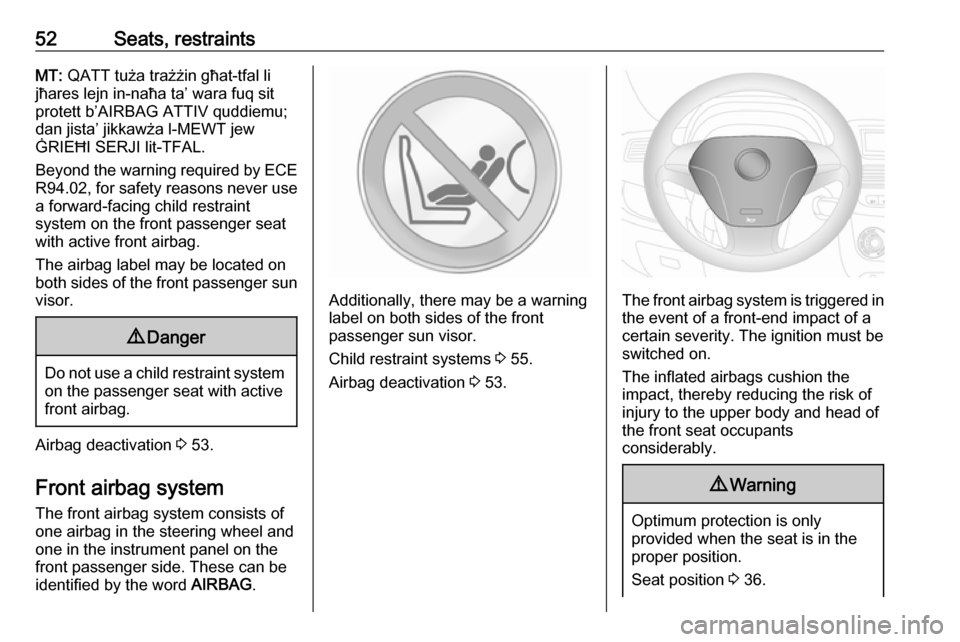
The airbag label may be located on
both sides of the front passenger sun
visor.9 Danger
Do not use a child restraint system
on the passenger seat with active
front airbag.
Airbag deactivation 3 53.
Front airbag system
The front airbag system consists of
one airbag in the steering wheel and
one in the instrument panel on the
front passenger side. These can be
identified by the word AIRBAG.
Additionally, there may be a warning
label on both sides of the front
passenger sun visor.
Child restraint systems 3 55.
Airbag deactivation 3 53.The front airbag system is triggered in
the event of a front-end impact of a
certain severity. The ignition must be
switched on.
The inflated airbags cushion the
impact, thereby reducing the risk of
injury to the upper body and head of
the front seat occupants
considerably.
9 Warning
Optimum protection is only
provided when the seat is in the
proper position.
Seat position 3 36.
Page 55 of 201

Seats, restraints53Keep the area in which the airbag
inflates clear of obstructions.
Fasten the seat belt correctly and
engage securely. Only then is the
airbag able to protect.
Side airbag system
The side airbag system consists of an
airbag in each front seat backrest.
This can be identified by the word
AIRBAG .
The side airbag system is triggered in the event of a side impact of a certain
severity. The ignition must be
switched on.
The inflated airbags cushion the
impact, thereby reducing the risk of
injury to the upper body and pelvis in
the event of a side-on collision
considerably.9 Warning
Keep the area in which the airbag
inflates clear of obstructions.
Note
Only use protective seat covers that have been approved for the vehicle.Be careful not to cover the airbags.
Airbag deactivation
The front passenger airbag system
must be deactivated if a child restraint
system is to be fitted on the front
passenger seat in accordance with
the instructions in the Child restraint
installation locations tables 3 57.
The side airbag systems, the belt
pretensioners and all driver airbag
systems will remain active.
Depending on vehicle, there is a
warning on the airbag label located on the front passenger sun visor. Refer
to "Airbag system" for further
information 3 48.
The front passenger airbag system
can be deactivated via the settings menu in the Driver Information Centre 3 90.
Deactivate the front passenger airbag
system as follows:
1. Press SETq once to access the
settings menu.
2. Scroll through the menu options using R or S until Pass bag (in
Standard version)
Page 62 of 201

60StorageStorageStorage compartments................60
Instrument panel storage ...........60
Glovebox ................................... 61
Cupholders ................................ 61
Front storage ............................. 61
Overhead console .....................61
Underseat storage .....................62
Load compartment .......................62
Rear storage .............................. 62
Load compartment cover ...........63
Lashing eyes ............................. 65
Load compartment grille ............66
Roof rack system .........................67
Roof rack ................................... 67
Loading information .....................67Storage compartments9Warning
Do not store heavy or sharp
objects in the storage
compartments. Otherwise vehicle
occupants could be injured by
objects being thrown around in the
event of hard braking, a sudden
change in direction or an accident.
Instrument panel storage
Storage compartments are located on both sides of the instrument panel.
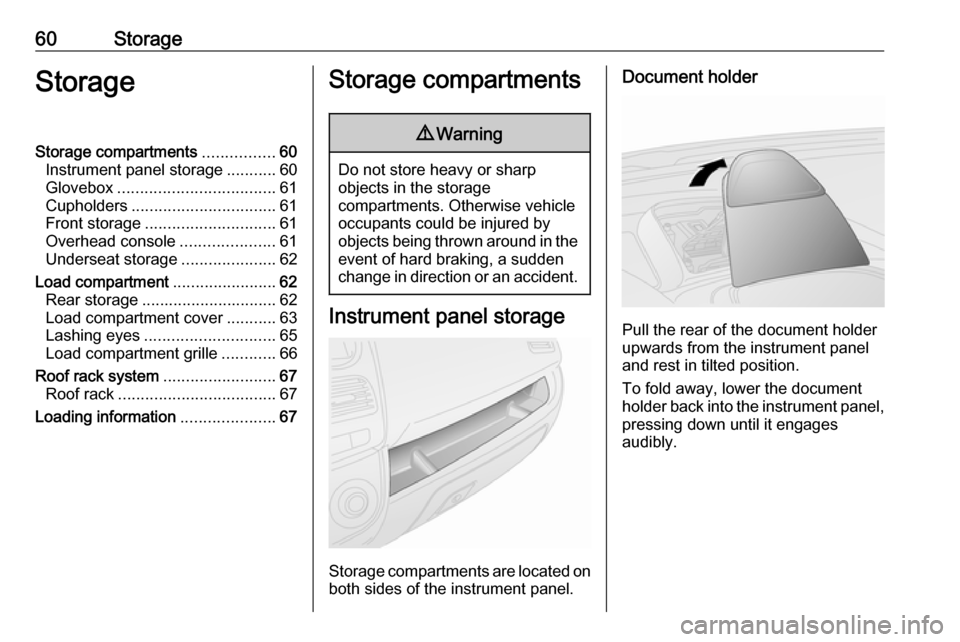
Document holder
Pull the rear of the document holder
upwards from the instrument panel
and rest in tilted position.
To fold away, lower the document holder back into the instrument panel, pressing down until it engages
audibly.
Page 64 of 201

62StorageUnderseat storage
Pull the loop on the seat cushion to
gain access to the storage area.
Load compartment
Rear storage
Storage compartments are located in
the rear door pockets and in the load
compartment sidewalls.
Roof bars
Do not exceed the maximum load
(which includes the weight of the bars) of 25 kg. Always distribute the
load evenly on the roof bars. The load must not obstruct complete closure ofthe doors.
Retighten the fastening screws on the
four brackets periodically.Caution
Do not use elastic lashings, e.g.
bungee cord. We recommend the
use of webbing straps.
Roof bars are designed to be fitted in
a specific position. Proper fastening
of the roof bars cannot be guaranteed if refitted in another position.
No materials (e.g. rubber, plastic)
should be placed between the feet of
the bars and the vehicle body, to
ensure proper fastening.9 Warning
The use of roof bars may affect
steering and vehicle handling.
Removal
To remove the roof bars when not in use:
Page 66 of 201

64StorageRemoving
Open the load compartment cover.
Pull the release lever and lift cover
from retainers.
Installing
Insert either side of the load
compartment cover in the recess, pull
the release lever. Insert the load
compartment cover and engage.
Rear parcel shelf
The rear parcel shelf consists of two
parts - a front part and rear part. The front part can be opened or closed,
allowing for greater flexibility in the
load compartment.
Do not place any excessively heavy
or sharp-edged objects on the rear
parcel shelf.9 Warning
Always make sure that the load in
the vehicle is securely stowed.
Otherwise objects can be thrown
around inside the vehicle and
cause personal injury or damage
to the load or car.The rear parcel shelf can be installed
in two positions, i.e. the upper
position
Page 68 of 201

66Storage
The maximum force applied to the
lashing eyes should not exceed
500 daN/5 kN/5000 N.
Depending on country, the maximum
force may be shown on a label.
Note
Specifications on the label always
have priority over those given in this manual.
Loading information 3 67.
Load compartment grille
Depending on version, the load
compartment area can be increased
by opening the load compartment
partition on the front passenger side
(where fitted).
● Fold down the front passenger seat. Refer to "Seat folding"
3 38.
● From inside the load compartment, release the pin (1)
on the rear of the partition to
unlock, then swing open the
partition door over the folded
front passenger seat.● Insert the pin in the slot (2) on the
backrest of the folded front
passenger seat to lock in
position.9 Warning
The load compartment partition
must always be locked in either
position during driving. Otherwise
vehicle occupants could be injured by the partition in the event of hard
braking, a sudden change in
direction or an accident.
Ladder bulkhead
Depending on version, a ladder
bulkhead is fixed behind the driver's
seat or behind the rear seats to
protect seat occupants from
unsecured objects in the load
compartment.
Page 70 of 201

68Storage● The load must not obstruct theoperation of the pedals, parking
brake and gear selector lever, or
hinder the freedom of movement of the driver. Do not place any
unsecured objects in the interior.
● Do not drive with an open load compartment.9Warning
Always make sure that the load in
the vehicle is securely stowed.
Otherwise objects can be thrown
around inside the vehicle and
cause personal injury or damage
to the load or vehicle.
● The payload is the difference between the permitted gross
vehicle weight (see identification
plate 3 180) and the EC kerb
weight.
To calculate the payload, enter
the data for your vehicle in the
weights table at the front of this
manual.
The EC kerb weight includes
weights for the driver (68 kg),
luggage (7 kg) and all fluids (fuel
tank 90% full).
Optional equipment and
accessories increase the kerb
weight.
● Driving with a roof load increases
the sensitivity of the vehicle to
cross-winds and has a
detrimental effect on vehicle
handling due to the vehicle's
higher centre of gravity.
Distribute the load evenly and secure it properly with retaining
straps. Adjust the tyre pressure
and vehicle speed according to
the load conditions. Check and
retighten the straps frequently.
Do not drive faster than
120 km/h.
The permissible roof load (which
includes the weight of the roof
rack) is 100 kg. The roof load is
the combined weight of the roof
rack and the load.
Page 71 of 201

Instruments and controls69Instruments and
controlsControls ....................................... 70
Steering wheel adjustment ........70
Steering wheel controls .............70
Horn ........................................... 70
Windscreen wiper/washer .........71
Rear window wiper/washer .......71
Headlamp washer .....................72
Outside temperature ..................72
Clock ......................................... 72
Power outlets ............................. 74
Cigarette lighter ......................... 75
Ashtrays .................................... 75
Warning lights, gauges and indi‐ cators ........................................... 76
Instrument cluster ......................76
Speedometer ............................. 76
Odometer .................................. 76
Trip odometer ............................ 76
Tachometer ............................... 76
Fuel gauge ................................ 77
Fuel selector .............................. 77
Engine coolant temperature gauge ....................................... 78
Service display .......................... 78Transmission display .................79
Control indicators ......................79
Generic warning ........................81
Turn signal ................................. 82
Seat belt reminder .....................82
Airbag and belt tensioners .........82
Airbag deactivation ....................83
Charging system .......................83
Malfunction indicator light ..........83
Brake system ............................. 84
Brake pad wear ......................... 84
Antilock brake system (ABS) .....84
Transmission ............................. 84
Gear shifting .............................. 85
Hill start assist ........................... 85
Ultrasonic parking assist ...........85
Electronic Stability Control ........85
Engine coolant temperature ......86
Preheating ................................. 86
Diesel particle filter ....................86
Tyre pressure monitoring system ...................................... 87
Engine oil pressure ....................87
Change engine oil .....................88
Low engine oil level ...................88
Low fuel ..................................... 88
Drain fuel filter ........................... 89
Immobiliser ................................ 89
Stop-start system ......................89
Exterior light .............................. 89High beam................................. 89
Fog light ..................................... 90
Rear fog light ............................. 90
Cruise control ............................ 90
Door open .................................. 90
Information displays .....................90
Driver Information Centre ..........90
Vehicle messages ........................95
Warning chimes .........................95
Fuel system messages ..............96
Trip computer ............................... 96
Page 74 of 201

72Instruments and controlsHeadlamp washerWith low beam on, washer fluid is
sprayed onto the headlights when the
windscreen washer is activated
(depending on version).
Note
Washer fluid is not sprayed onto the
headlights if fluid level is too low.
Outside temperature
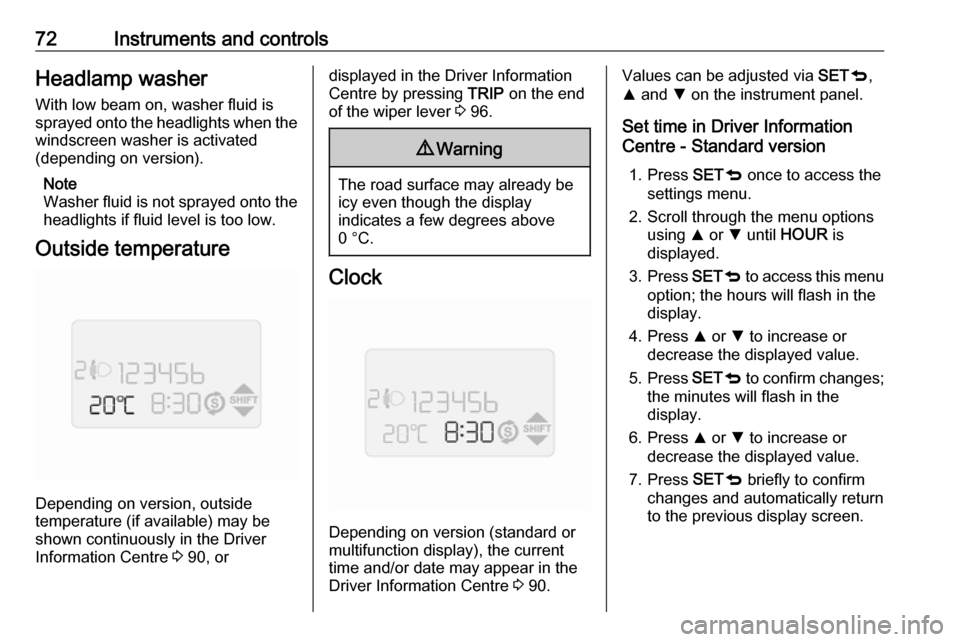
Depending on version, outside
temperature (if available) may be shown continuously in the DriverInformation Centre 3 90, or
displayed in the Driver Information
Centre by pressing TRIP on the end
of the wiper lever 3 96.9 Warning
The road surface may already be
icy even though the display
indicates a few degrees above
0 °C.
Clock
Depending on version (standard or
multifunction display), the current
time and/or date may appear in the
Driver Information Centre 3 90.
Values can be adjusted via SETq,
R and S on the instrument panel.
Set time in Driver Information
Centre - Standard version
1. Press SETq once to access the
settings menu.
2. Scroll through the menu options using R or S until HOUR is
displayed.
3. Press SETq to access this menu
option; the hours will flash in the display.
4. Press R or S to increase or
decrease the displayed value.
5. Press SETq to confirm changes;
the minutes will flash in the
display.
6. Press R or S to increase or
decrease the displayed value.
7. Press SETq briefly to confirm
changes and automatically return
to the previous display screen.