clutch OPEL COMBO D 2018 Manual user
[x] Cancel search | Manufacturer: OPEL, Model Year: 2018, Model line: COMBO D, Model: OPEL COMBO D 2018Pages: 203, PDF Size: 4.97 MB
Page 126 of 203

124Driving and operatingmalfunction and a warning message
may be displayed in the Driver
Information Centre.
Return the selector lever to the
centre position. After a short while,
N will be displayed in the Driver
Information Centre and the system
will operate normally again.
Driver Information Centre 3 91.
After selecting A/M, + or - and
releasing the selector lever, the lever automatically returns to the centre
position.N:neutralo:drive positionA/M:switch between automatic and manual mode
The transmission display
shows AUTO when in
automatic mode.R:reverse gear
Engage only when vehicle is
stationary. The transmission
display shows "R" when
reverse gear is engaged.+:shift to a higher gear-:shift to a lower gearCaution
It is not advisable to drive with the hand resting on the selector lever.
Starting-off
When the engine is started, depress
the brake pedal and move the
selector lever towards + to engage
first gear. Shift to a higher or lower
gear by moving selector lever to + or -.
Gears can be skipped by moving the selector lever repeatedly at short
intervals.
The driver will be alerted to an
incorrect gear selection by an audible warning chime in conjunction with a
message in the Driver Information
Centre 3 91. The system will
downshift, selecting the most
appropriate gear automatically.
If R is selected, reverse gear is
engaged. The vehicle starts to move
when the brake pedal is released. To
start off quickly, release the brake
pedal and accelerate immediately
after engaging a gear.
Move the selector lever towards A/M
to engage automatic mode; the
transmission shifts to other gears
automatically, dependent on driving conditions.
To engage manual mode, move the selector lever towards A/M. The
current gear will appear in the
transmission display.
Stopping the vehicle
In automatic or manual mode,
first gear is engaged and the clutch is
released when the vehicle is stopped. In R, reverse gear remains engaged.
When the vehicle is at a standstill, if
the engine is running and a forward or
reverse gear is engaged, a warning
chime will sound and the
transmission automatically shifts to
N in certain situations.
When stopping on gradients, engage
parking brake or depress the brake pedal. To prevent overheating of theclutch, an intermittent audible
warning chime may sound as a signal
to depress the brake pedal or apply
the parking brake.
Page 128 of 203

126Driving and operatingEco mode selects the most suitable
gear depending on the speed of the
vehicle, the engine speed and the
intensity with which the accelerator is pressed.
Activation
Press E on the selector lever housing.
Control indicator E is shown in the
transmission display to indicate
activation.
Deactivation
Eco mode is switched off by:
● pressing E again
● switching to manual mode
In order to protect the transmission at extremely high clutch temperatures,
an intermittent audible warning chime
may sound. In such cases, depress
the brake pedal, select N and apply
the parking brake to allow the clutch
to cool down.
Kickdown If the accelerator pedal is pressed
past the pressure point, the
transmission shifts to a lower geardepending on engine speed. Full
engine power is available for
acceleration.
If engine speed is too high the
transmission switches to a higher
gear, even in manual mode. Without
kickdown this automatic shift is not
effected in manual mode.
Fault
In the event of a fault, control indicator s is shown in the transmission
display.
Continued driving is possible,
provided the vehicle is driven with
care and anticipation. A warning
message may appear in the Driver
Information Centre in conjunction with
a warning chime 3 96.
Note
The volume of the warning chime
can also be adjusted via the Driver
Information Centre 3 91.
Have the cause of the fault remedied by a workshop.
Page 134 of 203

132Driving and operatingTurn end of lever to the ON position;
control indicator m 3 91 illuminates in
the instrument cluster. Depending on
version, a corresponding message,
e.g. Cruise Control on , may also be
displayed in the Driver Information Centre 3 91.
Activation
Accelerate to the desired speed and
push lever upwards ( +); the current
speed is stored and maintained.
Accelerator pedal can be released.
Vehicle speed can be increased by depressing the accelerator pedal.
When the accelerator pedal is
released, the previously stored speed
is resumed.
Cruise control remains activated
while gearshifting.
Increase speed
With cruise control active, push lever
upwards ( +) or briefly push lever
upwards ( +) repeatedly: speed
increases continuously or in small
increments.Alternatively accelerate to the desired speed and store by pushing lever
upwards ( +).
Reduce speed With cruise control active, push lever
downwards ( -) or briefly push lever
downwards ( -) repeatedly; speed
decreases continuously or in small
increments.
Deactivation
Automatic deactivation: ● vehicle speed below approx. 30 km/h
● the brake pedal is depressed
● the clutch pedal is depressed
● the traction control system/Anti- Slip Regulator (ASR) or
Electronic Stability Control (ESC)
is operating
● the antilock brake system (ABS) is operating
Resume stored speed
Press = at a speed above 30 km/h.
The stored speed will be obtained.Switching off
Turn end of lever to the OFF position;
control indicator m extinguishes. The
stored speed is deleted. Switching off
the ignition also deletes the stored
speed.
Parking assist9 Warning
It is the driver who bears full
responsibility for the parking
manoeuvre.
Always check the surrounding
area while reversing and using the parking assist system.
The parking assist makes parking
easier by measuring the distance between the vehicle and obstacles,
and giving acoustic signals.
Page 149 of 203

Vehicle care147Only use high-performance brake
fluid approved for the vehicle.
Brake and clutch fluid 3 178.
Vehicle battery
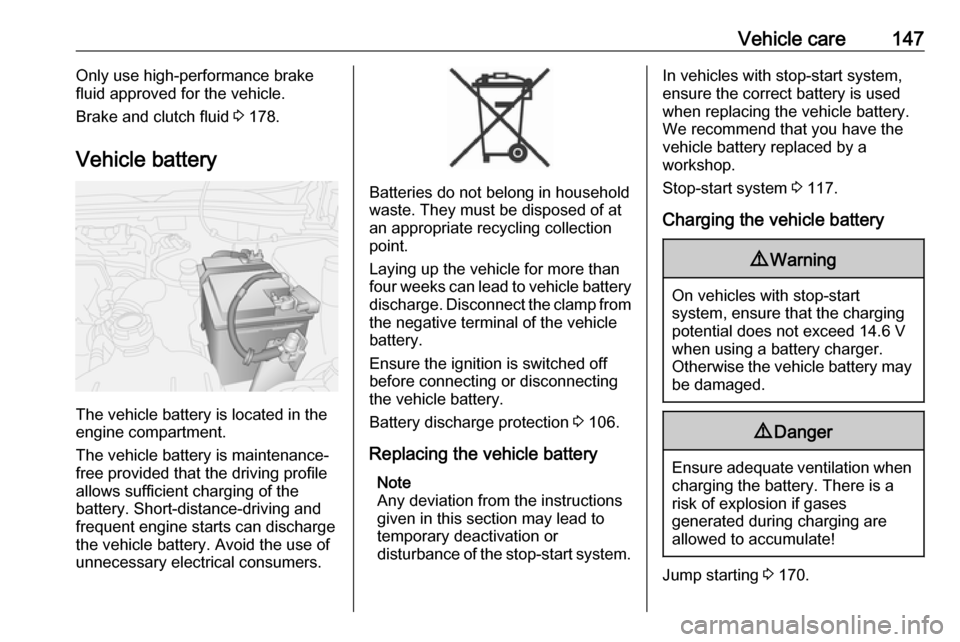
The vehicle battery is located in the
engine compartment.
The vehicle battery is maintenance-
free provided that the driving profile
allows sufficient charging of the
battery. Short-distance-driving and
frequent engine starts can discharge
the vehicle battery. Avoid the use of
unnecessary electrical consumers.
Batteries do not belong in household
waste. They must be disposed of at
an appropriate recycling collection
point.
Laying up the vehicle for more than
four weeks can lead to vehicle battery
discharge. Disconnect the clamp from
the negative terminal of the vehicle
battery.
Ensure the ignition is switched off
before connecting or disconnecting
the vehicle battery.
Battery discharge protection 3 106.
Replacing the vehicle battery Note
Any deviation from the instructions
given in this section may lead to temporary deactivation or
disturbance of the stop-start system.
In vehicles with stop-start system,
ensure the correct battery is used
when replacing the vehicle battery.
We recommend that you have the
vehicle battery replaced by a
workshop.
Stop-start system 3 117.
Charging the vehicle battery9 Warning
On vehicles with stop-start
system, ensure that the charging potential does not exceed 14.6 V
when using a battery charger.
Otherwise the vehicle battery may be damaged.
9 Danger
Ensure adequate ventilation when
charging the battery. There is a
risk of explosion if gases
generated during charging are
allowed to accumulate!
Jump starting 3 170.
Page 160 of 203

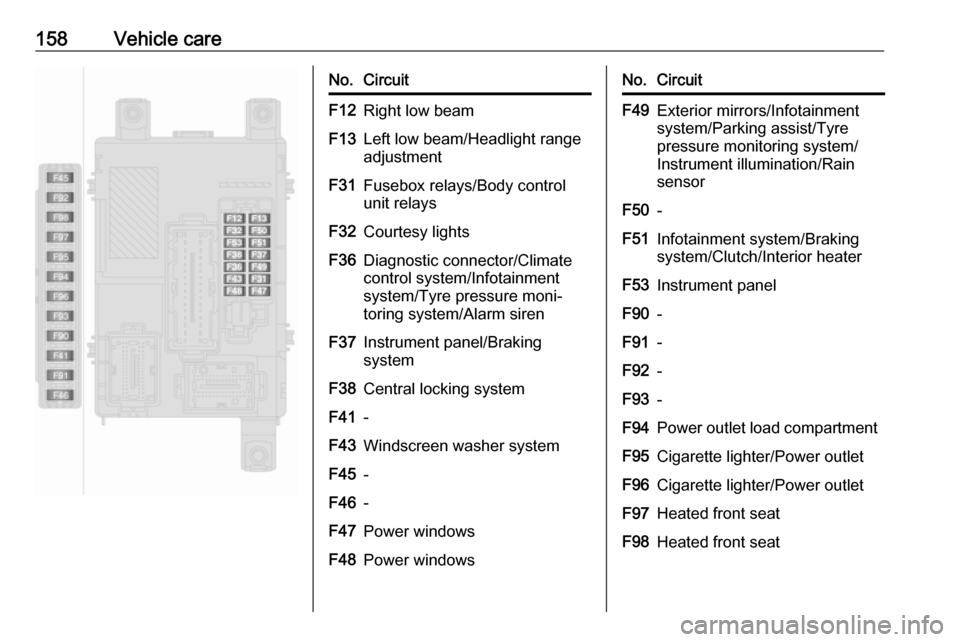
158Vehicle careNo.CircuitF12Right low beamF13Left low beam/Headlight range
adjustmentF31Fusebox relays/Body control
unit relaysF32Courtesy lightsF36Diagnostic connector/Climate
control system/Infotainment
system/Tyre pressure moni‐
toring system/Alarm sirenF37Instrument panel/Braking
systemF38Central locking systemF41-F43Windscreen washer systemF45-F46-F47Power windowsF48Power windowsNo.CircuitF49Exterior mirrors/Infotainment
system/Parking assist/Tyre
pressure monitoring system/
Instrument illumination/Rain
sensorF50-F51Infotainment system/Braking
system/Clutch/Interior heaterF53Instrument panelF90-F91-F92-F93-F94Power outlet load compartmentF95Cigarette lighter/Power outletF96Cigarette lighter/Power outletF97Heated front seatF98Heated front seat
Page 181 of 203

Service and maintenance179Dexos is the newest engine oil quality
that provides optimum protection for
petrol and diesel engines. If it is
unavailable, engine oils of other listed qualities must be used.
Recommendations for petrol engines
are also valid for Compressed Natural
Gas (CNG) fuelled engines.
Select the appropriate engine oil
based on its quality and on the
minimum ambient temperature
3 182.
Topping up engine oilCaution
In case of any spilled oil, wipe it up and dispose it properly.
Engine oils of different manufacturersand brands can be mixed as long as
they comply with the required engine
oil quality and viscosity.
Use of engine oil with only
ACEA A1/B1 or only A5/B5 quality is
prohibited, since it can cause long-
term engine damage under certain
operating conditions.
Select the appropriate engine oil
based on its quality and on the
minimum ambient temperature
3 182.
Additional engine oil additives
The use of additional engine oil
additives could cause damage and
invalidate the warranty.
Engine oil viscosity
The SAE viscosity grade gives
information on the thickness of the oil.
Multigrade oil is indicated by two
figures, e.g. SAE 5W-30. The first
figure, followed by a W, indicates the low temperature viscosity and the
second figure the high temperature viscosity.
Select the appropriate viscosity grade depending on the minimum ambient
temperature 3 182.
All of the recommended viscosity grades are suitable for high ambient
temperatures.
Coolant and antifreeze
Use only antifreeze approved for the
vehicle. Consult a workshop.The system is factory filled with
coolant designed for excellent
corrosion protection and frost
protection down to approx. -28 °C. In
regions with very low temperatures,
the factory filled coolant provides frost
protection down to approx. -37 °C.
This concentration should be
maintained all year round.
The use of additional coolant
additives that intend to give additional corrosion protection or seal against
minor leaks can cause function
problems. Liability for consequences
resulting from the use of additional
coolant additives will be rejected.
Washer fluid Use only washer fluid approved for
the vehicle to prevent damage of wiper blades, paintwork, plastic and
rubber parts. Consult a workshop.
Brake and clutch fluid Over time, brake fluid absorbs
moisture which will reduce braking
effectiveness. The brake fluid should
therefore be replaced at the specified interval.
Page 198 of 203

196IndexAAccessories and vehicle modifications .......................... 141
Adjustable air vents ...................111
Airbag activation ........................... 91
Airbag and belt tensioners ...........83
Airbag deactivation ..........53, 84, 91
Airbag label............................. 48, 53
Airbag system .............................. 48
Air conditioning regular operation ................................ 112
Air conditioning system .............. 108
Air intake .................................... 112
Air vents...................................... 111
Alert .............................................. 96
Antilock brake system ................ 127
Antilock brake system (ABS) .......85
Anti-Slip Regulator (ASR) ...........129
Anti-theft locking system .............. 29
Appearance care ........................173
Armrest ......................................... 40
Ashtrays ....................................... 76
ASR (Anti-Slip Regulator) ...........129
Audible warning chimes................ 96
Autoclose ...................................... 91
Automatic fuel cut-off ............97, 116
Automatic locking .........................91
Autostop ..................................... 117
AUX socket ................................... 75B
Battery ........................................ 147
Battery discharge protection ......106
Belts.............................................. 45
Bonnet ....................................... 143
Brake and clutch fluid .................178
Brake assist ............................... 128
Brake fluid .................................. 146
Brake pad wear ............................ 85
Brakes ............................... 127, 146
Brake system ............................... 85
Breakdown.................................. 172
Bulb replacement ....................... 149
C Capacities .................................. 190
Car Pass ...................................... 21
Catalytic converter .....................121
Central locking system ................24
Centre high-mounted brake light 152
Change engine oil .......................89
Changing tyre and wheel size ...163
Charging system .......................... 84
Child locks ................................... 25
Child restraint installation locations ................................... 58
Child restraints.............................. 55
Child restraint systems ................55
Child safety system for rear windows .................................... 32