wheel OPEL COMBO D 2018 Manual user
[x] Cancel search | Manufacturer: OPEL, Model Year: 2018, Model line: COMBO D, Model: OPEL COMBO D 2018Pages: 203, PDF Size: 4.97 MB
Page 51 of 203
Seats, restraints499Warning
The airbag system deploys in an
explosive manner, repairs must be performed by skilled personnel
only.
9 Warning
Adding accessories that change
the vehicle's frame, bumper
system, height, front end or side
sheet metal, may keep the airbag
system from working properly. The operation of the airbag system can
also be affected by changing any
parts of the front seats, seat belts, airbag sensing and diagnostic
module, steering wheel,
instrument panel, inner door seals including the speakers, any of the
airbag modules, ceiling or pillar
trim, front sensors, side impact
sensors or airbag wiring.
Note
The airbag systems and belt
pretensioner control electronics are
located in the centre console area.
Do not put any magnetic objects in
this area.
Do not affix any objects onto the
airbag covers and do not cover them with other materials. Have damagedcovers replaced by a workshop.
Each airbag is triggered only once.
Have deployed airbags replaced by
a workshop. Furthermore, it may be
necessary to have the steering
wheel, the instrument panel, parts of
the panelling, the door seals,
handles and the seats replaced.
Do not make any modifications to
the airbag system as this will
invalidate the vehicle operating
permit.
Control indicator v for airbag systems
3 83.Fault
If there is a fault in the airbag and belt tensioner system, the control
indicator v illuminates in the
instrument cluster. The system is not
operational.
Depending on version, a
corresponding warning message, e.g. Airbag failure , may also be
displayed in the Driver Information Centre 3 91.
Have the cause of the fault remedied by a workshop.
Control indicator v 3 83.
Child restraint systems on front passenger seat with airbag
systems
Warning according to ECE R94.02:
Page 54 of 203

52Seats, restraintsAIRBAGEM. Mohlo by dojít k
VÁŽNÉMU PORANĚNÍ nebo ÚMRTÍ
DÍTĚTE.
SK: NIKDY nepoužívajte detskú
sedačku otočenú vzad na sedadle
chránenom AKTÍVNYM AIRBAGOM, pretože môže dôjsť k SMRTI alebo
VÁŽNYM ZRANENIAM DIEŤAŤA.
LT: JOKIU BŪDU nemontuokite atgal
atgręžtos vaiko tvirtinimo sistemos
sėdynėje, prieš kurią įrengta AKTYVI
ORO PAGALVĖ, nes VAIKAS GALI
ŽŪTI arba RIMTAI SUSIŽALOTI.
LV: NEKĀDĀ GADĪJUMĀ
neizmantojiet uz aizmuguri vērstu bērnu sēdeklīti sēdvietā, kas tiek
aizsargāta ar tās priekšā uzstādītu
AKTĪVU DROŠĪBAS SPILVENU, jo
pretējā gadījumā BĒRNS var gūt
SMAGAS TRAUMAS vai IET BOJĀ.
ET: ÄRGE kasutage tahapoole
suunatud lapseturvaistet istmel, mille
ees on AKTIIVSE TURVAPADJAGA
kaitstud iste, sest see võib
põhjustada LAPSE SURMA või
TÕSISE VIGASTUSE.MT: QATT tuża trażżin għat-tfal li
jħares lejn in-naħa ta’ wara fuq sit
protett b’AIRBAG ATTIV quddiemu;
dan jista’ jikkawża l-MEWT jew
ĠRIEĦI SERJI lit-TFAL.
GA: Ná húsáid srian sábháilteachta
linbh cúil RIAMH ar shuíochán a
bhfuil mála aeir ag feidhmiú os a
chomhair. Tá baol BÁIS nó GORTÚ
DONA don PHÁISTE ag baint leis.
Beyond the warning required by ECE R94.02, for safety reasons never use
a forward-facing child restraint
system on the front passenger seat
with active front airbag.
The airbag label may be located on
both sides of the front passenger sun
visor.9 Danger
Do not use a child restraint system
on the passenger seat with active
front airbag.
Airbag deactivation 3 53.
Front airbag system
The front airbag system consists of
one airbag in the steering wheel and
one in the instrument panel on the
front passenger side. These can be
identified by the word AIRBAG.
Additionally, there may be a warning
label on both sides of the front
passenger sun visor.
Child restraint systems 3 55.
Airbag deactivation 3 53.
Page 72 of 203

70Instruments and controlsInstruments and
controlsControls ....................................... 71
Steering wheel adjustment ........71
Steering wheel controls .............71
Horn ........................................... 71
Windscreen wiper/washer .........72
Rear window wiper/washer .......72
Headlamp washer .....................73
Outside temperature ..................73
Clock ......................................... 73
Power outlets ............................. 75
Cigarette lighter ......................... 76
Ashtrays .................................... 76
Warning lights, gauges and indi‐ cators ........................................... 77
Instrument cluster ......................77
Speedometer ............................. 77
Odometer .................................. 77
Trip odometer ............................ 77
Tachometer ............................... 77
Fuel gauge ................................ 78
Fuel selector .............................. 78
Engine coolant temperature gauge ....................................... 79
Service display .......................... 79Transmission display .................80
Control indicators ......................80
Generic warning ........................82
Turn signal ................................. 83
Seat belt reminder .....................83
Airbag and belt tensioners .........83
Airbag deactivation ....................84
Charging system .......................84
Malfunction indicator light ..........84
Brake system ............................. 85
Brake pad wear ......................... 85
Antilock brake system (ABS) .....85
Transmission ............................. 85
Gear shifting .............................. 86
Hill start assist ........................... 86
Ultrasonic parking assist ...........86
Electronic Stability Control ........86
Engine coolant temperature ......87
Preheating ................................. 87
Diesel particle filter ....................87
Tyre pressure monitoring system ...................................... 88
Engine oil pressure ....................88
Change engine oil .....................89
Low engine oil level ...................89
Low fuel ..................................... 89
Drain fuel filter ........................... 90
Immobiliser ................................ 90
Stop-start system ......................90
Exterior light .............................. 90High beam................................. 90
Fog light ..................................... 91
Rear fog light ............................. 91
Cruise control ............................ 91
Door open .................................. 91
Information displays .....................91
Driver Information Centre ..........91
Vehicle messages ........................96
Warning chimes .........................96
Fuel system messages ..............97
Trip computer ............................... 97
Page 73 of 203

Instruments and controls71Controls
Steering wheel adjustment
Unlock lever, adjust steering wheel,
then engage lever and ensure it is
fully locked.
Do not adjust steering wheel unless
vehicle is stationary and steering
wheel lock has been released.
Steering wheel controls
The Infotainment system and a
connected mobile phone can be
operated via the controls on the
steering wheel.
Further information is available in the
Infotainment manual.
Horn
Press j.
The horn will sound regardless of
ignition switch position.
Page 77 of 203

Instruments and controls75Power outlets
A 12 V power outlet is located at thefront of the centre console.
Rear power outlets Depending on model variant, 12 V
power outlets are located at the
sidewall in the load compartment.
Short wheelbase van
Long wheelbase van
Combo Tour
Do not exceed the maximum power
consumption of 180 W.
With ignition off, the power outlets are
deactivated. Additionally, the power
outlets are deactivated in the event of
low vehicle battery voltage.
Electrical accessories that are
connected must comply with the
electromagnetic compatibility
requirements laid down in
DIN VDE 40 839.
Page 90 of 203
88Instruments and controlsextinguishes. Depending on version,
a warning message may also be
displayed in the Driver Information Centre 3 91.
If possible, do not allow engine speed
to drop below 2000 rpm during the
cleaning process.
Control indicator % illuminates when
diesel particle filter is full. Start
cleaning process as soon as possible to avoid damage to the engine.
Diesel particle filter 3 121.
Stop-start system 3 117.
Tyre pressure monitoring
system
w illuminates or flashes yellow.
Illuminates
Tyre pressure loss. Stop immediately and check tyre pressure.
Control indicator w illuminates
together with a warning chime and, in
vehicles with Multifunction version of
the Driver Information Centre 3 91,a corresponding message also
appears when a puncture or severely
under-inflated tyre is detected.
Flashes
Fault in system. After several
seconds w illuminates continuously.
Consult a workshop.
Depending on version, a
corresponding message also
appears in the Driver Information
Centre when a tyre without a pressure sensor is mounted (e.g. spare wheel).
Tyre pressure monitoring system
3 161.
Engine oil pressure
I illuminates red.
Illuminates when the ignition is
switched on and extinguishes shortly after the engine starts.
Illuminates when the engine is
running
Depending on version, a warning
message may also be displayed in
the Driver Information Centre 3 91.Caution
Engine lubrication may be
interrupted. This may result in
damage to the engine and/or
locking of the drive wheels.
1. Depress clutch.
2. Select neutral gear (or move selector lever to N).
3. Move out of the flow of traffic as quickly as possible without
impeding other vehicles.
4. Switch off ignition.
Page 91 of 203
Instruments and controls899Warning
When the engine is off,
considerably more force is needed
to brake and steer. During an
Autostop the brake servo unit will still be operational.
Do not remove ignition key until
vehicle is stationary, otherwise the steering wheel lock could engage
unexpectedly.
Check oil level before seeking the
assistance of a workshop 3 144.
Change engine oil Diesel engines with diesel particle
filter
I flashes red.
Illuminates when the ignition is
switched on and extinguishes shortly
after the engine starts.
The engine oil life monitor lets you know when to change the oil. Control
indicator I will flash to indicate that
engine oil life has been diminished
and the oil needs changing.
Depending on version, a
corresponding warning message,
e.g. Change engine oil , may also be
displayed in the Driver Information
Centre 3 91.
Based on driving conditions, the
interval at which an oil change will be
indicated can vary considerably.
Depending on model variant, I may
flash in the following ways:
● for one minute every two hours, or
● for three minute cycles with I off
for intervals of five seconds
The warning will be repeated every
time the engine is started, until the
engine oil is changed and the service display is reset. Seek the assistance
of a workshop.
Service display 3 79.
Low engine oil level
S illuminates red.
Illuminates for a few seconds after the ignition is switched on.If the control indicator does not
extinguish after a few seconds, or if it illuminates while driving, the engine
oil level is insufficient.
Depending on version, a
corresponding warning message,
e.g. Check engine oil level , may also
be displayed in the Driver Information
Centre 3 91.
Check oil level before seeking the assistance of a workshop 3 144.
Low fuel $ illuminates or flashes yellow.
Illuminates for a few seconds after the ignition is switched on.
Illuminates
Level in fuel tank is too low. Refuel
immediately 3 136.
Never run the tank dry.
Depending on version, a
corresponding warning message,
e.g. Warning low fuel , may also be
displayed in the Driver Information Centre 3 91.
Catalytic converter 3 121.
Page 102 of 203
100LightingLightingExterior lighting.......................... 100
Light switch .............................. 100
High beam ............................... 100
Headlight flash ......................... 100
Headlight range adjustment ....101
Headlights when driving abroad .................................... 101
Daytime running lights .............101
Hazard warning flashers ..........101
Turn and lane-change signals . 102
Front fog lights ......................... 102
Rear fog lights ......................... 102
Reversing lights .......................103
Misted light covers ...................103
Interior lighting ........................... 103
Instrument panel illumination control ..................................... 103
Interior lights ............................ 104
Load compartment lighting ......105
Lighting features ........................106
Exit lighting .............................. 106
Battery discharge protection ....106Exterior lighting
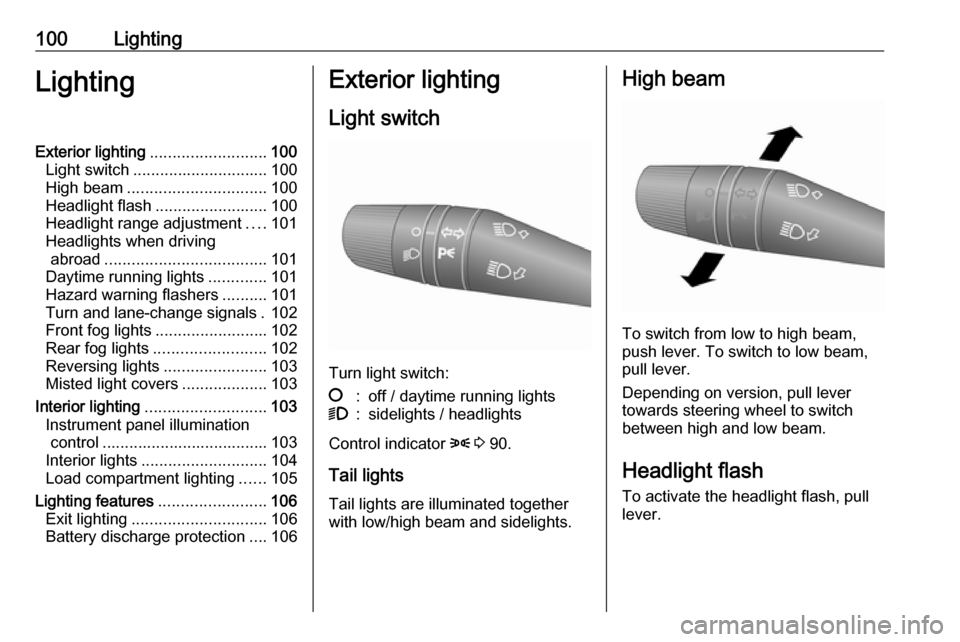
Light switch
Turn light switch:
§:off / daytime running lights9:sidelights / headlights
Control indicator 8 3 90.
Tail lights Tail lights are illuminated together
with low/high beam and sidelights.
High beam
To switch from low to high beam,
push lever. To switch to low beam,
pull lever.
Depending on version, pull lever
towards steering wheel to switch
between high and low beam.
Headlight flash To activate the headlight flash, pull
lever.
Page 104 of 203
102LightingDepending on version, hazard
warning flashers may come on
automatically during hard braking.
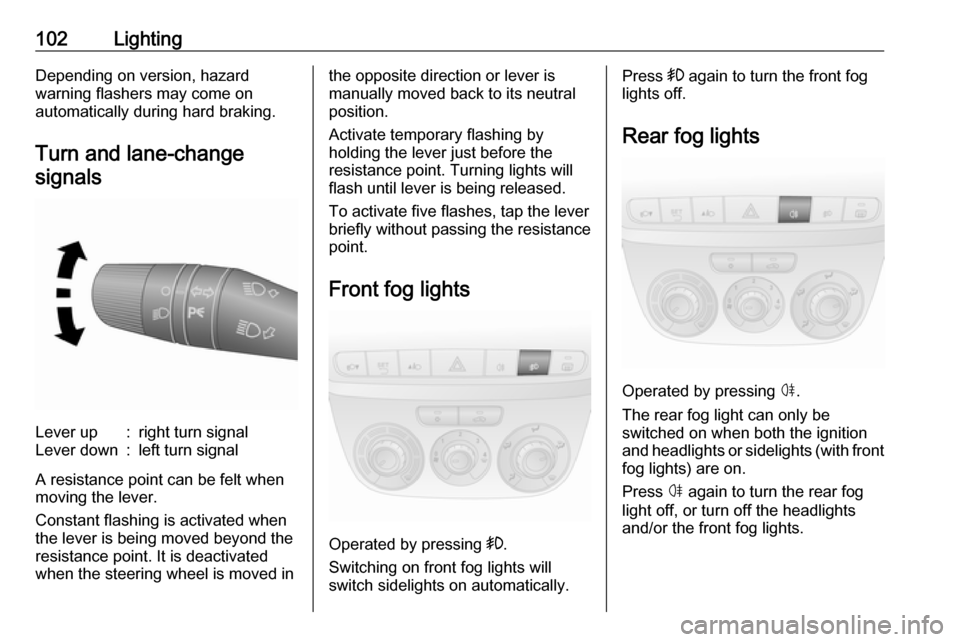
Turn and lane-change signalsLever up:right turn signalLever down:left turn signal
A resistance point can be felt when
moving the lever.
Constant flashing is activated when
the lever is being moved beyond the
resistance point. It is deactivated
when the steering wheel is moved in
the opposite direction or lever is
manually moved back to its neutral
position.
Activate temporary flashing by
holding the lever just before the
resistance point. Turning lights will
flash until lever is being released.
To activate five flashes, tap the lever
briefly without passing the resistance
point.
Front fog lights
Operated by pressing >.
Switching on front fog lights will
switch sidelights on automatically.
Press > again to turn the front fog
lights off.
Rear fog lights
Operated by pressing ø.
The rear fog light can only be
switched on when both the ignition
and headlights or sidelights (with front
fog lights) are on.
Press ø again to turn the rear fog
light off, or turn off the headlights
and/or the front fog lights.
Page 108 of 203
106LightingLighting featuresExit lighting
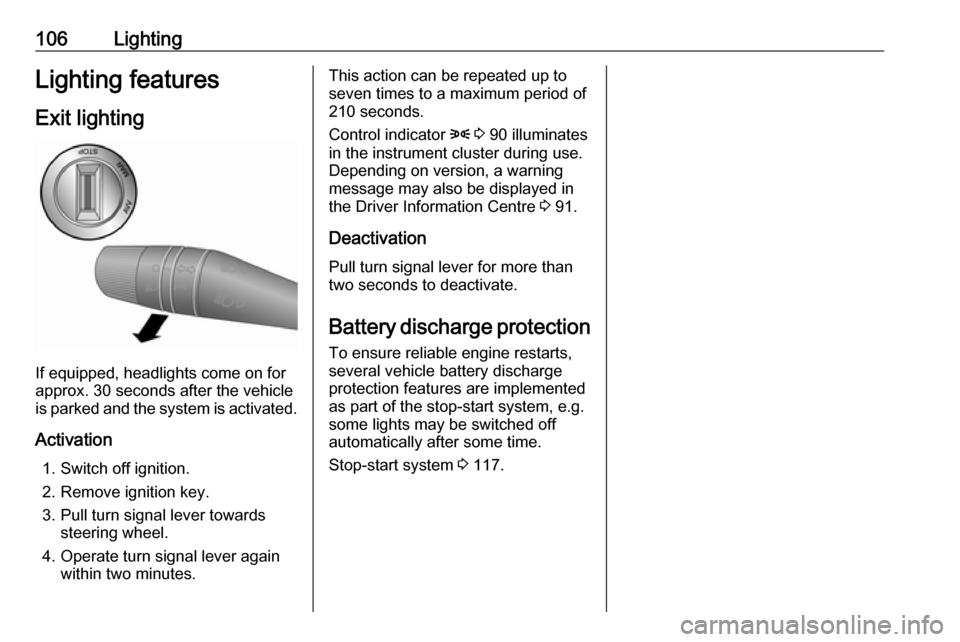
If equipped, headlights come on for
approx. 30 seconds after the vehicle
is parked and the system is activated.
Activation 1. Switch off ignition.
2. Remove ignition key.
3. Pull turn signal lever towards steering wheel.
4. Operate turn signal lever again within two minutes.
This action can be repeated up to
seven times to a maximum period of
210 seconds.
Control indicator 8 3 90 illuminates
in the instrument cluster during use.
Depending on version, a warning
message may also be displayed in
the Driver Information Centre 3 91.
Deactivation Pull turn signal lever for more thantwo seconds to deactivate.
Battery discharge protection
To ensure reliable engine restarts,
several vehicle battery discharge
protection features are implemented
as part of the stop-start system, e.g.
some lights may be switched off
automatically after some time.
Stop-start system 3 117.