OPEL COMBO E 2019.1 Infotainment system
Manufacturer: OPEL, Model Year: 2019.1, Model line: COMBO E, Model: OPEL COMBO E 2019.1Pages: 125, PDF Size: 2.48 MB
Page 101 of 125
Basic operation101Basic operationBasic operation.......................... 101
Tone and volume settings .........102
System settings ......................... 103Basic operation
OK button Press OK:
● to confirm or activate the selected option
● to confirm a set value
● to activate or deactivate a function
● to open a menu
ß button
Press ß:
● to exit a menu
● to return from a submenu to the next higher menu level
Examples of menu operation
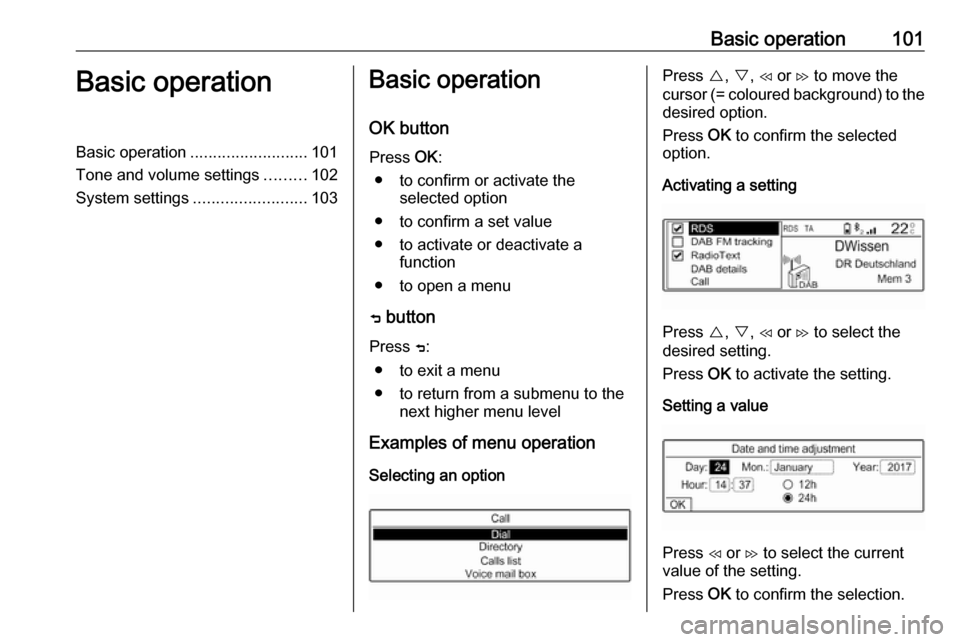
Selecting an optionPress {, } , H or I to move the
cursor (= coloured background) to the desired option.
Press OK to confirm the selected
option.
Activating a setting
Press {, } , H or I to select the
desired setting.
Press OK to activate the setting.
Setting a value
Press H or I to select the current
value of the setting.
Press OK to confirm the selection.
Page 102 of 125
102Basic operationPress H or I to adjust the desired
value.
Press OK to confirm the set value.
The cursor then switches to the value
of the next setting. To switch to the
value of another setting, press {, } ,
H or I. If the values of all settings are
set, select OK on the display and
press OK.
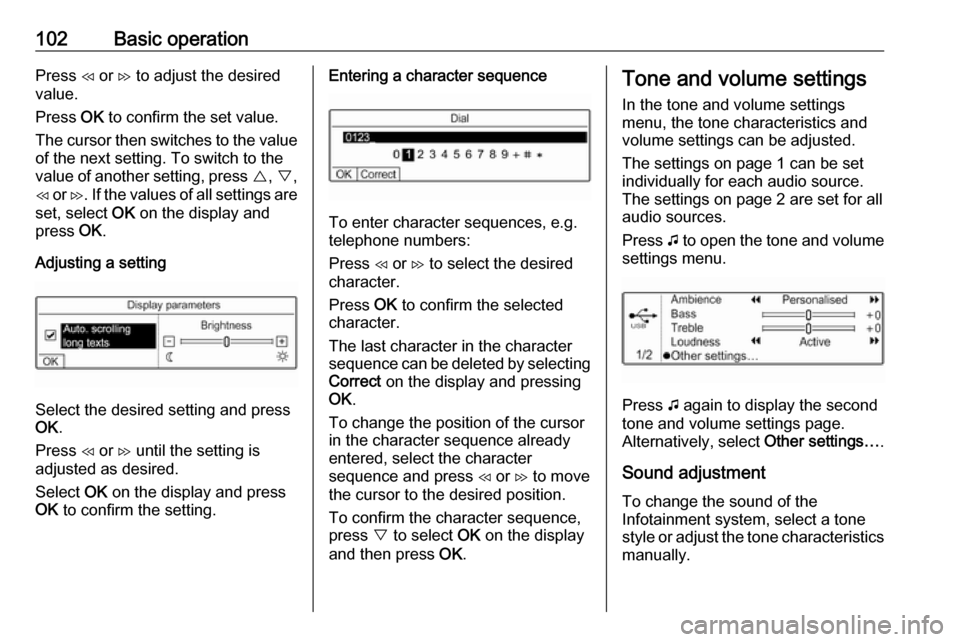
Adjusting a setting
Select the desired setting and press
OK .
Press H or I until the setting is
adjusted as desired.
Select OK on the display and press
OK to confirm the setting.
Entering a character sequence
To enter character sequences, e.g.
telephone numbers:
Press H or I to select the desired
character.
Press OK to confirm the selected
character.
The last character in the character sequence can be deleted by selecting
Correct on the display and pressing
OK .
To change the position of the cursor
in the character sequence already
entered, select the character
sequence and press H or I to move
the cursor to the desired position.
To confirm the character sequence,
press } to select OK on the display
and then press OK.
Tone and volume settings
In the tone and volume settings
menu, the tone characteristics and
volume settings can be adjusted.
The settings on page 1 can be set
individually for each audio source.
The settings on page 2 are set for all
audio sources.
Press G to open the tone and volume
settings menu.
Press G again to display the second
tone and volume settings page.
Alternatively, select Other settings….
Sound adjustment To change the sound of the
Infotainment system, select a tone
style or adjust the tone characteristics
manually.
Page 103 of 125

Basic operation103Tone style
To activate a tone style, select
Ambience . To toggle between the
different tone styles, repeatedly press
H or I.
If the tone style is set to Personalised,
Bass and Treble can be set manually.
Bass and treble
To enhance or attenuate the deep
frequencies, select Bass.
To enhance or attenuate the high
frequencies, select Treble.
Repeatedly press H or I to adjust the
settings.
Note
If the settings of Bass or Treble are
adjusted, the tone style is set to
Personalised .
Loudness
The Infotainment system has a
loudness compensation function for
better sound quality at low volume
levels. It is set to Active by default.To change the loudness setting,
select Loudness . Press H or I to
toggle between the settings Active
and Inactive .
Volume distribution
The volume distribution within the
passenger compartment can be
optimised for the driver or for all
passengers.
Select Distribution . Press H or I to
toggle between the settings Driver
and All passengers .
If Driver is selected, the volume
balance is automatically optimised for
the driver.
If All passengers is selected, the
volume distribution between left and
right in the passenger compartment
can be set manually.
Select Balance . Repeatedly press H
to move the point of the highest sound
level to the left or I to move the point
of the highest sound level to the right.Automatic volume adjustment
The volume of the Infotainment
system can be adjusted automatically
according to the speed of the vehicle.
Select Auto. volume . Press H or I to
toggle between the settings Active
and Inactive .
System settings Configuring the system
Open the settings menu to perform
some basic system configurations,
e.g.:
● Adjust the display of units for temperature or fuel consumption
● Change the display language
● Adjust date and time
Changing display language Press MENU and then select
Personalisation-configuration .
Select Display configuration and then
select Choice of language .
Page 104 of 125
104Basic operationTo adjust the language for the menu
texts, select the desired language
and press OK.
Adjusting time and date Press MENU and then select
Personalisation-configuration .
Select Display configuration and then
select Date and time adjustment .
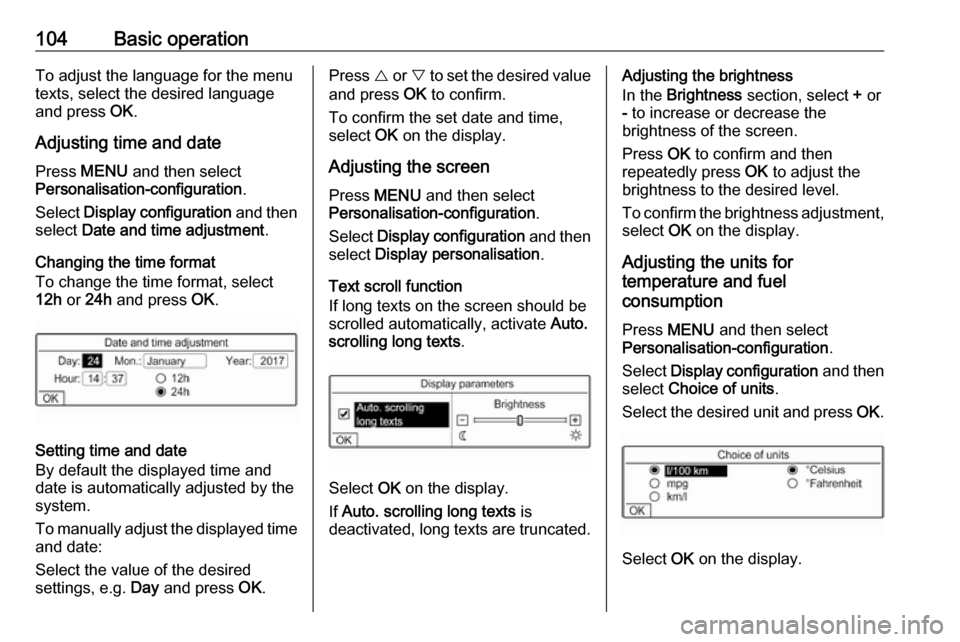
Changing the time format To change the time format, select
12h or 24h and press OK.
Setting time and date
By default the displayed time and date is automatically adjusted by the
system.
To manually adjust the displayed time
and date:
Select the value of the desired
settings, e.g. Day and press OK.
Press { or } to set the desired value
and press OK to confirm.
To confirm the set date and time,
select OK on the display.
Adjusting the screen Press MENU and then select
Personalisation-configuration .
Select Display configuration and then
select Display personalisation .
Text scroll function
If long texts on the screen should be
scrolled automatically, activate Auto.
scrolling long texts .
Select OK on the display.
If Auto. scrolling long texts is
deactivated, long texts are truncated.
Adjusting the brightness
In the Brightness section, select + or
- to increase or decrease the
brightness of the screen.
Press OK to confirm and then
repeatedly press OK to adjust the
brightness to the desired level.
To confirm the brightness adjustment,
select OK on the display.
Adjusting the units for
temperature and fuel
consumption
Press MENU and then select
Personalisation-configuration .
Select Display configuration and then
select Choice of units .
Select the desired unit and press OK.
Select OK on the display.
Page 105 of 125
Radio105RadioUsage........................................ 105
Station search ............................ 105
Radio data system .....................106
Digital audio broadcasting .........107Usage
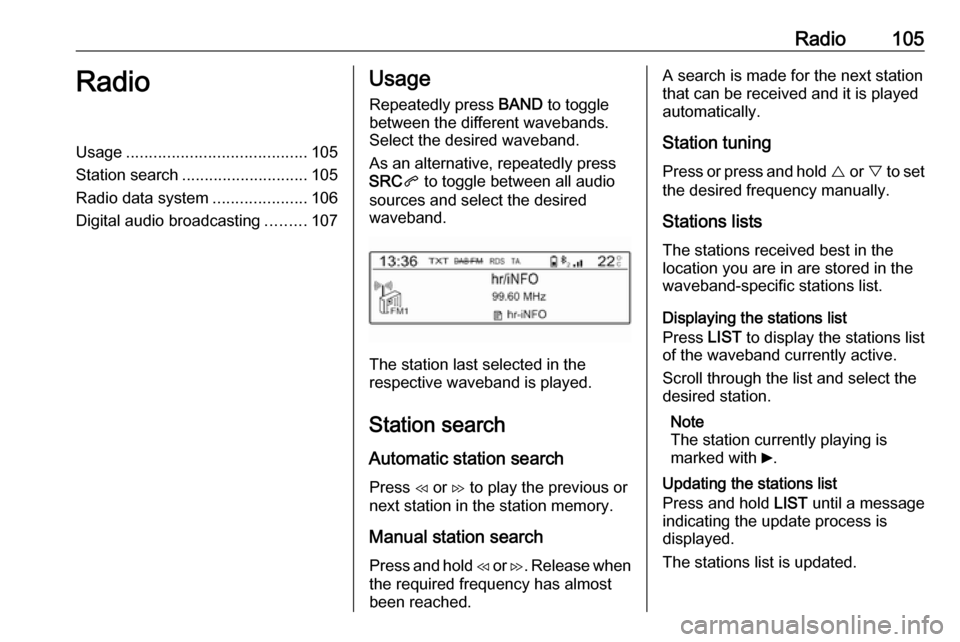
Repeatedly press BAND to toggle
between the different wavebands.
Select the desired waveband.
As an alternative, repeatedly press
SRC q to toggle between all audio
sources and select the desired
waveband.
The station last selected in the
respective waveband is played.
Station search
Automatic station search Press H or I to play the previous or
next station in the station memory.
Manual station search
Press and hold H or I. Release when
the required frequency has almost
been reached.
A search is made for the next station
that can be received and it is played
automatically.
Station tuning
Press or press and hold { or } to set
the desired frequency manually.
Stations lists
The stations received best in the
location you are in are stored in the
waveband-specific stations list.
Displaying the stations list
Press LIST to display the stations list
of the waveband currently active.
Scroll through the list and select the
desired station.
Note
The station currently playing is
marked with 6.
Updating the stations list
Press and hold LIST until a message
indicating the update process is
displayed.
The stations list is updated.
Page 106 of 125
106RadioPreset buttons
The six favourite radio stations of each waveband can be stored on
preset buttons. When pressing one of the preset buttons, the favourites
page is displayed.
Note
The station currently playing is
marked with 6.
Storing preset stations
To store a station to a preset button,
activate the desired waveband and
station. When the station is playing,
press and hold one of the preset
button 1... 6 on which the desired
station is to be stored.
The station name or frequency is
displayed next to the respective
favourite on the screen.
Retrieving preset stations
To retrieve a station stored as a
favourite, press the respective preset button 1... 6.Radio data system
Radio data system (RDS) is a service
of FM stations that considerably
facilitates the finding of the desired
station and its fault-free reception.
Alternative frequencies If the FM signal of a station is too
weak to be picked up by the receiver,
the Infotainment system can
automatically tune to an alternative
FM frequency to continue the
programme.
Activate the FM waveband and then
press OK to display the waveband
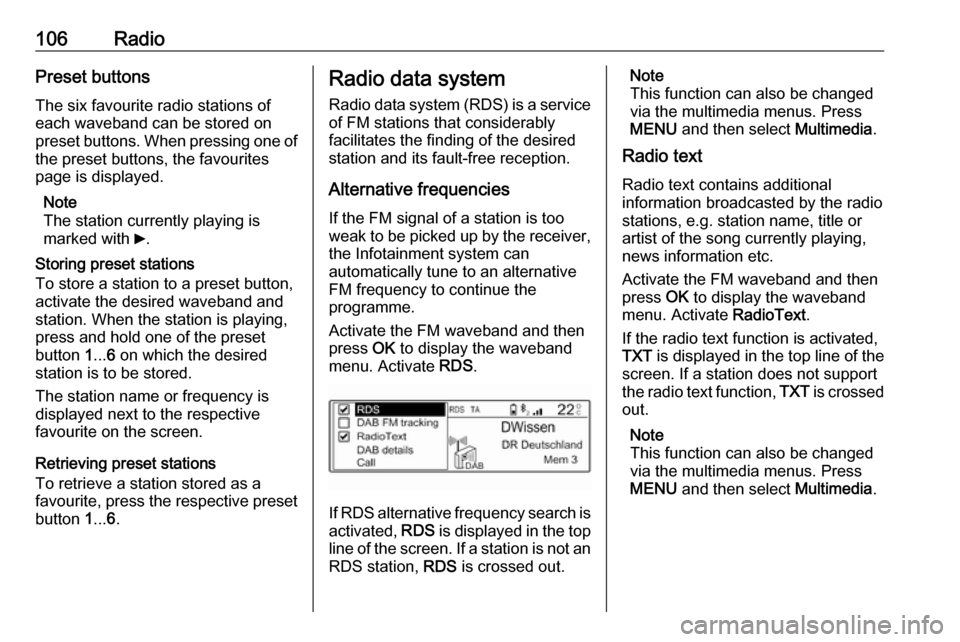
menu. Activate RDS.
If RDS alternative frequency search is
activated, RDS is displayed in the top
line of the screen. If a station is not an
RDS station, RDS is crossed out.
Note
This function can also be changed
via the multimedia menus. Press
MENU and then select Multimedia.
Radio text
Radio text contains additional
information broadcasted by the radio stations, e.g. station name, title or
artist of the song currently playing,
news information etc.
Activate the FM waveband and then
press OK to display the waveband
menu. Activate RadioText.
If the radio text function is activated,
TXT is displayed in the top line of the
screen. If a station does not support
the radio text function, TXT is crossed
out.
Note
This function can also be changed
via the multimedia menus. Press
MENU and then select Multimedia.
Page 107 of 125

Radio107Traffic announcements (TA)
Radio traffic service stations are RDS stations that broadcast traffic news. If
this function is activated, only traffic service stations are searched for and played.
Radio and media playback is
interrupted for the duration of the
traffic announcements.
To activate or deactivate the traffic
announcement standby facility of the
Infotainment system, press TA. A
corresponding message is displayed
confirming your action.
If traffic announcements are
activated, TA is displayed in the top
line of the screen. If a station is not a
radio traffic service station, TA is
crossed out.
Digital audio broadcasting
Digital audio broadcasting (DAB)
broadcasts radio stations digitally.
DAB stations are indicated by the programme name instead of the
broadcasting frequency.General information
● With DAB, several radio programmes (services) can be
broadcasted on a single
ensemble.
● Besides high-quality digital audio
services, DAB is also able to
transmit programme-associated
data and a multitude of other data services including travel andtraffic information.
● As long as a given DAB receiver can pick up the signal sent out bya broadcasting station (even if
the signal is very weak), sound
reproduction is ensured.
● In the event of poor reception, the
volume is reduced automatically
to avoid the output of
disagreeable noises.
● Interference caused by stations that are on nearby frequencies (a
phenomenon that is typical of AM
and FM reception) does not
occur with DAB.
● If the DAB signal is reflected by natural obstacles or buildings,
the reception quality of DAB isimproved, whereas AM or FM
reception is considerably
impaired in such cases.
● When DAB reception is enabled, the FM tuner of the Infotainmentsystem remains active in the
background and continually
searches for the best receivable FM stations. If TA 3 106 is
activated, traffic announcements
of the FM station with the best
reception are issued. Deactivate
TA if DAB reception should not
be interrupted by FM traffic
announcements.
Alternative frequencies If the DAB signal of a service is too
weak to be picked up by the receiver,
the Infotainment system can
automatically tune to an alternative
FM frequency to continue the
programme.
Activate the FM waveband and then
press OK to display the waveband
menu. Activate DAB FM tracking .
Page 108 of 125

108RadioNote
This function can also be changed
via the multimedia menus. Press
MENU and then select Multimedia.
If DAB FM automatical tracking is
activated, DAB FM is displayed in the
top line of the screen. If a station does
not support this function, DAB FM is
crossed out.
DAB station details
Activate the FM waveband and then
press OK to display the waveband
menu.
Select DAB details to display detailed
information on the DAB station
currently playing.
Page 109 of 125
CD Player109CD PlayerGeneral information...................109
Usage ........................................ 109General information
A CD player for the playback of audio CDs and MP3 CDs is located in the
storage compartment next to the Info
Display.Caution
Under no circumstances place
DVDs, single-CDs with a diameter
of 8 cm or shaped CDs in the audio
player.
You must not put any stickers on
CDs. These discs can get jammed in the CD drive and ruin the player. Replacement of the device will
then be necessary.
Usage
Starting CD playback
Push an audio or MP3 CD with the
labelled side facing upwards into the
CD slot until it is pulled in.
CD playback starts automatically and the CD main menu is displayed.
If a CD is already inserted, but the CD main menu is not active:
Press SRCq to toggle between the
audio sources.
CD playback is started.
Operation
For a detailed description of playback
functions for music tracks 3 110.
Removing a CD Press R. The CD is pushed out of the
CD slot.
If the CD is not removed after
ejection, it will be drawn back in after
a few seconds.
Page 110 of 125

110USB portUSB portGeneral information...................110
Playing saved audio files ...........110General information
On the control panel, there is a USB port for the connection of external
audio data sources.
Note
The socket must always be kept
clean and dry.
Connecting a USB device
An MP3 player, USB device or SD
card (via USB connector / adapter)
can be connected to the USB port. A
USB hub is not supported. If required,
use the appropriate connection cable.
Note
Not all auxiliary devices are
supported by the Infotainment
system. Check the compatibility list
on our website.
When connected to the USB port,
various functions of the above
devices can be operated via the
controls and menus of the
Infotainment system.
The Infotainment system
automatically creates playlists upon
connection.Disconnecting a USB device
Press SRCq to select a different
audio source and then remove the
USB storage device.Caution
Avoid disconnecting the device
during playback. This may
damage the device or the
Infotainment system.
File formats
The audio equipment supports
different audio file formats.
Playing saved audio files
Activating the USB music function If the device is not yet connected to
the Infotainment system, connect the
device.
The Infotainment system
automatically switches to USB music
mode.