ESP OPEL COMBO E 2019.1 Infotainment system
[x] Cancel search | Manufacturer: OPEL, Model Year: 2019.1, Model line: COMBO E, Model: OPEL COMBO E 2019.1Pages: 125, PDF Size: 2.48 MB
Page 41 of 125
Navigation41Starting, cancelling, resuming
route guidance
To start route guidance, enter or
select a destination address 3 35.
Depending on the situation, route
guidance may start automatically, or
you may have to follow some
instructions on the screen.
To cancel route guidance, select
MENU in the navigation main menu
and then select STOP NAVIGATION .
To resume a cancelled route
guidance, select MENU in the
navigation main menu and then
select RESUME GUIDANCE .
Turn list The next turning manoeuvre is
displayed on the left side of the
screen.
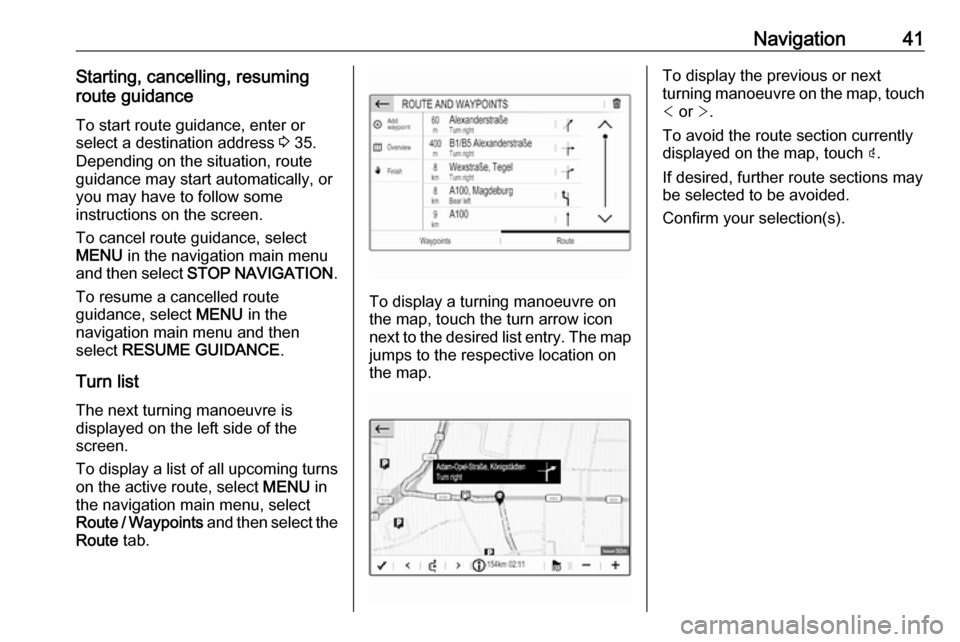
To display a list of all upcoming turns
on the active route, select MENU in
the navigation main menu, select
Route / Waypoints and then select the
Route tab.
To display a turning manoeuvre on
the map, touch the turn arrow icon
next to the desired list entry. The map jumps to the respective location on
the map.
To display the previous or next
turning manoeuvre on the map, touch < or >.
To avoid the route section currently
displayed on the map, touch þ.
If desired, further route sections may
be selected to be avoided.
Confirm your selection(s).
Page 47 of 125

Phone47Confirm the messages on the
Infotainment system and the
Bluetooth device.
● If SSP (secure simple pairing) is not supported:
On the Infotainment system: a message is displayed
asking you to enter a PIN
code on your Bluetooth
device.
On the Bluetooth device:
enter the PIN code and
confirm your input.
5. Activate the functions you want the paired smartphone to performand confirm your settings. You
can change these Bluetooth
profile settings at any time, see
below.
The Infotainment system and the device are paired.
6. The phone book is downloaded automatically to the Infotainment
system. Depending on the phone,
the Infotainment system must be
allowed access to the phone
book. If required, confirm themessages displayed on the
Bluetooth device.
If this function is not supported by the Bluetooth device, a
corresponding message is displayed.
Operations on paired devices Press a, select OPTIONS and then
select Bluetooth connection .
A list of all paired devices is
displayed.
Changing the Bluetooth profile
settings
Touch † next to the desired paired
device.
Activate or deactivate the profile
settings as desired and confirm your
settings.
Connecting a paired device
Devices which are paired but not
connected are identified by —.
Select the desired device to connect
it.Disconnecting a device
The currently connected device is
identified by “.
Select the device to disconnect it.
Deleting a paired device
Touch e in the upper right corner of
the screen to display e icons next to
each paired device.
Touch e next to the Bluetooth device
you want to delete and confirm the
displayed message.
Emergency call9 Warning
Connection setup cannot be
guaranteed in all situations. For
this reason you should not rely
exclusively on a mobile phone
Page 51 of 125

Phone51Put incoming calls always on holdFor safety reasons the phone function
can put all incoming calls on hold by
default.
To activate this function, select
OPTIONS , select Security and then
select Put incoming calls on hold .
Quick messages
Different quick messages can be sent to contacts via the Infotainment
system.
Select OPTIONS and then Quick
messages to display a list of quick
messages sorted by different
categories.
To send a quick message, select the respective message and choose the contact.Mobile phones and CB radio
equipment
Installation instructions and
operating guidelines
The vehicle specific installation
instructions and the operating
guidelines of the mobile phone and
hands-free manufacturer must be
observed when installing and
operating a mobile telephone. Failure to do so could invalidate the vehicletype approval (EU directive 95/54/
EC).
Recommendations for fault-free
operation:
● Professionally installed exterior antenna to obtain the maximum
range possible
● Maximum transmission power 10 W
● Installation of the phone in a suitable spot, consider relevant
Note in the Owner's Manual,
section Airbag system .Seek advice on predetermined
installation points for the external
antenna or equipment holder and
ways of using devices with a
transmission power exceeding 10 W.
Use of a hands-free attachment
without external antenna with mobile
telephone standards GSM
900/1800/1900 and UMTS is only
permitted if the maximum
transmission power of the mobile
telephone is 2 W for GSM 900 or
1 W for the other types.
For reasons of safety, do not use the
phone while driving. Even use of a hands-free set can be a distraction
while driving.9 Warning
Operation of radio equipment and
mobile telephones which fail to
meet above mentioned mobile
telephone standards is only
permitted using an antenna
located outside of the vehicle.
Page 59 of 125

Introduction59Important information on
operation and traffic safety9 Warning
Drive safely at all times. Only
operate the Infotainment system if the traffic conditions allow a safeusage.
In the interest of safety, it might be
appropriate to stop the vehicle
before operating the Infotainment
system.
9 Warning
The usage of a navigation app
does not release the driver from
the responsibility for a correct,
vigilant attitude in road traffic.
Always follow the applicable traffic rules.
Radio reception
Radio reception may be disrupted by static, noise, distortion or loss of
reception due to:
● changes in distance from the transmitter
● multi-path reception due to reflection
● shadowing
Page 64 of 125
64IntroductionFor a detailed description of mobile
phone operation via the Infotainment
system 3 86.
Apps
To show specific apps of your
smartphone on the display of the
Infotainment system, connect your
smartphone.
Press a and touch Apple CarPlay or
Android Auto . A menu with different
selectable apps is displayed.
For a detailed description 3 78.
Settings
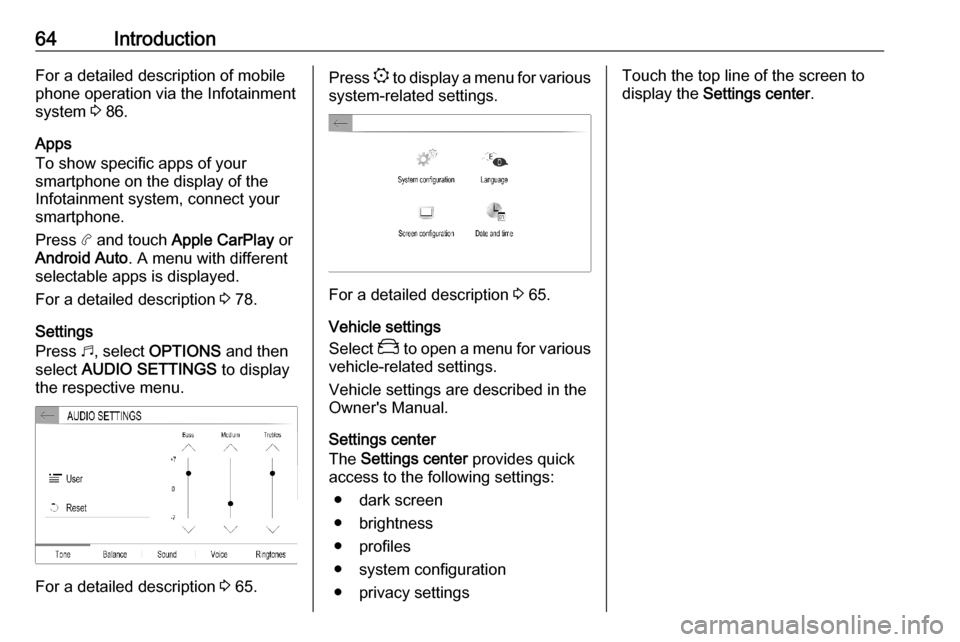
Press b, select OPTIONS and then
select AUDIO SETTINGS to display
the respective menu.
For a detailed description 3 65.
Press
: to display a menu for various
system-related settings.
For a detailed description 3 65.
Vehicle settings
Select _ to open a menu for various
vehicle-related settings.
Vehicle settings are described in the
Owner's Manual.
Settings center
The Settings center provides quick
access to the following settings:
● dark screen
● brightness
● profiles
● system configuration
● privacy settings
Touch the top line of the screen to
display the Settings center .
Page 65 of 125
Basic operation65Basic operationBasic operation............................ 65
Tone settings ............................... 67
Volume settings ........................... 67
System settings ........................... 68Basic operation
The display of the Infotainment
system has a touch-sensitive surface
that allows direct interaction with the
displayed menu controls.Caution
Do not use pointed or hard items
like ballpoint pens, pencils or
similar for touch screen operation.
Menu operation
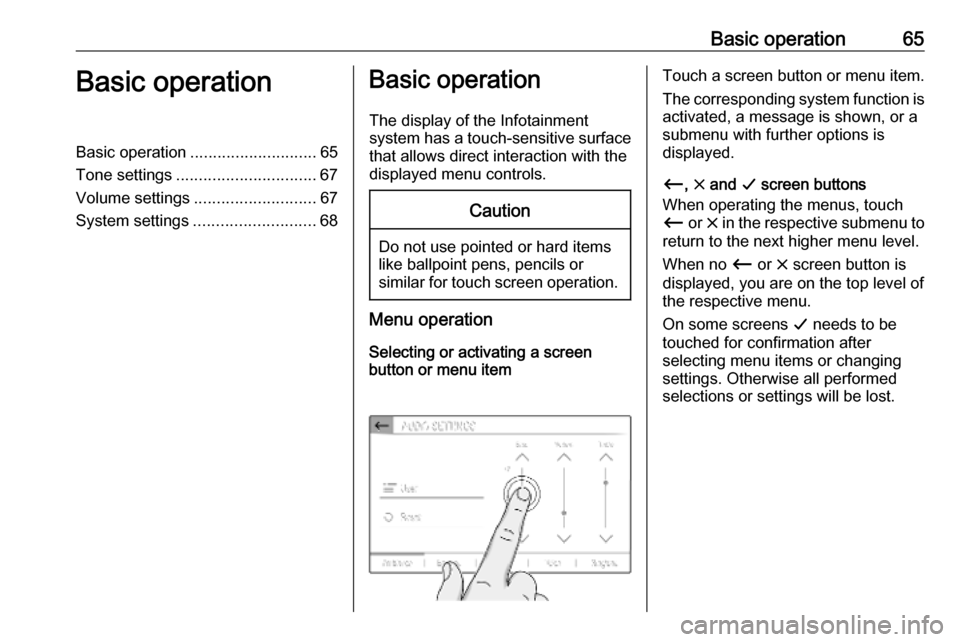
Selecting or activating a screen
button or menu item
Touch a screen button or menu item.
The corresponding system function is activated, a message is shown, or a
submenu with further options is
displayed.
Ù , & and G screen buttons
When operating the menus, touch Ù or & in the respective submenu to
return to the next higher menu level.
When no Ù or & screen button is
displayed, you are on the top level of
the respective menu.
On some screens G needs to be
touched for confirmation after
selecting menu items or changing
settings. Otherwise all performed selections or settings will be lost.
Page 66 of 125
66Basic operationScrolling a list
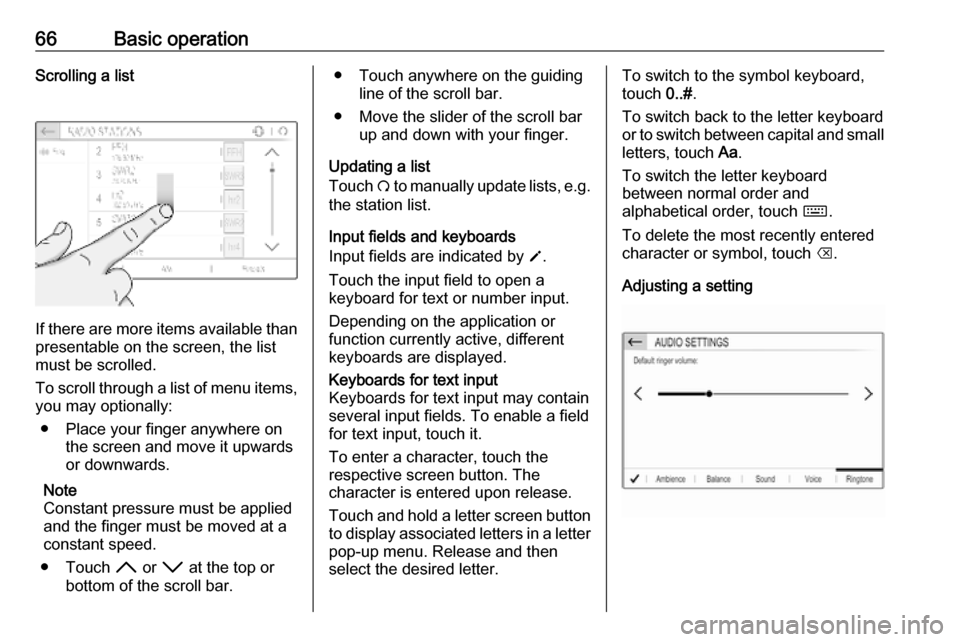
If there are more items available than
presentable on the screen, the list
must be scrolled.
To scroll through a list of menu items, you may optionally:
● Place your finger anywhere on the screen and move it upwards
or downwards.
Note
Constant pressure must be applied
and the finger must be moved at a
constant speed.
● Touch H or I at the top or
bottom of the scroll bar.
● Touch anywhere on the guiding line of the scroll bar.
● Move the slider of the scroll bar up and down with your finger.
Updating a list
Touch Ü to manually update lists, e.g.
the station list.
Input fields and keyboards
Input fields are indicated by o.
Touch the input field to open a
keyboard for text or number input.
Depending on the application or
function currently active, different
keyboards are displayed.Keyboards for text input
Keyboards for text input may contain
several input fields. To enable a field for text input, touch it.
To enter a character, touch the
respective screen button. The
character is entered upon release.
Touch and hold a letter screen button to display associated letters in a letter
pop-up menu. Release and then
select the desired letter.To switch to the symbol keyboard,
touch 0..#.
To switch back to the letter keyboard
or to switch between capital and small letters, touch Aa.
To switch the letter keyboard
between normal order and
alphabetical order, touch ç.
To delete the most recently entered character or symbol, touch k.
Adjusting a setting
Page 68 of 125
68Basic operationIf activated, the volume of the
Infotainment system is adapted
automatically to make up for the road and wind noise as you drive.
Speech output Select the Voice tab.
Adjust the volume for all speech
outputs of the system.
Ringtone Select the Ringtones tab.
Adjust the ringtone volume of
incoming calls.
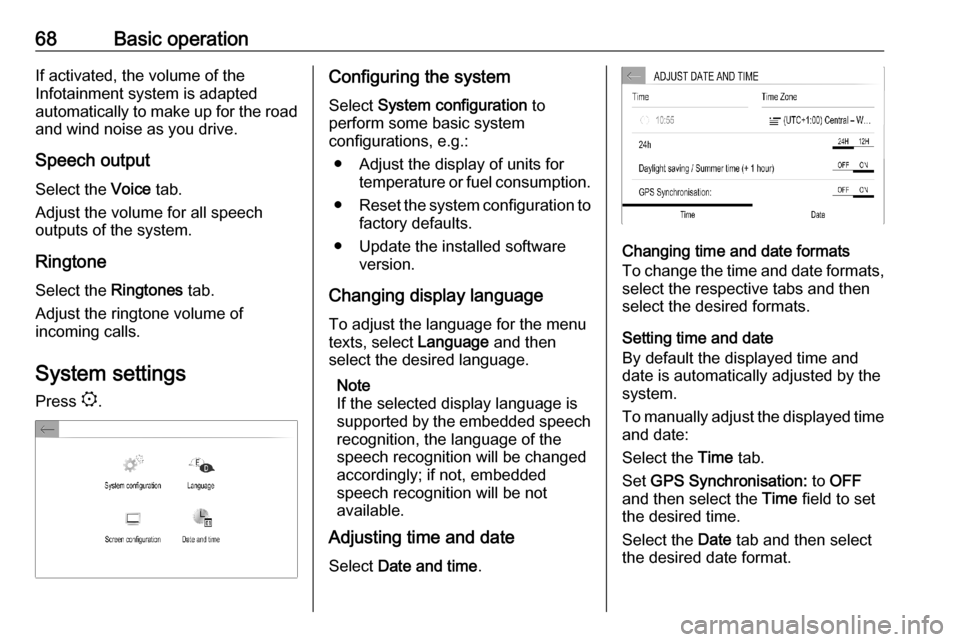
System settings
Press :.Configuring the system
Select System configuration to
perform some basic system
configurations, e.g.:
● Adjust the display of units for temperature or fuel consumption.
● Reset the system configuration to
factory defaults.
● Update the installed software version.
Changing display language
To adjust the language for the menu
texts, select Language and then
select the desired language.
Note
If the selected display language is
supported by the embedded speech recognition, the language of the
speech recognition will be changed
accordingly; if not, embedded
speech recognition will be not
available.
Adjusting time and date
Select Date and time .
Changing time and date formats
To change the time and date formats, select the respective tabs and then
select the desired formats.
Setting time and date
By default the displayed time and date is automatically adjusted by the
system.
To manually adjust the displayed time
and date:
Select the Time tab.
Set GPS Synchronisation: to OFF
and then select the Time field to set
the desired time.
Select the Date tab and then select
the desired date format.
Page 69 of 125
Basic operation69Adjusting the screenSelect Screen configuration .
Text scroll function
Select the Animation tab.
If long texts on the screen should be
scrolled automatically, activate
Automatic scrolling .
If Automatic scrolling is deactivated,
long texts are truncated.
Adjusting the brightness
Select Brightness and set the
brightness of the screen to the
desired level.
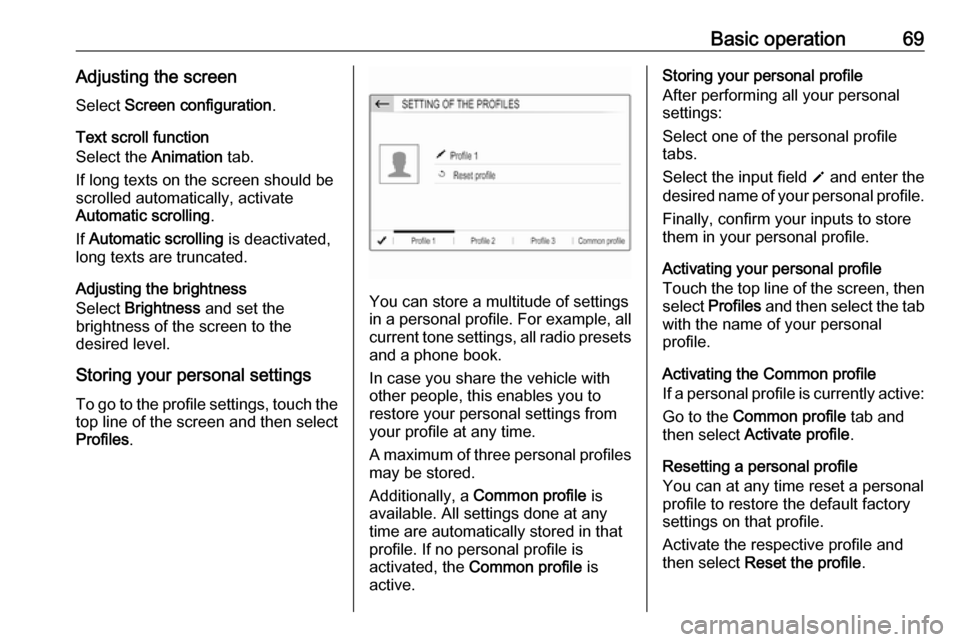
Storing your personal settings
To go to the profile settings, touch the top line of the screen and then select
Profiles .
You can store a multitude of settings
in a personal profile. For example, all
current tone settings, all radio presets
and a phone book.
In case you share the vehicle with
other people, this enables you to
restore your personal settings from
your profile at any time.
A maximum of three personal profiles may be stored.
Additionally, a Common profile is
available. All settings done at any
time are automatically stored in that
profile. If no personal profile is
activated, the Common profile is
active.
Storing your personal profile
After performing all your personal
settings:
Select one of the personal profile
tabs.
Select the input field o and enter the
desired name of your personal profile.
Finally, confirm your inputs to store
them in your personal profile.
Activating your personal profile
Touch the top line of the screen, then select Profiles and then select the tab
with the name of your personal
profile.
Activating the Common profile
If a personal profile is currently active:
Go to the Common profile tab and
then select Activate profile .
Resetting a personal profile
You can at any time reset a personal
profile to restore the default factory
settings on that profile.
Activate the respective profile and
then select Reset the profile .
Page 72 of 125
72RadioStoring favourite stations
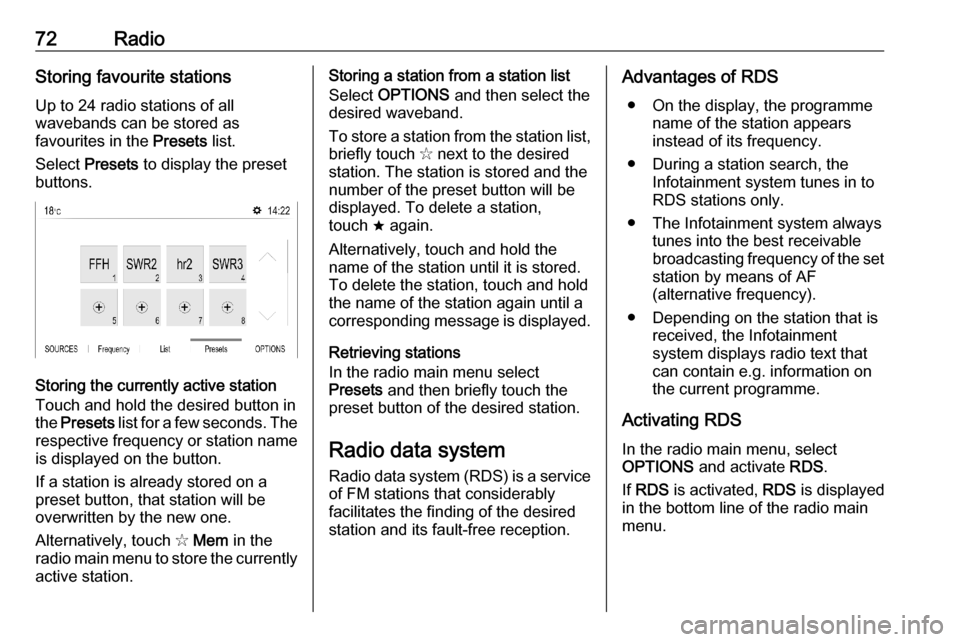
Up to 24 radio stations of all
wavebands can be stored as
favourites in the Presets list.
Select Presets to display the preset
buttons.
Storing the currently active station
Touch and hold the desired button in
the Presets list for a few seconds. The
respective frequency or station name is displayed on the button.
If a station is already stored on a
preset button, that station will be
overwritten by the new one.
Alternatively, touch ✩ Mem in the
radio main menu to store the currently
active station.
Storing a station from a station list
Select OPTIONS and then select the
desired waveband.
To store a station from the station list, briefly touch ✩ next to the desired
station. The station is stored and the
number of the preset button will be
displayed. To delete a station,
touch ; again.
Alternatively, touch and hold the name of the station until it is stored.To delete the station, touch and hold
the name of the station again until a
corresponding message is displayed.
Retrieving stations
In the radio main menu select
Presets and then briefly touch the
preset button of the desired station.
Radio data system
Radio data system (RDS) is a service of FM stations that considerably
facilitates the finding of the desired
station and its fault-free reception.Advantages of RDS
● On the display, the programme name of the station appears
instead of its frequency.
● During a station search, the Infotainment system tunes in to
RDS stations only.
● The Infotainment system always tunes into the best receivable
broadcasting frequency of the set station by means of AF
(alternative frequency).
● Depending on the station that is received, the Infotainment
system displays radio text that
can contain e.g. information on
the current programme.
Activating RDS In the radio main menu, select
OPTIONS and activate RDS.
If RDS is activated, RDS is displayed
in the bottom line of the radio main
menu.