steering OPEL COMBO E 2019 Manual user
[x] Cancel search | Manufacturer: OPEL, Model Year: 2019, Model line: COMBO E, Model: OPEL COMBO E 2019Pages: 279, PDF Size: 10.43 MB
Page 111 of 279

Instruments and controls109Illuminates temporarilyStart of saturation of the exhaust filter.
Start cleaning process as soon as
possible by driving at a vehicle speed of at least 60 km/h.
Illuminates constantly Indication of a low additive level. Seek
the assistance of a workshop.
Exhaust filter 3 152.
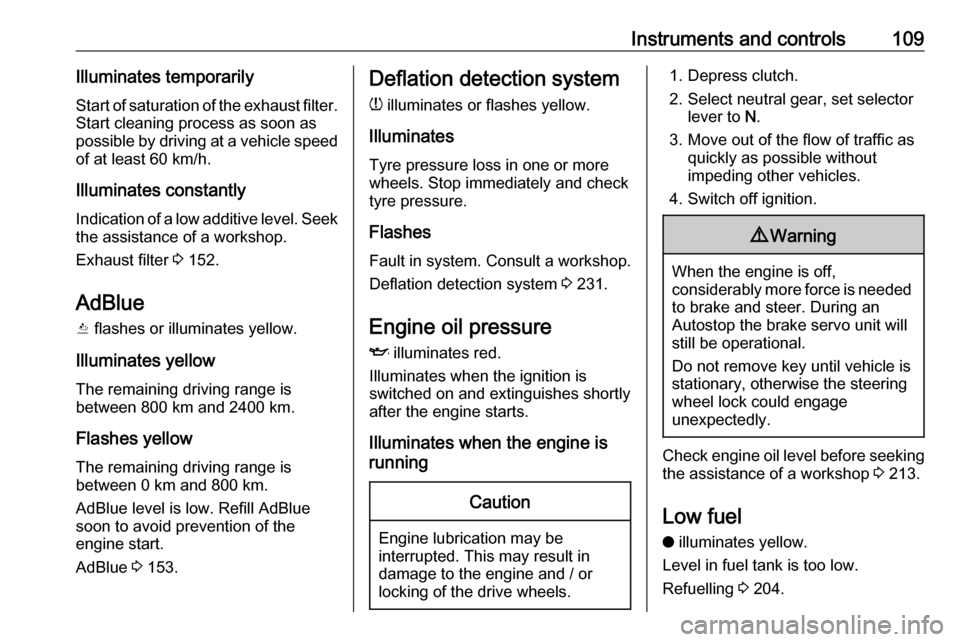
AdBlue Y flashes or illuminates yellow.
Illuminates yellow
The remaining driving range is
between 800 km and 2400 km.
Flashes yellow
The remaining driving range is
between 0 km and 800 km.
AdBlue level is low. Refill AdBlue soon to avoid prevention of the
engine start.
AdBlue 3 153.Deflation detection system
w illuminates or flashes yellow.
Illuminates
Tyre pressure loss in one or more wheels. Stop immediately and check
tyre pressure.
Flashes
Fault in system. Consult a workshop.
Deflation detection system 3 231.
Engine oil pressure
I illuminates red.
Illuminates when the ignition is
switched on and extinguishes shortly
after the engine starts.
Illuminates when the engine is
runningCaution
Engine lubrication may be
interrupted. This may result in
damage to the engine and / or
locking of the drive wheels.
1. Depress clutch.
2. Select neutral gear, set selector lever to N.
3. Move out of the flow of traffic as quickly as possible without
impeding other vehicles.
4. Switch off ignition.9 Warning
When the engine is off,
considerably more force is needed
to brake and steer. During an
Autostop the brake servo unit will still be operational.
Do not remove key until vehicle is stationary, otherwise the steeringwheel lock could engage
unexpectedly.
Check engine oil level before seeking
the assistance of a workshop 3 213.
Low fuel
o illuminates yellow.
Level in fuel tank is too low.
Refuelling 3 204.
Page 114 of 279

112Instruments and controlsDisplaysDriver Information Centre
The Driver Information Centre is
located in the instrument cluster.
Driver Information Centre indicates: ● overall and trip odometer
● digital speed indication
● trip / fuel information menu
● gear shift indication
● service information
● vehicle and warning messages ● driver assistance messages
● pop-up messages
Selecting menus and functions
The menus and functions can be selected via the buttons on the left
steering wheel stalk.
Turn the adjuster wheel to select a
page in the trip / fuel information
menu.
Press SET / CLR to confirm or reset
a function.
Vehicle and service messages are popped up in the Driver Information
Centre if required. Scroll messages
by turning the adjuster wheel.
Confirm messages by pressing
SET / CLR .
Additionally, some menus can be selected via the M or the CHECK
button.Press M or CHECK to switch
between the respective menus.
Vehicle messages 3 118.
Page 121 of 279

Instruments and controls119When the vehicle is being driven, the
load reduction function temporarily
deactivates certain functions, such as
the air conditioning, the heated rear
window, heated steering wheel, etc.
The deactivated functions are
reactivated automatically as soon as
conditions permit.Vehicle personalisation
The vehicle's behaviour can be
personalised by changing the settings in the Info Display.
Depending on vehicle equipment and
country-specific regulations some of
the functions described below may
not be available.
Some functions are only displayed or
active when the engine is running.
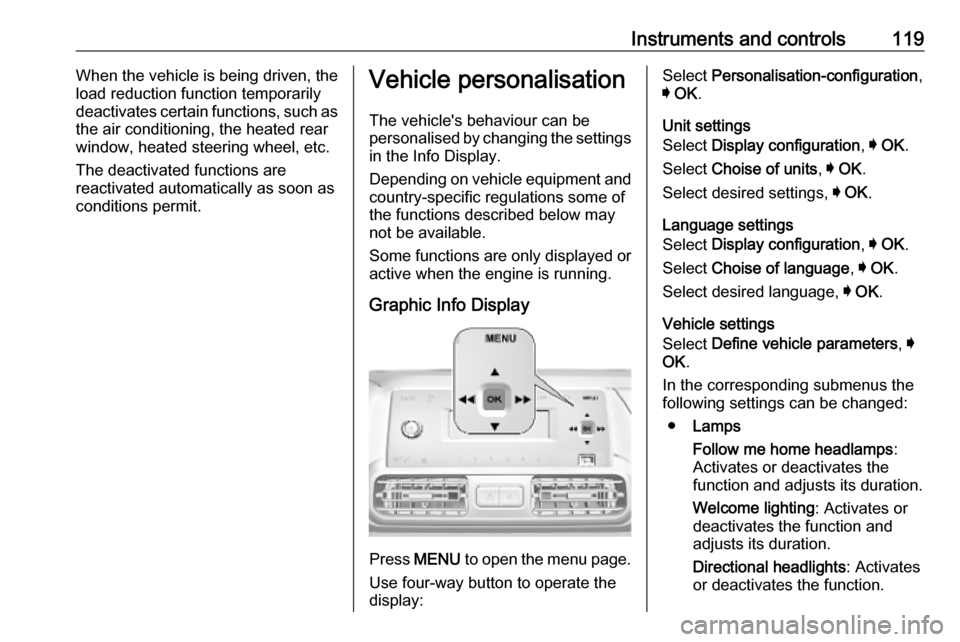
Graphic Info Display
Press MENU to open the menu page.
Use four-way button to operate the
display:
Select Personalisation-configuration ,
I OK .
Unit settings
Select Display configuration , I OK .
Select Choise of units , I OK .
Select desired settings, I OK .
Language settings
Select Display configuration , I OK .
Select Choise of language , I OK .
Select desired language, I OK .
Vehicle settings
Select Define vehicle parameters , I
OK .
In the corresponding submenus the
following settings can be changed:
● Lamps
Follow me home headlamps :
Activates or deactivates the
function and adjusts its duration.
Welcome lighting : Activates or
deactivates the function and
adjusts its duration.
Directional headlights : Activates
or deactivates the function.
Page 127 of 279

Lighting125Headlights when driving
abroad
When driving in countries where
traffic drives on the opposite side of
the road, the headlights do not have
to be adjusted.
Daytime running lights Daytime running lights increase
visibility of the vehicle during daylight.
They are switched on automatically
when the engine is running.
The system switches between
daytime running lights and low beam automatically, depending on the
lighting conditions.
Cornering lightsActivated at a speed of up to 40 km/h
when turning off. Depending on the
steering angle or the activation of the turn lights the front fog light illuminate
the direction of travel.
This function can be activated or
deactivated in the vehicle
personalisation 3 119.
Hazard warning flashersHazard warning flashers are switched
on automatically in the following
situations:
● Braking in an emergency (depending on the force of
deceleration).
● In the event of an accident.
They are switched off the first time
you accelerate or if you press ¨.
Turn lightsstalk up:right turn lightsstalk down:left turn lights
A resistance point can be felt when
moving the stalk.
Page 128 of 279

126LightingConstant flashing is activated when
the stalk is being moved beyond the
resistance point. It is deactivated
when the steering wheel is moved in
the opposite direction or stalk is
manually moved back to its neutral
position.
Activate temporary flashing by
holding the stalk just before the
resistance point. Turn lights will flash
until stalk is being released.
To activate three flashes, tap the stalk
briefly without passing the resistance
point.
If you forget to cancel the turn lights
for more than twenty seconds, the
volume of the audible signal will
increase if the speed is above
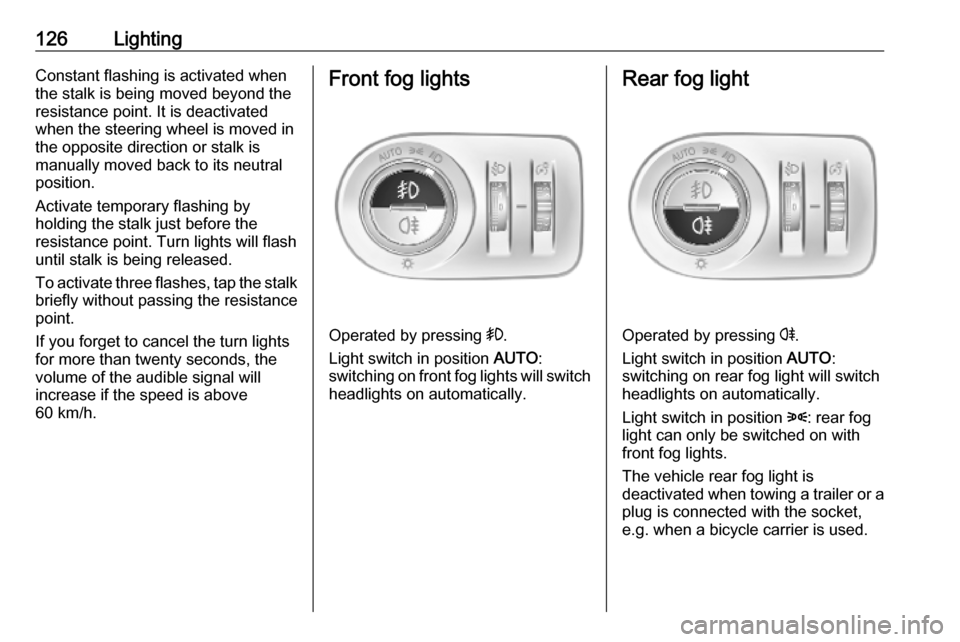
60 km/h.Front fog lights
Operated by pressing >.
Light switch in position AUTO:
switching on front fog lights will switch headlights on automatically.
Rear fog light
Operated by pressing r.
Light switch in position AUTO:
switching on rear fog light will switch
headlights on automatically.
Light switch in position 8: rear fog
light can only be switched on with
front fog lights.
The vehicle rear fog light is
deactivated when towing a trailer or a
plug is connected with the socket,
e.g. when a bicycle carrier is used.
Page 145 of 279

Driving and operating143Driving and
operatingDriving hints ............................... 144
Control of the vehicle ...............144
Steering ................................... 144
Starting and operating ...............144
New vehicle running-in ............144
Ignition switch positions ...........144
Power button ........................... 145
Power saving mode .................146
Starting the engine ..................147
Overrun cut-off ........................ 148
Stop-start system ....................148
Parking .................................... 151
Engine exhaust .......................... 152
Exhaust filter ............................ 152
Catalytic converter ...................153
AdBlue ..................................... 153
Automatic transmission ..............156
Transmission display ...............156
Selector lever .......................... 157
Manual mode ........................... 157
Electronic driving programmes 158
Fault ........................................ 159
Eco mode ................................ 159Manual transmission ..................159
Brakes ........................................ 160
Antilock brake system .............160
Parking brake .......................... 161
Brake assist ............................. 164
Hill start assist ......................... 164
Ride control systems .................164
Electronic Stability Control and Traction Control system .........164
Descent control system ...........165
Selective ride control ...............167
Driver assistance systems .........169
Cruise control .......................... 169
Speed limiter ........................... 171
Adaptive cruise control ............173
Forward collision alert .............180
Active emergency braking .......181
Front pedestrian protection .....184
Parking assist .......................... 185
Advanced parking assist .........189
Side blind spot alert .................193
Panoramic view system ...........195
Rear view camera ...................197
Lane keep assist .....................198
Driver alert ............................... 201
Fuel ............................................ 202
Fuel for petrol engines .............202
Fuel for diesel engines ............202
Refuelling ................................ 204Trailer hitch................................ 205
General information .................205
Driving characteristics and towing tips .............................. 205
Trailer towing ........................... 206
Towing equipment ...................206
Trailer stability assist ...............209
Page 146 of 279

144Driving and operatingDriving hints
Control of the vehicle
Never coast with engine not
running
Many systems will not function in this situation ( e.g. brake servo unit, power
steering). Driving in this manner is a
danger to yourself and others.
All systems function during an
Autostop.
Stop-start system 3 148.
Idle boost
If charging of the vehicle battery is
required due to battery condition, the
power output of the generator must
be increased. This will be achieved by an idle boost which may be audible.
A message appears in the Driver
Information Centre.
Pedals
To ensure the pedal travel is
uninhibited, there must be no mats in
the area of the pedals.Use only floor mats, which fit properly and are fixed by the retainers on the
driver side.
Steering If power steering assist is lost
because the engine stops or due to a system malfunction, the vehicle can
be steered but may require increased
effort.Starting and operating
New vehicle running-in Do not brake unnecessarily hard for
the first few journeys.
During the first drive, smoke may
occur because of wax and oil
evaporating off the exhaust system.
Park the vehicle in the open for a
while after the first drive and avoid
inhaling the fumes.
During the running-in period, fuel and engine oil consumption may be
higher.
Additionally, the cleaning process of
the exhaust filter may take place more
often.
Exhaust filter 3 152.
Autostop may be inhibited to allow
charging of the vehicle battery.
Ignition switch positions Turn key:
Page 147 of 279

Driving and operating1450:ignition off: some functions
remain active until key is
removed or driver's door is
opened, provided the ignition was
on previously1:ignition on power mode: ignition
is on, diesel engine is preheating, control indicators illuminate and
most electrical functions are
operable2:engine start: release key after
engine has been started
Steering wheel lock
Remove key from ignition switch and
turn steering wheel until it engages.
9 Danger
Never remove the key from
ignition switch during driving as
this will cause steering wheel lock.
Power button
The electronic key must be inside the
vehicle.
Engine start
Operate the clutch pedal (manual
transmission), the brake pedal and
press Start/Stop .Ignition on power mode without
starting the engine
Press Start/Stop without operating
clutch or brake pedal. Control
indicators illuminate and most
electrical functions are operable.Engine and ignition off
Press Start/Stop briefly in each mode
or when engine is running and vehicle
is stationary. Some functions remain
active until driver's door is opened,
provided the ignition was on
previously.Emergency shut off during driving
Press Start/Stop for about three
seconds 3 147. Steering wheel locks
as soon as vehicle is stationary.
Steering wheel lock
The steering wheel lock activates
automatically when:
● The vehicle is stationary.
● The ignition has been switched off.
To release steering wheel lock, open
and close driver's door and switch the ignition on power mode or start the
engine directly.
Page 148 of 279

146Driving and operating9Warning
If the vehicle battery is discharged,
the vehicle must not be towed,
tow-started or jump-started as the
steering wheel lock cannot be
disengaged.
Operation on vehicles with
electronic key system in case of
failure
If either the electronic key fails or the
battery of the electronic key is weak,
a message may be displayed in the
Driver Information Centre.
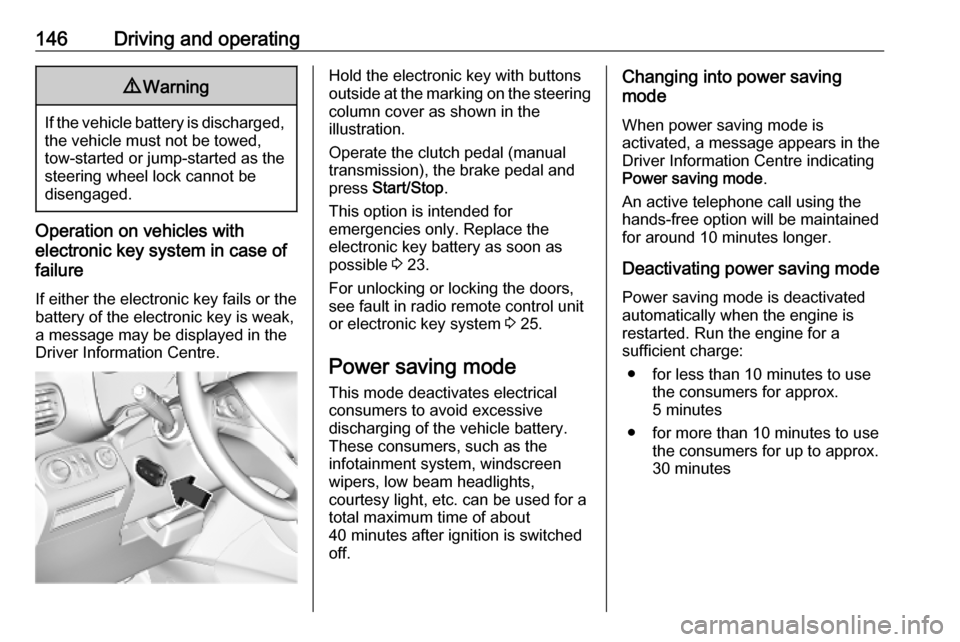
Hold the electronic key with buttons
outside at the marking on the steering column cover as shown in the
illustration.
Operate the clutch pedal (manual
transmission), the brake pedal and
press Start/Stop .
This option is intended for
emergencies only. Replace the
electronic key battery as soon as
possible 3 23.
For unlocking or locking the doors,
see fault in radio remote control unit
or electronic key system 3 25.
Power saving mode
This mode deactivates electrical
consumers to avoid excessive
discharging of the vehicle battery.
These consumers, such as the
infotainment system, windscreen
wipers, low beam headlights,
courtesy light, etc. can be used for a
total maximum time of about
40 minutes after ignition is switched
off.Changing into power saving
mode
When power saving mode is
activated, a message appears in the
Driver Information Centre indicating
Power saving mode .
An active telephone call using the
hands-free option will be maintained
for around 10 minutes longer.
Deactivating power saving mode
Power saving mode is deactivated
automatically when the engine is
restarted. Run the engine for a
sufficient charge:
● for less than 10 minutes to use the consumers for approx.
5 minutes
● for more than 10 minutes to use the consumers for up to approx.
30 minutes
Page 149 of 279

Driving and operating147Starting the engine
Vehicles with ignition switch
Turn key to position 1 to release the
steering wheel lock.
Manual transmission: operate clutch
and brake pedal.
Automatic transmission: operate
brake pedal and move selector lever
to P or N.
Do not operate accelerator pedal.
Diesel engines: wait until control
indicator ! extinguishes.
Turn key briefly to position 2 and
release after engine has been
started.
Manual transmission: during an
Autostop, the engine can be started
by depressing the clutch pedal
3 148.
Automatic transmission: during an
Autostop, the engine can be started
by releasing the brake pedal 3 148.
Vehicles with power button● Manual transmission: operate clutch and brake pedal.
● Automatic transmission: operate brake pedal and move selector
lever to P or N.
● Do not operate accelerator pedal.
● Press Start/Stop button.
● Release button after starting procedure begins. Diesel engine
starts after control indicator ! for
preheating extinguishes.
● Before restarting or to switch off the engine when vehicle is
stationary, press Start/Stop once
more briefly.
To start the engine during an
Autostop:
● Manual transmission: during an Autostop, the engine can be
started by depressing the clutch
pedal 3 148.
● Automatic transmission: during an Autostop, the engine can be
started by releasing the brake
pedal 3 148.