light OPEL COMBO E 2019 User Guide
[x] Cancel search | Manufacturer: OPEL, Model Year: 2019, Model line: COMBO E, Model: OPEL COMBO E 2019Pages: 279, PDF Size: 10.43 MB
Page 39 of 279
Keys, doors and windows37
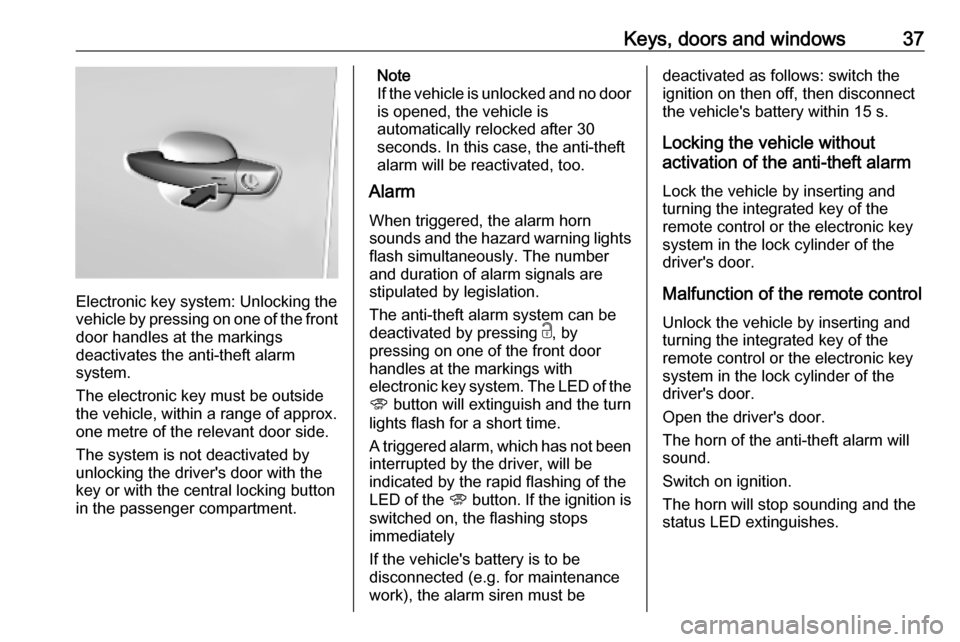
Electronic key system: Unlocking the
vehicle by pressing on one of the front
door handles at the markings
deactivates the anti-theft alarm
system.
The electronic key must be outside
the vehicle, within a range of approx. one metre of the relevant door side.
The system is not deactivated by
unlocking the driver's door with the
key or with the central locking button
in the passenger compartment.
Note
If the vehicle is unlocked and no door is opened, the vehicle is
automatically relocked after 30
seconds. In this case, the anti-theft
alarm will be reactivated, too.
Alarm
When triggered, the alarm horn
sounds and the hazard warning lights flash simultaneously. The number
and duration of alarm signals are
stipulated by legislation.
The anti-theft alarm system can be
deactivated by pressing c, by
pressing on one of the front door
handles at the markings with
electronic key system. The LED of the
U button will extinguish and the turn
lights flash for a short time.
A triggered alarm, which has not been interrupted by the driver, will be
indicated by the rapid flashing of the
LED of the U button. If the ignition is
switched on, the flashing stops
immediately
If the vehicle's battery is to be
disconnected (e.g. for maintenance
work), the alarm siren must bedeactivated as follows: switch the
ignition on then off, then disconnect
the vehicle's battery within 15 s.
Locking the vehicle without
activation of the anti-theft alarm
Lock the vehicle by inserting and
turning the integrated key of the
remote control or the electronic key
system in the lock cylinder of the
driver's door.
Malfunction of the remote control
Unlock the vehicle by inserting and
turning the integrated key of the
remote control or the electronic key
system in the lock cylinder of the
driver's door.
Open the driver's door.
The horn of the anti-theft alarm will
sound.
Switch on ignition.
The horn will stop sounding and the
status LED extinguishes.
Page 41 of 279
Keys, doors and windows39Folding mirrors
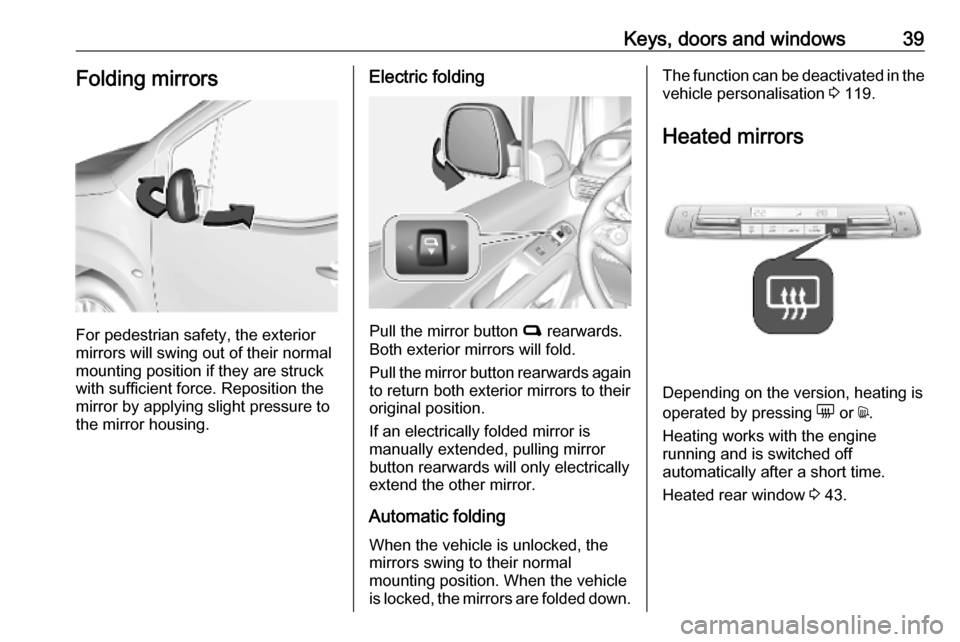
For pedestrian safety, the exterior
mirrors will swing out of their normal
mounting position if they are struck
with sufficient force. Reposition the mirror by applying slight pressure tothe mirror housing.
Electric folding
Pull the mirror button C rearwards.
Both exterior mirrors will fold.
Pull the mirror button rearwards again
to return both exterior mirrors to their
original position.
If an electrically folded mirror is
manually extended, pulling mirror
button rearwards will only electrically
extend the other mirror.
Automatic folding When the vehicle is unlocked, the
mirrors swing to their normal
mounting position. When the vehicle
is locked, the mirrors are folded down.
The function can be deactivated in the
vehicle personalisation 3 119.
Heated mirrors
Depending on the version, heating is
operated by pressing e or d.
Heating works with the engine
running and is switched off
automatically after a short time.
Heated rear window 3 43.
Page 46 of 279
44Keys, doors and windowsThis function heats the windscreen
along its bottom and along the driver's side of the windscreen.
Thus, the function allows a fast
detaching of the windscreen wiper
blades if they are frozen to the
windscreen. Additionally, an
accumulation of snow caused by the
operation of the windscreen wipers is
prevented.
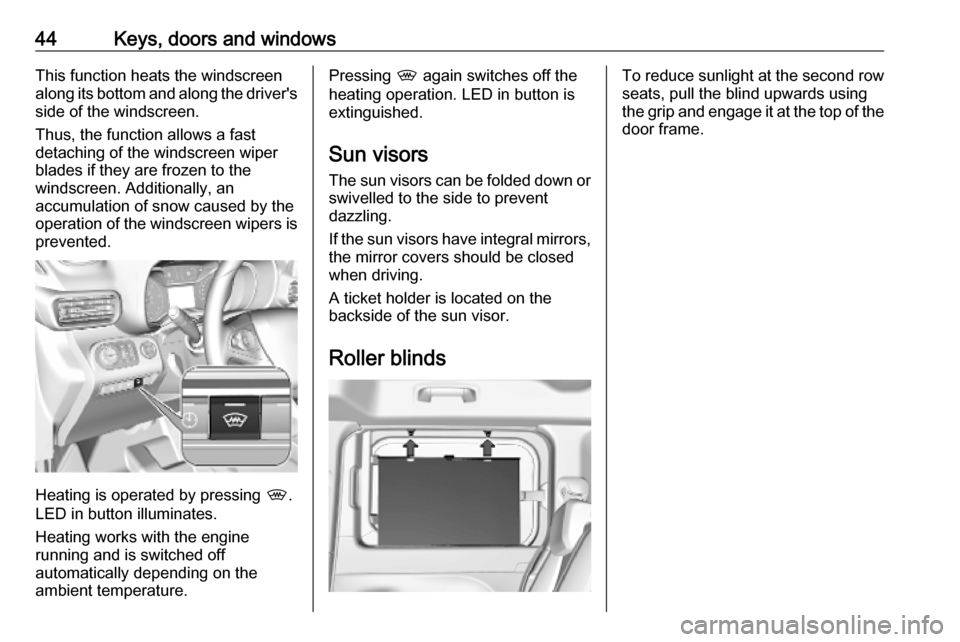
Heating is operated by pressing ,.
LED in button illuminates.
Heating works with the engine
running and is switched off
automatically depending on the
ambient temperature.
Pressing , again switches off the
heating operation. LED in button is extinguished.
Sun visors
The sun visors can be folded down or swivelled to the side to prevent
dazzling.
If the sun visors have integral mirrors, the mirror covers should be closed
when driving.
A ticket holder is located on the
backside of the sun visor.
Roller blindsTo reduce sunlight at the second row seats, pull the blind upwards using
the grip and engage it at the top of the
door frame.
Page 49 of 279
Seats, restraints47Head restraints on rear seats
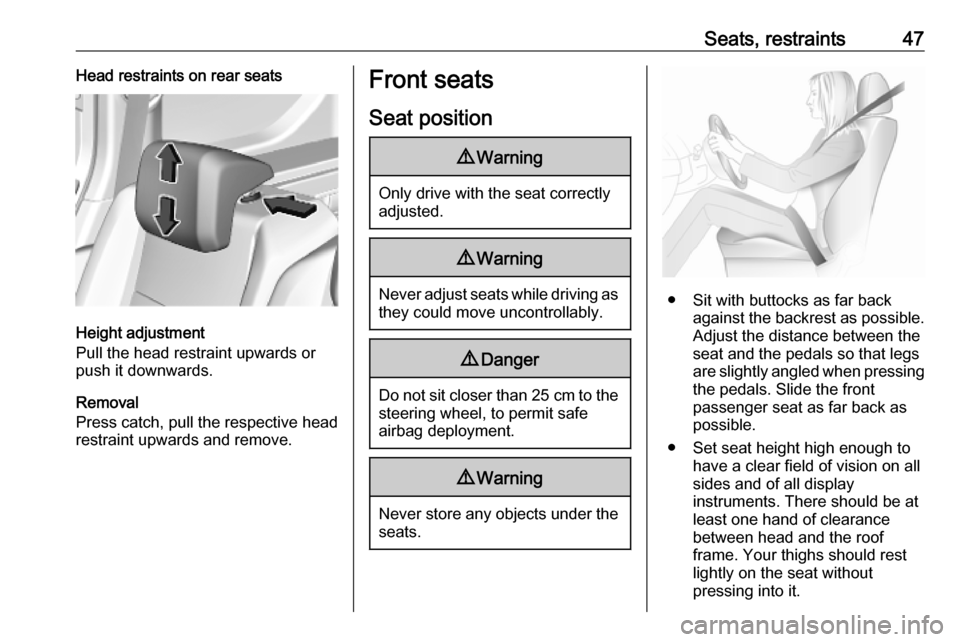
Height adjustment
Pull the head restraint upwards or
push it downwards.
Removal
Press catch, pull the respective head
restraint upwards and remove.
Front seats
Seat position9 Warning
Only drive with the seat correctly
adjusted.
9 Warning
Never adjust seats while driving as
they could move uncontrollably.
9 Danger
Do not sit closer than 25 cm to the
steering wheel, to permit safe
airbag deployment.
9 Warning
Never store any objects under the
seats.
● Sit with buttocks as far back against the backrest as possible.
Adjust the distance between the
seat and the pedals so that legs
are slightly angled when pressing the pedals. Slide the front
passenger seat as far back as
possible.
● Set seat height high enough to have a clear field of vision on allsides and of all display
instruments. There should be at
least one hand of clearance
between head and the roof
frame. Your thighs should rest
lightly on the seat without
pressing into it.
Page 50 of 279
48Seats, restraints● Sit with shoulders as far backagainst the backrest as possible.
Set the backrest rake so that it is possible to easily reach the
steering wheel with arms slightly
bent. Maintain contact between
shoulders and the backrest when turning the steering wheel. Do
not angle the backrest too far
back. We recommend a
maximum rake of approx. 25°.
● Adjust seat and steering wheel in
a way that the wrist rests on top
of the steering wheel while the
arm is fully extended and
shoulders are on the backrest.
● Adjust the steering wheel 3 90.
● Adjust the head restraint 3 46.
● Adjust the thigh support so that there is a space approx. two
fingers wide between the edge of the seat and the hollow of the
knee.
● Adjust the lumbar support so that
it supports the natural shape ofthe spine.Seat adjustment
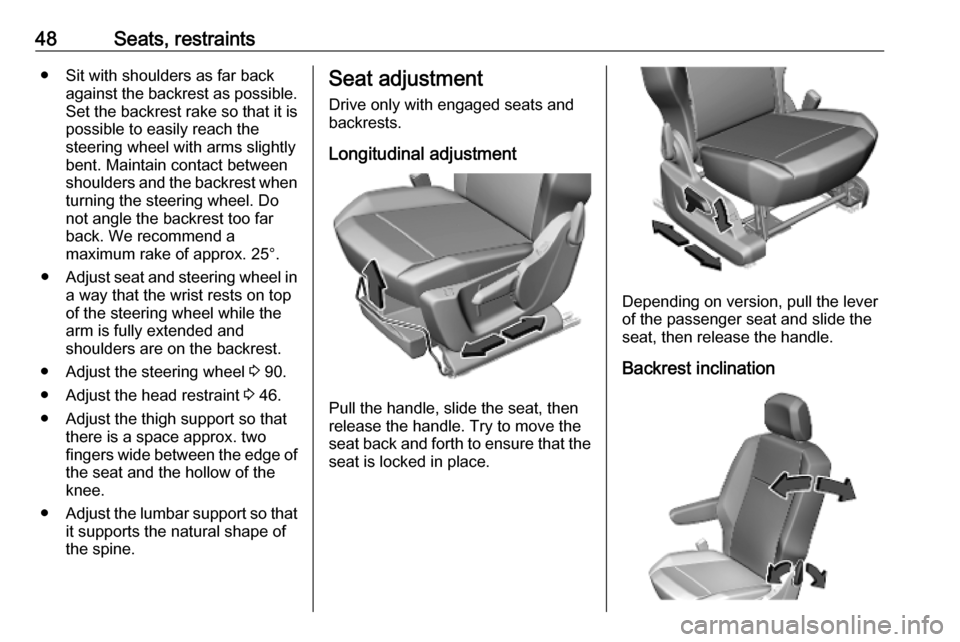
Drive only with engaged seats and
backrests.
Longitudinal adjustment
Pull the handle, slide the seat, then
release the handle. Try to move the seat back and forth to ensure that the
seat is locked in place.
Depending on version, pull the lever
of the passenger seat and slide the seat, then release the handle.
Backrest inclination
Page 65 of 279
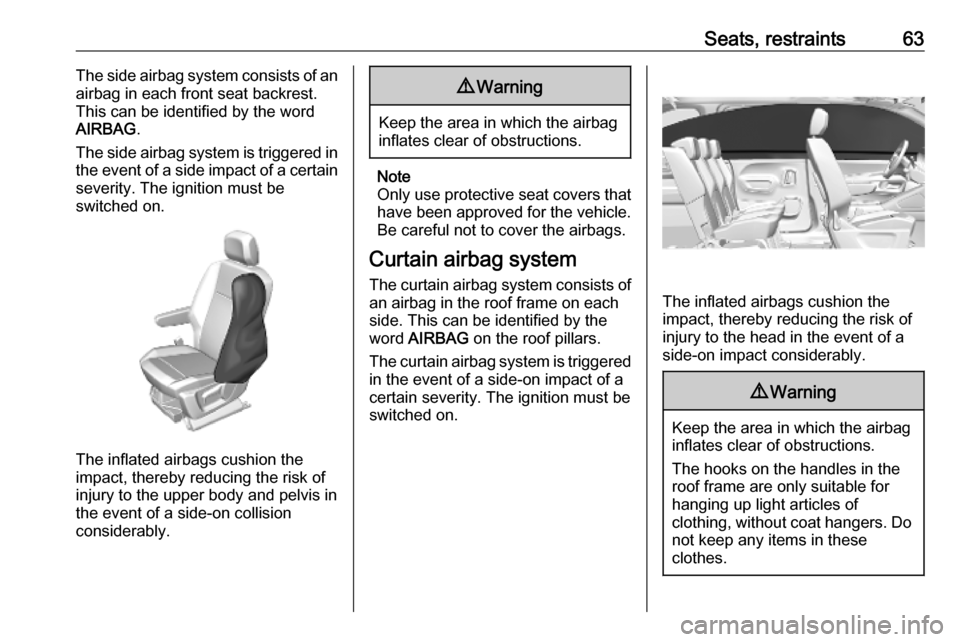
Seats, restraints63The side airbag system consists of an
airbag in each front seat backrest.
This can be identified by the word
AIRBAG .
The side airbag system is triggered in
the event of a side impact of a certain severity. The ignition must be
switched on.
The inflated airbags cushion the
impact, thereby reducing the risk of
injury to the upper body and pelvis in
the event of a side-on collision
considerably.
9 Warning
Keep the area in which the airbag
inflates clear of obstructions.
Note
Only use protective seat covers that have been approved for the vehicle.Be careful not to cover the airbags.
Curtain airbag system
The curtain airbag system consists of an airbag in the roof frame on each
side. This can be identified by the
word AIRBAG on the roof pillars.
The curtain airbag system is triggered
in the event of a side-on impact of a
certain severity. The ignition must be
switched on.
The inflated airbags cushion the
impact, thereby reducing the risk of
injury to the head in the event of a
side-on impact considerably.
9 Warning
Keep the area in which the airbag
inflates clear of obstructions.
The hooks on the handles in the
roof frame are only suitable for
hanging up light articles of
clothing, without coat hangers. Do not keep any items in these
clothes.
Page 75 of 279
Storage73
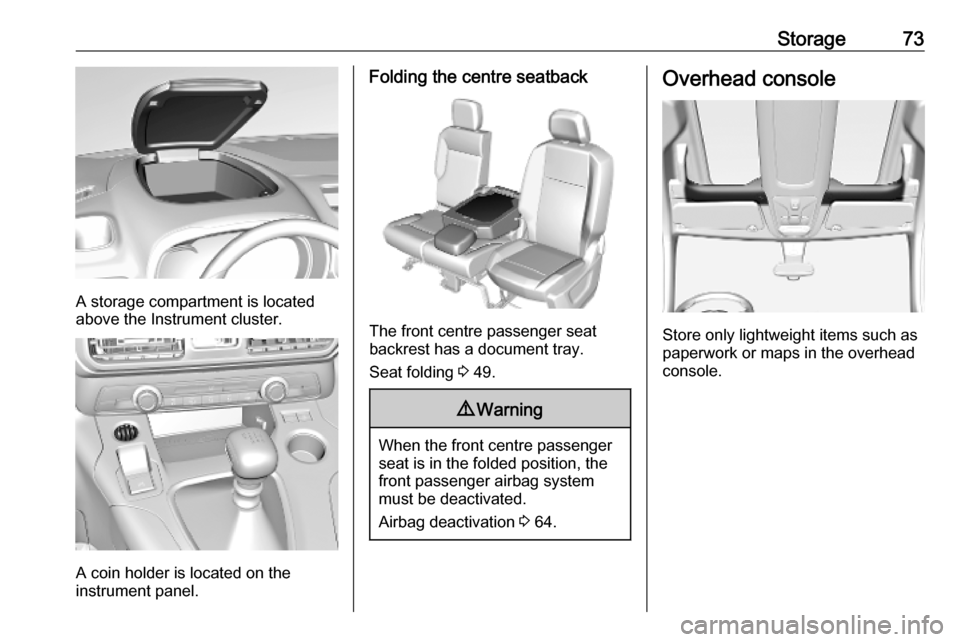
A storage compartment is located
above the Instrument cluster.
A coin holder is located on the
instrument panel.
Folding the centre seatback
The front centre passenger seat
backrest has a document tray.
Seat folding 3 49.
9 Warning
When the front centre passenger
seat is in the folded position, the front passenger airbag system
must be deactivated.
Airbag deactivation 3 64.
Overhead console
Store only lightweight items such as
paperwork or maps in the overhead
console.
Page 91 of 279

Instruments and controls89Instruments and
controlsControls ....................................... 90
Steering wheel adjustment ........90
Steering wheel controls .............90
Heated steering wheel ...............90
Horn ........................................... 91
Windscreen wiper and washer ..91
Rear window wiper and washer ...................................... 93
Outside temperature ..................93
Clock ......................................... 94
Power outlets ............................. 95
Inductive charging .....................96
Cigarette lighter ......................... 97
Ashtrays .................................... 97
Warning lights, gauges and indi‐ cators ........................................... 98
Instrument cluster ......................98
Speedometer ........................... 100
Odometer ................................ 101
Trip odometer .......................... 101
Tachometer ............................. 101
Fuel gauge .............................. 102
Engine coolant temperature gauge ..................................... 102Engine oil level monitor...........102
Service display ........................ 103
Control indicators ....................104
Turn lights ................................ 104
Seat belt reminder ...................104
Airbag and belt tensioners .......105
Airbag deactivation ..................105
Charging system .....................105
Malfunction indicator light ........106
Service vehicle soon ...............106
Stop engine ............................. 106
System check .......................... 106
Brake and clutch system .........106
Parking brake .......................... 107
Electric parking brake ..............107
Electric parking brake fault ......107
Antilock brake system (ABS) ...107
Gear shifting ............................ 107
Descent control system ...........107
Lane keep assist .....................108
Electronic Stability Control and Traction Control system .........108
Engine coolant temperature ....108
Preheating ............................... 108
Exhaust filter ............................ 108
AdBlue ..................................... 109
Deflation detection system ......109
Engine oil pressure ..................109
Low fuel ................................... 109
Autostop .................................. 110Exterior light............................ 110
High beam ............................... 110
Low beam ................................ 110
High beam assist .....................110
LED headlights ........................ 110
Front fog lights ......................... 110
Rear fog light ........................... 110
Rain sensor ............................. 110
Cruise control .......................... 110
Adaptive cruise control ............110
Vehicle detected ahead ...........111
Side blind spot alert .................111
Active emergency braking .......111
Speed limiter ........................... 111
Door open ................................ 111
Displays ..................................... 112
Driver Information Centre ........112
Info Display .............................. 114
Head-up display ......................116
Vehicle messages ......................118
Warning chimes .......................118
Battery voltage ........................ 118
Vehicle personalisation ..............119
Page 99 of 279

Instruments and controls97
The portable device to be charged
must be compatible with the Qi
standard, either by design or by using a compatible holder or shell. The
charging zone is identified by the Qi
symbol.
To charge a device, the ignition must
be switched on.
To charge a mobile device: 1. Remove all objects from the charging device.
2. Place the mobile device with the display facing upwards on the
charging device in the storage.
Charging status is indicated in the
LED: illuminates green, when mobile
device is charging.
Protective cover for the mobile device
could have impact on the inductive
charging.
In the event that the mobile device is
not charging properly, rotate it 180°
and place it on the charging device
again.
Cigarette lighter
The cigarette lighter is freely
accessible.
Depending on version, the cigarette
lighter may be located behind the storage cover. Press cover to open.
Press in cigarette lighter. It switches
off automatically once the element is
glowing. Pull out cigarette lighter.
AshtraysCaution
To be used only for ash and not for combustible rubbish.
A portable ashtray can be placed in
the cupholders.
Page 100 of 279

98Instruments and controlsWarning lights, gauges
and indicators
Instrument cluster
Depending on the version, the Driver
Information Centre may vary.