warning OPEL COMBO E 2020 Manual user
[x] Cancel search | Manufacturer: OPEL, Model Year: 2020, Model line: COMBO E, Model: OPEL COMBO E 2020Pages: 283, PDF Size: 29.4 MB
Page 204 of 283
202Driving and operating● the change of trajectory is notaccompanied by operation of the
turn signals
● the Electronic Stability Control is activated and not in operation
● the vehicle is not connected to a trailer or an electric bicycle carrier
● normal driving behaviour (system
detects dynamic driving style, i.e. pressure on the brake or
accelerator pedal)
● roads with poor lane markings
● no spare wheel is used
● the driver needs to be active during the correction
● the vehicle is not driven in a tight
cornerActivation
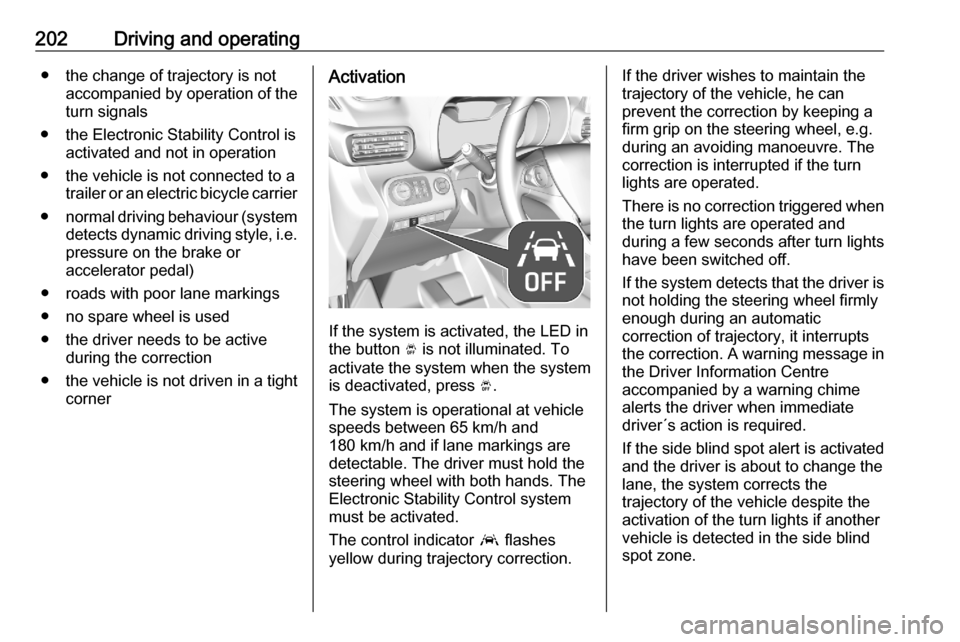
If the system is activated, the LED in
the button Ó is not illuminated. To
activate the system when the system
is deactivated, press Ó.
The system is operational at vehicle
speeds between 65 km/h and
180 km/h and if lane markings are
detectable. The driver must hold the
steering wheel with both hands. The Electronic Stability Control system
must be activated.
The control indicator a flashes
yellow during trajectory correction.
If the driver wishes to maintain the
trajectory of the vehicle, he can
prevent the correction by keeping a
firm grip on the steering wheel, e.g.
during an avoiding manoeuvre. The correction is interrupted if the turn
lights are operated.
There is no correction triggered when
the turn lights are operated and
during a few seconds after turn lights
have been switched off.
If the system detects that the driver is not holding the steering wheel firmly
enough during an automatic
correction of trajectory, it interrupts
the correction. A warning message in
the Driver Information Centre
accompanied by a warning chime
alerts the driver when immediate
driver´s action is required.
If the side blind spot alert is activated
and the driver is about to change the
lane, the system corrects the
trajectory of the vehicle despite the
activation of the turn lights if another
vehicle is detected in the side blind
spot zone.
Page 205 of 283

Driving and operating203DeactivationTo deactivate the system, press and
hold Ó. Deactivation of the system is
confirmed by the illuminated LED in
the button. In the Driver Information
Centre solid grey lines are displayed.
Recommended deactivation It is recommended to deactivate the
system in the following situations:
● Road surface in poor condition
● Unfavourable climatic conditions
● Slippery surfaces, e.g., ice
The system is not designed for driving in the following situations:
● Driving on a speed circuit
● Driving with a trailer
● Driving on a rolling stand
● Driving on unstable surfacesFault
In the event of a fault, a and C
appear in the instrument panel,
accompanied by a display message
and a warning chime. Contact a
dealer or a qualified workshop to have the system checked.
System limitations The system performance may be
affected by:
● windscreen not clean or affected by foreign objects, e.g. stickers
● close vehicles ahead
● banked roads
● narrow, winding or hilly roads
● road edges
● sudden lighting changes
● adverse environmental conditions, e.g. heavy rain or
snow
● vehicle modifications, e.g. tyresSwitch off the system if the system is
disturbed by tar marks, shadows,
road cracks, temporary or
construction lane markings, or other
road imperfections.9 Warning
Always keep your attention on the
road and maintain proper vehicle
position within the lane, otherwise
vehicle damage, injury or death
could occur.
Lane keep assist does not
continuously steer the vehicle.
The system may not keep the
vehicle in the lane or give an alert,
even if a lane marking is detected.
The steering of the lane keep
assist may not be sufficient to
avoid a lane departure.
The system may not detect hands-
off driving due to external
influences like road condition and
surface and weather. The driver has full responsibility to control the
Page 206 of 283

204Driving and operatingvehicle and is always required tokeep the hands on the steeringwheel while driving.
Using the system while towing a
trailer or on slippery roads could
cause loss of control of the vehicle
and a crash. Switch the system off.
Driver alert
The driver alert system monitores the driving time and the vigilance of the
driver. Monitoring the vigilance of the
driver is based on the trajectory
variations of the vehicle compared to
the lane markings.
9 Warning
The system cannot replace the
need for vigilance on the part of
the driver. Taking a break is
recommended as soon as feeling tired or at least every two hours.
Do not take the steering wheel
when feeling tired.
Activation or Deactivation
The system can be activated or
deactivated in the vehicle
personalisation 3 118.
The state of the system stays in
memory when the ignition is switched
off.
Driving time alert The driver gets notified by a pop-up
reminder symbol € in the Driver
Information Centre simultaneously with an acoustic alert if the driver has
not taken a break after 2 hours of
driving at a speed above 65 km/h. The
alert is repeated hourly until the
vehicle is stopped, no matter how
vehicle speed evolves.The counting of driving time alert is
reset if one of the following conditions is met:
● The vehicle has been stationary for more than 15 minutes with theengine running.
● The ignition has been switched off for a few minutes.
● The driver's seat belt has been unfastened and the driver's door
is open.
Note
If the vehicle speed drops below
65 km/h, the system is paused. The
driving time is counted again once
the speed is above 65 km/h.
Driver drowsiness detection
The system monitors the driver's level
of vigilance. A camera at the top of the windscreen detects variations in
trajectory compared to the lane
markings. This system is particularly
suited to fast roads (speed higher
than 65 km/h).
If the trajectory of the vehicle
suggests a certain level of
drowsiness or inattention by the
Page 213 of 283

Driving and operating2113. Insert the coupling ball bar in theopening and push firmly up to the
stop.
Secure the coupling ball bar
correctly by moving the lever to
the locked position, shown in the
picture.
4. Lock the coupling ball bar by turning the key. Remove the key
and close the protective flap.
5. Attach the trailer.
6. Fold the socket forward.
7. Connect the trailer plug to the socket.
8. Attach the breakaway stoppingcable to the eye on the carrier.
9 Warning
Towing a trailer is permitted only
when a coupling ball bar is fitted correctly. If the coupling ball bardoes not engage correctly, seekthe assistance of a workshop.
Dismounting coupling ball bar
1. Disconnect the trailer plug.
2. Unfasten the breakaway stopping
cable.
3. Remove the trailer.
4. Open the protective flap and unlock the coupling ball bar with
the key.
5. Move the lever of the coupling ball
bar to the rear position. Remove
the coupling ball bar by pulling it.
Page 218 of 283
216Vehicle careEnd-of-life vehicle recoveryInformation on end-of-life vehicle
recovery centres and the recycling of
end-of-life vehicles is available on our website, where legally required. Only
entrust this work to an authorised
recycling centre.Vehicle checks
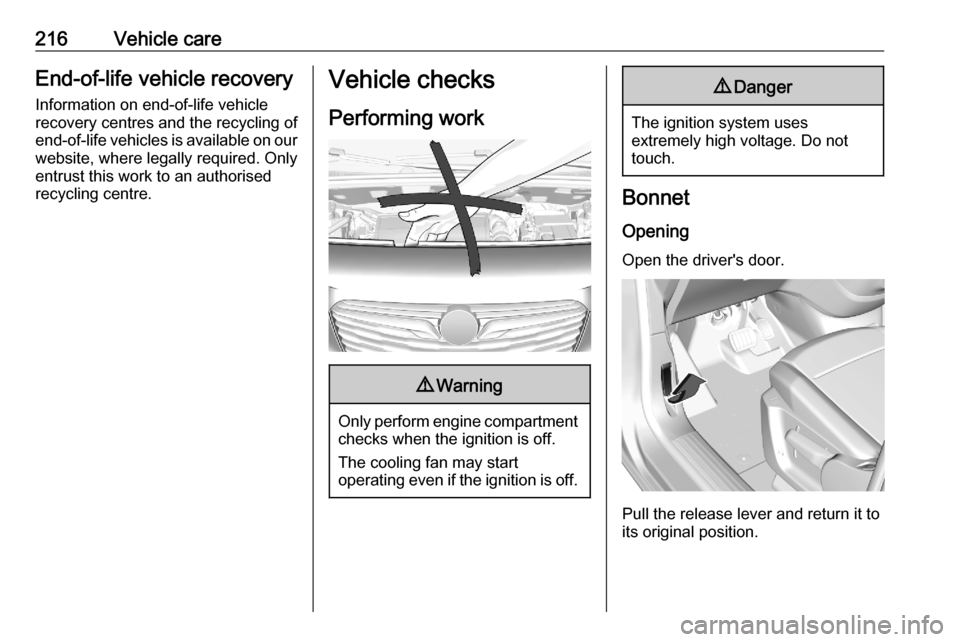
Performing work9 Warning
Only perform engine compartment
checks when the ignition is off.
The cooling fan may start
operating even if the ignition is off.
9 Danger
The ignition system uses
extremely high voltage. Do not
touch.
Bonnet
Opening
Open the driver's door.
Pull the release lever and return it to
its original position.
Page 220 of 283
218Vehicle careDifferent dipsticks are used
depending on engine variant.
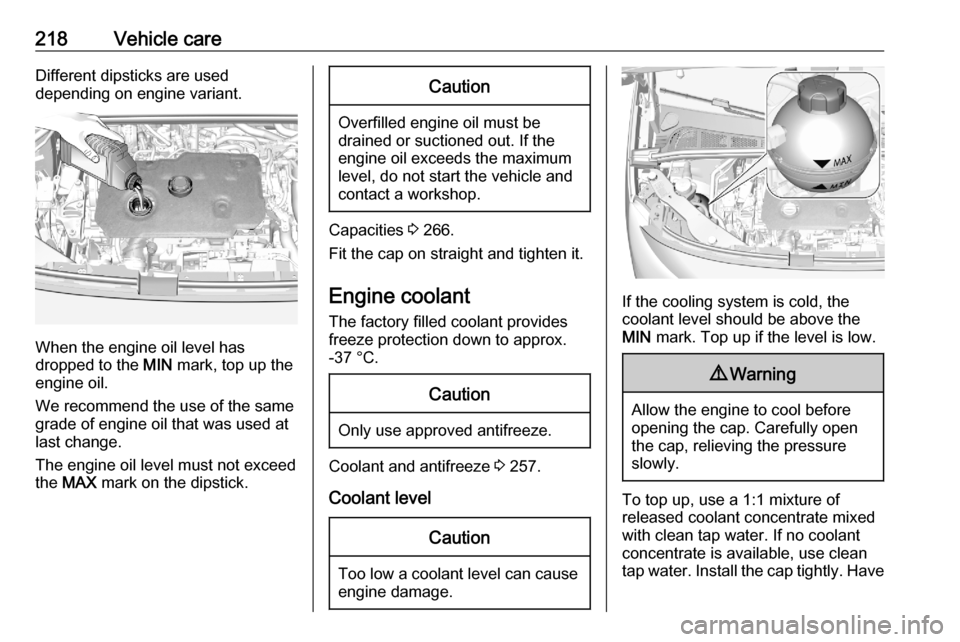
When the engine oil level has
dropped to the MIN mark, top up the
engine oil.
We recommend the use of the same
grade of engine oil that was used at
last change.
The engine oil level must not exceed the MAX mark on the dipstick.
Caution
Overfilled engine oil must be
drained or suctioned out. If the
engine oil exceeds the maximum
level, do not start the vehicle and
contact a workshop.
Capacities 3 266.
Fit the cap on straight and tighten it.
Engine coolant The factory filled coolant provides
freeze protection down to approx.
-37 °C.
Caution
Only use approved antifreeze.
Coolant and antifreeze 3 257.
Coolant level
Caution
Too low a coolant level can cause engine damage.
If the cooling system is cold, the
coolant level should be above the
MIN mark. Top up if the level is low.
9Warning
Allow the engine to cool before
opening the cap. Carefully open
the cap, relieving the pressure
slowly.
To top up, use a 1:1 mixture of
released coolant concentrate mixed
with clean tap water. If no coolant
concentrate is available, use clean
tap water. Install the cap tightly. Have
Page 221 of 283
Vehicle care219the coolant concentration checked
and have the cause of the coolant
loss remedied by a workshop.
Washer fluid
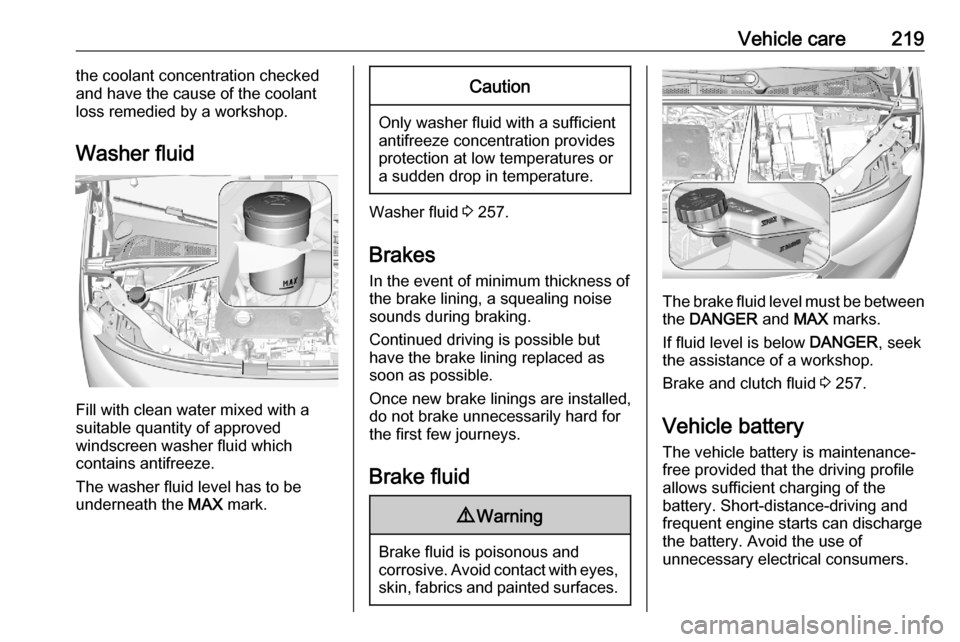
Fill with clean water mixed with a
suitable quantity of approved
windscreen washer fluid which
contains antifreeze.
The washer fluid level has to be
underneath the MAX mark.
Caution
Only washer fluid with a sufficient
antifreeze concentration provides
protection at low temperatures or
a sudden drop in temperature.
Washer fluid 3 257.
Brakes In the event of minimum thickness of
the brake lining, a squealing noise
sounds during braking.
Continued driving is possible but
have the brake lining replaced as
soon as possible.
Once new brake linings are installed,
do not brake unnecessarily hard for
the first few journeys.
Brake fluid
9 Warning
Brake fluid is poisonous and
corrosive. Avoid contact with eyes,
skin, fabrics and painted surfaces.
The brake fluid level must be betweenthe DANGER and MAX marks.
If fluid level is below DANGER, seek
the assistance of a workshop.
Brake and clutch fluid 3 257.
Vehicle battery
The vehicle battery is maintenance-
free provided that the driving profile
allows sufficient charging of the
battery. Short-distance-driving and
frequent engine starts can discharge
the battery. Avoid the use of
unnecessary electrical consumers.
Page 222 of 283
220Vehicle care
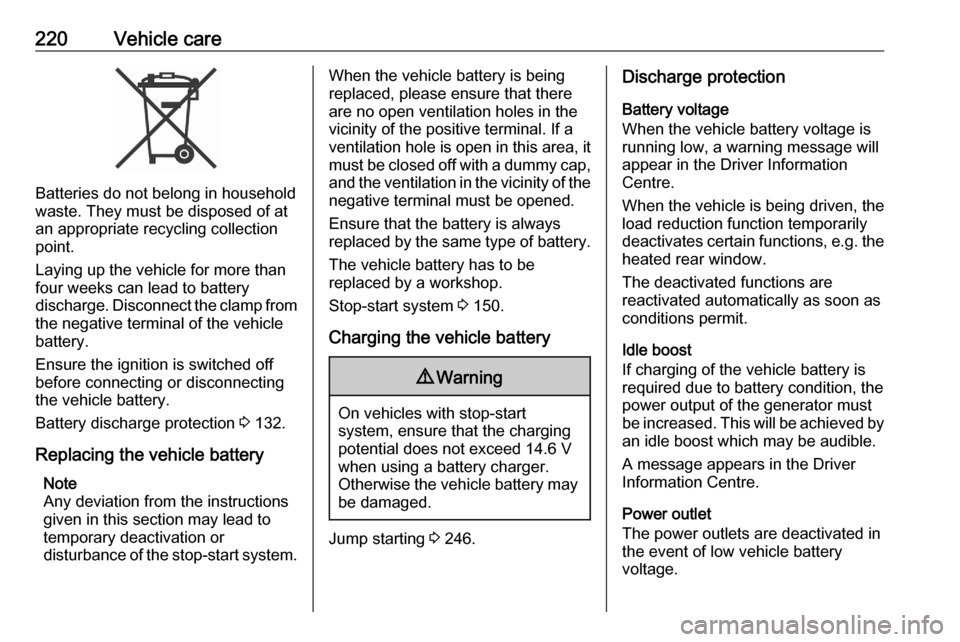
Batteries do not belong in household
waste. They must be disposed of at
an appropriate recycling collection
point.
Laying up the vehicle for more than
four weeks can lead to battery
discharge. Disconnect the clamp from the negative terminal of the vehicle
battery.
Ensure the ignition is switched off
before connecting or disconnecting
the vehicle battery.
Battery discharge protection 3 132.
Replacing the vehicle battery Note
Any deviation from the instructions
given in this section may lead to
temporary deactivation or
disturbance of the stop-start system.
When the vehicle battery is being
replaced, please ensure that there
are no open ventilation holes in the
vicinity of the positive terminal. If a
ventilation hole is open in this area, it
must be closed off with a dummy cap, and the ventilation in the vicinity of the negative terminal must be opened.
Ensure that the battery is always
replaced by the same type of battery.
The vehicle battery has to be
replaced by a workshop.
Stop-start system 3 150.
Charging the vehicle battery9 Warning
On vehicles with stop-start
system, ensure that the charging potential does not exceed 14.6 V
when using a battery charger.
Otherwise the vehicle battery may be damaged.
Jump starting 3 246.
Discharge protection
Battery voltage
When the vehicle battery voltage is
running low, a warning message will
appear in the Driver Information
Centre.
When the vehicle is being driven, the
load reduction function temporarily
deactivates certain functions, e.g. the
heated rear window.
The deactivated functions are
reactivated automatically as soon as
conditions permit.
Idle boost
If charging of the vehicle battery is
required due to battery condition, the
power output of the generator must
be increased. This will be achieved by an idle boost which may be audible.
A message appears in the Driver
Information Centre.
Power outlet
The power outlets are deactivated in
the event of low vehicle battery
voltage.
Page 223 of 283
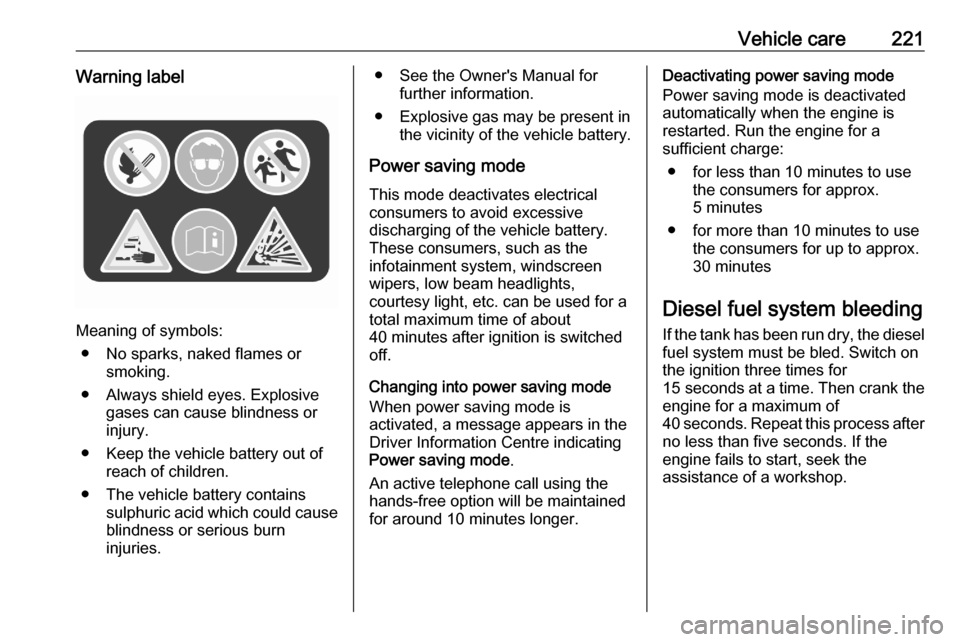
Vehicle care221Warning label
Meaning of symbols:● No sparks, naked flames or smoking.
● Always shield eyes. Explosive gases can cause blindness or
injury.
● Keep the vehicle battery out of reach of children.
● The vehicle battery contains sulphuric acid which could cause
blindness or serious burn
injuries.
● See the Owner's Manual for further information.
● Explosive gas may be present in the vicinity of the vehicle battery.
Power saving mode This mode deactivates electrical
consumers to avoid excessive
discharging of the vehicle battery.
These consumers, such as the
infotainment system, windscreen
wipers, low beam headlights,
courtesy light, etc. can be used for a
total maximum time of about
40 minutes after ignition is switched
off.
Changing into power saving mode
When power saving mode is
activated, a message appears in the
Driver Information Centre indicating
Power saving mode .
An active telephone call using the
hands-free option will be maintained
for around 10 minutes longer.Deactivating power saving mode
Power saving mode is deactivatedautomatically when the engine is
restarted. Run the engine for a
sufficient charge:
● for less than 10 minutes to use the consumers for approx.
5 minutes
● for more than 10 minutes to use the consumers for up to approx.
30 minutes
Diesel fuel system bleeding
If the tank has been run dry, the diesel fuel system must be bled. Switch on
the ignition three times for
15 seconds at a time. Then crank the
engine for a maximum of
40 seconds. Repeat this process after no less than five seconds. If the
engine fails to start, seek the
assistance of a workshop.
Page 229 of 283

Vehicle care227
2. Carefully withdraw the tail lightassembly from recess and
remove. Take care that the cable
duct remains in position.
3. Detach the cable from the retainer.4. Press the retaining lug backwards, pull the bulb carrier
and disengage the remaining
retaining lugs.
5. Push the bulb slightly down, turn it and remove it from the bulb
carrier. Replace the bulb:
Rear fog light ( 1)
Reversing light ( 2)
Turn light / hazard warning flasher
( 3 )
Tail light / brake light ( 4)
6. Attach the bulb carrier to the light assembly.
7. Attach the cable to the retainer.
8. Attach the light assembly to the vehicle body and tighten both
screws.
Vehicle with rear doors