instrument cluster OPEL COMBO E 2020 Manual user
[x] Cancel search | Manufacturer: OPEL, Model Year: 2020, Model line: COMBO E, Model: OPEL COMBO E 2020Pages: 283, PDF Size: 29.4 MB
Page 196 of 283

194Driving and operatingwill start a parking manoeuvre. Takecare regarding the availability of the
suggested parking slot.
Surface irregularities, e.g. on
construction zones, are not detected
by the system. The driver accepts
responsibility.
Side blind spot alert The side blind spot alert system
detects and reports objects on either
side of the vehicle, within a specified
blind spot zone. The system displays
a visual alert in each exterior mirror,
when detecting objects that may not
be visible in the interior and exterior
mirrors.
Side blind spot alert uses some of the
advanced parking assist sensors
which are located in the front and rear bumper on both sides of the vehicle.9 Warning
Side blind spot alert does not
replace driver vision.
The system does not detect:
● vehicles outside the side blind zones which may be rapidly
approaching
● pedestrians, cyclists or animals
Before changing a lane, always
check all mirrors, look over the
shoulder and use the turn signal.
Activation
Colour Info Display: press Í. Select
Driving functions on the Info Display
and then Blind spot sensors . Activate
the function.
B illuminates continously green in the
instrument cluster to confirm the
function.
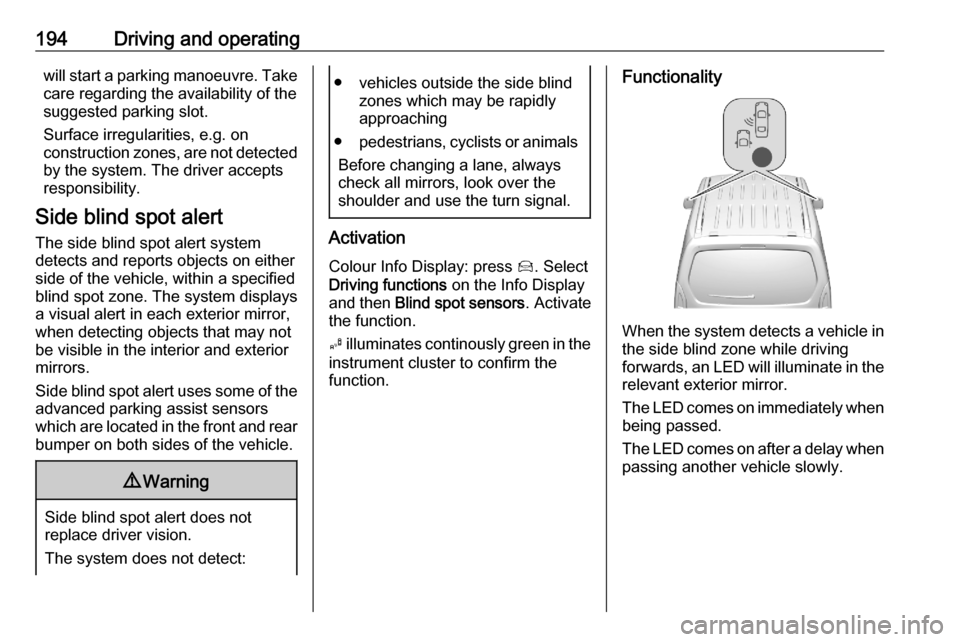
Functionality
When the system detects a vehicle in the side blind zone while driving
forwards, an LED will illuminate in the
relevant exterior mirror.
The LED comes on immediately when being passed.
The LED comes on after a delay when
passing another vehicle slowly.
Page 197 of 283

Driving and operating195Operation conditions
The following conditions must be
fulfilled for proper operation:
● all vehicles are moving in the same direction and in adjacent
lanes
● the speed of your vehicle is between 12 and 140 km/h
● passing a vehicle with a speed difference of less than 10 km/h
● another vehicle is passing with a speed difference of less than
25 km/h
● the traffic flow is normal
● driving on a straight or slightly curved road
● the vehicle is not pulling a trailer ● the sensors are not covered by mud, ice or snow
● the warning zones in the door mirrors or the detection zones on
front and rear bumper ar not
covered with adhesive labels or
other objectsNo alert will be given in the following
situations:
● in the presence of non-moving objects, e.g. parked vehicles,
barriers, street lamps, road signs
● with vehicles moving in the opposite direction
● driving on a winding road or a sharp corner
● when passing or being passed by
a very long vehicle, e.g. lorry,
coach, which is at the same time
detected at the rear in the blind
spot angle and present in the
driver's forward field of vision
● in very heavy traffic, vehicles detected in front and behind are
confused with a lorry or a
stationary object
● when passing too quickly
Deactivation The system is deactivated in the
vehicle personalisation 3 118. B
extinguishes in the instrument cluster.
Additionally, an acoustic signal
sounds.The state of the system is stored
when switching off the ignition.
The system is automatically
deactivated when towing an
electrically connected trailer.
Due to adverse weather conditions
such as heavy rain, false detections
may occur.
Fault
In the event of a fault, B flashes for a
few moments in the instrument panel,
accompanied by C and a display
message. Have the cause of the fault remedied by a workshop.
Passenger side camera
The passenger side camera monitors the side of the vehicle.
Page 203 of 283

Driving and operating201
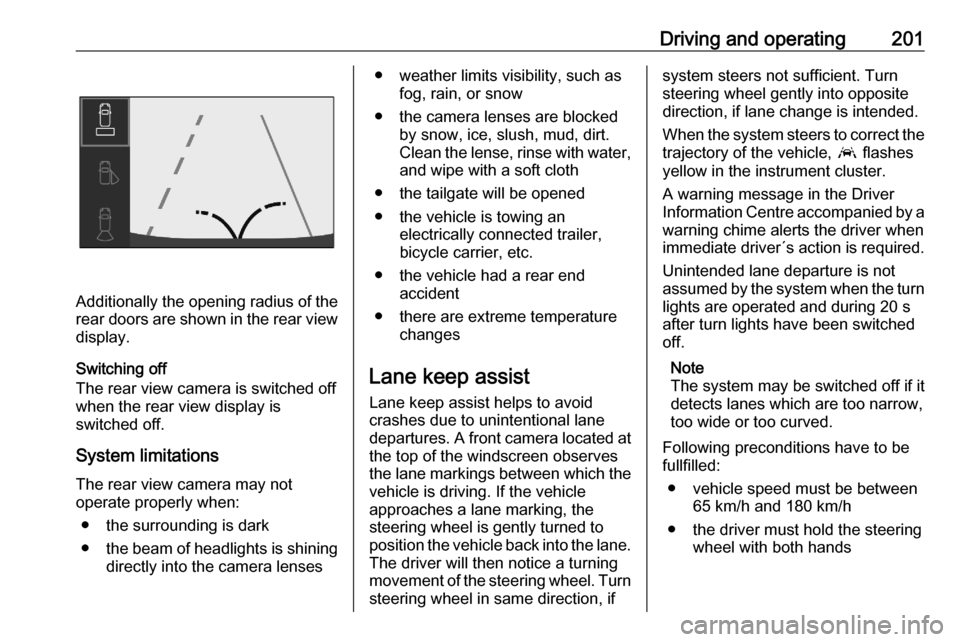
Additionally the opening radius of the
rear doors are shown in the rear view display.
Switching off
The rear view camera is switched off
when the rear view display is
switched off.
System limitationsThe rear view camera may not
operate properly when:
● the surrounding is dark
● the beam of headlights is shining
directly into the camera lenses
● weather limits visibility, such as fog, rain, or snow
● the camera lenses are blocked by snow, ice, slush, mud, dirt.
Clean the lense, rinse with water, and wipe with a soft cloth
● the tailgate will be opened
● the vehicle is towing an electrically connected trailer,
bicycle carrier, etc.
● the vehicle had a rear end accident
● there are extreme temperature changes
Lane keep assist
Lane keep assist helps to avoid
crashes due to unintentional lane
departures. A front camera located at the top of the windscreen observes
the lane markings between which the
vehicle is driving. If the vehicle
approaches a lane marking, the
steering wheel is gently turned to
position the vehicle back into the lane. The driver will then notice a turning
movement of the steering wheel. Turn
steering wheel in same direction, ifsystem steers not sufficient. Turn
steering wheel gently into opposite
direction, if lane change is intended.
When the system steers to correct the trajectory of the vehicle, a flashes
yellow in the instrument cluster.
A warning message in the Driver
Information Centre accompanied by a warning chime alerts the driver when
immediate driver´s action is required.
Unintended lane departure is not
assumed by the system when the turn lights are operated and during 20 s
after turn lights have been switched
off.
Note
The system may be switched off if it
detects lanes which are too narrow,
too wide or too curved.
Following preconditions have to be
fullfilled:
● vehicle speed must be between 65 km/h and 180 km/h
● the driver must hold the steering wheel with both hands
Page 234 of 283

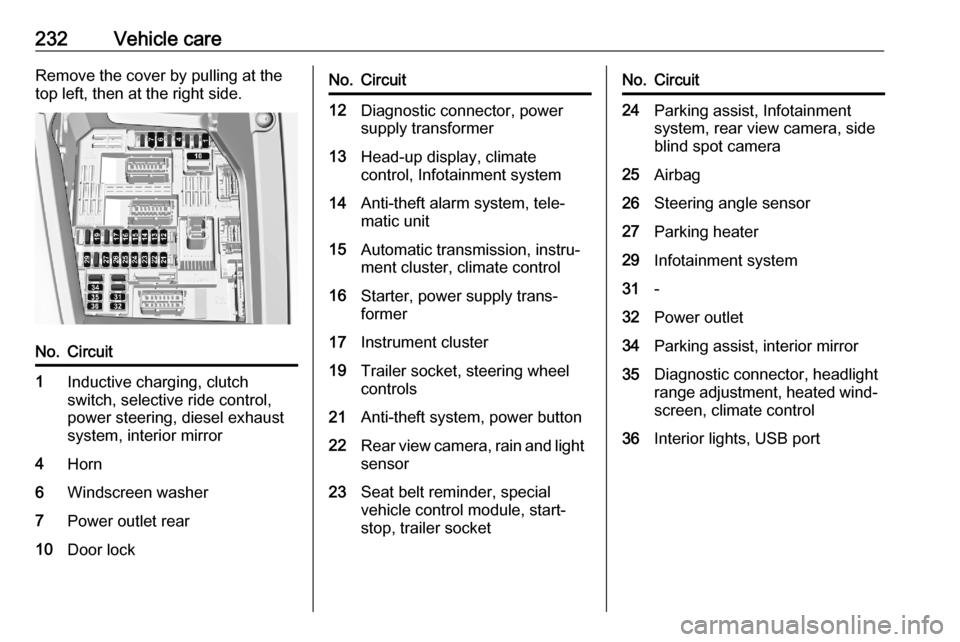
232Vehicle careRemove the cover by pulling at the
top left, then at the right side.No.Circuit1Inductive charging, clutch
switch, selective ride control,
power steering, diesel exhaust
system, interior mirror4Horn6Windscreen washer7Power outlet rear10Door lockNo.Circuit12Diagnostic connector, power
supply transformer13Head-up display, climate
control, Infotainment system14Anti-theft alarm system, tele‐
matic unit15Automatic transmission, instru‐
ment cluster, climate control16Starter, power supply trans‐
former17Instrument cluster19Trailer socket, steering wheel
controls21Anti-theft system, power button22Rear view camera, rain and light sensor23Seat belt reminder, special
vehicle control module, start-
stop, trailer socketNo.Circuit24Parking assist, Infotainment
system, rear view camera, side
blind spot camera25Airbag26Steering angle sensor27Parking heater29Infotainment system31-32Power outlet34Parking assist, interior mirror35Diagnostic connector, headlight
range adjustment, heated wind‐ screen, climate control36Interior lights, USB port
Page 254 of 283

252Vehicle careClean the leather upholstery with
clear water and a soft cloth. In case of heavy soiling, use leather care.
The instrument cluster and the
displays should only be cleaned using
a soft damp cloth. If necessary use a
weak soap solution.
Clean fabric upholstery with a
vacuum cleaner and brush. Remove
stains with an upholstery cleaner.
Clothing fabrics may not be
colourfast. This could cause visible
discolourations, especially on light-
coloured upholstery. Removable
stains and discolourations should be
cleaned as soon as possible.
Clean seat belts with lukewarm water or interior cleaner.Caution
Close Velcro fasteners as open
Velcro fasteners on clothing could damage seat upholstery.
The same applies to clothing with
sharp-edged objects, like zips or
belts or studded jeans.
Plastic and rubber parts
Plastic and rubber parts can be
cleaned with the same cleaner as
used to clean the body. Use interior cleaner if necessary. Do not use any
other agent. Avoid solvents and petrol in particular. Do not use high-
pressure jet cleaners.
Floor mats9 Warning
If a floor mat has the wrong size or
is not properly installed, it can
interfere with the accelerator pedal
and/or brake pedal, what can
cause unintended acceleration
and/or increased stopping
distance which can cause a crash and injury.
Use the following guidelines for
proper floor mat usage.
● The original equipped floor mats were designed for your vehicle.
Have damaged floor mats only
replaced by certified floor mats.
Always check that the floor mats
do not interfere with the pedals.
● Use the floor mat with the correct
side up. Do not turn it over.
● Do not place anything on top of the driver's side floor mat.
● Use only a single floor mat on the
driver's side.
Installing and removing the floor
mats
The driver's side floor mat and the
passenger's side floor mat are each
held in place by two retainers.
To install the floor mat: 1. Move the seat backwards as far as possible.
Page 280 of 283

278Gear shifting............................... 107
General information ...................209
Glass panel .................................. 46
Glovebox ..................................... 72
Graphic Info Display ...................118
H Halogen headlights ....................222
Hand brake ................................. 163
Hazard warning flashers ............127
Headlight flash ........................... 126
Headlight range adjustment ......127
Headlights................................... 124 Headlights when driving abroad 127
Head restraint adjustment .............8
Head restraints ............................ 47
Head-up display.......................... 115 Heated mirrors ............................. 40
Heated rear window ..................... 44
Heated steering wheel .................92
Heated windscreen .......................45
Heating ........................................ 52
Heating and ventilation system . 133
High beam ......................... 109, 125
High beam assist ................109, 125
Hill start assist ........................... 165
Horn ....................................... 15, 93
I
Identification plate .....................259
Ignition switch positions .............146Immobiliser .................................. 38
Indicators .................................... 100
Inductive charging ........................97
Info Display ................................. 113
Installing seats .............................. 54
Instrument cluster ........................99
Instrument panel fuse box .........231
Instrument panel illumination control .................................... 129
Instrument panel overview ........... 10
Interior care ............................... 251
Interior lighting ............................ 129
Interior lights ...................... 130, 230
Interior mirrors .............................. 40
Introduction .................................... 3
J
Jump starting ............................. 246
K Keys ............................................. 22
Keys, locks ................................... 22
L
Ladder flap.................................... 77
Lane keep assist ................107, 201
Lashing eyes ............................... 81
LED headlights ...................109, 225
Lighting features .........................131
Light switch ................................ 124
Load compartment ................33, 77Load compartment cover .............78
Load compartment grille ...............84
Loading ............................. 50, 53, 54
Loading information .....................88
Low beam ................................... 109
Low fuel ..................................... 109
M
Malfunction indicator light ..........105
Manual anti-dazzle ......................40
Manual mode ............................. 159
Manual transmission .................. 161
Mirror adjustment ........................... 8
Misted light covers .....................129
Multimedia .................................. 118
Multimedia Navi Pro ...................118
N New vehicle running-in ..............146
Number plate light .....................229
O Object detection systems ...........186
Odometer ................................... 100
Oil, engine .......................... 257, 261
Opel Connect.............................. 122
Outside temperature ....................95
Overhead console .......................74
Overload indicator ................89, 107
Overrun cut-off ........................... 150