engine OPEL COMBO E 2020 User Guide
[x] Cancel search | Manufacturer: OPEL, Model Year: 2020, Model line: COMBO E, Model: OPEL COMBO E 2020Pages: 283, PDF Size: 29.4 MB
Page 42 of 283
40Keys, doors and windowsElectric folding
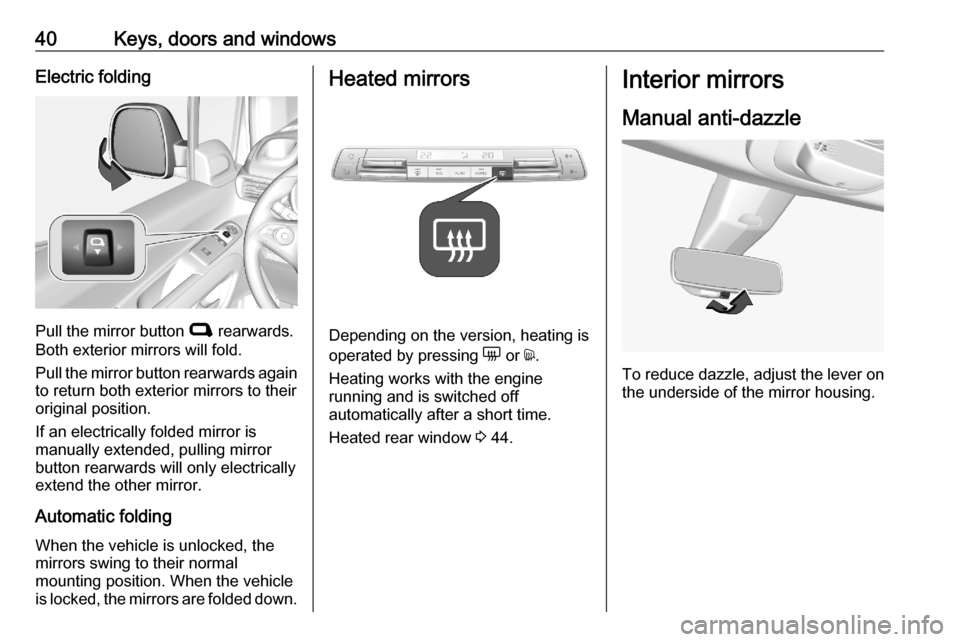
Pull the mirror button C rearwards.
Both exterior mirrors will fold.
Pull the mirror button rearwards again
to return both exterior mirrors to their
original position.
If an electrically folded mirror is
manually extended, pulling mirror
button rearwards will only electrically
extend the other mirror.
Automatic folding When the vehicle is unlocked, the
mirrors swing to their normal
mounting position. When the vehicle
is locked, the mirrors are folded down.
Heated mirrors
Depending on the version, heating is
operated by pressing e or d.
Heating works with the engine
running and is switched off
automatically after a short time.
Heated rear window 3 44.
Interior mirrors
Manual anti-dazzle
To reduce dazzle, adjust the lever on the underside of the mirror housing.
Page 46 of 283
44Keys, doors and windows
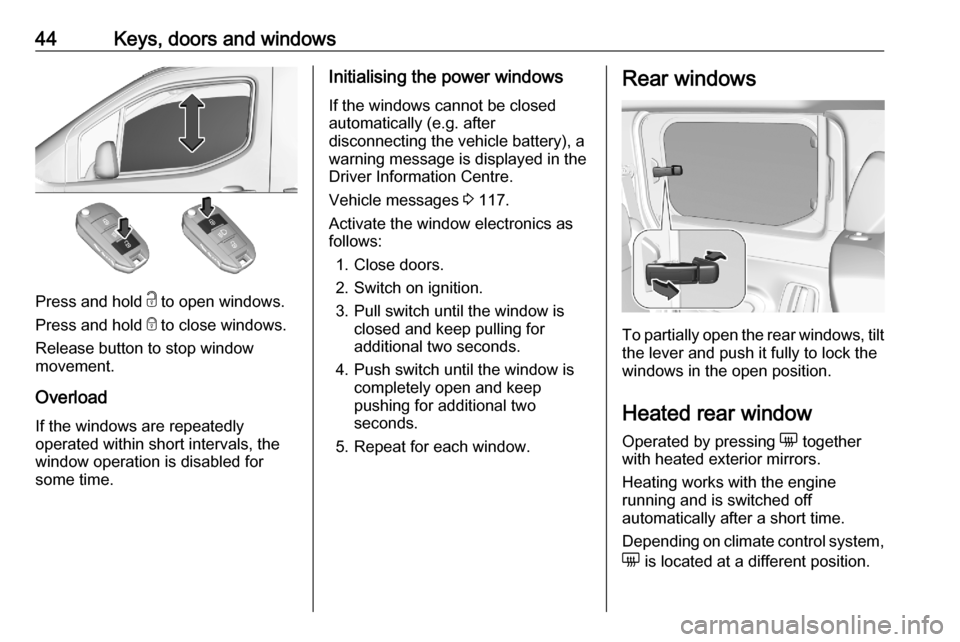
Press and hold c to open windows.
Press and hold e to close windows.
Release button to stop window
movement.
Overload
If the windows are repeatedly
operated within short intervals, the
window operation is disabled for
some time.
Initialising the power windows
If the windows cannot be closed
automatically (e.g. after
disconnecting the vehicle battery), a
warning message is displayed in the
Driver Information Centre.
Vehicle messages 3 117.
Activate the window electronics as
follows:
1. Close doors.
2. Switch on ignition.
3. Pull switch until the window is closed and keep pulling for
additional two seconds.
4. Push switch until the window is completely open and keep
pushing for additional two
seconds.
5. Repeat for each window.Rear windows
To partially open the rear windows, tilt the lever and push it fully to lock the
windows in the open position.
Heated rear window Operated by pressing e together
with heated exterior mirrors.
Heating works with the engine
running and is switched off
automatically after a short time.
Depending on climate control system, e is located at a different position.
Page 47 of 283
Keys, doors and windows45
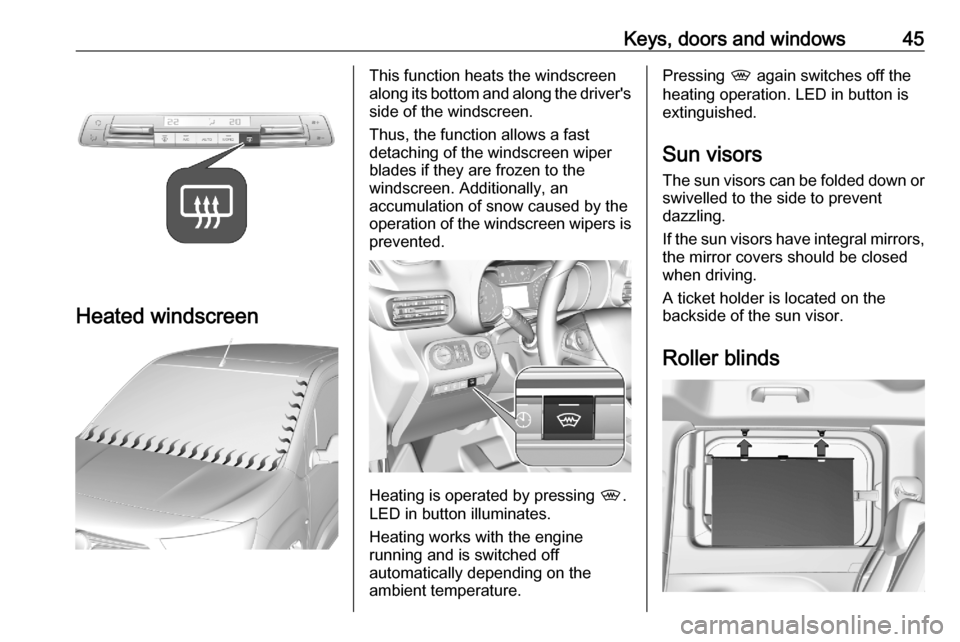
Heated windscreen
This function heats the windscreen
along its bottom and along the driver's side of the windscreen.
Thus, the function allows a fast
detaching of the windscreen wiper
blades if they are frozen to the
windscreen. Additionally, an
accumulation of snow caused by the
operation of the windscreen wipers is
prevented.
Heating is operated by pressing ,.
LED in button illuminates.
Heating works with the engine
running and is switched off
automatically depending on the
ambient temperature.
Pressing , again switches off the
heating operation. LED in button is extinguished.
Sun visors
The sun visors can be folded down or swivelled to the side to prevent
dazzling.
If the sun visors have integral mirrors, the mirror covers should be closed
when driving.
A ticket holder is located on the
backside of the sun visor.
Roller blinds
Page 54 of 283
52Seats, restraintsTo restore the seat cushion to the
original position, push the lever and
lower the seat cushion till it is
engaged.9 Warning
When the front passenger seat is
in the folded position, the front
passenger airbag system must be deactivated.
Airbag deactivation 3 65.
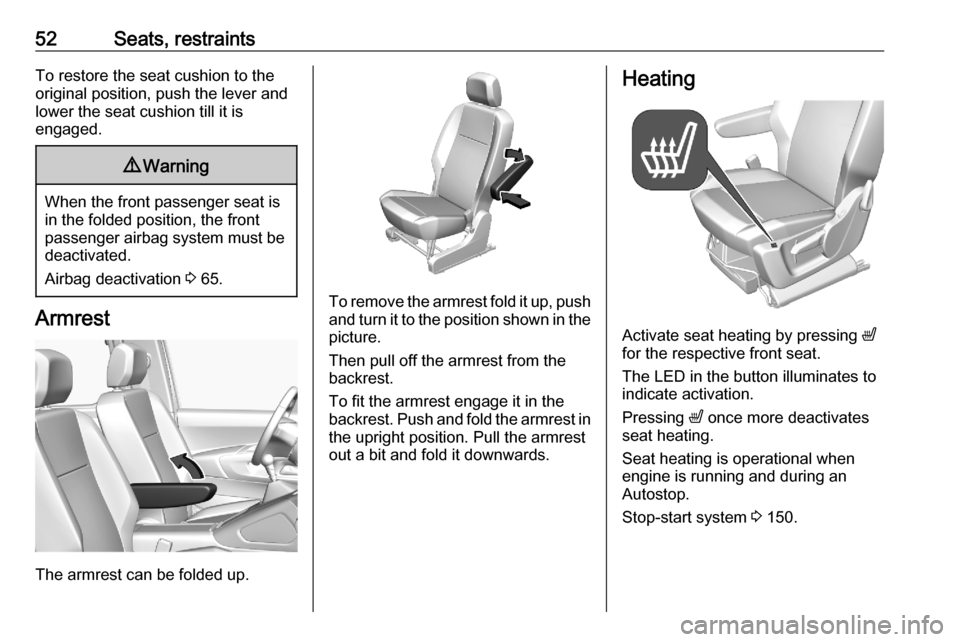
Armrest
The armrest can be folded up.
To remove the armrest fold it up, push
and turn it to the position shown in the
picture.
Then pull off the armrest from the
backrest.
To fit the armrest engage it in the
backrest. Push and fold the armrest in the upright position. Pull the armrest
out a bit and fold it downwards.
Heating
Activate seat heating by pressing ß
for the respective front seat.
The LED in the button illuminates to
indicate activation.
Pressing ß once more deactivates
seat heating.
Seat heating is operational when
engine is running and during an
Autostop.
Stop-start system 3 150.
Page 92 of 283

90StorageActivation
Note
For optimal operation, park the
vehicle on a horizontal surface.
Do not park the vehicle on a slope.
Do not park the vehicle with the
wheels on the pavement.
The system is activated automatically
each time the engine is started. In
addition, the system can be activated
manually by pressing ON in the
loading area. After activation, the
system operates for five minutes.
Page 93 of 283

Instruments and controls91Instruments and
controlsControls ....................................... 92
Steering wheel adjustment ........92
Steering wheel controls .............92
Heated steering wheel ...............92
Horn ........................................... 93
Windscreen wiper and washer ..93
Rear window wiper and washer ...................................... 95
Outside temperature ..................95
Clock ......................................... 96
Power outlets ............................. 96
Inductive charging .....................97
Cigarette lighter ......................... 98
Ashtrays .................................... 99
Warning lights, gauges and indi‐ cators ........................................... 99
Instrument cluster ......................99
Speedometer ........................... 100
Odometer ................................ 100
Trip odometer .......................... 100
Tachometer ............................. 101
Fuel gauge .............................. 101
Engine coolant temperature gauge ..................................... 102Engine oil level monitor...........102
Service display ........................ 102
Control indicators ....................103
Turn lights ................................ 103
Seat belt reminder ...................104
Airbag and belt tensioners .......104
Airbag deactivation ..................105
Charging system .....................105
Malfunction indicator light ........105
Service vehicle soon ...............105
Stop engine ............................. 105
System check .......................... 106
Brake and clutch system .........106
Parking brake .......................... 106
Electric parking brake ..............106
Electric parking brake fault ......106
Antilock brake system (ABS) ...107
Gear shifting ............................ 107
Overload indicator ...................107
Descent control system ...........107
Lane keep assist .....................107
Electronic Stability Control and Traction Control system .........107
Engine coolant temperature ....107
Preheating ............................... 108
Exhaust filter ............................ 108
AdBlue ..................................... 108
Deflation detection system ......108
Engine oil pressure ..................108
Low fuel ................................... 109Autostop.................................. 109
Exterior light ............................ 109
High beam ............................... 109
Low beam ................................ 109
High beam assist .....................109
LED headlights ........................ 109
Front fog lights ......................... 109
Rear fog light ........................... 110
Rain sensor ............................. 110
Cruise control .......................... 110
Adaptive cruise control ............110
Side blind spot alert .................110
Active emergency braking .......110
Speed limiter ........................... 110
Door open ................................ 110
Displays ..................................... 111
Driver Information Centre ........111
Info Display .............................. 113
Head-up display ......................115
Rear view display ....................116
Vehicle messages ......................117
Warning chimes .......................117
Vehicle personalisation ..............118
Telematics services ...................122
Opel Connect .......................... 122
Page 94 of 283
92Instruments and controlsControlsSteering wheel adjustment
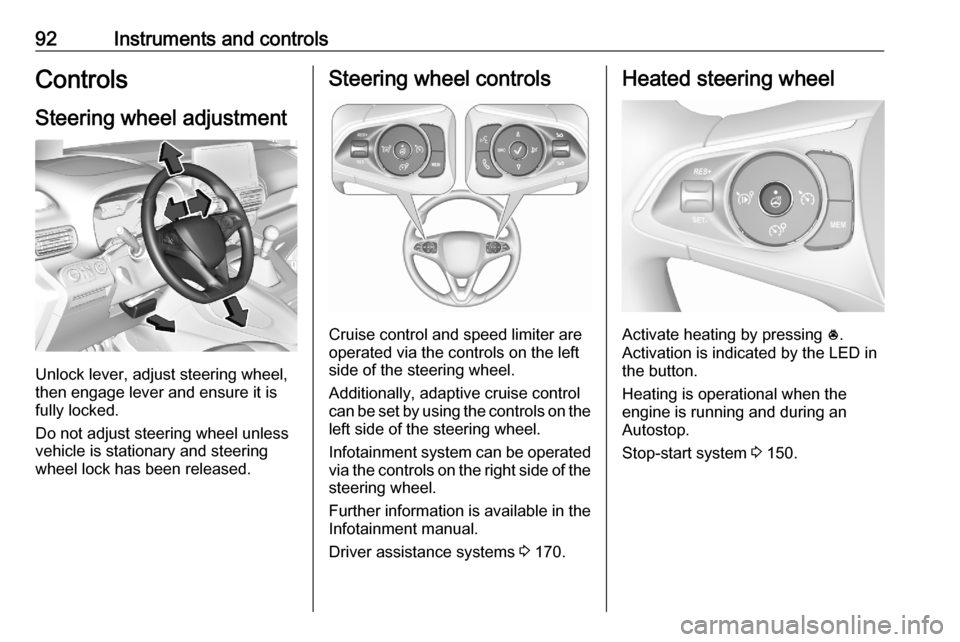
Unlock lever, adjust steering wheel,
then engage lever and ensure it is fully locked.
Do not adjust steering wheel unless
vehicle is stationary and steering
wheel lock has been released.
Steering wheel controls
Cruise control and speed limiter are
operated via the controls on the left
side of the steering wheel.
Additionally, adaptive cruise control can be set by using the controls on the
left side of the steering wheel.
Infotainment system can be operated
via the controls on the right side of the
steering wheel.
Further information is available in the
Infotainment manual.
Driver assistance systems 3 170.
Heated steering wheel
Activate heating by pressing *.
Activation is indicated by the LED in
the button.
Heating is operational when the
engine is running and during an
Autostop.
Stop-start system 3 150.
Page 101 of 283
Instruments and controls99AshtraysCaution
To be used only for ash and not forcombustible rubbish.
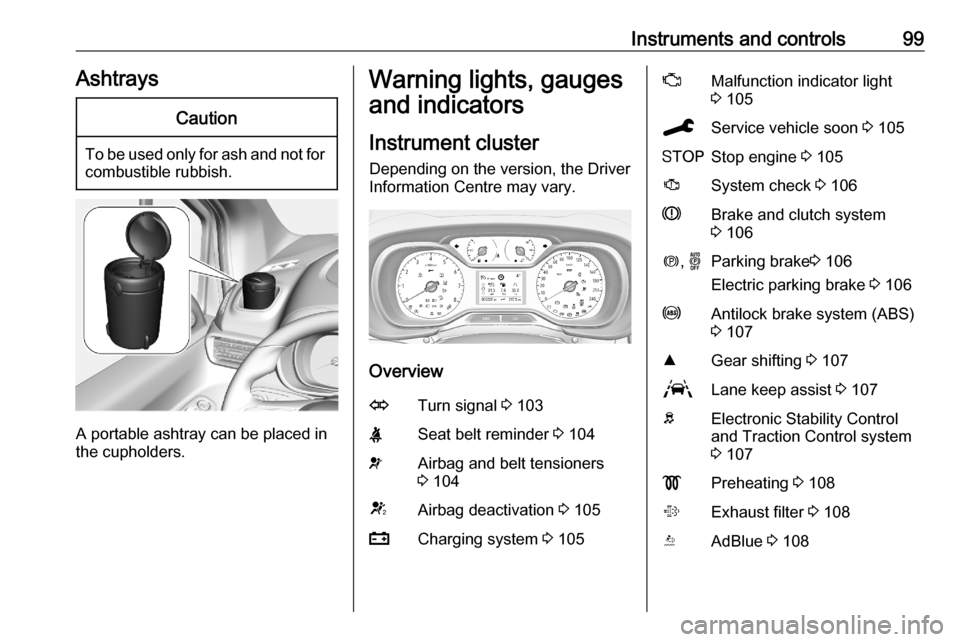
A portable ashtray can be placed in
the cupholders.
Warning lights, gauges
and indicators
Instrument cluster
Depending on the version, the Driver Information Centre may vary.
Overview
OTurn signal 3 103XSeat belt reminder 3 104vAirbag and belt tensioners
3 104VAirbag deactivation 3 105pCharging system 3 105ZMalfunction indicator light
3 105CService vehicle soon 3 105YStop engine 3 105JSystem check 3 106RBrake and clutch system
3 106m , oParking brake 3 106
Electric parking brake 3 106uAntilock brake system (ABS)
3 107RGear shifting 3 107LLane keep assist 3 107bElectronic Stability Control
and Traction Control system
3 107!Preheating 3 108%Exhaust filter 3 108YAdBlue 3 108
Page 102 of 283
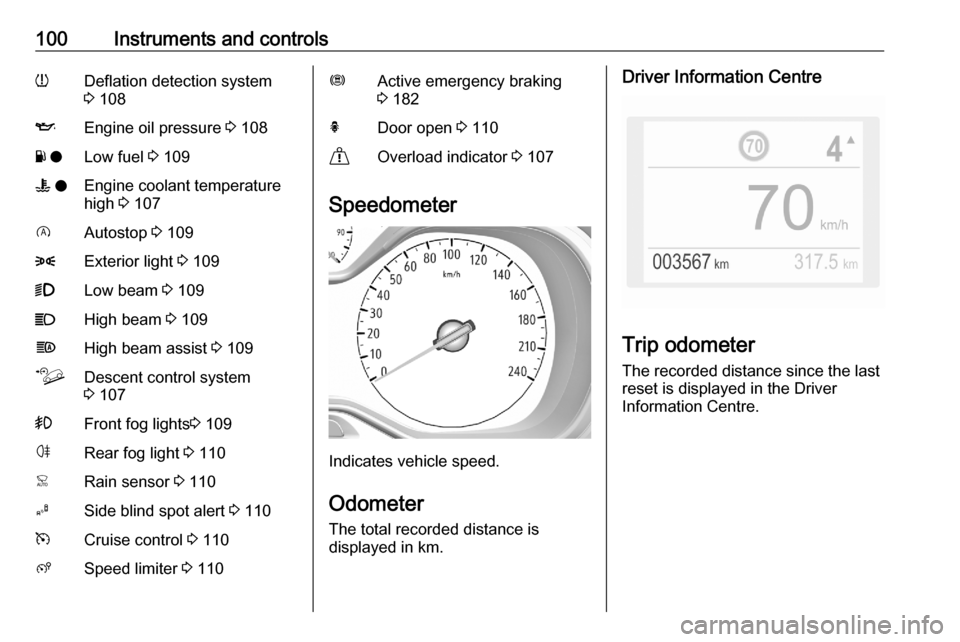
100Instruments and controlswDeflation detection system
3 108IEngine oil pressure 3 108Y oLow fuel 3 109W oEngine coolant temperature
high 3 107DAutostop 3 1098Exterior light 3 1099Low beam 3 109CHigh beam 3 109fHigh beam assist 3 109òDescent control system
3 107>Front fog lights 3 109øRear fog light 3 110
Speedometer
Indicates vehicle speed.
Odometer
The total recorded distance is
displayed in km.
Driver Information Centre
Trip odometer
The recorded distance since the last
reset is displayed in the Driver
Information Centre.
Page 103 of 283

Instruments and controls101
Monochrome display
Trip odometer counts up to
9,999.9 km without automatic reset.
Press L for 2 seconds to reset trip
odometer.
Colour display
Trip odometer counts up to
1,999.9 km and resets then
automatically.
Press L for 2 seconds to reset trip
odometer.
The trip / fuel information menu provides additionally two trip counter 3 111.
Tachometer
Displays the engine speed.
Drive in a low engine speed range for each gear as much as possible.
A red marker indicates the beginning
of the warning zone of excessive revolutions. For Diesel engines, thewarning zone starts at 5000
revolutions per minute. For petrol
engines, the warning zone starts at
7000 revolutions per minute.
Caution
If the needle is beyond the red marker, the maximum permitted
engine speed is exceeded. Engine at risk.
Fuel gauge
Displays the fuel level.
Control indicator o illuminates if the
fuel level is low.
Never run the fuel tank dry. Because of the fuel remaining in the
tank, the top-up quantity may be less
than the specified fuel tank capacity.