bonnet OPEL CORSA E 2018.5 Owner's Manual
[x] Cancel search | Manufacturer: OPEL, Model Year: 2018.5, Model line: CORSA E, Model: OPEL CORSA E 2018.5Pages: 271, PDF Size: 7.99 MB
Page 13 of 271
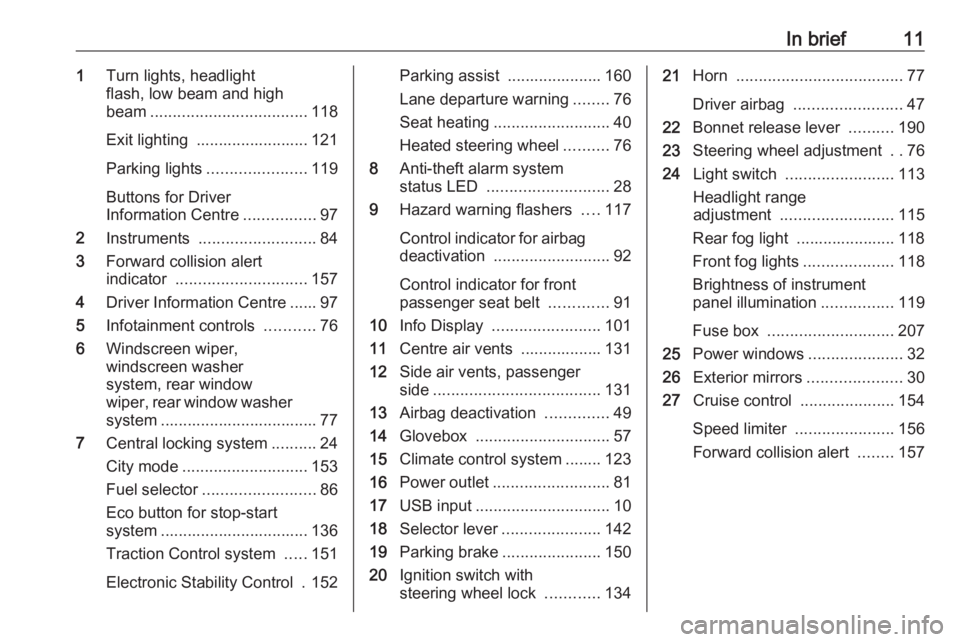
In brief111Turn lights, headlight
flash, low beam and high
beam ................................... 118
Exit lighting ......................... 121
Parking lights ...................... 119
Buttons for Driver
Information Centre ................97
2 Instruments .......................... 84
3 Forward collision alert
indicator ............................. 157
4 Driver Information Centre ...... 97
5 Infotainment controls ...........76
6 Windscreen wiper,
windscreen washer
system, rear window
wiper, rear window washer
system ................................... 77
7 Central locking system ..........24
City mode ............................ 153
Fuel selector ......................... 86
Eco button for stop-start
system ................................. 136
Traction Control system .....151
Electronic Stability Control . 152Parking assist ..................... 160
Lane departure warning ........76
Seat heating .......................... 40
Heated steering wheel ..........76
8 Anti-theft alarm system
status LED ........................... 28
9 Hazard warning flashers ....117
Control indicator for airbag
deactivation .......................... 92
Control indicator for front
passenger seat belt .............91
10 Info Display ........................ 101
11 Centre air vents .................. 131
12 Side air vents, passenger
side ..................................... 131
13 Airbag deactivation ..............49
14 Glovebox .............................. 57
15 Climate control system ........ 123
16 Power outlet .......................... 81
17 USB input .............................. 10
18 Selector lever ...................... 142
19 Parking brake ......................150
20 Ignition switch with
steering wheel lock ............13421Horn ..................................... 77
Driver airbag ........................ 47
22 Bonnet release lever ..........190
23 Steering wheel adjustment ..76
24 Light switch ........................ 113
Headlight range
adjustment ......................... 115
Rear fog light ...................... 118
Front fog lights ....................118
Brightness of instrument
panel illumination ................119
Fuse box ............................ 207
25 Power windows .....................32
26 Exterior mirrors .....................30
27 Cruise control .....................154
Speed limiter ...................... 156
Forward collision alert ........157
Page 15 of 271
In brief131Turn lights, headlight
flash, low beam and high
beam ................................... 118
Exit lighting ......................... 121
Parking lights ...................... 119
Buttons for Driver
Information Centre ................97
2 Instruments .......................... 84
3 Forward collision alert
indicator ............................. 157
4 Driver Information Centre ...... 97
5 Infotainment controls ...........76
6 Windscreen wiper,
windscreen washer
system, rear window
wiper, rear window washer
system ................................... 77
7 Central locking system ..........24
City mode ............................ 153
Fuel selector ......................... 86
Eco button for stop-start
system ................................. 136
Traction Control system .....151
Electronic Stability Control . 152Parking assist ..................... 160
Lane departure warning ........76
Seat heating .......................... 40
Heated steering wheel ..........76
8 Anti-theft alarm system
status LED ........................... 28
9 Hazard warning flashers ....117
Control indicator for airbag
deactivation .......................... 92
Control indicator for front
passenger seat belt .............91
10 Info Display ........................ 101
11 Centre air vents .................. 131
12 Side air vents, passenger
side ..................................... 131
13 Airbag deactivation ..............49
14 Glovebox .............................. 57
15 Climate control system ........ 123
16 Power outlet .......................... 81
17 USB input .............................. 10
18 Selector lever ...................... 142
19 Parking brake ......................150
20 Ignition switch with
steering wheel lock ............13421Horn ..................................... 77
Driver airbag ........................ 47
22 Bonnet release lever ..........190
23 Steering wheel adjustment ..76
24 Light switch ........................ 113
Headlight range
adjustment ......................... 115
Rear fog light ...................... 118
Front fog lights ....................118
Brightness of instrument
panel illumination ................119
Fuse box ............................ 207
25 Power windows .....................32
26 Exterior mirrors .....................30
27 Cruise control .....................154
Speed limiter ...................... 156
Forward collision alert ........157
Page 30 of 271

28Keys, doors and windowsgases, which cannot be seen or
smelled, could enter the vehicle.
This can cause unconsciousness
and even death.Caution
Before opening the tailgate, check overhead obstructions, e.g. a
garage door, to avoid damage to
the tailgate. Always check the
moving area above and behind the
tailgate.
Note
The installation of certain heavy
accessories onto the tailgate may
affect its ability to remain open.
Vehicle security
Anti-theft locking system9 Warning
Do not use the system if there are
people in the vehicle! The doorscannot be unlocked from the
inside.
The system deadlocks all the doors. All doors must be closed otherwise
the system cannot be activated.
If the ignition was on, the driver's door
must be opened and closed once so
that the vehicle can be secured.
Unlocking the vehicle disables the
mechanical anti-theft locking system.
This is not possible with the central
locking button.
Activating
Press e on the radio remote control
twice within 5 seconds.
Anti-theft alarm system
The anti-theft alarm system is
combined with the anti-theft locking
system.
It monitors: ● doors, tailgate, bonnet
● ignition
Page 31 of 271
Keys, doors and windows29Activation● Self-activated 30 seconds after locking the vehicle by pressing e
once.
● Directly by pressing e twice
within 5 seconds.
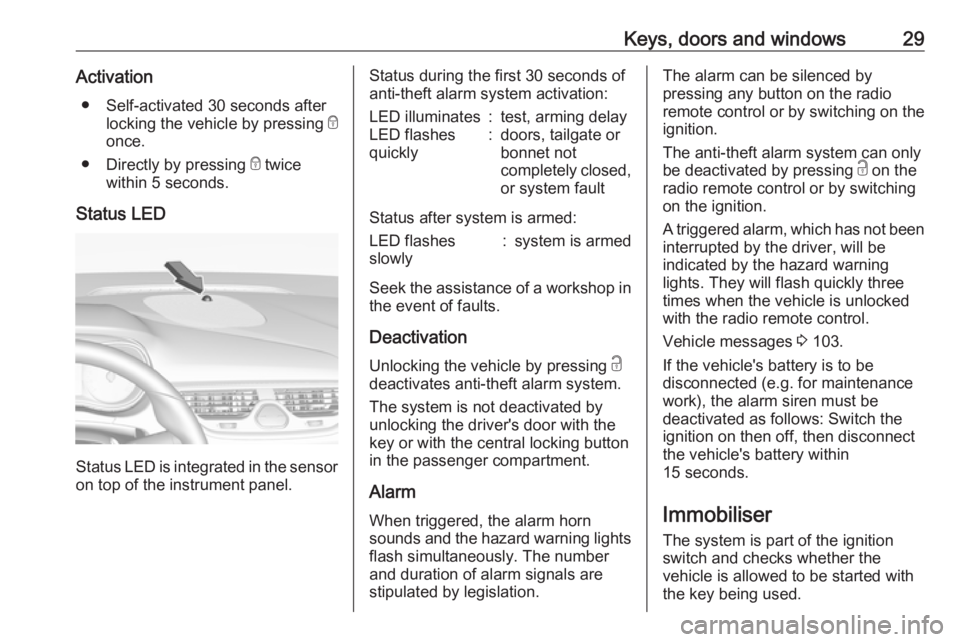
Status LED
Status LED is integrated in the sensor
on top of the instrument panel.
Status during the first 30 seconds of
anti-theft alarm system activation:LED illuminates:test, arming delayLED flashes
quickly:doors, tailgate or
bonnet not
completely closed,
or system fault
Status after system is armed:
LED flashes
slowly:system is armed
Seek the assistance of a workshop in the event of faults.
Deactivation Unlocking the vehicle by pressing c
deactivates anti-theft alarm system.
The system is not deactivated by
unlocking the driver's door with the
key or with the central locking button
in the passenger compartment.
Alarm When triggered, the alarm horn
sounds and the hazard warning lights
flash simultaneously. The number
and duration of alarm signals are
stipulated by legislation.
The alarm can be silenced by
pressing any button on the radio
remote control or by switching on the
ignition.
The anti-theft alarm system can only
be deactivated by pressing c on the
radio remote control or by switching
on the ignition.
A triggered alarm, which has not been interrupted by the driver, will be
indicated by the hazard warning
lights. They will flash quickly three
times when the vehicle is unlocked
with the radio remote control.
Vehicle messages 3 103.
If the vehicle's battery is to be
disconnected (e.g. for maintenance
work), the alarm siren must be
deactivated as follows: Switch the
ignition on then off, then disconnect
the vehicle's battery within
15 seconds.
Immobiliser The system is part of the ignition
switch and checks whether the
vehicle is allowed to be started with
the key being used.
Page 106 of 271
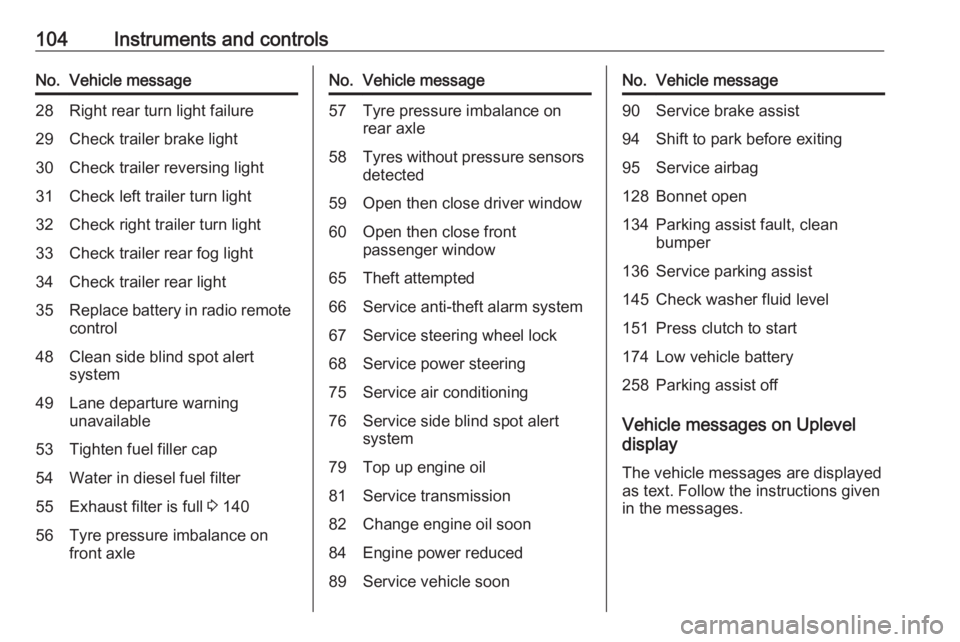
104Instruments and controlsNo.Vehicle message28Right rear turn light failure29Check trailer brake light30Check trailer reversing light31Check left trailer turn light32Check right trailer turn light33Check trailer rear fog light34Check trailer rear light35Replace battery in radio remote
control48Clean side blind spot alert
system49Lane departure warning
unavailable53Tighten fuel filler cap54Water in diesel fuel filter55Exhaust filter is full 3 14056Tyre pressure imbalance on
front axleNo.Vehicle message57Tyre pressure imbalance on rear axle58Tyres without pressure sensors
detected59Open then close driver window60Open then close front
passenger window65Theft attempted66Service anti-theft alarm system67Service steering wheel lock68Service power steering75Service air conditioning76Service side blind spot alert
system79Top up engine oil81Service transmission82Change engine oil soon84Engine power reduced89Service vehicle soonNo.Vehicle message90Service brake assist94Shift to park before exiting95Service airbag128Bonnet open134Parking assist fault, clean
bumper136Service parking assist145Check washer fluid level151Press clutch to start174Low vehicle battery258Parking assist off
Vehicle messages on Uplevel
display
The vehicle messages are displayed as text. Follow the instructions given
in the messages.
Page 139 of 271

Driving and operating137Deactivation
Deactivate the stop-start system
manually by pressing eco. The
deactivation is indicated when the
LED in the button extinguishes.
Autostop
Vehicles with manual transmission
If the vehicle is at a low speed or at a
standstill, activate an Autostop as
follows:
● Depress the clutch pedal.
● Set the lever in neutral.
● Release the clutch pedal.The engine will be switched off while
the ignition stays on.Vehicles with manual transmission
automated
If the vehicle is at a standstill with the brake pedal depressed, Autostop is
activated automatically.
The engine will be switched off while
the ignition stays on.
The stop-start system will be disabled
on inclines of 12% or more.
Indication
An Autostop is indicated by control
indicator D.
During an Autostop, the heating and
brake performance will be
maintained.
Conditions for an Autostop
The stop-start system checks if each
of the following conditions is fulfilled:
● The stop-start system is not manually deactivated.
● The bonnet is fully closed.
● The driver's door is closed or the driver's seat belt is fastened.
● The vehicle battery is sufficiently charged and in good condition.
● The engine is warmed-up.
● The engine coolant temperature is not too high.
● The engine exhaust temperature is not too high, e.g. after driving
with high engine load.
● The ambient temperature is above -5 °C.
● The climate control system allows an Autostop.
● The brake vacuum is sufficient.
● The self-cleaning function of the exhaust filter is not active.
● The vehicle was driven at least at
walking speed since the last
Autostop.
Page 140 of 271

138Driving and operatingOtherwise an Autostop will be
inhibited.
Certain settings of the climate control
system may inhibit an Autostop. See
'Climate control' chapter for further
information 3 126.
Immediately after motorway driving
an Autostop may be inhibited.
New vehicle running-in 3 134.
Vehicle battery discharge protection To ensure reliable engine restarts,
several vehicle battery discharge
protection features are implemented
as part of the stop-start system.
Power saving measures
During an Autostop, several electrical
features, e.g. the rear window
heating, are disabled or switched into a power saving mode. The fan speed
of the climate control system is
reduced to save power.
Restart of the engine by the driverVehicles with manual transmission
Depress the clutch pedal to restart the
engine.When the engine is restarted, control
indicator D in the Driver Information
Centre extinguishes.
If the selector lever is shifted out of
neutral before depressing the clutch
pedal first, control indicator -
illuminates or is shown as a symbol in
the Driver Information Centre.
Control indicator - 3 93.Vehicles with manual transmission
automated
Release the brake pedal or move
selector lever out of D to restart the
engine.
When the engine is restarted, control
indicator D in the Driver Information
Centre extinguishes.
Restart of the engine by the stop-
start system
The selector lever must be in neutral
to enable an automatic restart.
If one of the following conditions occurs during an Autostop, the
engine will be restarted automatically
by the stop-start system:
● The stop-start system is manually deactivated.
● The bonnet is opened.
● The driver's seat belt is unfastened and the driver's door
is opened.
● The engine temperature is too low.
● The charging level of the vehicle battery is below a defined level.
● The brake vacuum is not sufficient.
● The vehicle is driven at least at walking speed.
● The climate control system requests an engine start.
● The air conditioning is manually switched on.
If the bonnet is not fully closed, a
warning message is displayed in the
Driver Information Centre.
If an electrical accessory, e.g. a
portable CD player, is connected to
the power outlet, a brief power drop
during restart might be noticeable.
Page 190 of 271
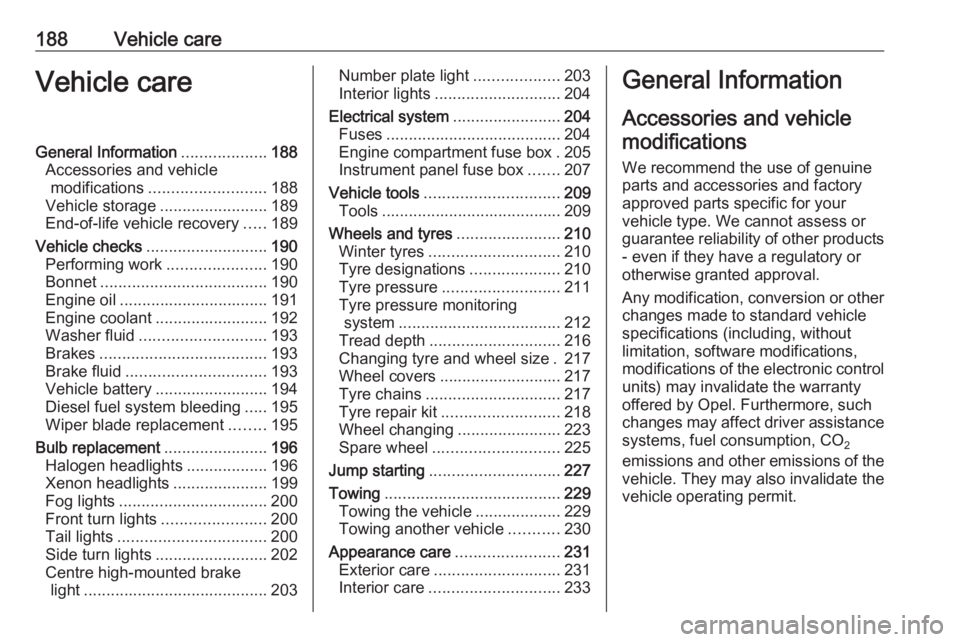
188Vehicle careVehicle careGeneral Information...................188
Accessories and vehicle modifications .......................... 188
Vehicle storage ........................189
End-of-life vehicle recovery .....189
Vehicle checks ........................... 190
Performing work ......................190
Bonnet ..................................... 190
Engine oil ................................. 191
Engine coolant ......................... 192
Washer fluid ............................ 193
Brakes ..................................... 193
Brake fluid ............................... 193
Vehicle battery ......................... 194
Diesel fuel system bleeding .....195
Wiper blade replacement ........195
Bulb replacement .......................196
Halogen headlights ..................196
Xenon headlights .....................199
Fog lights ................................. 200
Front turn lights .......................200
Tail lights ................................. 200
Side turn lights ......................... 202
Centre high-mounted brake light ......................................... 203Number plate light...................203
Interior lights ............................ 204
Electrical system ........................204
Fuses ....................................... 204
Engine compartment fuse box . 205
Instrument panel fuse box .......207
Vehicle tools .............................. 209
Tools ........................................ 209
Wheels and tyres .......................210
Winter tyres ............................. 210
Tyre designations ....................210
Tyre pressure .......................... 211
Tyre pressure monitoring
system .................................... 212
Tread depth ............................. 216
Changing tyre and wheel size . 217
Wheel covers ........................... 217
Tyre chains .............................. 217
Tyre repair kit .......................... 218
Wheel changing .......................223
Spare wheel ............................ 225
Jump starting ............................. 227
Towing ....................................... 229
Towing the vehicle ...................229
Towing another vehicle ...........230
Appearance care .......................231
Exterior care ............................ 231
Interior care ............................. 233General Information
Accessories and vehiclemodifications
We recommend the use of genuine
parts and accessories and factory
approved parts specific for your
vehicle type. We cannot assess or guarantee reliability of other products
- even if they have a regulatory or
otherwise granted approval.
Any modification, conversion or other
changes made to standard vehicle
specifications (including, without
limitation, software modifications,
modifications of the electronic control units) may invalidate the warranty
offered by Opel. Furthermore, such
changes may affect driver assistance
systems, fuel consumption, CO 2
emissions and other emissions of the
vehicle. They may also invalidate the
vehicle operating permit.
Page 191 of 271

Vehicle care189Caution
When transporting the vehicle on
a train or on a recovery vehicle, the
mud flaps may be damaged.
Vehicle storage
Storage for a long period of time
If the vehicle is to be stored for several months:
● Wash and wax the vehicle.
● Have the wax in the engine compartment and underbody
checked.
● Clean and preserve the rubber seals.
● Fill up fuel tank completely.
● Change the engine oil.
● Drain the washer fluid reservoir.
● Check the coolant antifreeze and
corrosion protection.
● Adjust tyre pressure to the value specified for full load.
● Park the vehicle in a dry, wellventilated place. Engage first or
reverse gear or set selector lever
to P. Prevent the vehicle from
rolling.
● Do not apply the parking brake.
● Open the bonnet, close all doors and lock the vehicle.
● Disconnect the clamp from the negative terminal of the vehicle
battery. Beware that all systems
are not functional, e.g. anti-theft
alarm system.
Putting back into operation
When the vehicle is to be put back into
operation:
● Connect the clamp to the negative terminal of the vehicle
battery. Activate the electronics
of the power windows.
● Check tyre pressure.
● Fill up the washer fluid reservoir.
● Check the engine oil level.
● Check the coolant level.
● Fit the number plate if necessary.End-of-life vehicle recovery
Information on end-of-life vehicle
recovery centres and the recycling of
end-of-life vehicles is available on our website. Only entrust this work to an
authorised recycling centre.
Gas vehicles must be recycled by a
service centre authorised for gas
vehicles.
Page 192 of 271

190Vehicle careVehicle checks
Performing work9 Warning
Only perform engine compartment
checks when the ignition is off.
The cooling fan may start
operating even if the ignition is off.
9 Danger
The ignition system and Xenon
headlights use extremely high
voltage. Do not touch.
Bonnet
Opening
Pull the release lever and return it to
its original position.
Push the safety catch upwards and open the bonnet.
Secure the bonnet support.