check engine light OPEL CORSA E 2019 Manual user
[x] Cancel search | Manufacturer: OPEL, Model Year: 2019, Model line: CORSA E, Model: OPEL CORSA E 2019Pages: 231, PDF Size: 6.87 MB
Page 20 of 231
18In briefTransmission
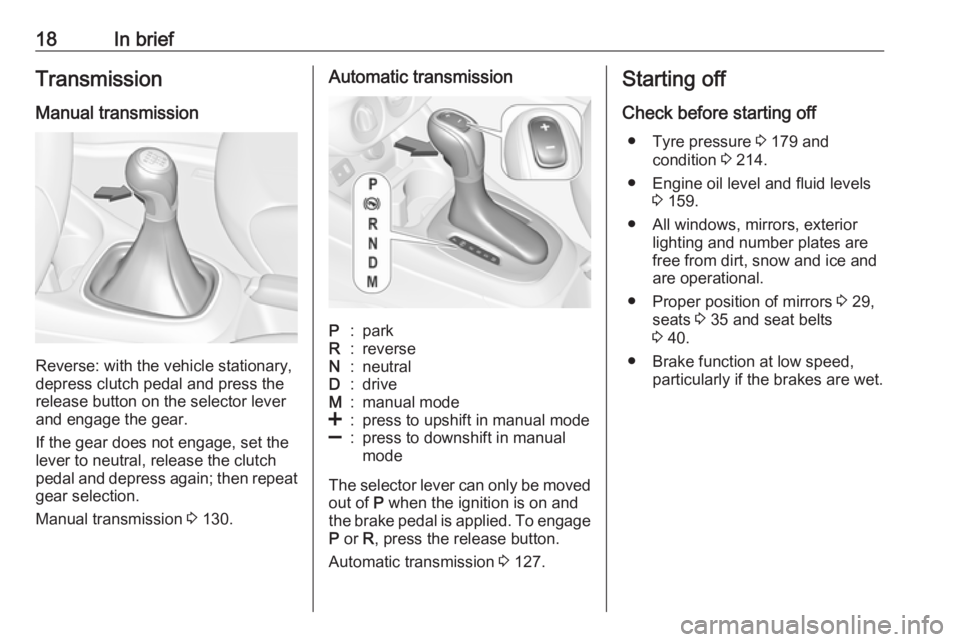
Manual transmission
Reverse: with the vehicle stationary,
depress clutch pedal and press the release button on the selector lever
and engage the gear.
If the gear does not engage, set the
lever to neutral, release the clutch
pedal and depress again; then repeat
gear selection.
Manual transmission 3 130.
Automatic transmissionP:parkR:reverseN:neutralD:driveM:manual mode<:press to upshift in manual mode]:press to downshift in manual
mode
The selector lever can only be moved out of P when the ignition is on and
the brake pedal is applied. To engage
P or R, press the release button.
Automatic transmission 3 127.
Starting off
Check before starting off ● Tyre pressure 3 179 and
condition 3 214.
● Engine oil level and fluid levels 3 159.
● All windows, mirrors, exterior lighting and number plates are
free from dirt, snow and ice and
are operational.
● Proper position of mirrors 3 29,
seats 3 35 and seat belts
3 40.
● Brake function at low speed, particularly if the brakes are wet.
Page 75 of 231
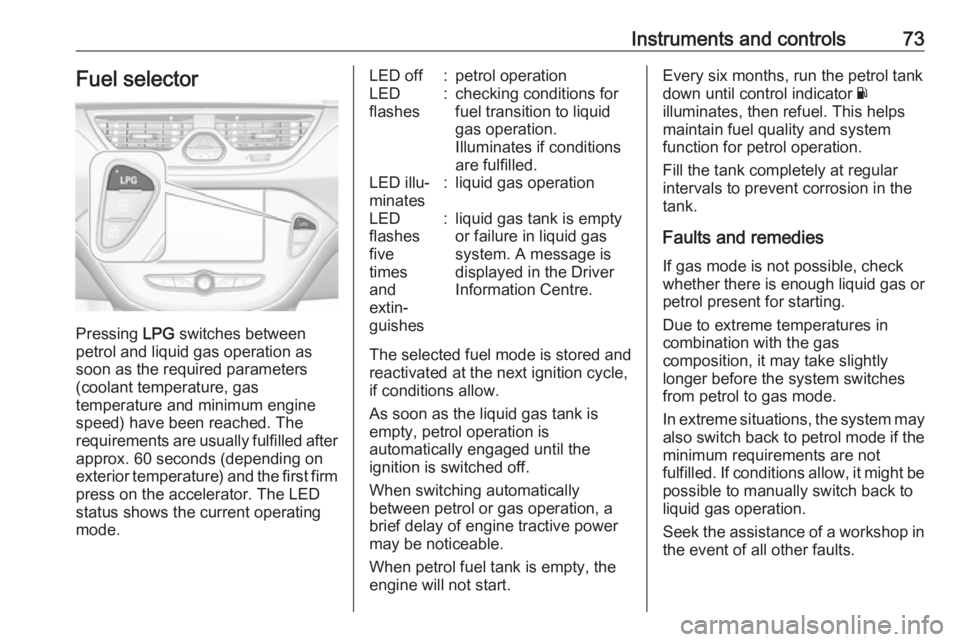
Instruments and controls73Fuel selector
Pressing LPG switches between
petrol and liquid gas operation as
soon as the required parameters (coolant temperature, gas
temperature and minimum engine
speed) have been reached. The
requirements are usually fulfilled after
approx. 60 seconds (depending on
exterior temperature) and the first firm press on the accelerator. The LED
status shows the current operating
mode.
LED off:petrol operationLED
flashes:checking conditions for
fuel transition to liquid
gas operation.
Illuminates if conditions
are fulfilled.LED illu‐
minates:liquid gas operationLED
flashes
five
times
and
extin‐
guishes:liquid gas tank is empty
or failure in liquid gas
system. A message is
displayed in the Driver
Information Centre.
The selected fuel mode is stored and reactivated at the next ignition cycle,
if conditions allow.
As soon as the liquid gas tank is
empty, petrol operation is
automatically engaged until the
ignition is switched off.
When switching automatically
between petrol or gas operation, a
brief delay of engine tractive power
may be noticeable.
When petrol fuel tank is empty, the
engine will not start.
Every six months, run the petrol tank
down until control indicator Y
illuminates, then refuel. This helps
maintain fuel quality and system
function for petrol operation.
Fill the tank completely at regular
intervals to prevent corrosion in the
tank.
Faults and remedies If gas mode is not possible, check
whether there is enough liquid gas or
petrol present for starting.
Due to extreme temperatures in
combination with the gas
composition, it may take slightly
longer before the system switches
from petrol to gas mode.
In extreme situations, the system may also switch back to petrol mode if the
minimum requirements are not
fulfilled. If conditions allow, it might be
possible to manually switch back to
liquid gas operation.
Seek the assistance of a workshop in the event of all other faults.
Page 92 of 231
90Instruments and controlsVehicle messages on Midlevel
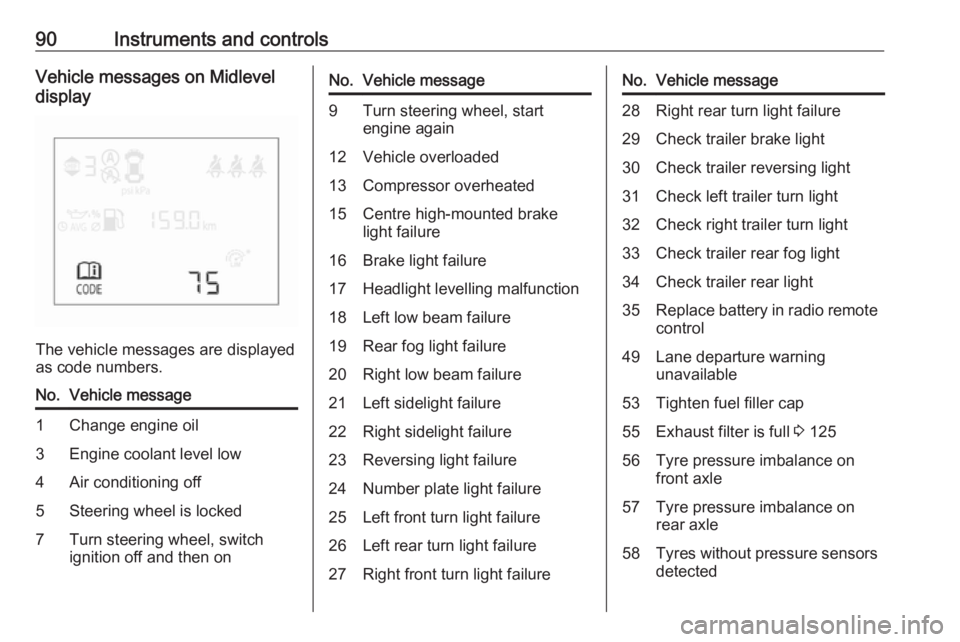
display
The vehicle messages are displayed
as code numbers.
No.Vehicle message1Change engine oil3Engine coolant level low4Air conditioning off5Steering wheel is locked7Turn steering wheel, switch
ignition off and then onNo.Vehicle message9Turn steering wheel, start
engine again12Vehicle overloaded13Compressor overheated15Centre high-mounted brake
light failure16Brake light failure17Headlight levelling malfunction18Left low beam failure19Rear fog light failure20Right low beam failure21Left sidelight failure22Right sidelight failure23Reversing light failure24Number plate light failure25Left front turn light failure26Left rear turn light failure27Right front turn light failureNo.Vehicle message28Right rear turn light failure29Check trailer brake light30Check trailer reversing light31Check left trailer turn light32Check right trailer turn light33Check trailer rear fog light34Check trailer rear light35Replace battery in radio remote
control49Lane departure warning
unavailable53Tighten fuel filler cap55Exhaust filter is full 3 12556Tyre pressure imbalance on
front axle57Tyre pressure imbalance on
rear axle58Tyres without pressure sensors
detected
Page 99 of 231
Instruments and controls97background, even if they are not in
use. This includes automatic
updates, downloads, as well as
programme or app synchronisation
traffic. The data volume purchased
via OnStar might be consumed
rapidly. Turn off automatic
synchronisations in the settings of
your device.
Up to seven devices may be
connected.
To connect a mobile device with the
Wi-Fi hotspot:
1. Press j and then select Wi-Fi
settings on the Info Display. The
settings displayed include the Wi- Fi hotspot name (SSID),
password and connection type.
2. Start a Wi-Fi network search on your mobile device.
3. Select your vehicle hotspot (SSID) when listed.
4. When prompted, enter the password on your mobile device.
Note
To change the SSID or password,
press Z and talk to an advisor or log
in to your account.To switch off the Wi-Fi hotspot
functionality, press Z to call an
advisor.
Smartphone app
With the myOpel smartphone app,
some vehicle functions can be
operated remotely.
The following functions are available: ● Lock or unlock vehicle.
● Honk horn or flash lights.
● Check fuel level, engine oil life and tyre pressure (only with tyre
pressure monitoring system).
● Send navigation destination to the vehicle, if equipped with a
built-in navigation system.
● Locate vehicle on a map.
● Manage Wi-Fi settings.
To operate these functions, download the app from App Store ®
or
Google Play™ Store.Remote control
If desired, use any phone to call an
advisor, who can remotely operate
specific vehicle functions. Find the
respective OnStar phone number on
our country-specific website.
The following functions are available: ● Lock or unlock vehicle.
● Provide information on the vehicle location.
● Honk horn or flash lights.
Stolen vehicle assistance
If the vehicle is stolen, report the theft to the authorities and request OnStar
stolen vehicle assistance. Use any
phone to call an advisor. Find the
respective OnStar phone number on
our country-specific website.
OnStar can provide support in
locating and recovering the vehicle.Theft alert
When the anti-theft alarm system is
triggered, a notification is sent to
OnStar. You are then informed about
this event by text message or email.
Page 158 of 231
156Vehicle careVehicle careGeneral Information...................156
Accessories and vehicle modifications .......................... 156
Vehicle storage ........................157
End-of-life vehicle recovery .....157
Vehicle checks ........................... 158
Performing work ......................158
Bonnet ..................................... 158
Engine oil ................................. 159
Engine coolant ......................... 160
Washer fluid ............................ 161
Brakes ..................................... 161
Brake fluid ............................... 161
Vehicle battery ......................... 162
Wiper blade replacement ........163
Bulb replacement .......................164
Halogen headlights ..................164
Xenon headlights .....................167
Front fog lights ......................... 168
Front turn lights .......................168
Tail lights ................................. 168
Side turn lights ......................... 170
Centre high-mounted brake light ......................................... 171Number plate light...................171
Interior lights ............................ 172
Electrical system ........................172
Fuses ....................................... 172
Engine compartment fuse box . 173
Instrument panel fuse box .......175
Vehicle tools .............................. 177
Tools ........................................ 177
Wheels and tyres .......................178
Winter tyres ............................. 178
Tyre designations ....................178
Tyre pressure .......................... 179
Tyre pressure monitoring
system .................................... 180
Tread depth ............................. 184
Changing tyre and wheel size . 184
Wheel covers ........................... 185
Tyre chains .............................. 185
Tyre repair kit .......................... 185
Wheel changing .......................191
Spare wheel ............................ 192
Jump starting ............................. 195
Towing ....................................... 196
Towing the vehicle ...................196
Towing another vehicle ...........197
Appearance care .......................198
Exterior care ............................ 198
Interior care ............................. 200General Information
Accessories and vehiclemodifications
We recommend the use of genuine
parts and accessories and factory
approved parts specific for your
vehicle type. We cannot assess or guarantee reliability of other products
- even if they have a regulatory or
otherwise granted approval.
Any modification, conversion or other
changes made to standard vehicle
specifications (including, without
limitation, software modifications,
modifications of the electronic control units) may invalidate the warranty
offered by Opel. Furthermore, such
changes may affect driver assistance
systems, fuel consumption, CO 2
emissions and other emissions of the
vehicle. They may also invalidate the
vehicle operating permit.
Page 160 of 231
158Vehicle careVehicle checks
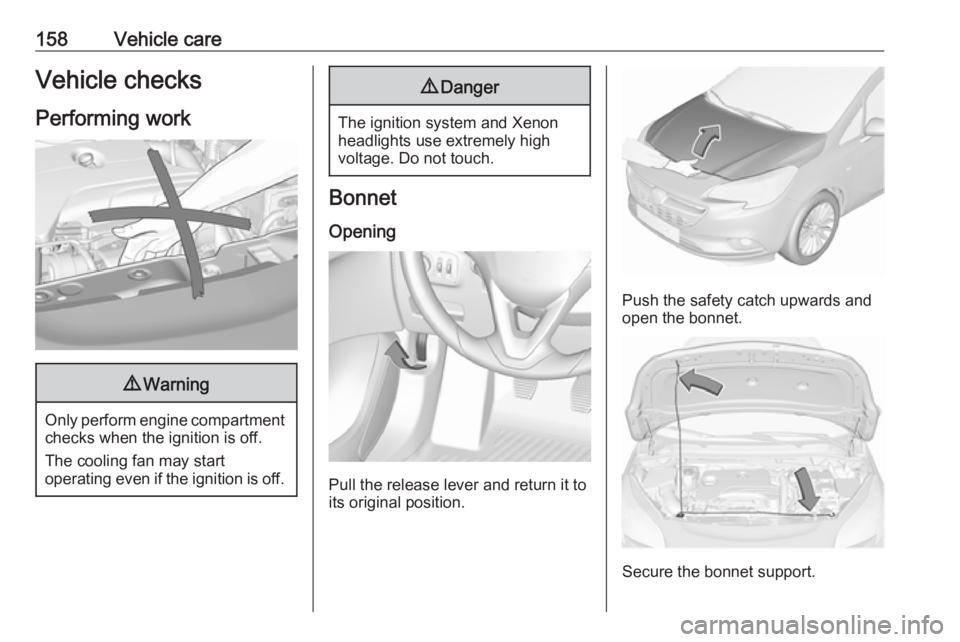
Performing work9 Warning
Only perform engine compartment
checks when the ignition is off.
The cooling fan may start
operating even if the ignition is off.
9 Danger
The ignition system and Xenon
headlights use extremely high
voltage. Do not touch.
Bonnet
Opening
Pull the release lever and return it to
its original position.
Push the safety catch upwards and open the bonnet.
Secure the bonnet support.
Page 166 of 231

164Vehicle careRear window
Lift wiper arm. Disengage wiper bladeas shown in illustration and remove.
Attach the wiper blade slightly angled
to the wiper arm and push until it
engages.
Lower wiper arm carefully.
Bulb replacement
Switch off the ignition and switch off
the relevant switch or close the doors.
Only hold a new bulb at the base! Do not touch the bulb glass with bare
hands.
Use only the same bulb type for
replacement.
Replace headlight bulbs from within
the engine compartment.
Bulb check
After a bulb replacement switch on
the ignition, operate and check the
lights.
Halogen headlights Halogen headlights with separate
bulbs for sidelight, low beam and high
beam.
Sidelight / daytime running light (1)
Low beam (2)
High beam (3)
Front turn lights 3 168.
Page 229 of 231
227Roof load...................................... 61
Roof rack ..................................... 61
S Safety belts ................................... 39
Seat adjustment ....................... 7, 36
Seat belt ........................................ 8
Seat belt reminder .......................78
Seat belts ..................................... 39
Seat folding .................................. 37
Seat heating ................................. 38
Seat position ................................ 35
Selector lever ............................. 127
Service ....................................... 118
Service display ............................ 74
Service information ....................202
Service vehicle soon .................... 79
Side airbag system ......................46
Sidelights .................................... 100
Side turn lights ........................... 170
Software acknowledgement .......218
Spare wheel ............................... 192
Speed limiter......................... 83, 137
Speedometer ............................... 71
Starting and operating ................120
Starting off ................................... 18
Starting the engine ....................121
Steering wheel adjustment ......9, 64
Steering wheel controls ...............64
Stop-start system........................ 122Storage ......................................... 55
Storage compartments .................55
Sun visors .................................... 33
Symbols ......................................... 4
T
Tachometer ................................. 72
Tail lights ................................... 168
Three-point seat belt .................... 40
Tools .......................................... 177
Towing ........................................ 196
Towing another vehicle .............197
Towing the vehicle .....................196
Traction Control system ............. 133
Traffic sign assistant .............83, 146
Transmission ............................... 18
Transmission display .................127
Tread depth ............................... 184
Trip odometer .............................. 71
Turn lights ............................ 77, 104
Tyre chains ................................ 185
Tyre designations ......................178
Tyre pressure ............................ 179
Tyre pressure monitoring system ............................... 81, 180
Tyre pressures ........................... 214
Tyre repair kit ............................. 185
U Underseat storage .......................57
Upholstery .................................. 200Uplevel display............................. 83
Using this manual ..........................3
V Vehicle battery ........................... 162
Vehicle checks............................ 158
Vehicle data ................................ 207
Vehicle data recording and privacy ..................................... 220
Vehicle detected ahead ................83
Vehicle dimensions .................... 212
Vehicle Identification Number ....205
Vehicle jack ................................ 177
Vehicle messages .......................89
Vehicle personalisation ...............92
Vehicle security ............................ 27
Vehicle specific data ......................3
Vehicle storage ........................... 157
Vehicle tools ............................... 177
Vehicle unlocking ........................... 6 Ventilation ................................... 110
W
Warning chimes ........................... 91
Warning lights ............................... 71
Warning triangle .......................... 60
Washer and wiper systems .........16
Washer fluid ............................... 161
Wheel changing .........................191
Wheel covers ............................. 185
Wheels and tyres .......................178