wheel size OPEL CORSA E 2019 Manual user
[x] Cancel search | Manufacturer: OPEL, Model Year: 2019, Model line: CORSA E, Model: OPEL CORSA E 2019Pages: 231, PDF Size: 6.87 MB
Page 104 of 231
102LightingHigh beam
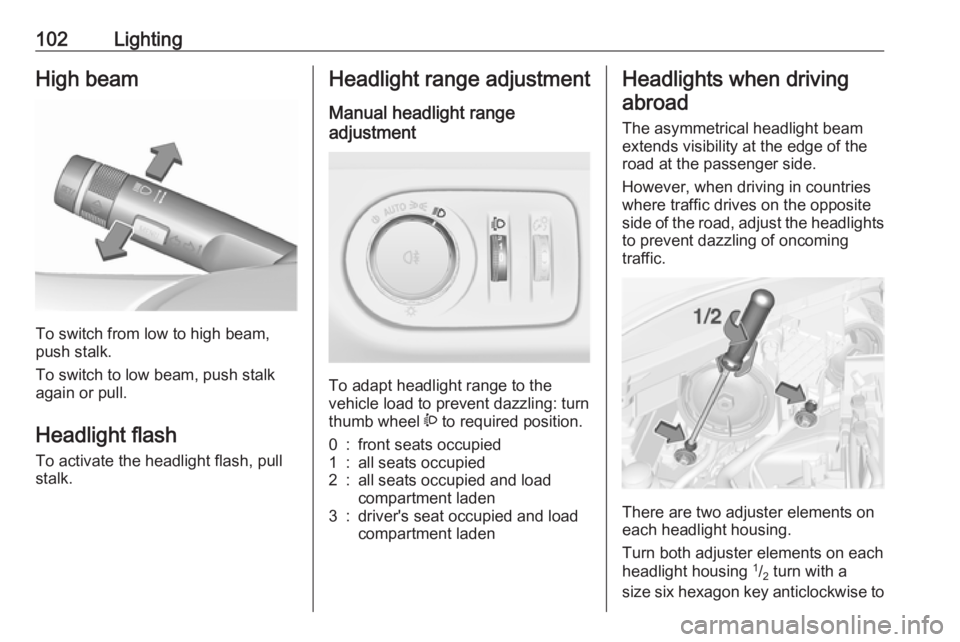
To switch from low to high beam,
push stalk.
To switch to low beam, push stalk again or pull.
Headlight flash To activate the headlight flash, pull
stalk.
Headlight range adjustment
Manual headlight range
adjustment
To adapt headlight range to the
vehicle load to prevent dazzling: turn
thumb wheel ? to required position.
0:front seats occupied1:all seats occupied2:all seats occupied and load
compartment laden3:driver's seat occupied and load
compartment ladenHeadlights when driving
abroad
The asymmetrical headlight beam
extends visibility at the edge of the
road at the passenger side.
However, when driving in countries
where traffic drives on the opposite
side of the road, adjust the headlights to prevent dazzling of oncoming
traffic.
There are two adjuster elements on
each headlight housing.
Turn both adjuster elements on each headlight housing 1
/2 turn with a
size six hexagon key anticlockwise to
Page 158 of 231
156Vehicle careVehicle careGeneral Information...................156
Accessories and vehicle modifications .......................... 156
Vehicle storage ........................157
End-of-life vehicle recovery .....157
Vehicle checks ........................... 158
Performing work ......................158
Bonnet ..................................... 158
Engine oil ................................. 159
Engine coolant ......................... 160
Washer fluid ............................ 161
Brakes ..................................... 161
Brake fluid ............................... 161
Vehicle battery ......................... 162
Wiper blade replacement ........163
Bulb replacement .......................164
Halogen headlights ..................164
Xenon headlights .....................167
Front fog lights ......................... 168
Front turn lights .......................168
Tail lights ................................. 168
Side turn lights ......................... 170
Centre high-mounted brake light ......................................... 171Number plate light...................171
Interior lights ............................ 172
Electrical system ........................172
Fuses ....................................... 172
Engine compartment fuse box . 173
Instrument panel fuse box .......175
Vehicle tools .............................. 177
Tools ........................................ 177
Wheels and tyres .......................178
Winter tyres ............................. 178
Tyre designations ....................178
Tyre pressure .......................... 179
Tyre pressure monitoring
system .................................... 180
Tread depth ............................. 184
Changing tyre and wheel size . 184
Wheel covers ........................... 185
Tyre chains .............................. 185
Tyre repair kit .......................... 185
Wheel changing .......................191
Spare wheel ............................ 192
Jump starting ............................. 195
Towing ....................................... 196
Towing the vehicle ...................196
Towing another vehicle ...........197
Appearance care .......................198
Exterior care ............................ 198
Interior care ............................. 200General Information
Accessories and vehiclemodifications
We recommend the use of genuine
parts and accessories and factory
approved parts specific for your
vehicle type. We cannot assess or guarantee reliability of other products
- even if they have a regulatory or
otherwise granted approval.
Any modification, conversion or other
changes made to standard vehicle
specifications (including, without
limitation, software modifications,
modifications of the electronic control units) may invalidate the warranty
offered by Opel. Furthermore, such
changes may affect driver assistance
systems, fuel consumption, CO 2
emissions and other emissions of the
vehicle. They may also invalidate the
vehicle operating permit.
Page 180 of 231
178Vehicle careVehicles with spare wheel
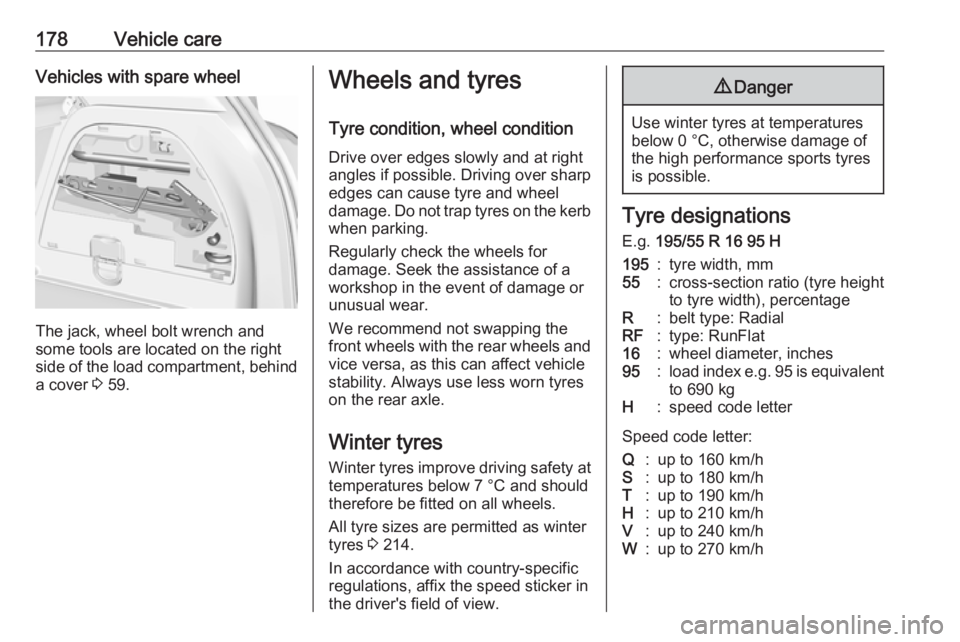
The jack, wheel bolt wrench and
some tools are located on the right
side of the load compartment, behind a cover 3 59.
Wheels and tyres
Tyre condition, wheel condition
Drive over edges slowly and at right
angles if possible. Driving over sharp
edges can cause tyre and wheel
damage. Do not trap tyres on the kerb when parking.
Regularly check the wheels for
damage. Seek the assistance of a
workshop in the event of damage or
unusual wear.
We recommend not swapping the
front wheels with the rear wheels and vice versa, as this can affect vehicle
stability. Always use less worn tyres
on the rear axle.
Winter tyres
Winter tyres improve driving safety at temperatures below 7 °C and should
therefore be fitted on all wheels.
All tyre sizes are permitted as winter
tyres 3 214.
In accordance with country-specific
regulations, affix the speed sticker in
the driver's field of view.9 Danger
Use winter tyres at temperatures
below 0 °C, otherwise damage of
the high performance sports tyres
is possible.
Tyre designations
E.g. 195/55 R 16 95 H
195:tyre width, mm55:cross-section ratio (tyre height
to tyre width), percentageR:belt type: RadialRF:type: RunFlat16:wheel diameter, inches95:load index e.g. 95 is equivalent
to 690 kgH:speed code letter
Speed code letter:
Q:up to 160 km/hS:up to 180 km/hT:up to 190 km/hH:up to 210 km/hV:up to 240 km/hW:up to 270 km/h
Page 181 of 231
Vehicle care179Choose a tyre appropriate for the
maximum speed of your vehicle.
Refer to the EEC Certificate of
Conformity provided with your vehicle
or other national registration
documents. Optional equipment
could reduce the maximum speed of
the vehicle.
Directional tyres
Directional tyres must be mounted so that they rotate in the correct
direction. The proper rotation
direction is indicated by a symbol
(e.g. an arrow) on the sidewall.
Tyre pressure
Check the pressure of cold tyres at
least every 14 days and before any
long journey.
Do not forget the spare wheel.
Tyre pressure 3 214.
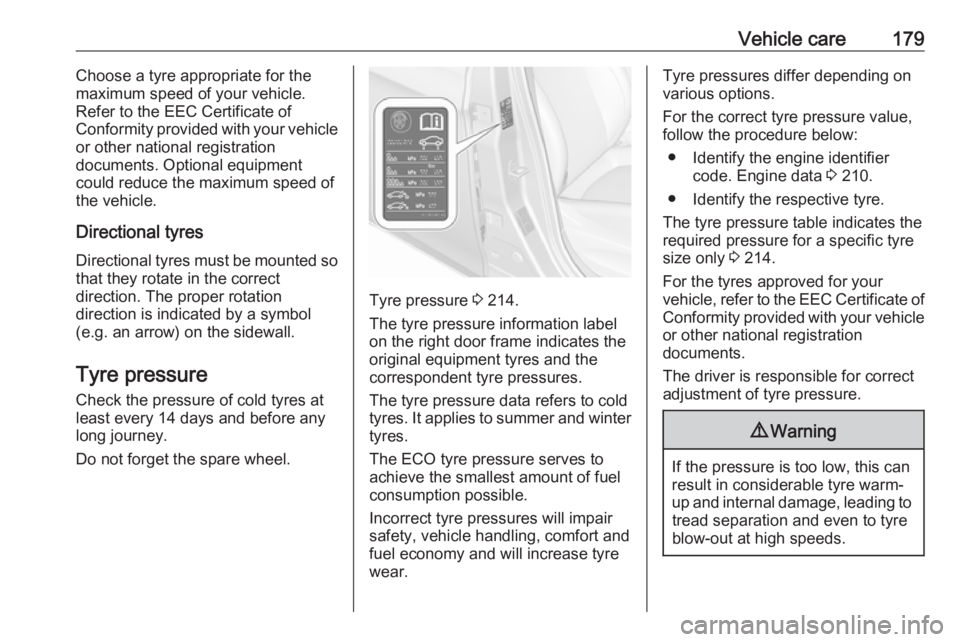
The tyre pressure information label
on the right door frame indicates the original equipment tyres and the
correspondent tyre pressures.
The tyre pressure data refers to cold
tyres. It applies to summer and winter
tyres.
The ECO tyre pressure serves to
achieve the smallest amount of fuel
consumption possible.
Incorrect tyre pressures will impair
safety, vehicle handling, comfort and fuel economy and will increase tyre
wear.
Tyre pressures differ depending on
various options.
For the correct tyre pressure value,
follow the procedure below:
● Identify the engine identifier code. Engine data 3 210.
● Identify the respective tyre.
The tyre pressure table indicates the
required pressure for a specific tyre size only 3 214.
For the tyres approved for your
vehicle, refer to the EEC Certificate of Conformity provided with your vehicle
or other national registration
documents.
The driver is responsible for correct
adjustment of tyre pressure.9 Warning
If the pressure is too low, this can
result in considerable tyre warm-
up and internal damage, leading to tread separation and even to tyre
blow-out at high speeds.
Page 186 of 231
184Vehicle care10. Proceed to the right side frontwheel, and repeat the procedure
in step 9 .
11. Proceed to the right side rear wheel, and repeat the procedure
in step 9.
12. Proceed to the left side rear wheel, and repeat the procedure
in step 9. The horn sounds twice
to indicate that the sensor
identification code has been
matched to the left side rear
wheel, and the tyre pressure
sensor matching process is no
longer active.
13. Turn off the ignition.
14. Set all four tyres to the recommended air pressure level
as indicated on the tyre pressure
information label.
15. Ensure the tyre loading status is set according to the selected
pressure 3 83.
Tread depth Check tread depth at regular
intervals.Tyres should be replaced for safety
reasons at a tread depth of 2-3 mm
(4 mm for winter tyres).
For safety reasons it is recommended
that the tread depth of the tyres on
one axle should not vary by more than 2 mm.
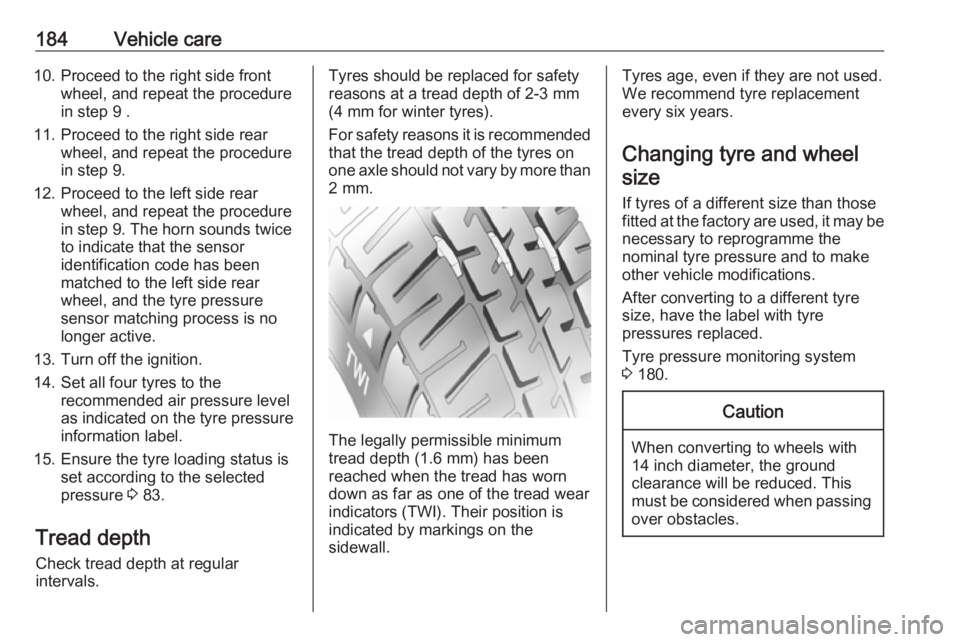
The legally permissible minimum
tread depth (1.6 mm) has been
reached when the tread has worn
down as far as one of the tread wear
indicators (TWI). Their position is
indicated by markings on the
sidewall.
Tyres age, even if they are not used.
We recommend tyre replacement
every six years.
Changing tyre and wheel size
If tyres of a different size than those
fitted at the factory are used, it may be necessary to reprogramme the
nominal tyre pressure and to make
other vehicle modifications.
After converting to a different tyre
size, have the label with tyre
pressures replaced.
Tyre pressure monitoring system
3 180.Caution
When converting to wheels with
14 inch diameter, the ground
clearance will be reduced. This
must be considered when passing
over obstacles.
Page 187 of 231

Vehicle care1859Warning
The use of unsuitable tyres or
wheels may lead to accidents and will invalidate the vehicle
operating permit.
Wheel covers
Wheel covers and tyres that are
factory approved for the respective
vehicle and comply with all of the
relevant wheel and tyre combination
requirements must be used.
If the wheel covers and tyres used are
not factory approved, the tyres must
not have a rim protection ridge.
Wheel covers must not impair brake
cooling.
9 Warning
Use of unsuitable tyres or wheel
covers could lead to sudden
pressure loss and thereby
accidents.
Steel wheels: When using locking
wheel nuts, do not attach wheel
covers.
Tyre chains
Tyre chains are only permitted on the
front wheels.
Always use fine mesh chains that add no more than 10 mm to the tyre tread
and the inboard sides (including chain lock).
9 Warning
Damage may lead to tyre blowout.
Tyre chains are permitted on tyres of
size 175/70 R14, 185/70 R14,
185/65 R15, 205/45 R17.
Tyre chains are permitted on tyres of
size 195/55 R16 with rims of size
16 x 6 and 16 x 6.5, the latter only in combination with limited steering
angle. Seek the assistance of a
workshop.
Tyre chains are not permitted on tyres of size 215/45 R17 and 215/40 R18.
The use of tyre chains is not permitted on the temporary spare wheel.
Tyre repair kit Minor damage to the tyre tread can be
repaired with the tyre repair kit.
Do not remove foreign bodies from
the tyres.
Tyre damage exceeding 4 mm or that is at the tyre's side wall near the rim
cannot be repaired with the tyre repair kit.
Page 194 of 231
192Vehicle care
Front arm position of the lifting
platform at the underbody.
Spare wheel The spare wheel can be classified as
a temporary spare wheel depending
on the size compared to the other
mounted wheels and country
regulations. In this case a permissible maximum speed applies, even
though no label at the spare wheel
indicates this.
Only mount one temporary spare
wheel. Do not drive faster than
80 km/h. Take curves slowly. Do not use for a long period of time.
Caution
The use of a spare wheel that issmaller than the other wheels or in combination with winter tyres
could affect driveability. Have the defective tyre replaced as soon as
possible.
3-door / 5-door hatchback
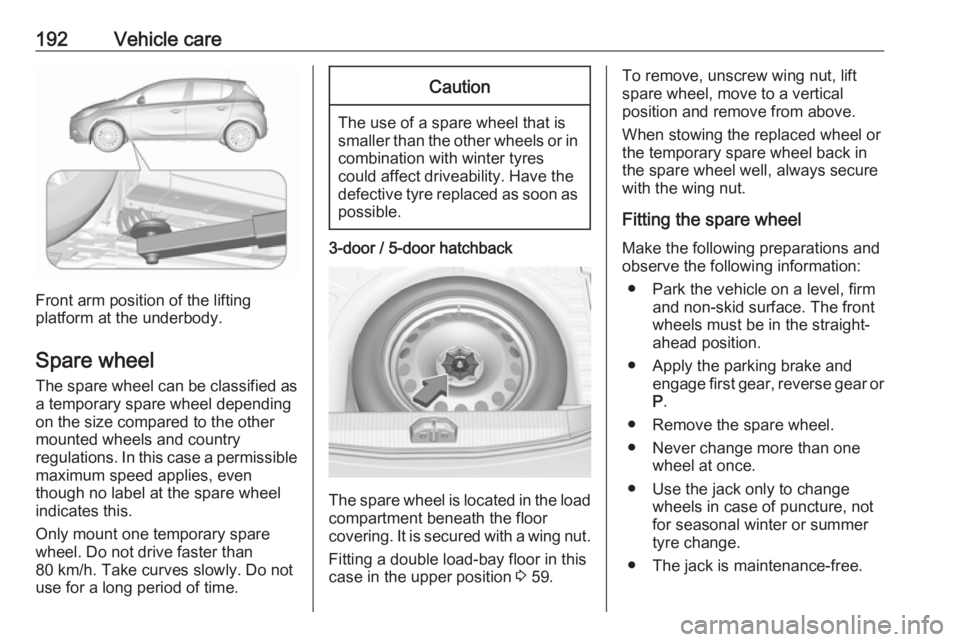
The spare wheel is located in the load
compartment beneath the floor
covering. It is secured with a wing nut.
Fitting a double load-bay floor in this
case in the upper position 3 59.
To remove, unscrew wing nut, lift
spare wheel, move to a vertical
position and remove from above.
When stowing the replaced wheel or
the temporary spare wheel back in
the spare wheel well, always secure
with the wing nut.
Fitting the spare wheel
Make the following preparations and
observe the following information:
● Park the vehicle on a level, firm and non-skid surface. The front
wheels must be in the straight-
ahead position.
● Apply the parking brake and engage first gear, reverse gear or
P .
● Remove the spare wheel.
● Never change more than one wheel at once.
● Use the jack only to change wheels in case of puncture, not
for seasonal winter or summer
tyre change.
● The jack is maintenance-free.
Page 226 of 231
224IndexAAccessories and vehicle modifications .......................... 156
Adjustable air vents ...................117
Airbag and belt tensioners ...........78
Airbag deactivation ................47, 79
Airbag label................................... 42 Airbag system .............................. 42
Air conditioning regular operation ................................ 118
Air conditioning system .............. 111
Air intake .................................... 118
Air vents...................................... 117
Antilock brake system ................ 131
Antilock brake system (ABS) .......80
Anti-theft alarm system ................27
Anti-theft locking system .............. 27
Appearance care ........................198
Ashtrays ....................................... 70
Automatic anti-dazzle ..................30
Automatic light control ...............101
Automatic locking ........................25
Automatic transmission .............127
Autostop ............................... 82, 122
B Battery discharge protection ......108
Battery voltage ............................. 92
Belts.............................................. 39
Bonnet ....................................... 158Brake and clutch fluid.................203
Brake and clutch system .............79
Brake assist ............................... 132
Brake fluid .................................. 161 Brakes ............................... 131, 161
Breakdown.................................. 196
Bulb replacement ....................... 164
C Capacities .................................. 212
Catalytic converter .....................126
Central locking system ................23
Centre high-mounted brake light 171
Changing tyre and wheel size ...184
Charging system .......................... 79
Child locks ................................... 25
Child restraint installation locations ................................... 52
Child restraints.............................. 48
Child restraint systems ................48
Cigarette lighter ........................... 70
City mode ................................... 134
Climate control ............................. 17
Climate control systems .............110
Clock ............................................ 68
Code ............................................. 89
Control indicators.......................... 75
Control of the vehicle .................119
Controls ........................................ 64
Convex shape .............................. 29