key OPEL CROSSLAND X 2017.75 Manual user
[x] Cancel search | Manufacturer: OPEL, Model Year: 2017.75, Model line: CROSSLAND X, Model: OPEL CROSSLAND X 2017.75Pages: 245, PDF Size: 7.6 MB
Page 116 of 245

114LightingLighting featuresCentre console lighting A spotlight integrated in the overheadconsole illuminates the centre
console when headlights are
switched off.
Entry lighting
Welcome lighting Some or all of the following lights are
switched on for a short time by
unlocking the vehicle with the radio
remote control:
● headlights
● tail lights
● number plate lights
● instrument panel light
● interior lights
The number of activated lights
depends on the surrounding light
conditions.
The lighting switches off immediately
when the ignition is switched on.
Starting off 3 18.This function can be activated or
deactivated in the vehicle
personalisation.
Vehicle personalisation 3 100.
The following lights will additionally
switch on when the driver's door is
opened:
● illumination of some switches
● Driver Information Centre
● door pocket lights
Exit lighting The following lights are switched on if
the key is removed from the ignition
switch:
● interior lights
● instrument panel light
They will switch off automatically after
a delay. This function works only in
the dark. Theatre lighting is activated
if the driver's door is opened during
this time.Battery discharge protection
Vehicle battery state of charge
function
The function guarantees longest
vehicle battery life via a generator
with controllable power output and
optimised power distribution.
To prevent discharge of the vehicle
battery when driving, the following
systems are reduced automatically in two stages and finally switched off:
● auxiliary heater
● heated rear window and mirrors ● heated seats
● fan
In the second stage, a message
which confirms the activation of the
vehicle battery discharge protection
will be displayed in the Driver
Information Centre.
Switching off electric lights
To prevent discharge of the vehicle
battery when the ignition is switched
off, some interior lights are switched
off automatically after some time.
Page 130 of 245
128Driving and operatingDriving hints
Control of the vehicle
Never coast with engine not
running
Many systems will not function in this situation ( e.g. brake servo unit, power
steering). Driving in this manner is a
danger to yourself and others.
All systems function during an
Autostop.
Stop-start system 3 132.
Idle boost
If charging of the vehicle battery is
required due to battery condition, the
power output of the generator must
be increased. This will be achieved by an idle boost which may be audible.
A message appears in the Driver
Information Centre.
Pedals
To ensure the pedal travel is
uninhibited, there must be no mats in
the area of the pedals.Use only floor mats, which fit properly and are fixed by the retainers on the
driver side.
Steering If power steering assist is lost
because the engine stops or due to a system malfunction, the vehicle can
be steered but may require increased
effort.Starting and operating
New vehicle running-in Do not brake unnecessarily hard for
the first few journeys.
During the first drive, smoke may
occur because of wax and oil
evaporating off the exhaust system.
Park the vehicle in the open for a
while after the first drive and avoid
inhaling the fumes.
During the running-in period, fuel and engine oil consumption may be
higher.
Additionally, the cleaning process of
the diesel particle filter may take
place more often.
Diesel particle filter 3 136.
Autostop may be inhibited to allow
charging of the vehicle battery.
Ignition switch positions Turn key:
Page 131 of 245
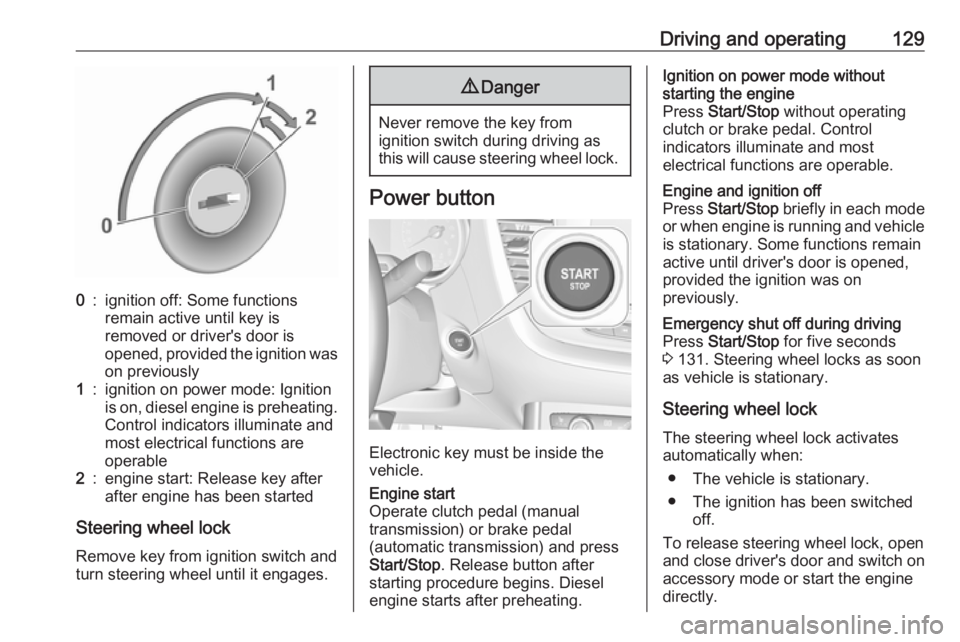
Driving and operating1290:ignition off: Some functions
remain active until key is
removed or driver's door is
opened, provided the ignition was
on previously1:ignition on power mode: Ignition
is on, diesel engine is preheating. Control indicators illuminate and
most electrical functions are
operable2:engine start: Release key after
after engine has been started
Steering wheel lock
Remove key from ignition switch and
turn steering wheel until it engages.
9 Danger
Never remove the key from
ignition switch during driving as
this will cause steering wheel lock.
Power button
Electronic key must be inside the
vehicle.
Engine start
Operate clutch pedal (manual
transmission) or brake pedal
(automatic transmission) and press
Start/Stop . Release button after
starting procedure begins. Diesel
engine starts after preheating.Ignition on power mode without
starting the engine
Press Start/Stop without operating
clutch or brake pedal. Control
indicators illuminate and most
electrical functions are operable.Engine and ignition off
Press Start/Stop briefly in each mode
or when engine is running and vehicle
is stationary. Some functions remain
active until driver's door is opened,
provided the ignition was on
previously.Emergency shut off during driving
Press Start/Stop for five seconds
3 131. Steering wheel locks as soon
as vehicle is stationary.
Steering wheel lock
The steering wheel lock activates
automatically when:
● The vehicle is stationary.
● The ignition has been switched off.
To release steering wheel lock, open
and close driver's door and switch on accessory mode or start the engine
directly.
Page 132 of 245

130Driving and operating9Warning
If the vehicle battery is discharged,
the vehicle must not be towed,
tow-started or jump-started as the
steering wheel lock cannot be
disengaged.
Operation on vehicles with
electronic key system in case of
failure
If either the electronic key fails or the
battery of the electronic key is weak,
the Driver Information Centre may
display No Remote Detected or
Replace Battery in Remote Key when
you try to start the vehicle.
Hold the electronic key with buttons outside at the marking on the steering column cover as shown in the
illustration.
Depress the clutch pedal (manual
transmission) or the brake pedal
(automatic transmission or manual
transmission automated) and press
Start/Stop button to start the engine.
This option is intended for
emergencies only. Replace the
electronic key battery as soon as
possible 3 24.
For unlocking or locking the doors,
see fault in radio remote control unit
or electronic key system 3 25.
Power saving mode
This function manages the duration of
using certain systems to avoid
discharging of the vehicle battery.
After the engine has stopped, some
systems can still be used such as the audio and telematics system,
windscreen wipers, dipped beam
headlamps, courtesy lamps, etc. for a total maximum time of about forty
minutes.
Changing into power saving
mode
When a certain discharging status of
the vehicle battery is achieved, the
active functions are switched in
standby mode. A message appears in the Driver Information Centre
indicating Power saving mode .
A telephone call being made at this
time will be maintained for around 10
minutes with the Bluetooth handsfree
system of the Infotainment system.
Page 133 of 245
Driving and operating131Deactivating power saving modeStandby mode is reactivated
automatically next time the vehicle is
driven. To use the functions
immediately, start the engine:
● for less than ten minutes to use the systems for approximately
five minutes
● for more than ten minutes to use the systems for up to
approximately thirty minutes.
Have the engine run for the duration
specified to ensure that the battery
charge is sufficient. Do not repeatedly
and continuously restart the engine in
order to charge the battery.Starting the engine
Vehicles with ignition switch
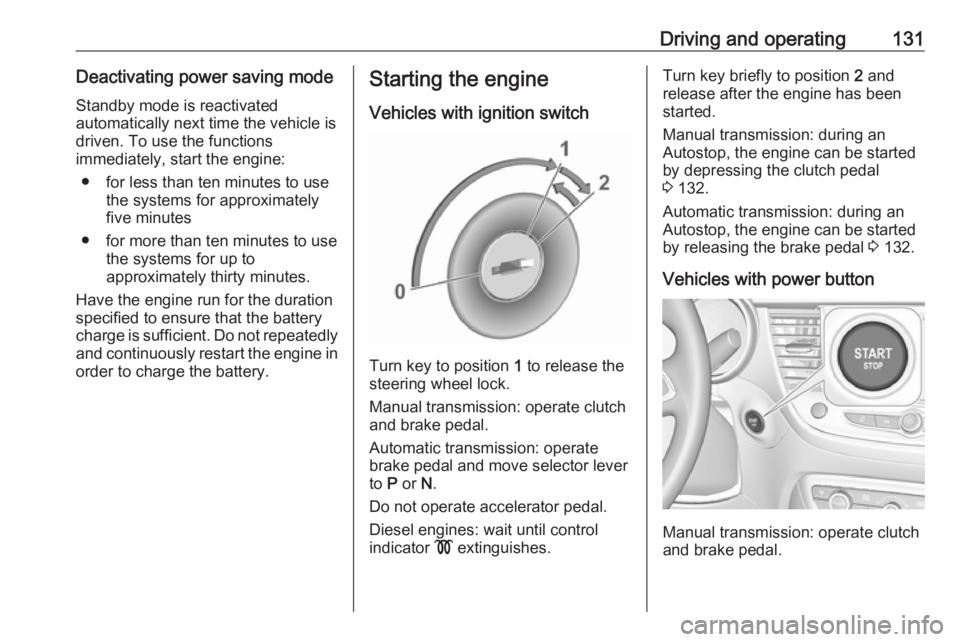
Turn key to position 1 to release the
steering wheel lock.
Manual transmission: operate clutch
and brake pedal.
Automatic transmission: operate
brake pedal and move selector lever
to P or N.
Do not operate accelerator pedal.
Diesel engines: wait until control
indicator ! extinguishes.
Turn key briefly to position 2 and
release after the engine has been
started.
Manual transmission: during an
Autostop, the engine can be started
by depressing the clutch pedal
3 132.
Automatic transmission: during an
Autostop, the engine can be started
by releasing the brake pedal 3 132.
Vehicles with power button
Manual transmission: operate clutch
and brake pedal.
Page 137 of 245
Driving and operating135● The driver's seat belt isunfastened and the driver's door
is opened.
● The engine temperature is too low.
● The charging level of the vehicle battery is below a defined level.
● The brake vacuum is not sufficient.
● The vehicle is driven at least at walking speed.
● The climate control system requests an engine start.
● The air conditioning is manually switched on.
If the bonnet is not fully closed, a warning message is displayed in the
Driver Information Centre.
If an electrical accessory, e.g. a
portable CD player, is connected to
the power outlet, a brief power drop during the restart might be noticeable.Parking9 Warning
● Do not park the vehicle on an
easily ignitable surface. The
high temperature of the
exhaust system could ignite the
surface.
● Always apply the parking brake. Activate the manual
parking brake without pressing the release button. Apply as
firmly as possible on a downhill slope or uphill slope. Depress
brake pedal at the same time to
reduce operating force.
● Switch off the engine.
● If the vehicle is on a level surface or uphill slope, engage
first gear or set the selector
lever to position P before
removing the ignition key or
switching off ignition on
vehicles with power button. On an uphill slope, turn the front
wheels away from the kerb.
If the vehicle is on a downhill
slope, engage reverse gear or
set the selector lever to position
P before removing the ignition
key or switching off ignition on
vehicles with power button.
Turn the front wheels towards
the kerb.
● Close the windows.
● Remove the ignition key from the ignition switch or switch off
ignition on vehicles with power
button. Turn the steering wheel until the steering wheel lock is
felt to engage.
● Lock the vehicle.
● Activate the anti-theft alarm system.
● The engine cooling fans may run
after the engine has been
switched off 3 177.
Caution
After running at high engine
speeds or with high engine loads,
operate the engine briefly at a low
Page 141 of 245
Driving and operating139stations and can be purchased e.g.at Opel dealers and other retail
outlets.
Since AdBlue has a limited
durability, check the date of expiry
before refilling.
Note
When AdBlue-tank is empty, refill at
least five litresto ensure that the new
AdBlue level is being detected.
In case AdBlue refill is not
successfully detected:
1. Continuously drive the vehicle for ten minutes making sure that
vehicle speed is always higher
than 20 km/h.
2. If AdBlue refill is detected successfully, AdBlue supply-
driven warnings or limitations will disappear.
If AdBlue refill is still not detected, seek the assistance of a workshop.
If AdBlue must be refilled at
temperatures below -11 °C, the
refilling of AdBlue may not be
detected by the system. In thisevent, park the vehicle in a space
with a higher ambient temperature
until AdBlue is liquified.
Note
When unscrewing the protective cap from the filler neck, ammonia fumes
may emerge. Do not inhale as the
fumes have a pungent smell. The
fumes are not harmful by inhalation.
It is recommended to fill the AdBlue
tank completely.
The vehicle must be parked on a level surface.
The filler neck for AdBlue is located behind the fuel filler flap, which is
located at left rear side of the vehicle.
The fuel filler flap can only be opened
if the vehicle is unlocked.
1. Remove key from ignition switch.
2. Close all doors to avoid ammonia fumes entering the interior of the
vehicle.
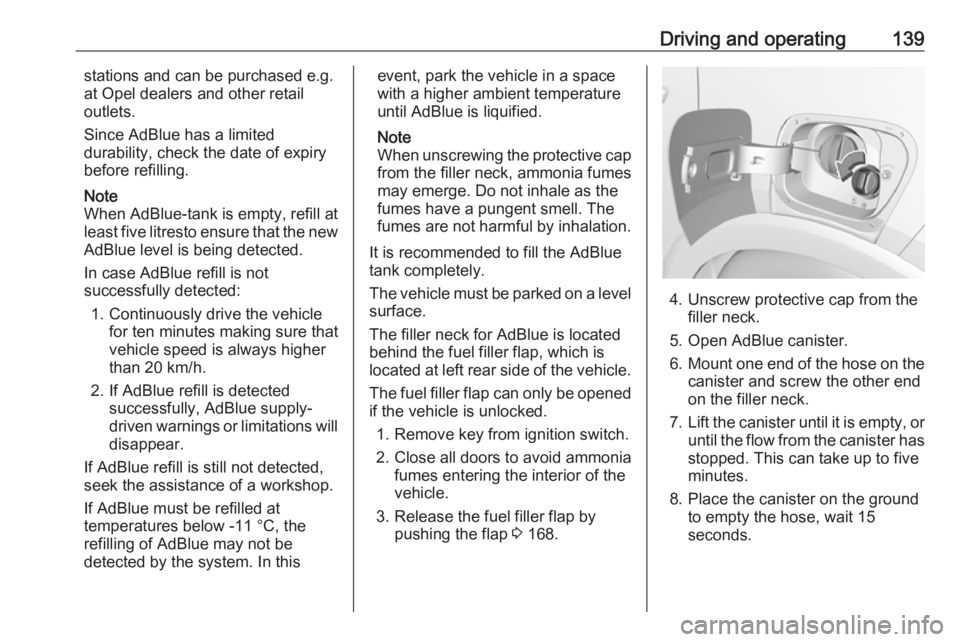
3. Release the fuel filler flap by pushing the flap 3 168.
4. Unscrew protective cap from the
filler neck.
5. Open AdBlue canister.
6. Mount one end of the hose on the
canister and screw the other end
on the filler neck.
7. Lift the canister until it is empty, or
until the flow from the canister has stopped. This can take up to five
minutes.
8. Place the canister on the ground to empty the hose, wait 15
seconds.
Page 144 of 245
142Driving and operatingIn manual mode, no automatic
shifting to a higher gear takes place
at high engine revolutions.
Gear shift indication
R with the number of a higher gear is
indicated, when upshifting is
recommended for fuel saving
reasons.
Shift indication appears only in
manual mode.
Electronic driving programmes
● Following a cold start, the operating temperature
programme increases engine
speed to quickly bring the
catalytic converter to the required
temperature.
● Special programmes automatically adapt the shifting
points when driving up inclines or
down hills.
● In snowy or icy conditions or on other slippery surfaces, the
electronic transmission controlenables the driver to select
manually first, second or third
gear for starting off.
Kickdown
Pressing down the accelerator pedal
beyond the kickdown detent will lead to maximum acceleration
independent of selected driving
mode. The transmission shifts to a lower gear depending on enginespeed.
Fault
In the event of a fault a message is
displayed in the Driver Information Centre. Vehicle messages 3 98.
Electronic transmission control
enables only third gear. The
transmission no longer shifts
automatically.
Do not drive faster than 100 km/h.
Have the cause of the fault remedied
by a workshop.Interruption of power supply
In the event of an interruption of
power supply, the selector lever
cannot be moved out of the P
position. The ignition key cannot be
removed from the ignition switch.
If the vehicle battery is discharged,
start the vehicle using jump leads
3 207.
If the vehicle battery is not the cause
of the fault, release the selector lever.
1. Apply the parking brake.
2. Release the selector lever trim from the centre console. Poke
with a finger into the leather
socket below the selector lever
and push the trim upwards.
Page 174 of 245
172Driving and operating
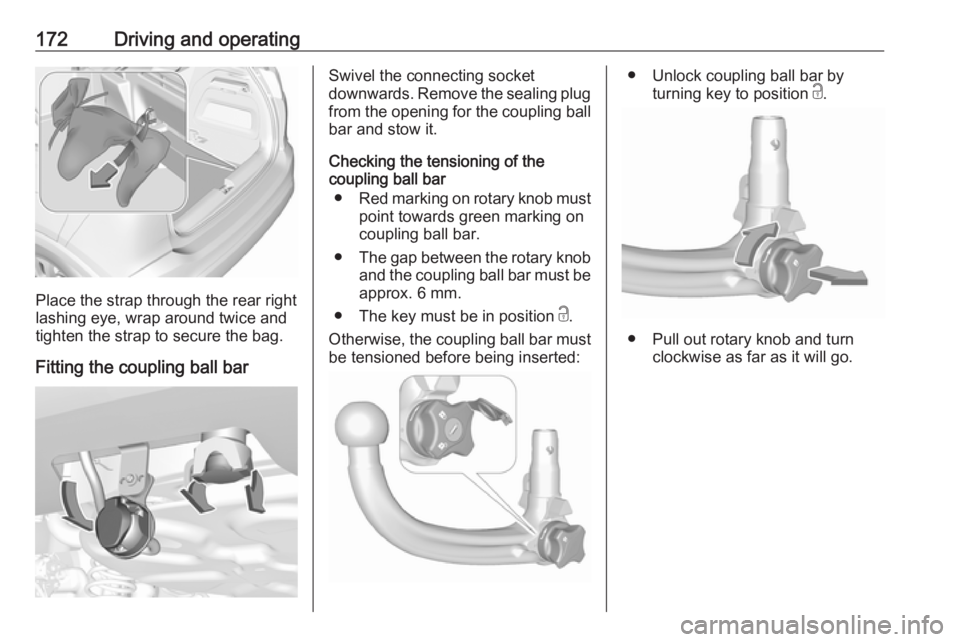
Place the strap through the rear right
lashing eye, wrap around twice and
tighten the strap to secure the bag.
Fitting the coupling ball bar
Swivel the connecting socket
downwards. Remove the sealing plug from the opening for the coupling ball
bar and stow it.
Checking the tensioning of the
coupling ball bar
● Red marking on rotary knob must
point towards green marking on
coupling ball bar.
● The gap between the rotary knob
and the coupling ball bar must be approx. 6 mm.
● The key must be in position c.
Otherwise, the coupling ball bar must
be tensioned before being inserted:● Unlock coupling ball bar by
turning key to position c.
● Pull out rotary knob and turn
clockwise as far as it will go.
Page 175 of 245
Driving and operating173Inserting the coupling ball bar
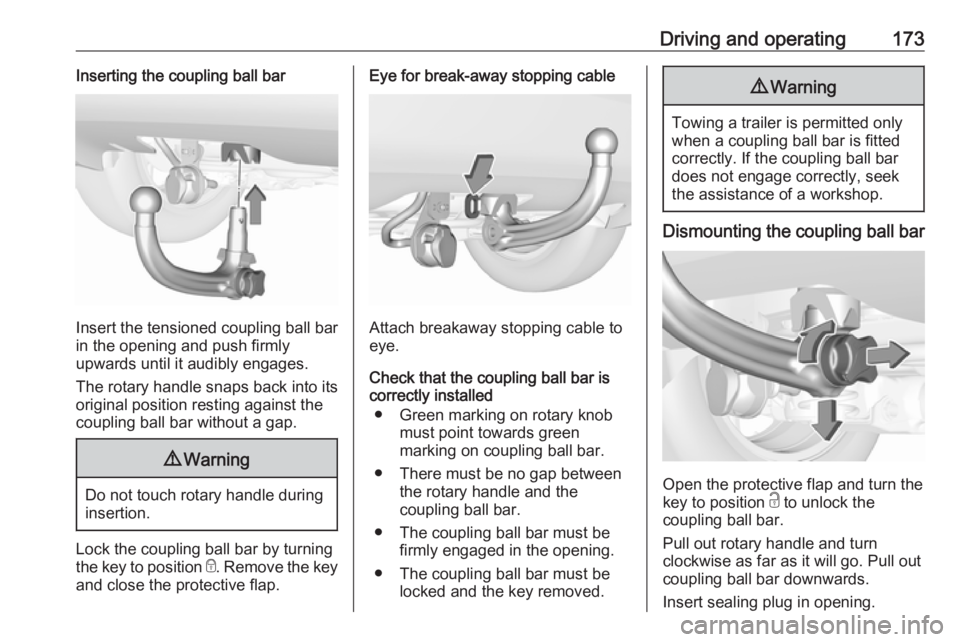
Insert the tensioned coupling ball bar
in the opening and push firmly
upwards until it audibly engages.
The rotary handle snaps back into its
original position resting against the
coupling ball bar without a gap.
9 Warning
Do not touch rotary handle during
insertion.
Lock the coupling ball bar by turning
the key to position e. Remove the key
and close the protective flap.
Eye for break-away stopping cable
Attach breakaway stopping cable to
eye.
Check that the coupling ball bar is correctly installed
● Green marking on rotary knob must point towards green
marking on coupling ball bar.
● There must be no gap between the rotary handle and the
coupling ball bar.
● The coupling ball bar must be firmly engaged in the opening.
● The coupling ball bar must be locked and the key removed.
9Warning
Towing a trailer is permitted only
when a coupling ball bar is fitted correctly. If the coupling ball bardoes not engage correctly, seekthe assistance of a workshop.
Dismounting the coupling ball bar
Open the protective flap and turn the
key to position c to unlock the
coupling ball bar.
Pull out rotary handle and turn
clockwise as far as it will go. Pull out coupling ball bar downwards.
Insert sealing plug in opening.