buttons OPEL CROSSLAND X 2017.75 Manual user
[x] Cancel search | Manufacturer: OPEL, Model Year: 2017.75, Model line: CROSSLAND X, Model: OPEL CROSSLAND X 2017.75Pages: 245, PDF Size: 7.6 MB
Page 13 of 245

In brief111Power windows .....................38
2 Exterior mirrors .....................35
3 Cruise control .....................147
Speed limiter ....................... 149
4 Turn and lane-change
signals, headlight flash,
low/high beam, high beam
assist ................................... 108
Exit lighting ......................... 114
Parking lights ...................... 112
Buttons for Driver
Information Centre ................93
5 Side air vents ...................... 124
6 Instruments .......................... 83
Driver Information Centre ...... 93
7 Buttons for Driver
Information Centre ................93
8 Windscreen wiper and
washer, rear wiper and
washer ................................. 75
9 Head-up display ....................97
10 Centre air vents .................. 124
11 Hazard warning flashers ....110
12 Info-Display .......................... 9513Centre air vent ......................95
14 Light sensor
15 Central locking system ..........25
16 Glovebox .............................. 64
Fuse box ............................ 193
17 Controls for Info-Display
operation ............................... 95
18 Climate control system ........ 116
19 USB charging port ................ 78
20 Parking assist/Advanced
parking assist .....................151
Lane departure warning .....165
Eco button for stop-start
system ................................. 132
Electronic Stability Control and Traction Control ...........146
21 Power outlet .......................... 78
22 Manual transmission ..........143
Automatic transmission ......140
23 Manual parking brake .........145
24 Power button ....................... 129
25 Ignition switch .....................128
26 Steering wheel adjustment ..7427 Horn ..................................... 75
28 Bonnet release lever ..........177
29 Storage ................................. 64
30 Head-up display ....................97
31 Light switch ........................ 107
Headlight range
adjustment ......................... 109
Front/rear fog lights ............111
Instrument illumination .......112
Page 25 of 245
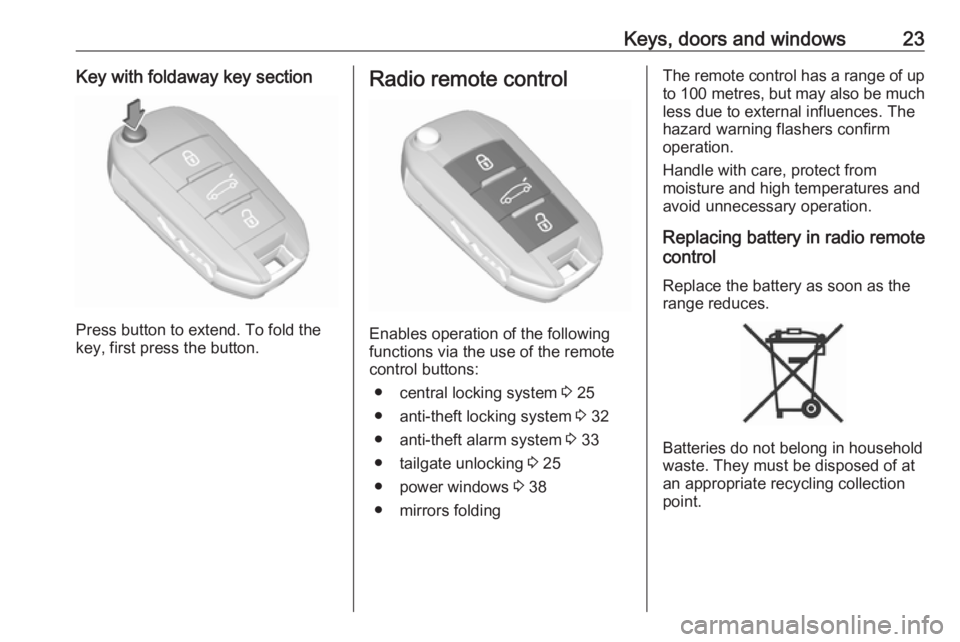
Keys, doors and windows23Key with foldaway key section
Press button to extend. To fold the
key, first press the button.
Radio remote control
Enables operation of the following
functions via the use of the remote control buttons:
● central locking system 3 25
● anti-theft locking system 3 32
● anti-theft alarm system 3 33
● tailgate unlocking 3 25
● power windows 3 38
● mirrors folding
The remote control has a range of up
to 100 metres , but may also be much
less due to external influences. The
hazard warning flashers confirm
operation.
Handle with care, protect from
moisture and high temperatures and
avoid unnecessary operation.
Replacing battery in radio remote
control
Replace the battery as soon as the
range reduces.
Batteries do not belong in household
waste. They must be disposed of at
an appropriate recycling collection
point.
Page 30 of 245
28Keys, doors and windowsThe system locks if any door has
been opened and all doors are now
closed.
If the driver's door is not closed
properly, the electronic key remains in the vehicle or the ignition is not off,
locking will not be permitted and a
warning chime sounds.
If there have been two or more
electronic keys in the vehicle and the
ignition was on once, the doors will be locked even if just one electronic key
is taken out of the vehicle.
Unlocking and opening the tailgate
The tailgate can be unlocked and
opened by pushing the touchpad
under the tailgate moulding when the
electronic key is in range. The doors
remain locked depending on the
configuration in the vehicle
personalisation.
Load compartment 3 31
Vehicle personalisation 3 100Operation with buttons on the
electronic key
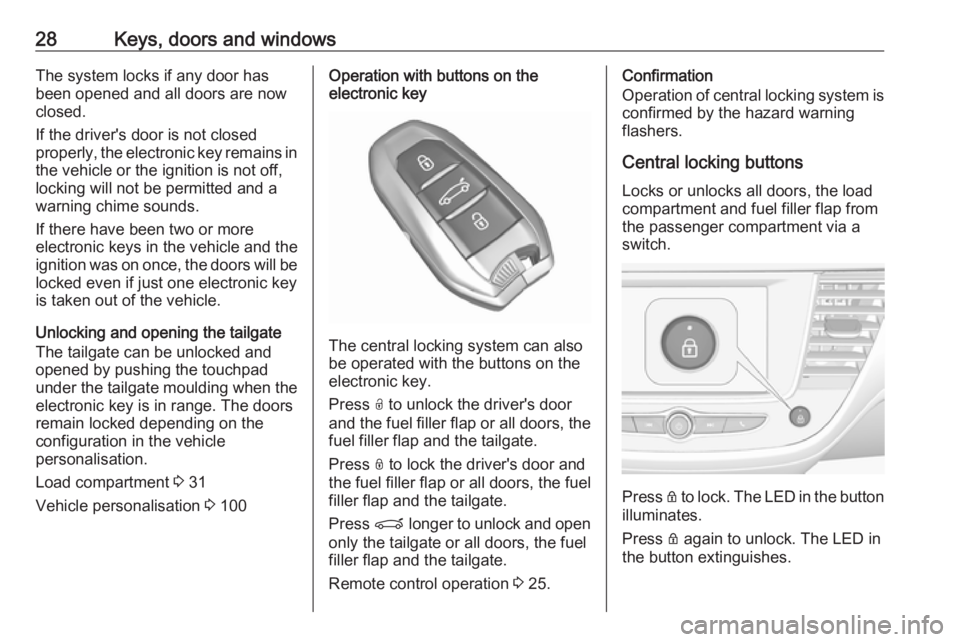
The central locking system can also
be operated with the buttons on the
electronic key.
Press O to unlock the driver's door
and the fuel filler flap or all doors, the fuel filler flap and the tailgate.
Press N to lock the driver's door and
the fuel filler flap or all doors, the fuel
filler flap and the tailgate.
Press P longer to unlock and open
only the tailgate or all doors, the fuel
filler flap and the tailgate.
Remote control operation 3 25.
Confirmation
Operation of central locking system is
confirmed by the hazard warning
flashers.
Central locking buttonsLocks or unlocks all doors, the load
compartment and fuel filler flap from
the passenger compartment via a
switch.
Press Q to lock. The LED in the button
illuminates.
Press Q again to unlock. The LED in
the button extinguishes.
Page 95 of 245
Instruments and controls93Information displays
Driver Information Centre
The Driver Information Centre is
located in the instrument cluster.
Depending on the version and the
instrument cluster, the Driver
Information Centre is available as
Baselevel or Midlevel display.
Driver Information Centre indicates: ● overall and trip odometer
● digital speed indication
● trip/fuel information menu
● gear shift indication
● service information
● vehicle and warning messages
● driver assistance messages
● pop-up messages
Selecting menus and functions
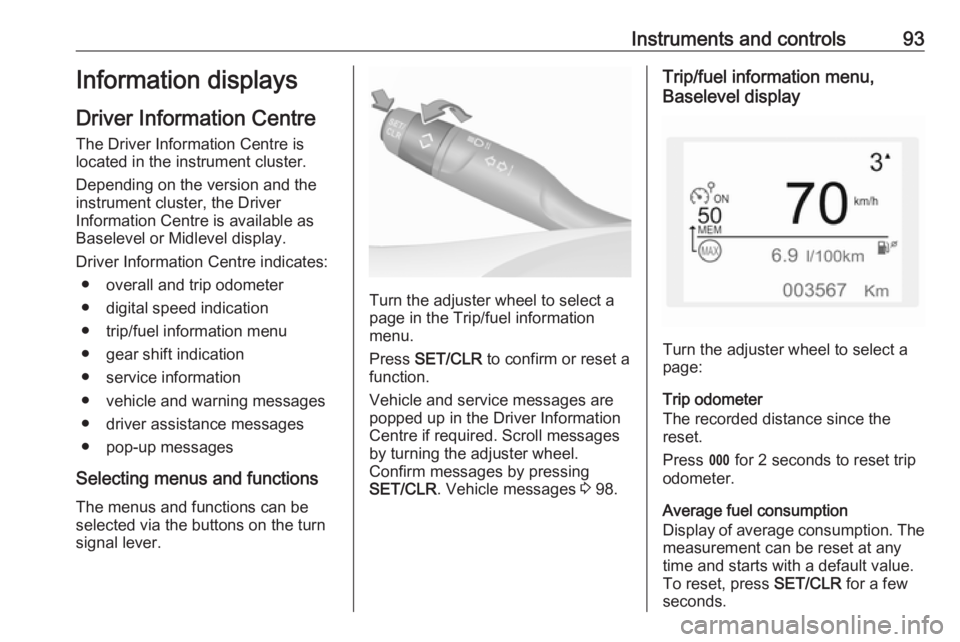
The menus and functions can be selected via the buttons on the turnsignal lever.
Turn the adjuster wheel to select a
page in the Trip/fuel information
menu.
Press SET/CLR to confirm or reset a
function.
Vehicle and service messages are popped up in the Driver Information
Centre if required. Scroll messages by turning the adjuster wheel.
Confirm messages by pressing
SET/CLR . Vehicle messages 3 98.
Trip/fuel information menu,
Baselevel display
Turn the adjuster wheel to select a
page:
Trip odometer
The recorded distance since the reset.
Press L for 2 seconds to reset trip
odometer.
Average fuel consumption
Display of average consumption. The measurement can be reset at any
time and starts with a default value.
To reset, press SET/CLR for a few
seconds.
Page 98 of 245
96Instruments and controlsPress èäåé to select a menu page.
Press OK to confirm a selection.
Press BACK to exit a menu without
changing a setting.
7'' Colour-Info-Display
Selecting menus and settings
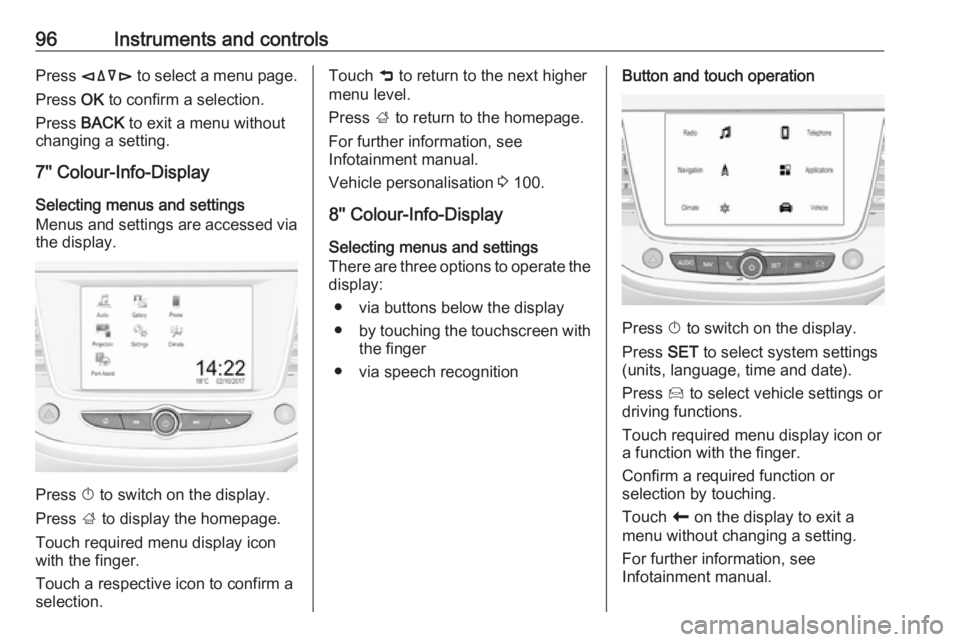
Menus and settings are accessed via the display.
Press X to switch on the display.
Press ; to display the homepage.
Touch required menu display icon
with the finger.
Touch a respective icon to confirm a
selection.
Touch 9 to return to the next higher
menu level.
Press ; to return to the homepage.
For further information, see Infotainment manual.
Vehicle personalisation 3 100.
8'' Colour-Info-Display
Selecting menus and settings
There are three options to operate the
display:
● via buttons below the display
● by touching the touchscreen with
the finger
● via speech recognitionButton and touch operation
Press X to switch on the display.
Press SET to select system settings
(units, language, time and date).
Press Í to select vehicle settings or
driving functions.
Touch required menu display icon or a function with the finger.
Confirm a required function or
selection by touching.
Touch r on the display to exit a
menu without changing a setting.
For further information, see
Infotainment manual.
Page 103 of 245

Instruments and controls101Use touch buttons to operate the
display:
Select Settings .
Unit settings
Select Units
Change units for Consumption and
Distance and Temperature .
Touch 9 repeatedly to return to the
homepage.
Language settings
Select Language .
Change language by touching the
respective entry.
Touch 9 repeatedly to return to the
homepage.
Vehicle settings
Select Vehicle .
In the corresponding submenus the
following settings can be changed:
● Collision / Detection Systems
Side Blind Spot Alert : Activates
or deactivates side blind spot
alert.Drowsy Driver Alert : Activates or
deactivates the driver
drowsiness system.
Speed Limit Information :
Activates or deactivates the
speed limit information by traffic sign recognition.
Rear View Camera Guidelines :
Activates or deactivates the rear
view camera guidelines on the
Info display.
● Comfort and Convenience
Auto Wipe in Reverse Gear :
Activates or deactivates
automatic switching on of the
rear window wiper when reverse
gear is engaged.
● Lighting
Ambient Lighting : Activates or
deactivates the ambient lighting
and adjusts its brightness.
Welcome Lighting : Activates or
deactivates and changes the duration of welcome lighting.Exit Lighting : Activates or
deactivates and changes the
duration of exit lighting.
● Remote Lock, Unlock, Start
Remote Door Unlock : Changes
the configuration to unlock the
driver's door only or all doors
when pressing O on the remote
control.
Unlock boot only : Activates or
deactivates unlocking the tailgate
only when pressing T on the
remote control.
Touch 9 repeatedly to return to the
homepage.
Page 104 of 245
102Instruments and controls8" Colour-Info-Display
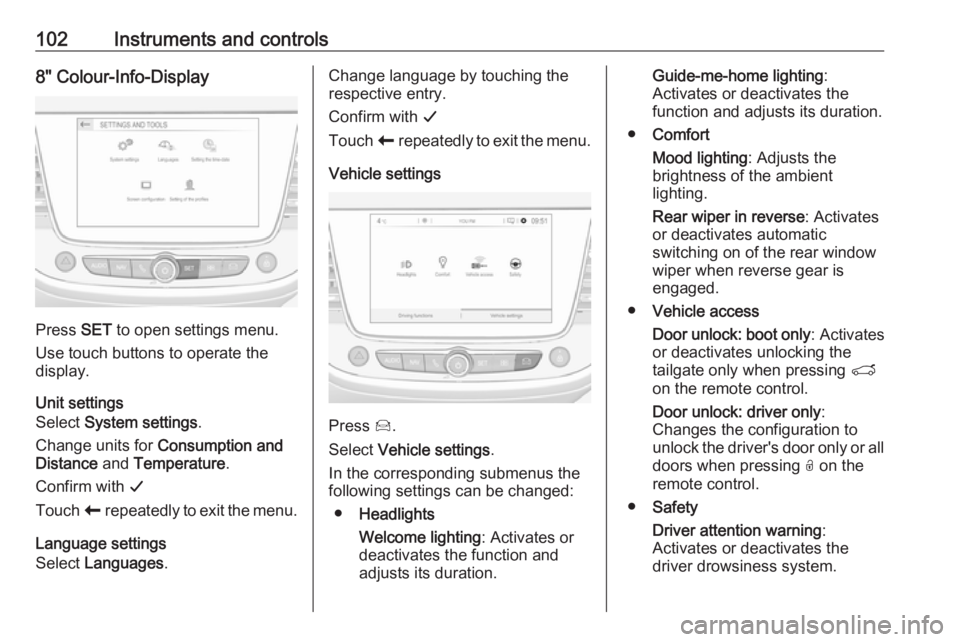
Press SET to open settings menu.
Use touch buttons to operate the
display.
Unit settings
Select System settings .
Change units for Consumption and
Distance and Temperature .
Confirm with G
Touch r repeatedly to exit the menu.
Language settings
Select Languages .
Change language by touching the
respective entry.
Confirm with G
Touch r repeatedly to exit the menu.
Vehicle settings
Press Í.
Select Vehicle settings .
In the corresponding submenus the
following settings can be changed:
● Headlights
Welcome lighting : Activates or
deactivates the function and
adjusts its duration.
Guide-me-home lighting :
Activates or deactivates the
function and adjusts its duration.
● Comfort
Mood lighting : Adjusts the
brightness of the ambient
lighting.
Rear wiper in reverse : Activates
or deactivates automatic
switching on of the rear window
wiper when reverse gear is
engaged.
● Vehicle access
Door unlock: boot only : Activates
or deactivates unlocking the
tailgate only when pressing T
on the remote control.
Door unlock: driver only :
Changes the configuration to
unlock the driver's door only or all
doors when pressing O on the
remote control.
● Safety
Driver attention warning :
Activates or deactivates the
driver drowsiness system.
Page 106 of 245
104Instruments and controlsOnStar buttons
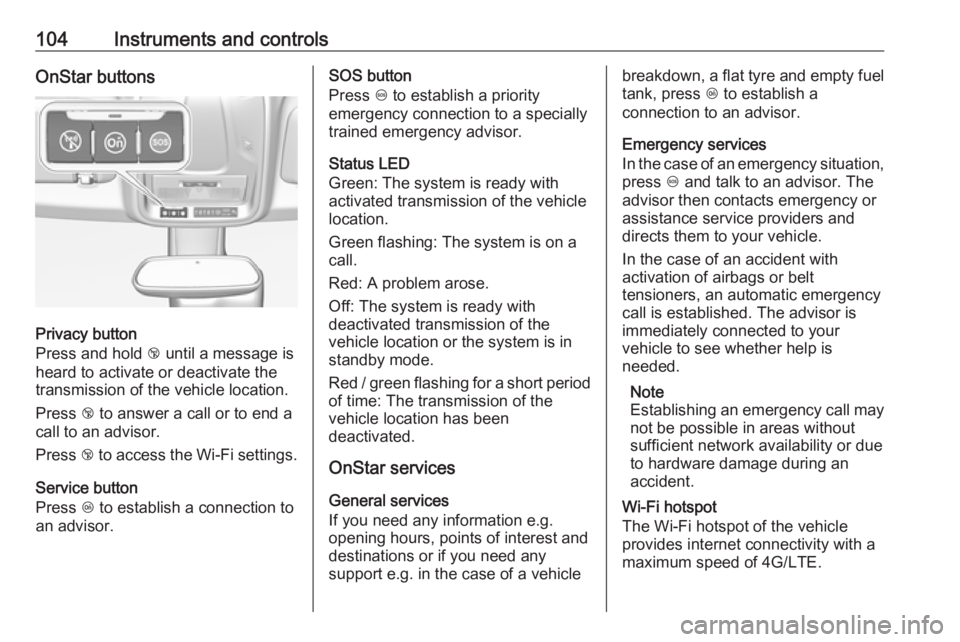
Privacy button
Press and hold j until a message is
heard to activate or deactivate the
transmission of the vehicle location.
Press j to answer a call or to end a
call to an advisor.
Press j to access the Wi-Fi settings.
Service button
Press Z to establish a connection to
an advisor.
SOS button
Press [ to establish a priority
emergency connection to a specially
trained emergency advisor.
Status LED
Green: The system is ready with
activated transmission of the vehicle
location.
Green flashing: The system is on a
call.
Red: A problem arose.
Off: The system is ready with
deactivated transmission of the
vehicle location or the system is in
standby mode.
Red / green flashing for a short period of time: The transmission of the
vehicle location has been
deactivated.
OnStar services
General services
If you need any information e.g.
opening hours, points of interest and
destinations or if you need any
support e.g. in the case of a vehiclebreakdown, a flat tyre and empty fuel
tank, press Z to establish a
connection to an advisor.
Emergency services
In the case of an emergency situation,
press [ and talk to an advisor. The
advisor then contacts emergency or
assistance service providers and
directs them to your vehicle.
In the case of an accident with
activation of airbags or belt
tensioners, an automatic emergency
call is established. The advisor is
immediately connected to your
vehicle to see whether help is
needed.
Note
Establishing an emergency call may
not be possible in areas without
sufficient network availability or due
to hardware damage during an
accident.
Wi-Fi hotspot
The Wi-Fi hotspot of the vehicle
provides internet connectivity with a
maximum speed of 4G/LTE.
Page 121 of 245
Climate control119Heated rear window, windscreen
and exterior mirrors b
3 39
Heated seats ß
3 47.
Electronic climate control system
The dual zone climate control allows
different temperatures for driver side
and front passenger side.
In automatic mode, temperature, fan
speed and air distribution are
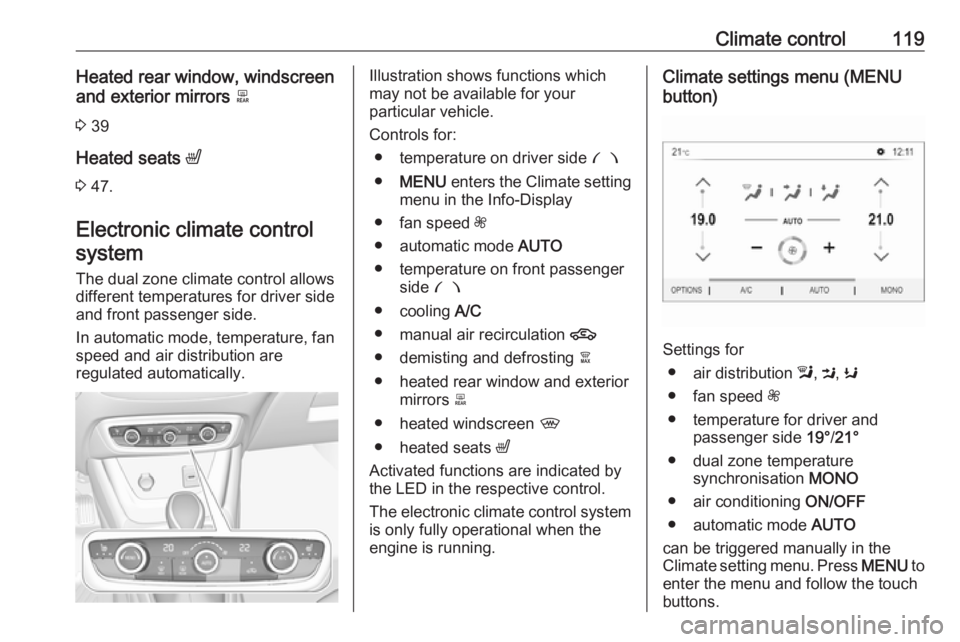
regulated automatically.Illustration shows functions which
may not be available for your
particular vehicle.
Controls for: ● temperature on driver side £
● MENU enters the Climate setting
menu in the Info-Display
● fan speed Z
● automatic mode AUTO
● temperature on front passenger side £
● cooling A/C
● manual air recirculation 4
● demisting and defrosting à
● heated rear window and exterior mirrors b
● heated windscreen ,
● heated seats ß
Activated functions are indicated by the LED in the respective control.
The electronic climate control system
is only fully operational when the
engine is running.Climate settings menu (MENU
button)
Settings for
● air distribution l, M , K
● fan speed Z
● temperature for driver and passenger side 19°/21°
● dual zone temperature synchronisation MONO
● air conditioning ON/OFF
● automatic mode AUTO
can be triggered manually in the
Climate setting menu. Press MENU to
enter the menu and follow the touch
buttons.
Page 122 of 245
120Climate controlClimate setting menu can also be
displayed
● by selecting Climate on the 7''
Colour-Info-Display or
● by pressing Í and then selecting
Climate from the menu on the 8''
Colour-Info-Display.
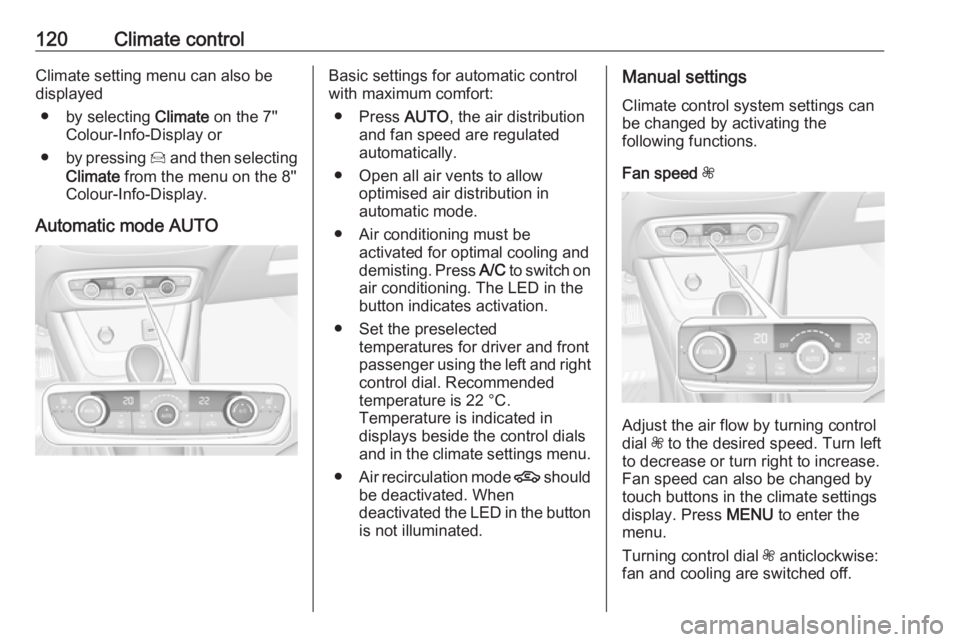
Automatic mode AUTOBasic settings for automatic control
with maximum comfort:
● Press AUTO, the air distribution
and fan speed are regulated
automatically.
● Open all air vents to allow optimised air distribution in
automatic mode.
● Air conditioning must be activated for optimal cooling and
demisting. Press A/C to switch on
air conditioning. The LED in the
button indicates activation.
● Set the preselected temperatures for driver and front
passenger using the left and right control dial. Recommended
temperature is 22 °C.
Temperature is indicated in
displays beside the control dials
and in the climate settings menu.
● Air recirculation mode 4 should
be deactivated. When
deactivated the LED in the button is not illuminated.Manual settings
Climate control system settings can
be changed by activating the
following functions.
Fan speed Z
Adjust the air flow by turning control
dial Z to the desired speed. Turn left
to decrease or turn right to increase.
Fan speed can also be changed by touch buttons in the climate settings
display. Press MENU to enter the
menu.
Turning control dial Z anticlockwise:
fan and cooling are switched off.