transmission OPEL CROSSLAND X 2019.75 Manual user
[x] Cancel search | Manufacturer: OPEL, Model Year: 2019.75, Model line: CROSSLAND X, Model: OPEL CROSSLAND X 2019.75Pages: 253, PDF Size: 7.76 MB
Page 135 of 253
Driving and operating133
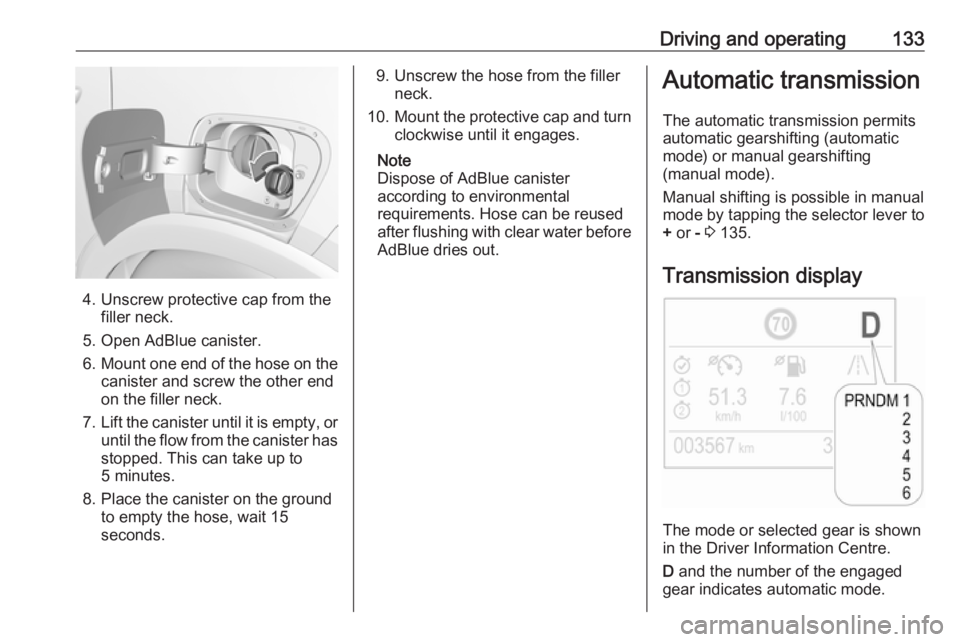
4. Unscrew protective cap from thefiller neck.
5. Open AdBlue canister.
6. Mount one end of the hose on the
canister and screw the other end
on the filler neck.
7. Lift the canister until it is empty, or
until the flow from the canister has stopped. This can take up to
5 minutes.
8. Place the canister on the ground to empty the hose, wait 15
seconds.
9. Unscrew the hose from the filler neck.
10. Mount the protective cap and turn
clockwise until it engages.
Note
Dispose of AdBlue canister
according to environmental
requirements. Hose can be reused
after flushing with clear water before
AdBlue dries out.Automatic transmission
The automatic transmission permits
automatic gearshifting (automatic
mode) or manual gearshifting
(manual mode).
Manual shifting is possible in manual
mode by tapping the selector lever to + or - 3 135.
Transmission display
The mode or selected gear is shown
in the Driver Information Centre.
D and the number of the engaged
gear indicates automatic mode.
Page 137 of 253
Driving and operating135Manual mode
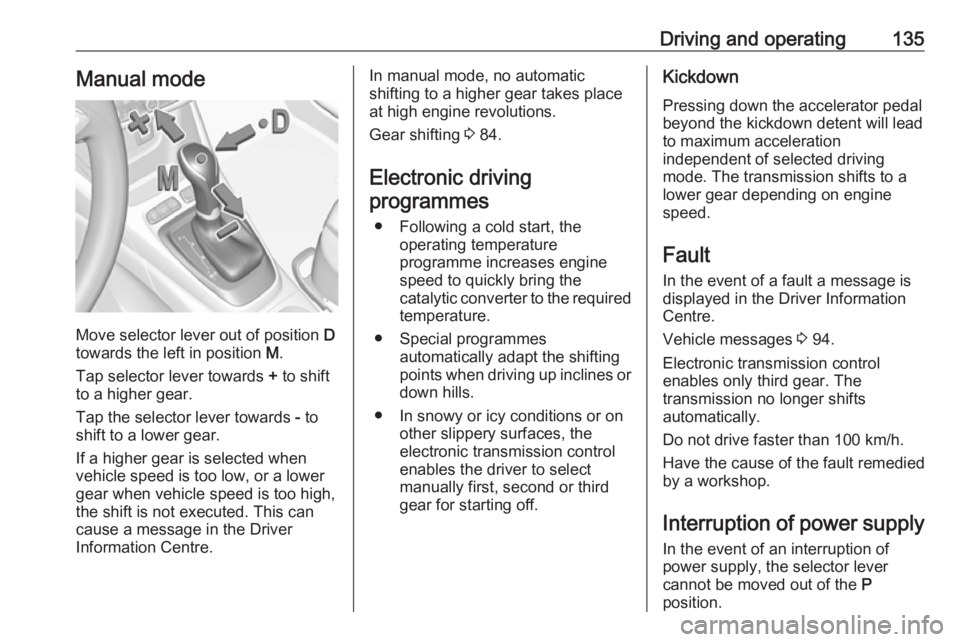
Move selector lever out of position D
towards the left in position M.
Tap selector lever towards + to shift
to a higher gear.
Tap the selector lever towards - to
shift to a lower gear.
If a higher gear is selected when
vehicle speed is too low, or a lower
gear when vehicle speed is too high,
the shift is not executed. This can
cause a message in the Driver
Information Centre.
In manual mode, no automatic
shifting to a higher gear takes place
at high engine revolutions.
Gear shifting 3 84.
Electronic driving programmes
● Following a cold start, the operating temperature
programme increases engine
speed to quickly bring the
catalytic converter to the required
temperature.
● Special programmes automatically adapt the shifting
points when driving up inclines or
down hills.
● In snowy or icy conditions or on other slippery surfaces, the
electronic transmission control
enables the driver to select
manually first, second or third gear for starting off.Kickdown
Pressing down the accelerator pedal
beyond the kickdown detent will lead to maximum acceleration
independent of selected driving
mode. The transmission shifts to a
lower gear depending on engine speed.
Fault
In the event of a fault a message is
displayed in the Driver Information
Centre.
Vehicle messages 3 94.
Electronic transmission control
enables only third gear. The
transmission no longer shifts
automatically.
Do not drive faster than 100 km/h.
Have the cause of the fault remedied by a workshop.
Interruption of power supply In the event of an interruption of
power supply, the selector lever
cannot be moved out of the P
position.
Page 138 of 253
136Driving and operatingIf the vehicle battery is discharged,
start the vehicle using jump leads
3 207.
If the vehicle battery is not the cause
of the fault, release the selector lever.
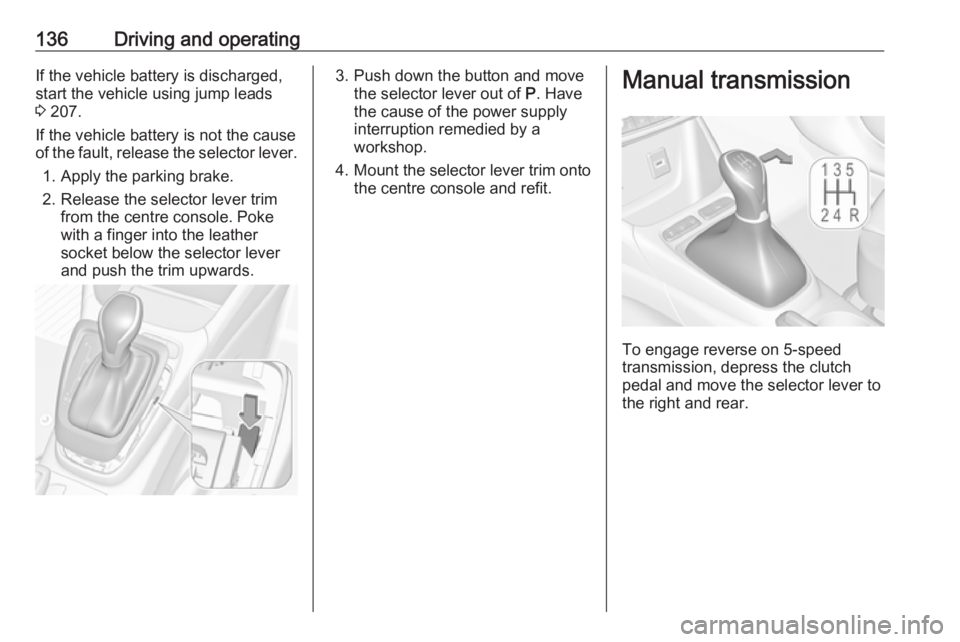
1. Apply the parking brake.
2. Release the selector lever trim from the centre console. Pokewith a finger into the leather
socket below the selector lever
and push the trim upwards.3. Push down the button and move the selector lever out of P. Have
the cause of the power supply
interruption remedied by a
workshop.
4. Mount the selector lever trim onto
the centre console and refit.Manual transmission
To engage reverse on 5-speed
transmission, depress the clutch
pedal and move the selector lever to
the right and rear.
Page 139 of 253
Driving and operating137
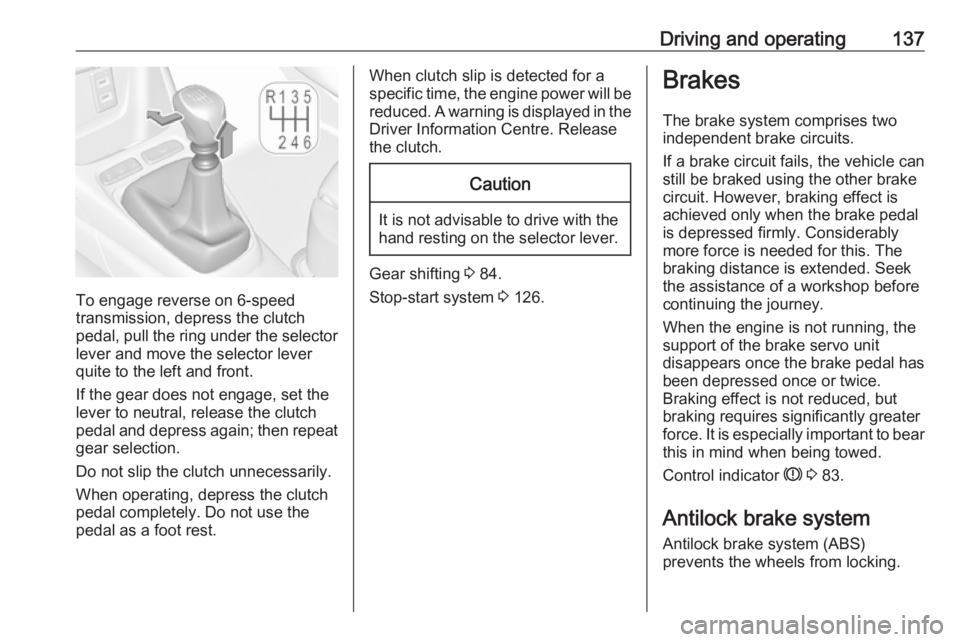
To engage reverse on 6-speed
transmission, depress the clutch
pedal, pull the ring under the selector
lever and move the selector lever
quite to the left and front.
If the gear does not engage, set the
lever to neutral, release the clutch
pedal and depress again; then repeat gear selection.
Do not slip the clutch unnecessarily. When operating, depress the clutchpedal completely. Do not use the
pedal as a foot rest.
When clutch slip is detected for a
specific time, the engine power will be
reduced. A warning is displayed in the
Driver Information Centre. Release
the clutch.Caution
It is not advisable to drive with the hand resting on the selector lever.
Gear shifting 3 84.
Stop-start system 3 126.
Brakes
The brake system comprises two
independent brake circuits.
If a brake circuit fails, the vehicle can
still be braked using the other brake
circuit. However, braking effect is
achieved only when the brake pedal
is depressed firmly. Considerably
more force is needed for this. The
braking distance is extended. Seek the assistance of a workshop before
continuing the journey.
When the engine is not running, the
support of the brake servo unit
disappears once the brake pedal has been depressed once or twice.
Braking effect is not reduced, but
braking requires significantly greater
force. It is especially important to bear this in mind when being towed.
Control indicator R 3 83.
Antilock brake system
Antilock brake system (ABS)
prevents the wheels from locking.
Page 142 of 253
140Driving and operatingDeactivation
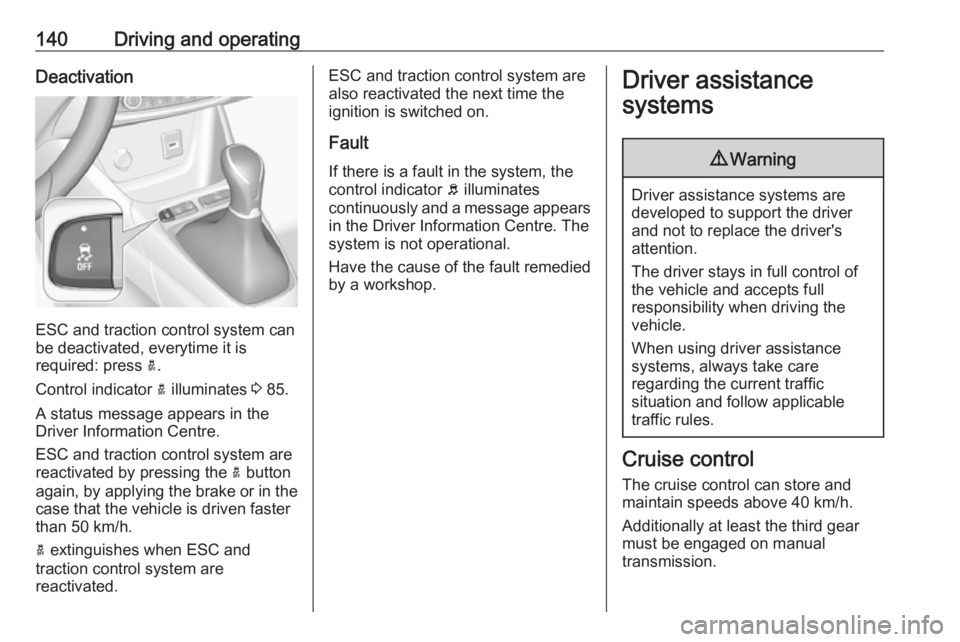
ESC and traction control system can
be deactivated, everytime it is
required: press a.
Control indicator a illuminates 3 85.
A status message appears in the Driver Information Centre.
ESC and traction control system are
reactivated by pressing the a button
again, by applying the brake or in the case that the vehicle is driven faster
than 50 km/h.
a extinguishes when ESC and
traction control system are
reactivated.
ESC and traction control system are also reactivated the next time the
ignition is switched on.
Fault
If there is a fault in the system, the
control indicator b illuminates
continuously and a message appears in the Driver Information Centre. The
system is not operational.
Have the cause of the fault remedied by a workshop.Driver assistance
systems9 Warning
Driver assistance systems are
developed to support the driver
and not to replace the driver's
attention.
The driver stays in full control of
the vehicle and accepts full
responsibility when driving the
vehicle.
When using driver assistance
systems, always take care
regarding the current traffic
situation and follow applicable
traffic rules.
Cruise control
The cruise control can store and
maintain speeds above 40 km/h.
Additionally at least the third gear
must be engaged on manual
transmission.
Page 143 of 253
Driving and operating141Additionally position D or the second
or a higher gear in position M must be
selected on automatic transmission.
Deviations from the stored speeds may occur when driving uphill or
downhill.
The system maintains the vehicle
speed at the preset speed by the driver, without any action on the
accelerator pedal.
The preset speed can be exceeded
temporarily by pressing the
accelerator pedal firmly.
The status and preset speed is
displayed in the Driver Information
Centre.
Do not use the cruise control if it is not advisable to maintain a constant
speed.
Control indicator m 3 87.Switching on the system
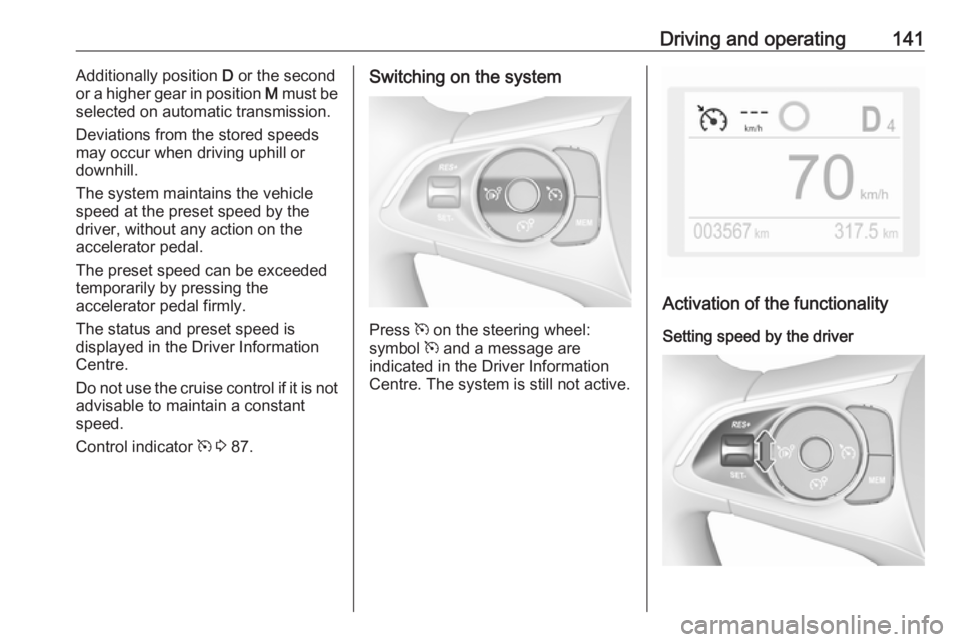
Press m on the steering wheel:
symbol m and a message are
indicated in the Driver Information
Centre. The system is still not active.
Activation of the functionality
Setting speed by the driver
Page 145 of 253
Driving and operating143Cruise control is deactivated, but not
switched off. Last stored speed
remains in memory for later speed
resume.
Cruise control is deactivated
automatically when:
● The brake pedal is depressed.
● Vehicle speed is below 40 km/h.
● The Traction Control system or Electronic Stability Control is
operating.
● The manual transmission is in N,
first or second gear.
● The automatic transmission is in position M and first gear.
Resume stored speed
Move thumb wheel to RES/+ at a
speed above 40 km/h. The stored
speed will be obtained.
Switching off the system
Press m: the cruise control mode is
deselected and the cruise control
indication extinguishes in the Driver
Information Centre.Pressing ß to activate the speed
limiter deactivates cruise control.
Switching off the ignition cancels any
programmed speed value.
Fault
In the event of a cruise control fault, the speed is cleared resulting in
flashing of the dashes.
The speed limit recognition may not
operate correctly if traffic signs do not
comply with the Vienna Convention
on Road Signs and Signals.
Speed limiter
The speed limiter prevents the
vehicle from exceeding a preset
maximum speed.
The maximum speed can be set at
speeds above 30 km/h.
The driver can accelerate the vehicle
up to the preset speed. Deviations
from the limited speed may occur
when driving downhill.
The preset speed can be exceeded
temporarily by pressing the
accelerator pedal firmly.The status and preset speed limit is
displayed in the Driver Information Centre.
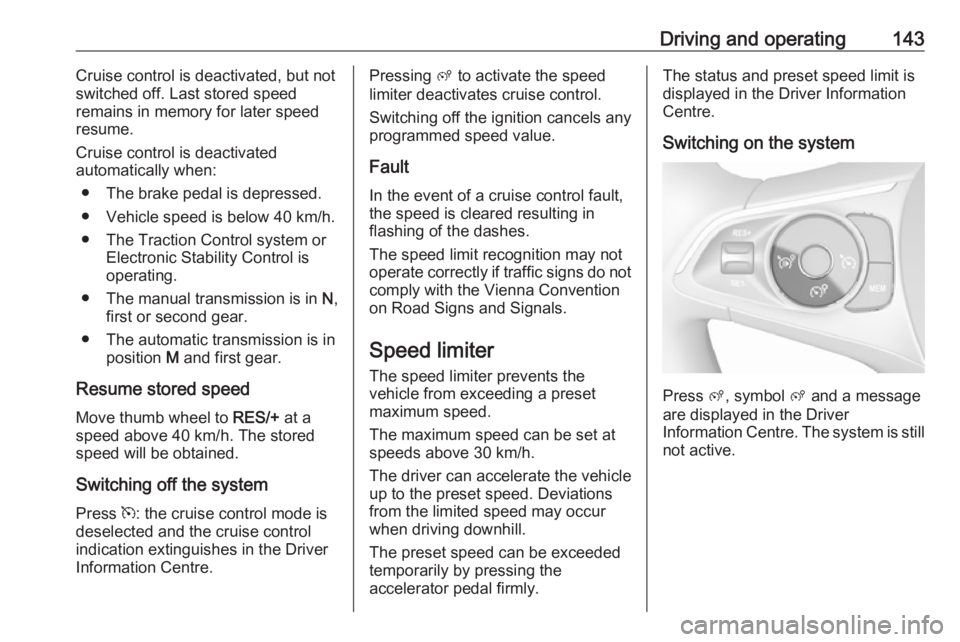
Switching on the system
Press ß, symbol ß and a message
are displayed in the Driver
Information Centre. The system is still not active.
Page 172 of 253
170Driving and operatingTrailer towingTrailer loadsThe permissible trailer loads are
vehicle and engine-dependent
maximum values which must not be
exceeded. The actual trailer load is
the difference between the actual
gross weight of the trailer and the
actual coupling socket load with the
trailer coupled.
The permissible trailer loads are
specified in the vehicle documents. In
general, they are valid for inclines up
to 12%.
The permissible trailer load applies
up to the specified incline and at sea
level. Since engine power decreases
as altitude increases due to the air
becoming thinner, therefore reducing
climbing ability, the permissible gross train weight also decreases by 10%
for every 1000 m of altitude. The
gross train weight does not have to be
reduced when driving on roads with
slight inclines (less than 8%, e.g.
motorways).The permissible gross train weight must not be exceeded. This weight is
specified on the identification plate
3 221.
Vertical coupling load
The vertical coupling load is the load
exerted by the trailer on the coupling
ball. It can be varied by changing the
weight distribution when loading the
trailer.
The maximum permissible vertical
coupling load of 65 kg is specified on the towing equipment identification
plate and in the vehicle documents.
For vehicles with engine DV5RC and
automatic transmission, the
maximum permissible vertical
coupling load is 55 kg. Always aim for the maximum load, especially in the
case of heavy trailers. The vertical
coupling load should never fall below
25 kg.Rear axle load
When the trailer is coupled and the
towing vehicle fully loaded, the
permissible rear axle load (see
identification plate or vehicle
documents) may be exceeded by
60 kg , the gross vehicle weight rating
must not be exceeded. If the
permissible rear axle load is
exceeded, a maximum speed of
100 km/h applies.
Towing equipmentCaution
When operating without a trailer,
remove the coupling ball bar.
Stowage of coupling ball bar
The bag with the coupling ball bar is
stowed on the rear floor cover in the
load compartment.
Page 193 of 253
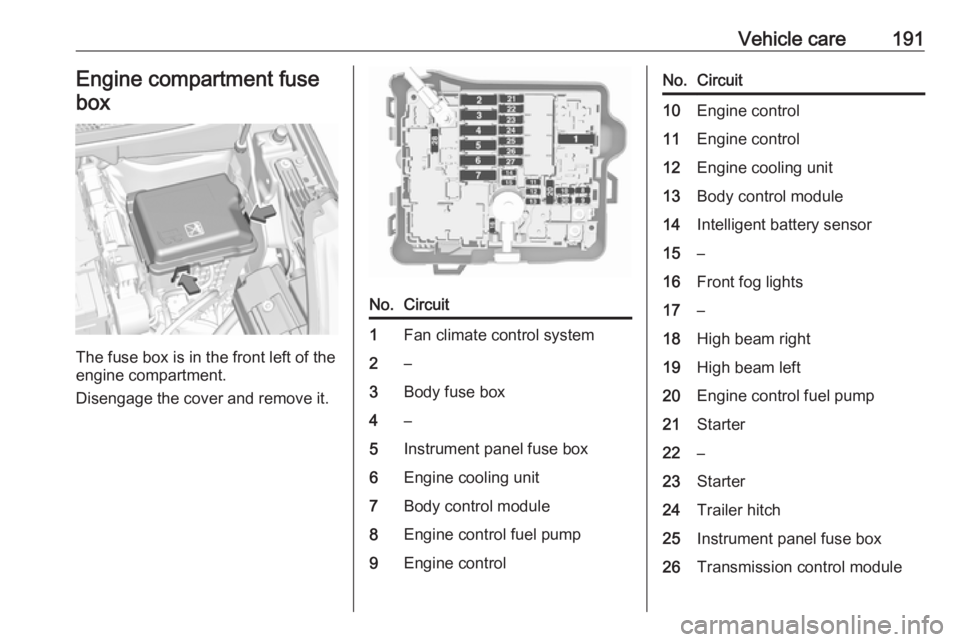
Vehicle care191Engine compartment fusebox
The fuse box is in the front left of the
engine compartment.
Disengage the cover and remove it.
No.Circuit1Fan climate control system2–3Body fuse box4–5Instrument panel fuse box6Engine cooling unit7Body control module8Engine control fuel pump9Engine controlNo.Circuit10Engine control11Engine control12Engine cooling unit13Body control module14Intelligent battery sensor15–16Front fog lights17–18High beam right19High beam left20Engine control fuel pump21Starter22–23Starter24Trailer hitch25Instrument panel fuse box26Transmission control module
Page 210 of 253
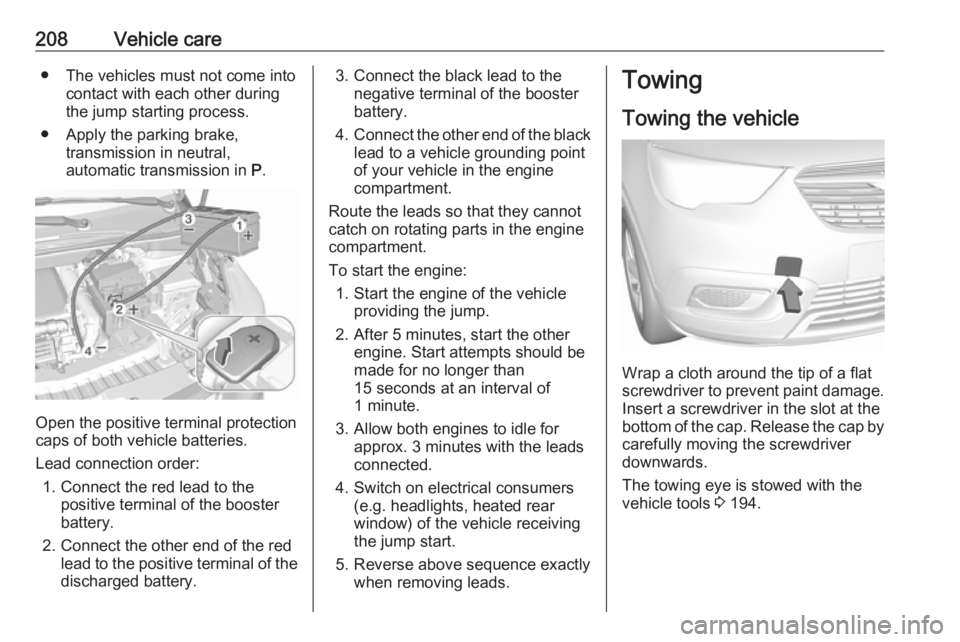
208Vehicle care● The vehicles must not come intocontact with each other during
the jump starting process.
● Apply the parking brake, transmission in neutral,
automatic transmission in P.
Open the positive terminal protection
caps of both vehicle batteries.
Lead connection order: 1. Connect the red lead to the positive terminal of the booster
battery.
2. Connect the other end of the red lead to the positive terminal of the
discharged battery.
3. Connect the black lead to the negative terminal of the boosterbattery.
4. Connect the other end of the black
lead to a vehicle grounding point
of your vehicle in the engine
compartment.
Route the leads so that they cannot
catch on rotating parts in the engine
compartment.
To start the engine: 1. Start the engine of the vehicle providing the jump.
2. After 5 minutes, start the other engine. Start attempts should be
made for no longer than
15 seconds at an interval of
1 minute.
3. Allow both engines to idle for approx. 3 minutes with the leads
connected.
4. Switch on electrical consumers (e.g. headlights, heated rear
window) of the vehicle receiving
the jump start.
5. Reverse above sequence exactly when removing leads.Towing
Towing the vehicle
Wrap a cloth around the tip of a flat
screwdriver to prevent paint damage.
Insert a screwdriver in the slot at the
bottom of the cap. Release the cap by carefully moving the screwdriver
downwards.
The towing eye is stowed with the vehicle tools 3 194.