change wheel OPEL GRANDLAND X 2018 Infotainment system
[x] Cancel search | Manufacturer: OPEL, Model Year: 2018, Model line: GRANDLAND X, Model: OPEL GRANDLAND X 2018Pages: 265, PDF Size: 7.5 MB
Page 13 of 265
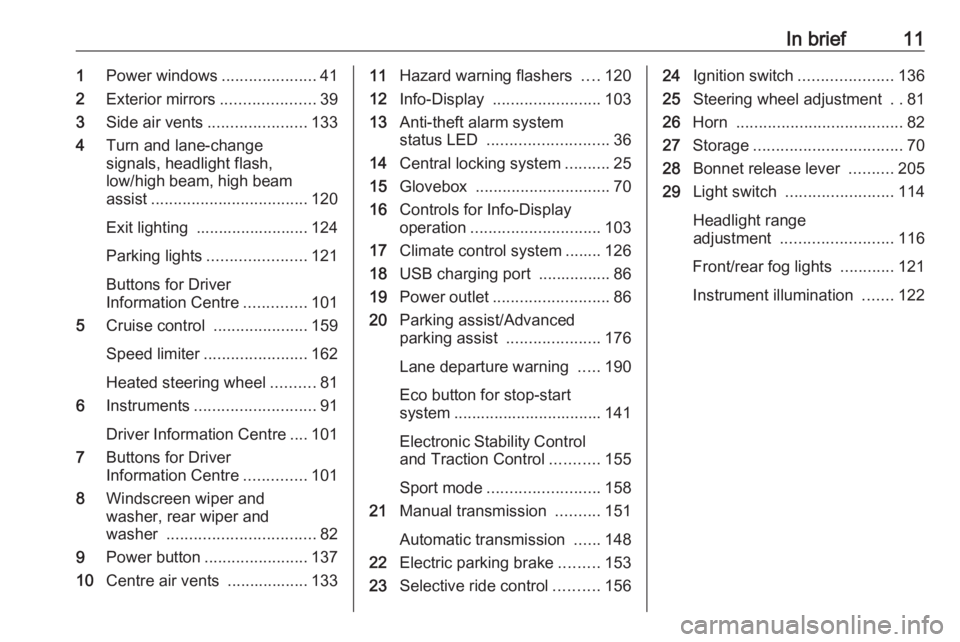
In brief111Power windows .....................41
2 Exterior mirrors .....................39
3 Side air vents ...................... 133
4 Turn and lane-change
signals, headlight flash,
low/high beam, high beam
assist ................................... 120
Exit lighting ......................... 124
Parking lights ...................... 121
Buttons for Driver
Information Centre ..............101
5 Cruise control .....................159
Speed limiter ....................... 162
Heated steering wheel ..........81
6 Instruments ........................... 91
Driver Information Centre .... 101
7 Buttons for Driver
Information Centre ..............101
8 Windscreen wiper and
washer, rear wiper and
washer ................................. 82
9 Power button ....................... 137
10 Centre air vents .................. 13311Hazard warning flashers ....120
12 Info-Display ........................ 103
13 Anti-theft alarm system
status LED ........................... 36
14 Central locking system ..........25
15 Glovebox .............................. 70
16 Controls for Info-Display
operation ............................. 103
17 Climate control system ........ 126
18 USB charging port ................ 86
19 Power outlet .......................... 86
20 Parking assist/Advanced
parking assist .....................176
Lane departure warning .....190
Eco button for stop-start
system ................................. 141
Electronic Stability Control
and Traction Control ...........155
Sport mode ......................... 158
21 Manual transmission ..........151
Automatic transmission ......148
22 Electric parking brake .........153
23 Selective ride control ..........15624Ignition switch .....................136
25 Steering wheel adjustment ..81
26 Horn ..................................... 82
27 Storage ................................. 70
28 Bonnet release lever ..........205
29 Light switch ........................ 114
Headlight range
adjustment ......................... 116
Front/rear fog lights ............121
Instrument illumination .......122
Page 59 of 265
Seats, restraints57Airbag system
The airbag system consists of a
number of individual systems
depending on the scope of
equipment.
When triggered the airbags inflate
within milliseconds. They also deflate
so quickly that it is often unnoticeable during the collision.9 Warning
The airbag system deploys in an
explosive manner, repairs must be performed by skilled personnel
only.
9 Warning
Adding accessories that change
the vehicle's frame, bumper
system, height, front end or side
sheet metal, may keep the airbag
system from working properly. The operation of the airbag system can
also be affected by changing any
parts of the front seats, seat belts,
airbag sensing and diagnostic
module, steering wheel,
instrument panel, inner door seals including the speakers, any of the
airbag modules, ceiling or pillar
trim, front sensors, side impact
sensors or airbag wiring.
Note
The airbag systems and belt
pretensioner control electronics are
located in the centre console area.
Do not put any magnetic objects in
this area.
Do not affix any objects onto the
airbag covers and do not cover them with other materials. Have damagedcovers replaced by a workshop.
Each airbag is triggered only once.
Have deployed airbags replaced by
a workshop. Furthermore, it may be
necessary to have the steering
wheel, the instrument panel, parts of
the panelling, the door seals,
handles and the seats replaced.
Do not make any modifications to
the airbag system as this will
invalidate the vehicle operating
permit.
Control indicator v for airbag systems
3 95.
Child restraint systems on front
passenger seat with airbag
systems
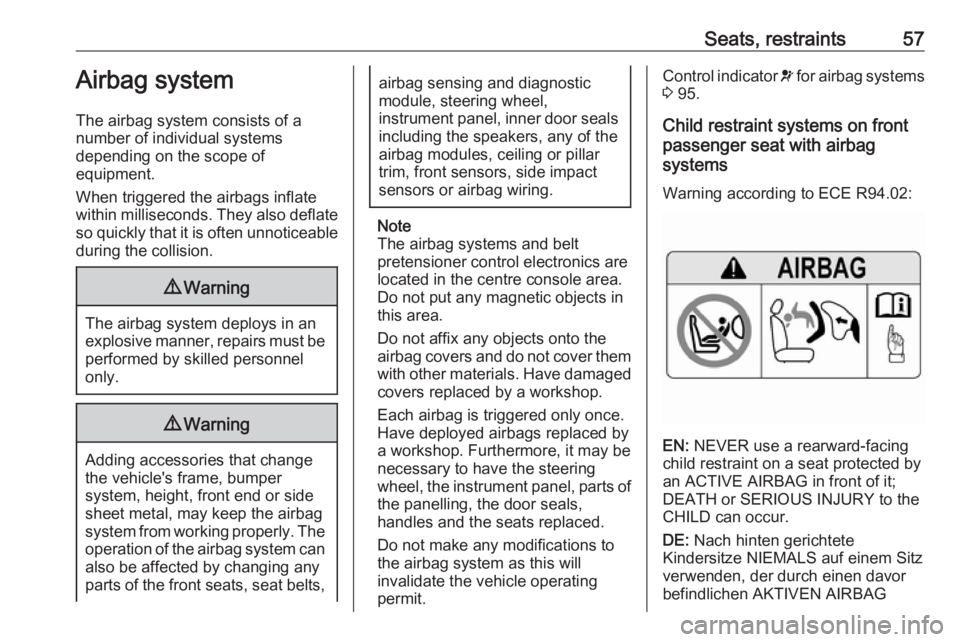
Warning according to ECE R94.02:
EN: NEVER use a rearward-facing
child restraint on a seat protected by
an ACTIVE AIRBAG in front of it;
DEATH or SERIOUS INJURY to the
CHILD can occur.
DE: Nach hinten gerichtete
Kindersitze NIEMALS auf einem Sitz
verwenden, der durch einen davor
befindlichen AKTIVEN AIRBAG
Page 108 of 265
106Instruments and controls● If a warning message appears inthe Driver Information Centre.
● If the electronic key is not in the passenger compartment.
● If the parking assist detects an object.
● If an unintended lane change occurs.
● If the diesel particle filter has reached the maximum filling
level.
When the vehicle is parked and/or the driver's door is opened
● With exterior lights on.
During an Autostop ● If the driver's door is opened.
● If any condition for an autostart is
not fulfilled.
Battery voltage
When the vehicle battery voltage is
running low, a warning message will
appear in the Driver Information
Centre.When the vehicle is being driven, the
load reduction function temporarily
deactivates certain functions, such as the air conditioning, the heated rear
screen, heated steering wheel, etc.
The deactivated functions are
reactivated automatically as soon as
conditions permit.Vehicle personalisation
The vehicle's behaviour can be
personalised by changing the settings in the Info-Display.
Depending on vehicle equipment and
country-specific regulations some of
the functions described below may
not be available.
Some functions are only displayed or
active when the engine is running.
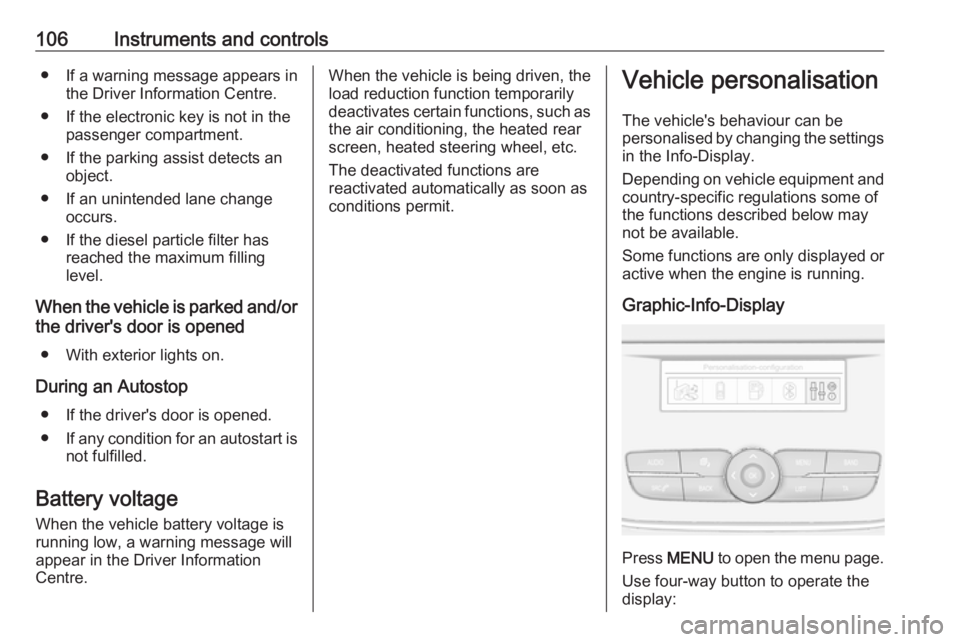
Graphic-Info-Display
Press MENU to open the menu page.
Use four-way button to operate the
display:
Page 118 of 265
116LightingActivate the high beam assist by
pressing f on the turn and lane
change lever. The LED of the button
illuminates if the high beam assist is
activated. High beam is switched on
automatically at a speed above
25 mph.
The green control indicator f
illuminates continuously when the
assist is activated, the blue one 7
illuminates when high beam is on.
Control indicator f 3 100.
Deactivation Deactivate the high beam assist by
pressing f on the turn and lane
change lever
If a headlight flash is activated when
the high beam assist is activated and low beam is on, the high beam assist
will be deactivated. The system
changes to high beam.
If a headlight flash is activated when
the high beam assist is activated and high beam is on, the high beam assist
will be deactivated. The system
changes to low beam.To reactivate the high beam assist,
flash the headlights again.
Headlight flash
To activate the headlight flash, pull
lever.
Pulling lever deactivates high beam.
Headlight range adjustment
Manual headlight range
adjustment
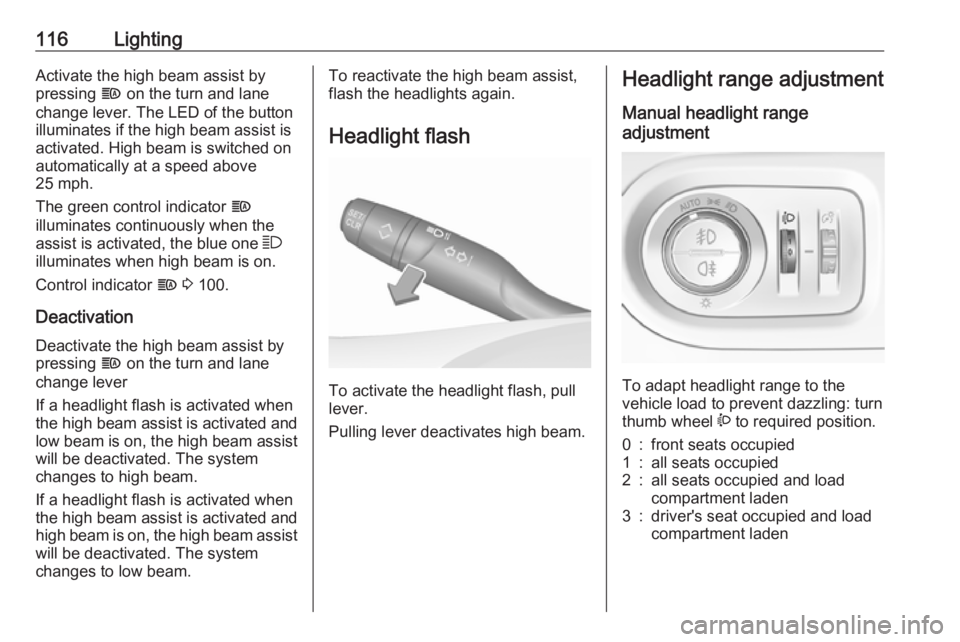
To adapt headlight range to the
vehicle load to prevent dazzling: turn
thumb wheel ? to required position.
0:front seats occupied1:all seats occupied2:all seats occupied and load
compartment laden3:driver's seat occupied and load
compartment laden
Page 122 of 265
120LightingIf a headlight flash is activated when
the high beam assist is activated and
high beam is on, the high beam assist will be deactivated. The system
changes to low beam.
To reactivate the high beam assist,
flash the headlights again.
Fault in LED headlight system
When the system detects a failure in
the LED headlight system, it selects a preset position to avoid dazzling of
oncoming traffic. A warning is
displayed in the Driver Information
Centre.Hazard warning flashers
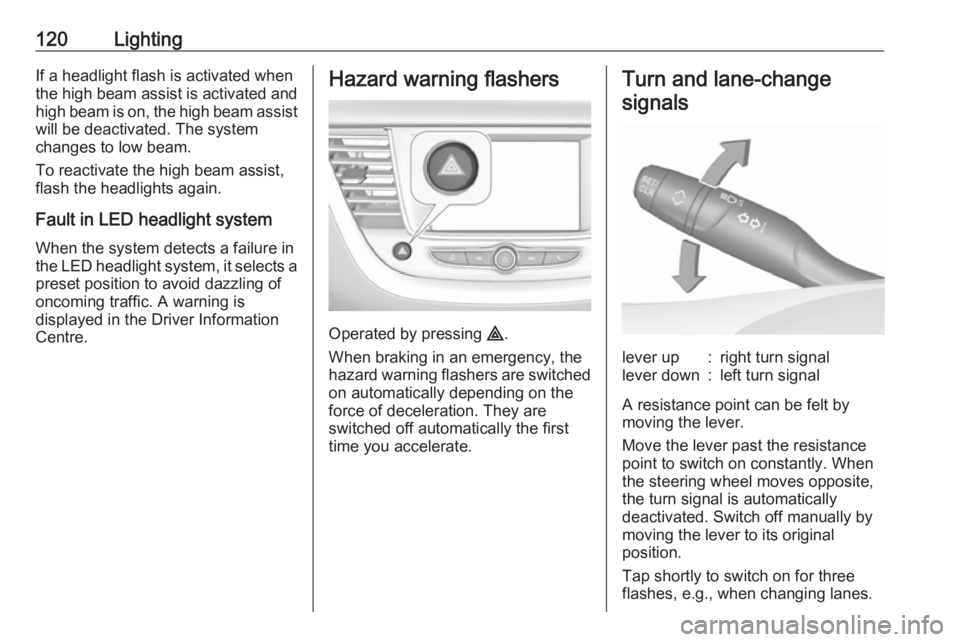
Operated by pressing ¨.
When braking in an emergency, the
hazard warning flashers are switched
on automatically depending on the
force of deceleration. They are
switched off automatically the first
time you accelerate.
Turn and lane-change
signalslever up:right turn signallever down:left turn signal
A resistance point can be felt bymoving the lever.
Move the lever past the resistance
point to switch on constantly. When
the steering wheel moves opposite,
the turn signal is automatically
deactivated. Switch off manually by
moving the lever to its original
position.
Tap shortly to switch on for three
flashes, e.g., when changing lanes.
Page 162 of 265
160Driving and operatingSwitching on
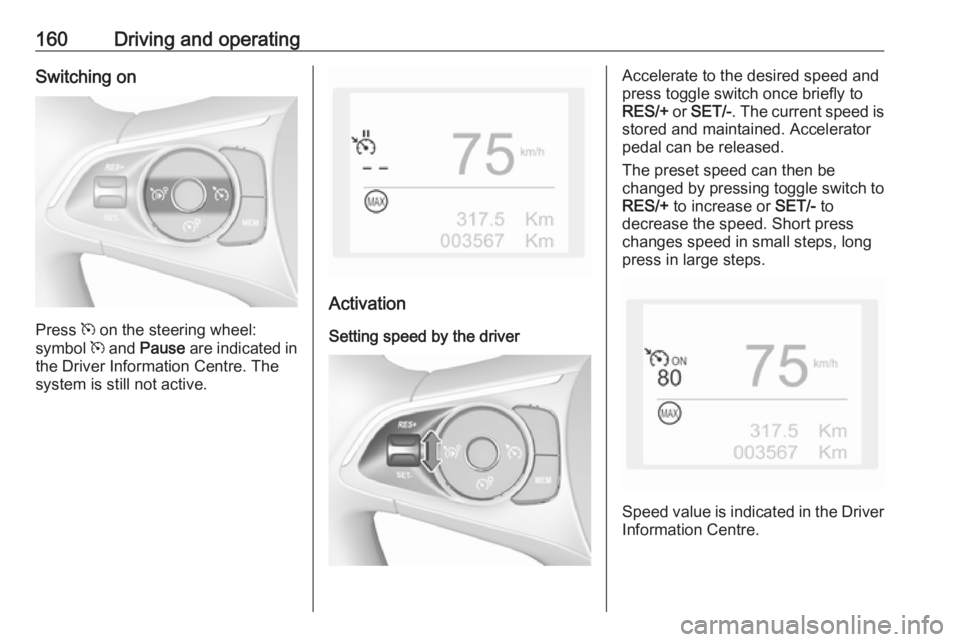
Press m on the steering wheel:
symbol m and Pause are indicated in
the Driver Information Centre. The
system is still not active.
Activation
Setting speed by the driver
Accelerate to the desired speed and
press toggle switch once briefly to
RES/+ or SET/- . The current speed is
stored and maintained. Accelerator
pedal can be released.
The preset speed can then be
changed by pressing toggle switch to
RES/+ to increase or SET/- to
decrease the speed. Short press
changes speed in small steps, long
press in large steps.
Speed value is indicated in the Driver
Information Centre.
Page 166 of 265
164Driving and operatingFault
In the event of a speed limiter fault, the speed is cleared resulting in
flashing of the dashes.
The speed limiter may not operate correctly if traffic signs do not comply
with the Vienna Convention on Road
Signs and Signals (Wiener
Übereinkommen über
Straßenverkehrszeichen).
Adaptive cruise control
Adaptive cruise control is an
enhancement to conventional cruise
control with the additional feature of
maintaining a certain distance behind the vehicle ahead. It uses radar and
camera sensors to detect the vehicles ahead. If no vehicle is detected in the
driving path, the adaptive cruise
control will behave like a conventional
cruise control.
Adaptive cruise control automatically
decelerates the vehicle when
approaching a slower moving vehicle. It then adjusts the vehicle speed to
follow the vehicle ahead at the
selected following distance. Thevehicle speed increases or decreases
to follow the vehicle in front, but will
not exceed the set speed. It may
apply limited braking with activated
brake lights.
If the vehicle in front accelerates or changes lane, the adaptive cruise
control progressively accelerates
your vehicle to return to the
programmed speed. If the driver
operates a direction indicator to
overtake a slower vehicle, the
adaptive cruise control allows your
vehicle to temporarily approach the
vehicle in front to assist the
overtaking manoeuvre, though never
exceeding the programmed speed.9 Warning
The complete driver attention is
always required while driving with adaptive cruise control. The driver stays fully in control of the vehicle
because the brake pedal, the
accelerator pedal and the cancel
switch have priority over any
adaptive cruise control operation.
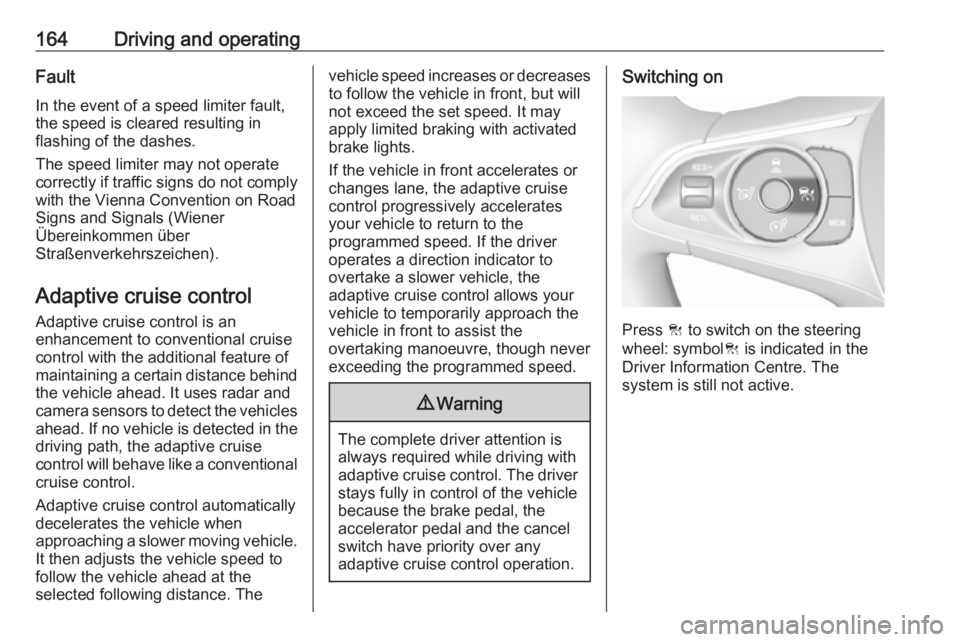
Switching on
Press C to switch on the steering
wheel: symbol C is indicated in the
Driver Information Centre. The
system is still not active.
Page 167 of 265
Driving and operating165
Activation
Adaptive cruise control is switched on manually at a speed between 40 and
180 km/h. For vehicles with automatic
transmission, the automatic selector
lever must be in position D or M.
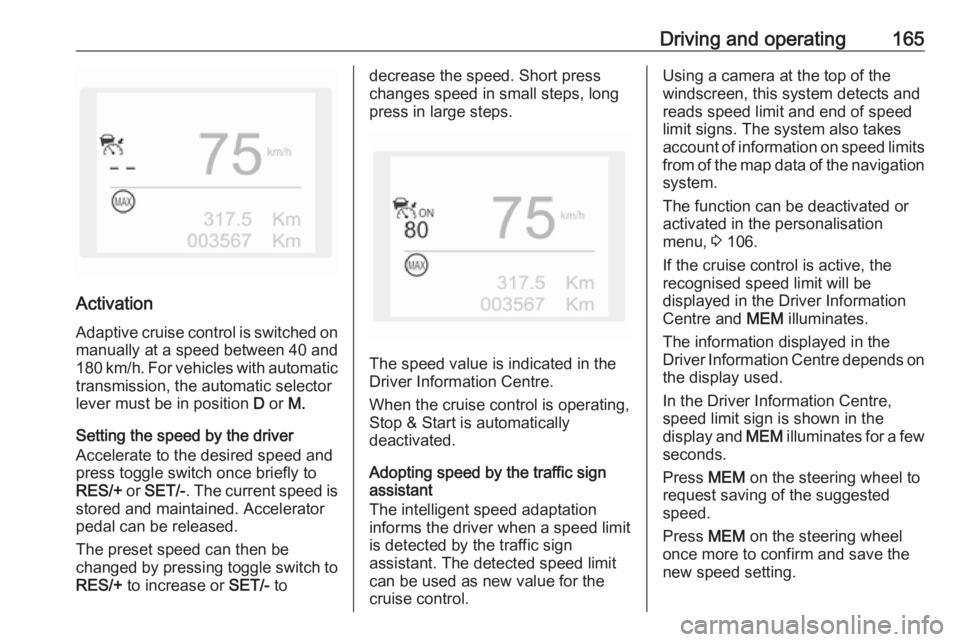
Setting the speed by the driver
Accelerate to the desired speed and
press toggle switch once briefly to
RES/+ or SET/- . The current speed is
stored and maintained. Accelerator
pedal can be released.
The preset speed can then be
changed by pressing toggle switch to
RES/+ to increase or SET/- to
decrease the speed. Short press
changes speed in small steps, long
press in large steps.
The speed value is indicated in the
Driver Information Centre.
When the cruise control is operating,
Stop & Start is automatically
deactivated.
Adopting speed by the traffic sign assistant
The intelligent speed adaptation
informs the driver when a speed limit
is detected by the traffic sign
assistant. The detected speed limit
can be used as new value for the
cruise control.
Using a camera at the top of the
windscreen, this system detects and
reads speed limit and end of speed
limit signs. The system also takes
account of information on speed limits from of the map data of the navigationsystem.
The function can be deactivated or
activated in the personalisation
menu, 3 106.
If the cruise control is active, the
recognised speed limit will be
displayed in the Driver Information
Centre and MEM illuminates.
The information displayed in the
Driver Information Centre depends on
the display used.
In the Driver Information Centre,
speed limit sign is shown in the
display and MEM illuminates for a few
seconds.
Press MEM on the steering wheel to
request saving of the suggested
speed.
Press MEM on the steering wheel
once more to confirm and save the
new speed setting.
Page 170 of 265
168Driving and operatingPressing ß to activate the speed
limiter deactivates cruise control.
Switching off the ignition cancels any
programmed speed value.
Driver's attention ● Use adaptive cruise control carefully on bends or mountain
roads, as it can lose the vehicle
ahead and needs time to detect it again.
● Do not use the system on slippery roads as it can create
rapid changes in tyre traction
(wheel spinning), so that you
could lose control of the vehicle.
● Do not use adaptive cruise control during rain, snow or
heavy dirt, as the radar sensor
can be covered by a water film,
dust, ice or snow. This reduces or suppresses completely the
visibility. In case of sensor
blockage, clean the sensor
cover.
● Do not use the system when the spare wheel is in use.System limits9Warning
The system's automatic brake
force does not permit hard braking and the braking level may not be
sufficient to avoid a collision.
● After a sudden lane change, the system needs a certain time to
detect the next preceding
vehicle. So if a new vehicle is
detected, the system may
accelerate instead of braking.
● Adaptive cruise control does ignore the oncoming traffic.
● Adaptive cruise control does not consider pedestrians and
animals for braking and driving
off.
● Adaptive cruise control considers
stopped vehicles only at low
speed.
● Do not use adaptive cruise control when towing a trailer.
● Do not use adaptive cruise control on roads with an incline ofmore than 10%.
As the radar's field of detection is
quite narrow, it is possible that the
system may not detect:
● Vehicles of reduced width (motorcycles, scooters...).
● Vehicles not running in the middle of the lane,
● Vehicles entering a corner.
● Vehicles suddenly pulling out.
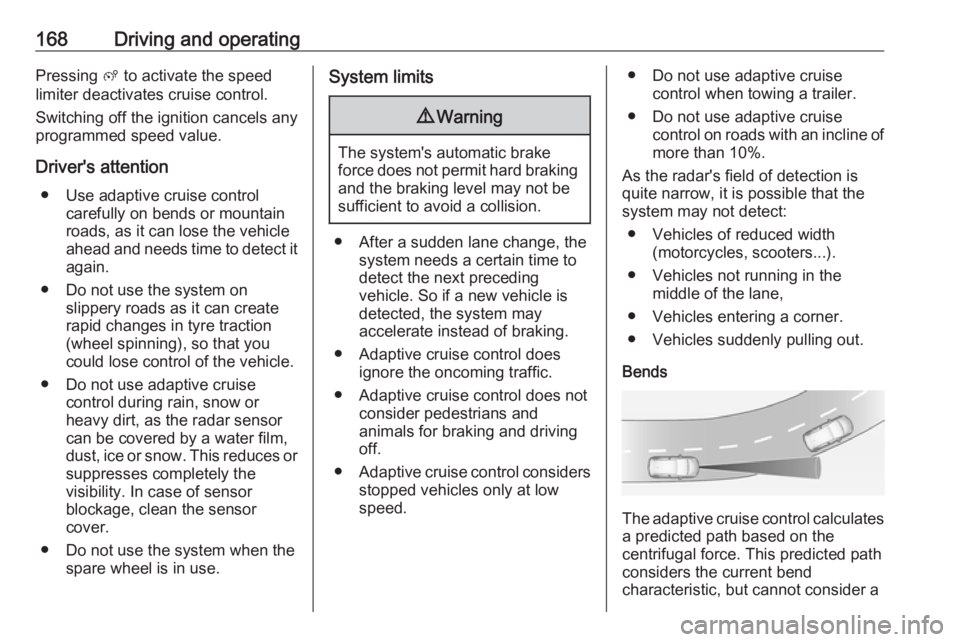
Bends
The adaptive cruise control calculates
a predicted path based on the
centrifugal force. This predicted path
considers the current bend
characteristic, but cannot consider a
Page 188 of 265
186Driving and operatingFunctionality
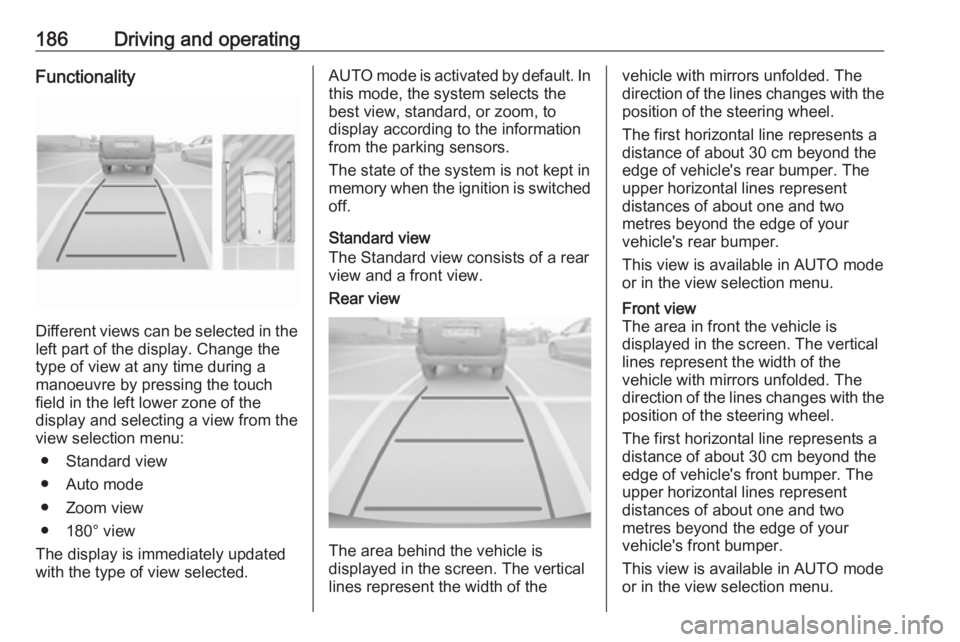
Different views can be selected in theleft part of the display. Change the
type of view at any time during a
manoeuvre by pressing the touch
field in the left lower zone of the
display and selecting a view from the
view selection menu:
● Standard view
● Auto mode
● Zoom view
● 180° view
The display is immediately updated
with the type of view selected.
AUTO mode is activated by default. In
this mode, the system selects the
best view, standard, or zoom, to
display according to the information
from the parking sensors.
The state of the system is not kept in
memory when the ignition is switched
off.
Standard view
The Standard view consists of a rear view and a front view.Rear view
The area behind the vehicle is
displayed in the screen. The vertical
lines represent the width of the
vehicle with mirrors unfolded. The
direction of the lines changes with the position of the steering wheel.
The first horizontal line represents a
distance of about 30 cm beyond the
edge of vehicle's rear bumper. The
upper horizontal lines represent
distances of about one and two
metres beyond the edge of your
vehicle's rear bumper.
This view is available in AUTO mode
or in the view selection menu.Front view
The area in front the vehicle is
displayed in the screen. The vertical
lines represent the width of the
vehicle with mirrors unfolded. The
direction of the lines changes with the position of the steering wheel.
The first horizontal line represents a
distance of about 30 cm beyond the
edge of vehicle's front bumper. The
upper horizontal lines represent
distances of about one and two
metres beyond the edge of your
vehicle's front bumper.
This view is available in AUTO mode
or in the view selection menu.