interval OPEL GRANDLAND X 2018 Infotainment system
[x] Cancel search | Manufacturer: OPEL, Model Year: 2018, Model line: GRANDLAND X, Model: OPEL GRANDLAND X 2018Pages: 265, PDF Size: 7.5 MB
Page 16 of 265
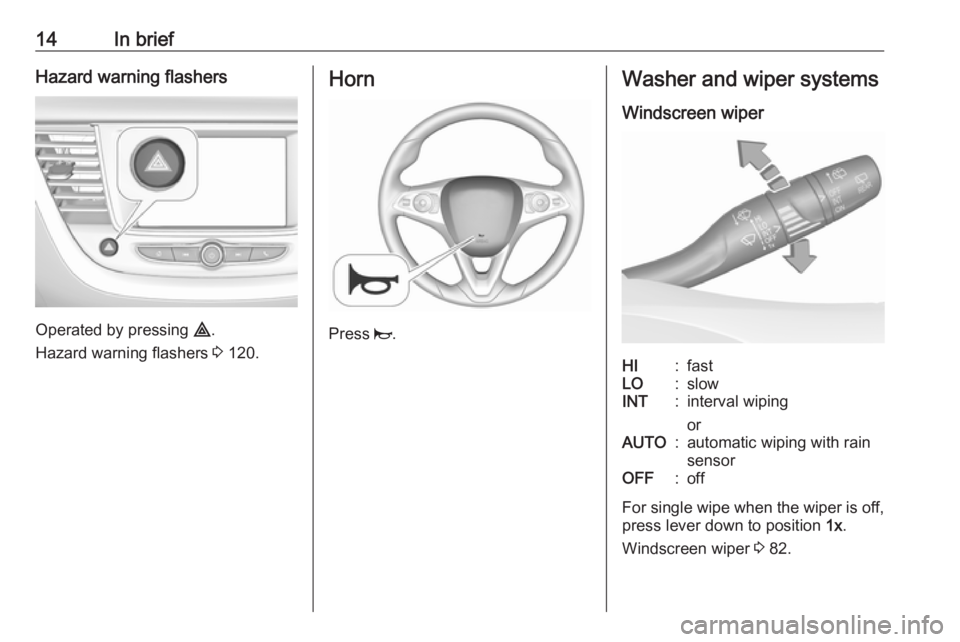
14In briefHazard warning flashers
Operated by pressing ¨.
Hazard warning flashers 3 120.
Horn
Press j.
Washer and wiper systems
Windscreen wiperHI:fastLO:slowINT:interval wiping
orAUTO:automatic wiping with rain
sensorOFF:off
For single wipe when the wiper is off,
press lever down to position 1x.
Windscreen wiper 3 82.
Page 26 of 265
24Keys, doors and windows
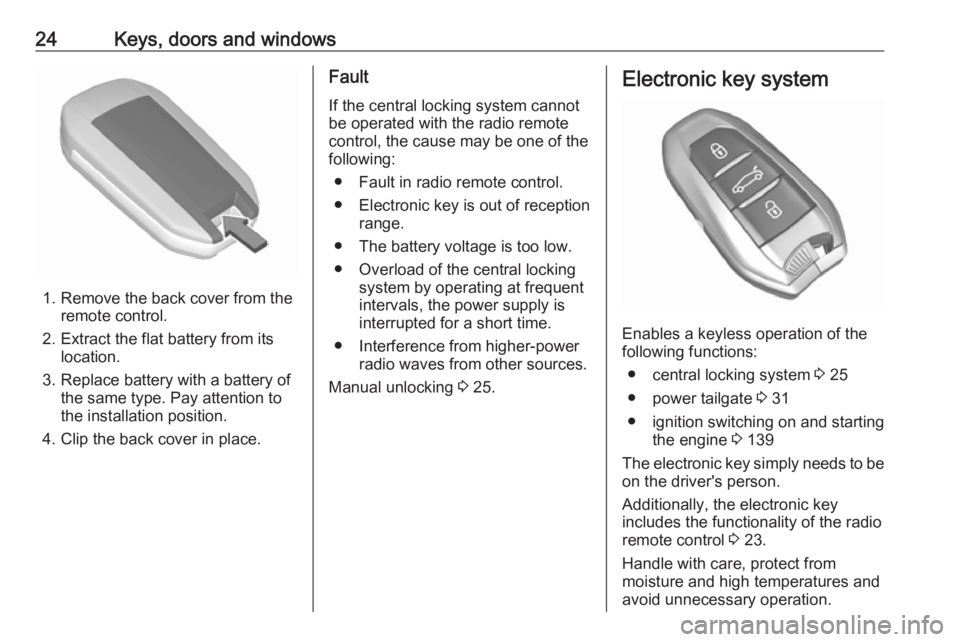
1. Remove the back cover from theremote control.
2. Extract the flat battery from its location.
3. Replace battery with a battery of the same type. Pay attention to
the installation position.
4. Clip the back cover in place.
Fault
If the central locking system cannot
be operated with the radio remote
control, the cause may be one of the
following:
● Fault in radio remote control.● Electronic key is out of reception range.
● The battery voltage is too low.
● Overload of the central locking system by operating at frequentintervals, the power supply is
interrupted for a short time.
● Interference from higher-power radio waves from other sources.
Manual unlocking 3 25.Electronic key system
Enables a keyless operation of the
following functions:
● central locking system 3 25
● power tailgate 3 31
● ignition switching on and starting the engine 3 139
The electronic key simply needs to be on the driver's person.
Additionally, the electronic key
includes the functionality of the radio
remote control 3 23.
Handle with care, protect from
moisture and high temperatures and
avoid unnecessary operation.
Page 27 of 265
Keys, doors and windows25Replacing battery in electronic
key
Replace the battery as soon as the
system no longer operates properly or the range is reduced. The need for battery replacement is indicated by a
message in the Driver Information
Centre 3 105.
Batteries do not belong in household
waste. They must be disposed of at
an appropriate recycling collection
point.
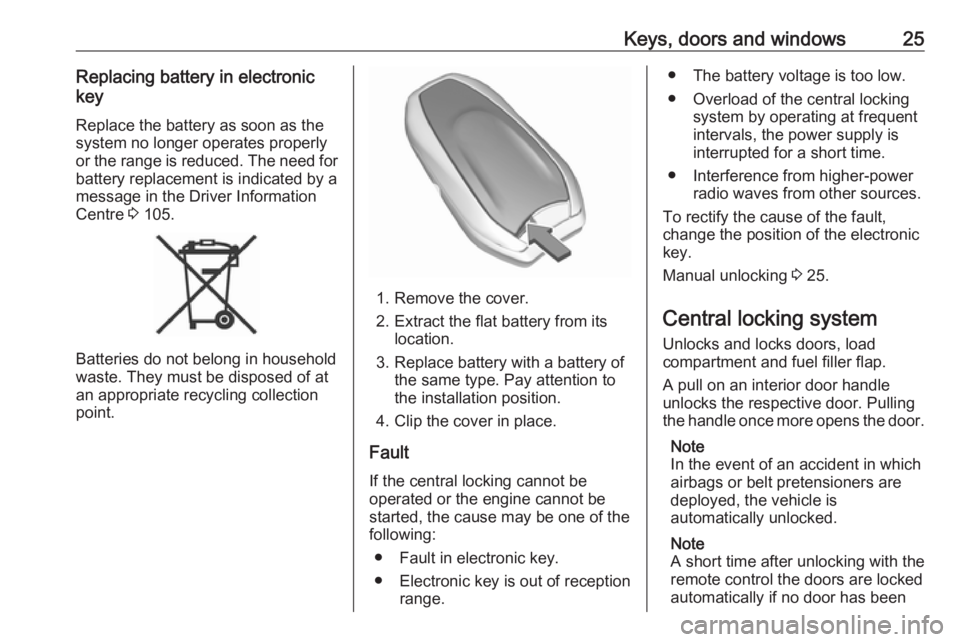
1. Remove the cover.
2. Extract the flat battery from its location.
3. Replace battery with a battery of the same type. Pay attention to
the installation position.
4. Clip the cover in place.
Fault
If the central locking cannot be
operated or the engine cannot be
started, the cause may be one of the
following:
● Fault in electronic key.
● Electronic key is out of reception range.
● The battery voltage is too low.
● Overload of the central locking system by operating at frequent
intervals, the power supply is
interrupted for a short time.
● Interference from higher-power radio waves from other sources.
To rectify the cause of the fault,
change the position of the electronic
key.
Manual unlocking 3 25.
Central locking system Unlocks and locks doors, load
compartment and fuel filler flap.
A pull on an interior door handle
unlocks the respective door. Pulling
the handle once more opens the door.
Note
In the event of an accident in which
airbags or belt pretensioners are
deployed, the vehicle is
automatically unlocked.
Note
A short time after unlocking with the
remote control the doors are locked
automatically if no door has been
Page 37 of 265
Keys, doors and windows35Remove all obstacles before
resuming normal power operation.
If the vehicle is equipped with factory-
fitted towing equipment and a trailer
is electrically connected, the power
tailgate can only be opened with the
touchpad switch or closed with T in
the open tailgate. Ensure that there
are no obstacles in the moving area.
Overload
If the power tailgate is repeatedly
operated at short intervals, the
function is disabled for some time.
Move tailgate manually into end
position to reset the system.
Initialising power tailgate If the power tailgate cannot be
operated automatically (e.g. after
disconnecting the vehicle battery), a
warning message is displayed in the
Driver Information Centre.
Activate electronics as follows: 1. Open tailgate manually.
2. Close tailgate manually.
3. Switch on ignition.Seek the assistance of a workshop if
the problem is not solved.
General hints for operating
tailgate9 Danger
Do not drive with the tailgate open
or ajar, e.g. when transporting
bulky objects, since toxic exhaust
gases, which cannot be seen or
smelled, could enter the vehicle.
This can cause unconsciousness
and even death.
Caution
Before opening the tailgate, check overhead obstructions, e.g. a
garage door, to avoid damage to
the tailgate. Always check the
moving area above and behind the
tailgate.
Note
The installation of certain heavy
accessories onto the tailgate may
affect its ability to remain open.
Note
The operation of the power tailgate
is disabled under low vehicle battery
conditions. In this case, the tailgate
may not even by manually operable.
Note
With the power tailgate disabled and all doors unlocked, the tailgate can
only be operated manually. In this
event, manually closing the tailgate
requires significantly greater force.
Note
At low outside temperatures the
tailgate may not open fully by itself.
In this case lift the tailgate manually
to its normal end position.
Page 44 of 265
42Keys, doors and windowsChild safety system for rear
windows
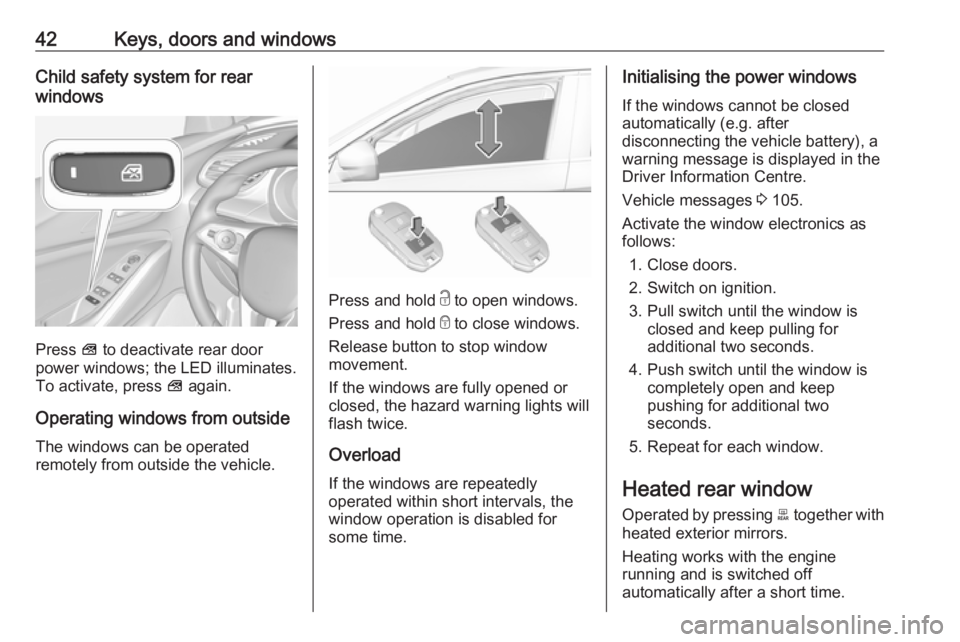
Press V to deactivate rear door
power windows; the LED illuminates.
To activate, press V again.
Operating windows from outside
The windows can be operated
remotely from outside the vehicle.
Press and hold c to open windows.
Press and hold e to close windows.
Release button to stop window
movement.
If the windows are fully opened or
closed, the hazard warning lights will
flash twice.
Overload
If the windows are repeatedly
operated within short intervals, the
window operation is disabled for
some time.
Initialising the power windows
If the windows cannot be closed
automatically (e.g. after
disconnecting the vehicle battery), a
warning message is displayed in the
Driver Information Centre.
Vehicle messages 3 105.
Activate the window electronics as
follows:
1. Close doors.
2. Switch on ignition.
3. Pull switch until the window is closed and keep pulling for
additional two seconds.
4. Push switch until the window is completely open and keep
pushing for additional two
seconds.
5. Repeat for each window.
Heated rear window Operated by pressing b together with
heated exterior mirrors.
Heating works with the engine
running and is switched off
automatically after a short time.
Page 84 of 265
82Instruments and controlsThe recommended grip areas of the
steering wheel are heated quicker
and to a higher temperature than the
other areas.
Heating is operational when the
engine is running and during an
Autostop.
Stop-start system 3 141.
Horn
Press j.
Windscreen wiper/washer
Windscreen wiper with adjustable
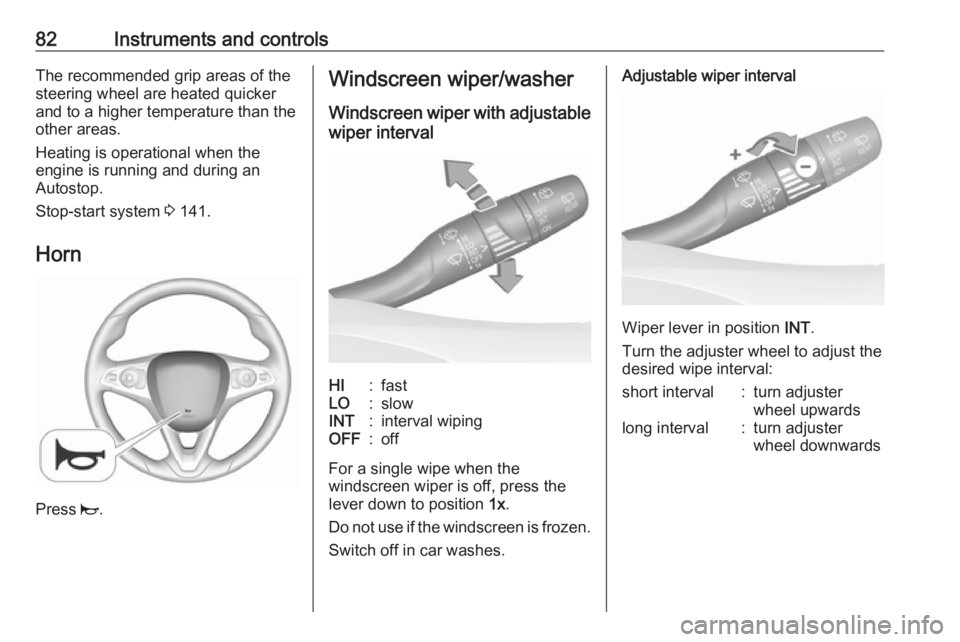
wiper intervalHI:fastLO:slowINT:interval wipingOFF:off
For a single wipe when the
windscreen wiper is off, press the
lever down to position 1x.
Do not use if the windscreen is frozen.
Switch off in car washes.
Adjustable wiper interval
Wiper lever in position INT.
Turn the adjuster wheel to adjust the
desired wipe interval:
short interval:turn adjuster
wheel upwardslong interval:turn adjuster
wheel downwards
Page 95 of 265
Instruments and controls93Fuel gauge
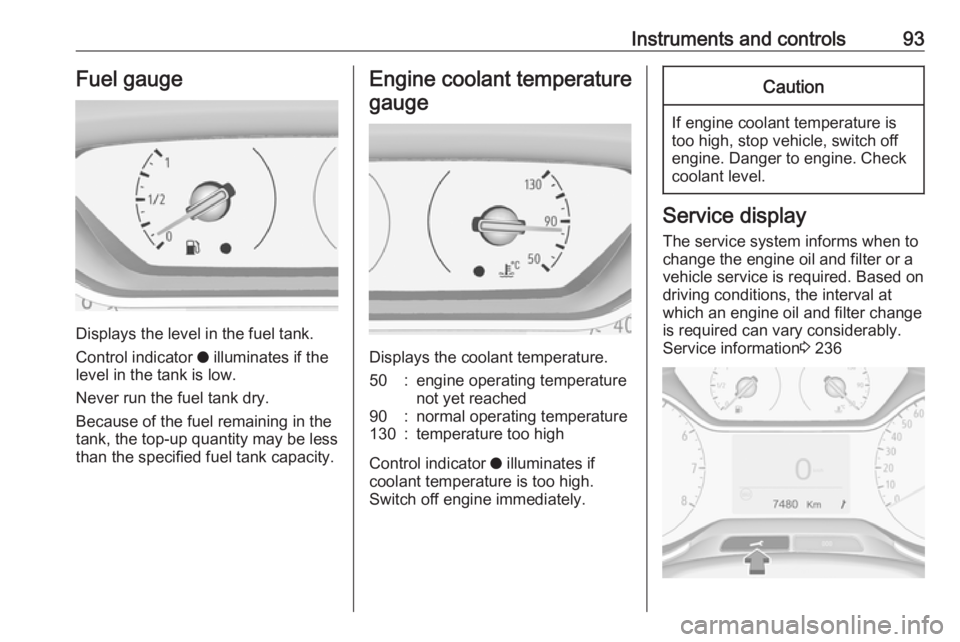
Displays the level in the fuel tank.
Control indicator o illuminates if the
level in the tank is low.
Never run the fuel tank dry.
Because of the fuel remaining in the
tank, the top-up quantity may be less
than the specified fuel tank capacity.
Engine coolant temperature
gauge
Displays the coolant temperature.
50:engine operating temperature
not yet reached90:normal operating temperature130:temperature too high
Control indicator o illuminates if
coolant temperature is too high. Switch off engine immediately.
Caution
If engine coolant temperature is
too high, stop vehicle, switch off
engine. Danger to engine. Check
coolant level.
Service display
The service system informs when to
change the engine oil and filter or a
vehicle service is required. Based on
driving conditions, the interval at
which an engine oil and filter change
is required can vary considerably.
Service information 3 236
Page 96 of 265
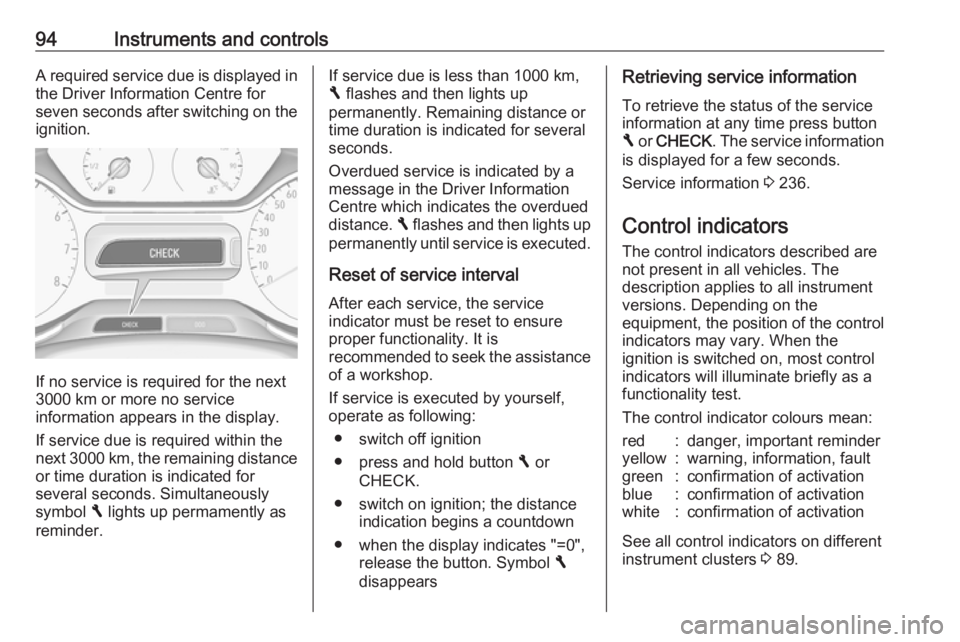
94Instruments and controlsA required service due is displayed in
the Driver Information Centre for
seven seconds after switching on the ignition.
If no service is required for the next
3000 km or more no service
information appears in the display.
If service due is required within the
next 3000 km, the remaining distance or time duration is indicated for
several seconds. Simultaneously
symbol F lights up permamently as
reminder.
If service due is less than 1000 km,
F flashes and then lights up
permanently. Remaining distance or
time duration is indicated for several
seconds.
Overdued service is indicated by a
message in the Driver Information
Centre which indicates the overdued
distance. F flashes and then lights up
permanently until service is executed.
Reset of service interval After each service, the service
indicator must be reset to ensure
proper functionality. It is
recommended to seek the assistance
of a workshop.
If service is executed by yourself,
operate as following:
● switch off ignition
● press and hold button F or
CHECK.
● switch on ignition; the distance indication begins a countdown
● when the display indicates "=0", release the button. Symbol F
disappearsRetrieving service information
To retrieve the status of the service
information at any time press button
F or CHECK . The service information
is displayed for a few seconds.
Service information 3 236.
Control indicators
The control indicators described are
not present in all vehicles. The
description applies to all instrument
versions. Depending on the
equipment, the position of the control indicators may vary. When the
ignition is switched on, most control
indicators will illuminate briefly as a
functionality test.
The control indicator colours mean:red:danger, important reminderyellow:warning, information, faultgreen:confirmation of activationblue:confirmation of activationwhite:confirmation of activation
See all control indicators on different
instrument clusters 3 89.
Page 178 of 265
176Driving and operatingParking assist
General information When attaching a trailer or bike
carrier to the trailer hitch, the parking
assist is deactivated.9 Warning
The driver bears full responsibility
for the parking manoeuvre.
Always check the surrounding
area when driving backwards or
forwards while using parking
assist system.
Rear parking assist
The rear parking assist makes
parking easier by measuring the
distance between the vehicle and
rear obstacles. It informs and warns
the driver by giving acoustic signals
and display indication.
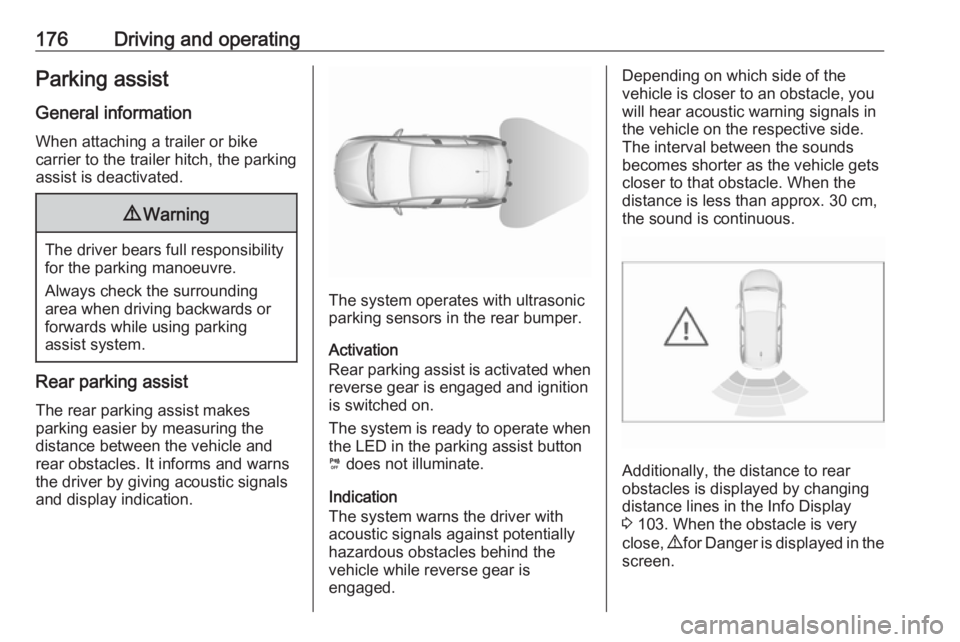
The system operates with ultrasonic
parking sensors in the rear bumper.
Activation
Rear parking assist is activated when reverse gear is engaged and ignition
is switched on.
The system is ready to operate when
the LED in the parking assist button
¼ does not illuminate.
Indication
The system warns the driver with acoustic signals against potentially
hazardous obstacles behind the
vehicle while reverse gear is
engaged.
Depending on which side of the
vehicle is closer to an obstacle, you
will hear acoustic warning signals in the vehicle on the respective side.
The interval between the sounds
becomes shorter as the vehicle gets
closer to that obstacle. When the
distance is less than approx. 30 cm,
the sound is continuous.
Additionally, the distance to rear
obstacles is displayed by changing
distance lines in the Info Display
3 103. When the obstacle is very
close, 9 for Danger is displayed in the
screen.
Page 179 of 265
Driving and operating177Deactivation
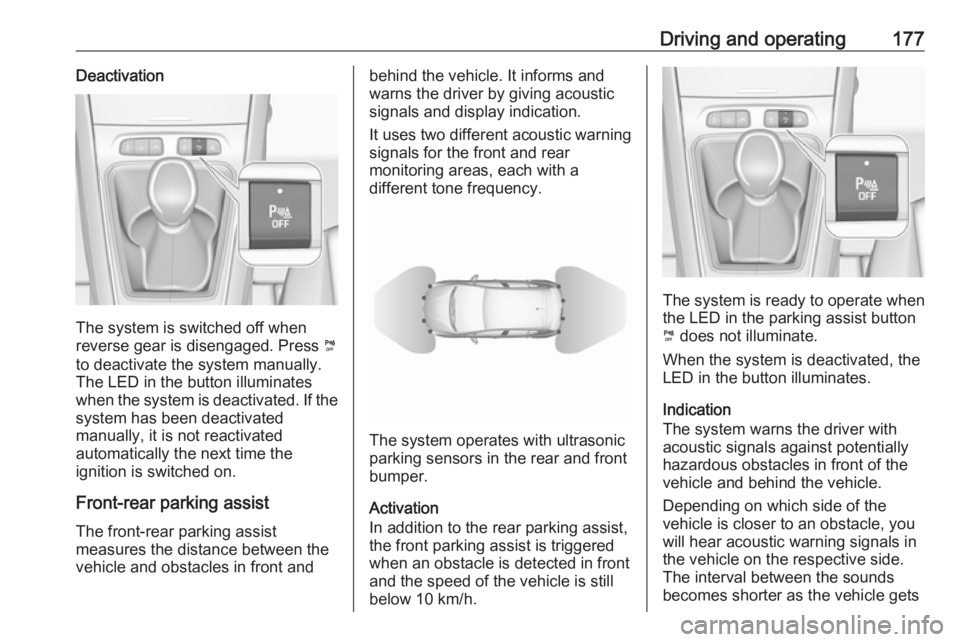
The system is switched off when
reverse gear is disengaged. Press ¼
to deactivate the system manually.
The LED in the button illuminates
when the system is deactivated. If the
system has been deactivated
manually, it is not reactivated
automatically the next time the
ignition is switched on.
Front-rear parking assist
The front-rear parking assist
measures the distance between the
vehicle and obstacles in front and
behind the vehicle. It informs and
warns the driver by giving acoustic
signals and display indication.
It uses two different acoustic warning
signals for the front and rear
monitoring areas, each with a
different tone frequency.
The system operates with ultrasonic
parking sensors in the rear and front
bumper.
Activation
In addition to the rear parking assist,
the front parking assist is triggered
when an obstacle is detected in front
and the speed of the vehicle is still
below 10 km/h.
The system is ready to operate when
the LED in the parking assist button
¼ does not illuminate.
When the system is deactivated, the
LED in the button illuminates.
Indication
The system warns the driver with acoustic signals against potentially
hazardous obstacles in front of the
vehicle and behind the vehicle.
Depending on which side of the
vehicle is closer to an obstacle, you will hear acoustic warning signals inthe vehicle on the respective side.
The interval between the sounds
becomes shorter as the vehicle gets