check oil OPEL GRANDLAND X 2018 Infotainment system
[x] Cancel search | Manufacturer: OPEL, Model Year: 2018, Model line: GRANDLAND X, Model: OPEL GRANDLAND X 2018Pages: 265, PDF Size: 7.5 MB
Page 20 of 265
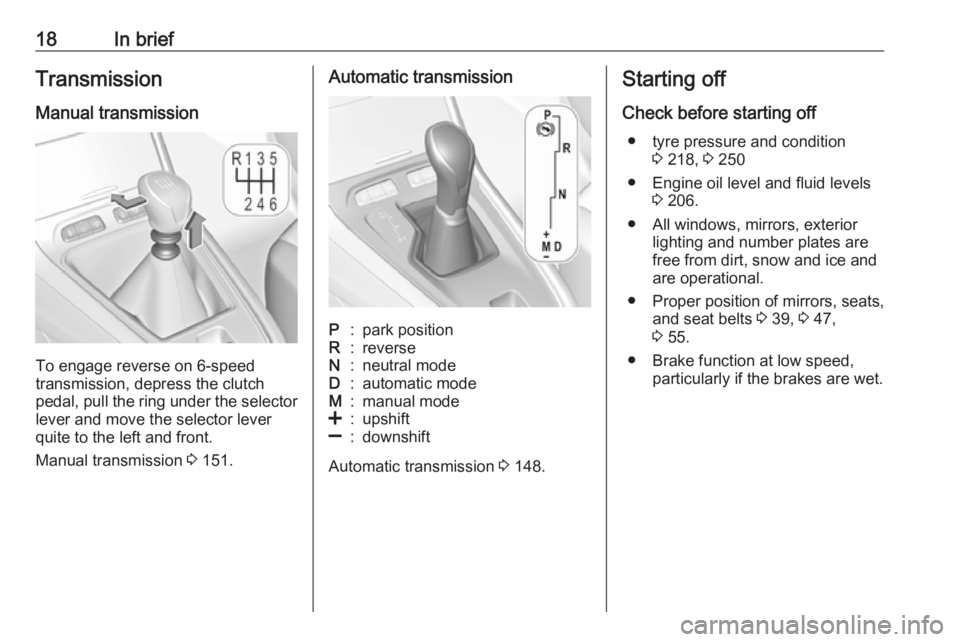
18In briefTransmission
Manual transmission
To engage reverse on 6-speed
transmission, depress the clutch
pedal, pull the ring under the selector
lever and move the selector lever
quite to the left and front.
Manual transmission 3 151.
Automatic transmissionP:park positionR:reverseN:neutral modeD:automatic modeM:manual mode<:upshift]:downshift
Automatic transmission 3 148.
Starting off
Check before starting off ● tyre pressure and condition 3 218, 3 250
● Engine oil level and fluid levels 3 206.
● All windows, mirrors, exterior lighting and number plates are
free from dirt, snow and ice and
are operational.
● Proper position of mirrors, seats, and seat belts 3 39, 3 47,
3 55.
● Brake function at low speed, particularly if the brakes are wet.
Page 56 of 265
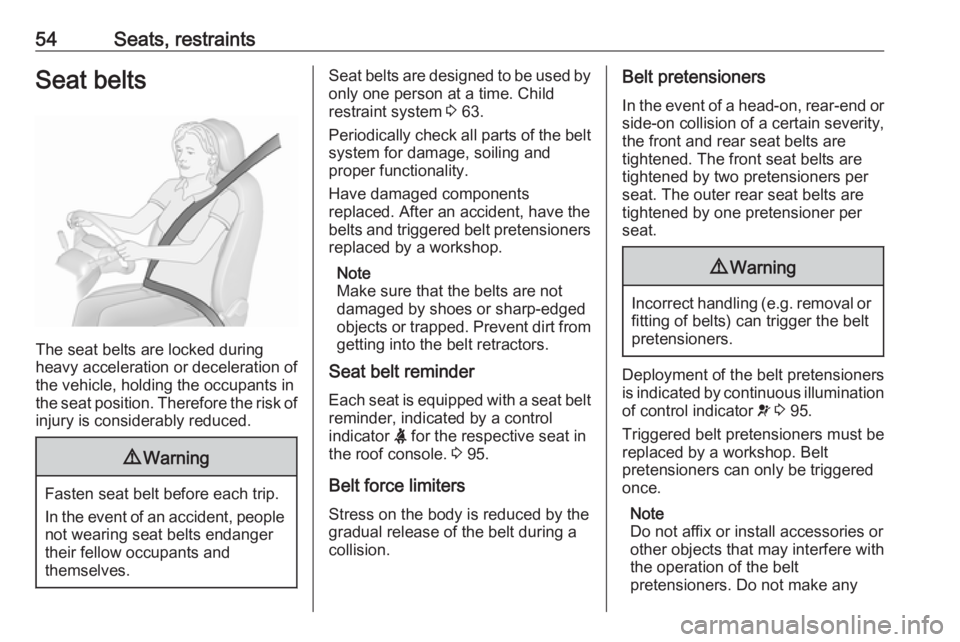
54Seats, restraintsSeat belts
The seat belts are locked during
heavy acceleration or deceleration of
the vehicle, holding the occupants in
the seat position. Therefore the risk of injury is considerably reduced.
9 Warning
Fasten seat belt before each trip.
In the event of an accident, people
not wearing seat belts endanger their fellow occupants and
themselves.
Seat belts are designed to be used by only one person at a time. Child
restraint system 3 63.
Periodically check all parts of the belt
system for damage, soiling and
proper functionality.
Have damaged components
replaced. After an accident, have the
belts and triggered belt pretensioners replaced by a workshop.
Note
Make sure that the belts are not
damaged by shoes or sharp-edged
objects or trapped. Prevent dirt from
getting into the belt retractors.
Seat belt reminder
Each seat is equipped with a seat belt
reminder, indicated by a control
indicator X for the respective seat in
the roof console. 3 95.
Belt force limiters
Stress on the body is reduced by the
gradual release of the belt during a
collision.Belt pretensioners
In the event of a head-on, rear-end or
side-on collision of a certain severity,
the front and rear seat belts are
tightened. The front seat belts are
tightened by two pretensioners per
seat. The outer rear seat belts are
tightened by one pretensioner per
seat.9 Warning
Incorrect handling (e.g. removal or
fitting of belts) can trigger the belt
pretensioners.
Deployment of the belt pretensioners
is indicated by continuous illumination
of control indicator v 3 95.
Triggered belt pretensioners must be replaced by a workshop. Belt
pretensioners can only be triggered
once.
Note
Do not affix or install accessories or
other objects that may interfere with
the operation of the belt
pretensioners. Do not make any
Page 82 of 265
80Instruments and controlsInstruments and
controlsControls ....................................... 81
Steering wheel adjustment ........81
Steering wheel controls .............81
Heated steering wheel ...............81
Horn ........................................... 82
Windscreen wiper/washer .........82
Rear window wiper/washer .......84
Outside temperature ..................84
Clock ......................................... 85
Power outlets ............................. 86
Inductive charging .....................87
Cigarette lighter ......................... 88
Ashtrays .................................... 88
Warning lights, gauges and indi‐ cators ........................................... 89
Instrument cluster ......................89
Speedometer ............................. 91
Odometer .................................. 92
Trip odometer ............................ 92
Tachometer ............................... 92
Fuel gauge ................................ 93
Engine coolant temperature gauge ....................................... 93
Service display .......................... 93Control indicators ......................94
Turn signal ................................. 95
Seat belt reminder .....................95
Airbag and belt tensioners .........95
Airbag deactivation ....................96
Charging system .......................96
Malfunction indicator light ..........96
Stop engine ............................... 96
System check ............................ 97
Brake and clutch system ...........97
Electric parking brake ................97
Electric parking brake fault ........97
Antilock brake system (ABS) .....97
Gear shifting .............................. 98
Lane departure warning ............98
Lane keep assist .......................98
Electronic Stability Control and Traction Control system ...........98
Engine coolant temperature ......98
Preheating ................................. 99
Diesel particle filter ....................99
AdBlue ....................................... 99
Deflation detection system ........99
Engine oil pressure ....................99
Low fuel ................................... 100
Autostop .................................. 100
Exterior light ............................ 100
High beam ............................... 100
High beam assist .....................100
LED headlights ........................ 100Fog light................................... 100
Rear fog light ........................... 100
Rain sensor ............................. 100
Cruise control .......................... 101
Adaptive cruise control ............101
Vehicle detected ahead ...........101
Speed limiter ........................... 101
Door open ................................ 101
Information displays ...................101
Driver Information Centre ........101
Info display .............................. 103
Vehicle messages ......................105
Warning chimes .......................105
Battery voltage ........................ 106
Vehicle personalisation ..............106
Telematics service .....................110
OnStar ..................................... 110
Page 93 of 265
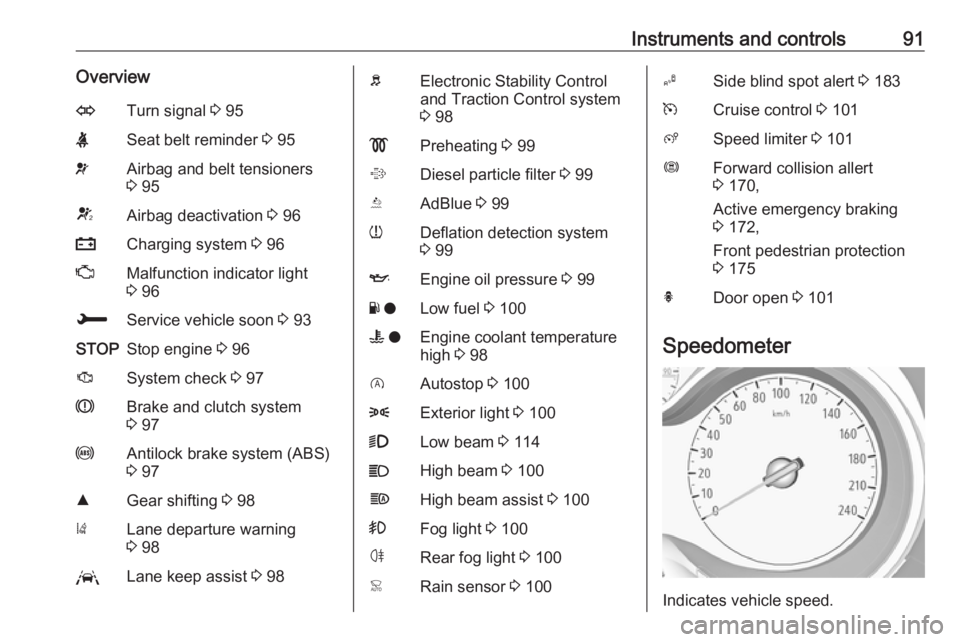
Instruments and controls91OverviewOTurn signal 3 95XSeat belt reminder 3 95vAirbag and belt tensioners
3 95VAirbag deactivation 3 96pCharging system 3 96ZMalfunction indicator light
3 96HService vehicle soon 3 93STOPStop engine 3 96JSystem check 3 97RBrake and clutch system
3 97uAntilock brake system (ABS)
3 97RGear shifting 3 98)Lane departure warning
3 98LLane keep assist 3 98bElectronic Stability Control
and Traction Control system
3 98!Preheating 3 99%Diesel particle filter 3 99YAdBlue 3 99wDeflation detection system
3 99IEngine oil pressure 3 99Y oLow fuel 3 100W oEngine coolant temperature
high 3 98DAutostop 3 1008Exterior light 3 1009Low beam 3 114CHigh beam 3 100fHigh beam assist 3 100>Fog light 3 100øRear fog light 3 100
Active emergency braking
3 172,
Front pedestrian protection
3 175hDoor open 3 101
Speedometer
Indicates vehicle speed.
Page 95 of 265
Instruments and controls93Fuel gauge
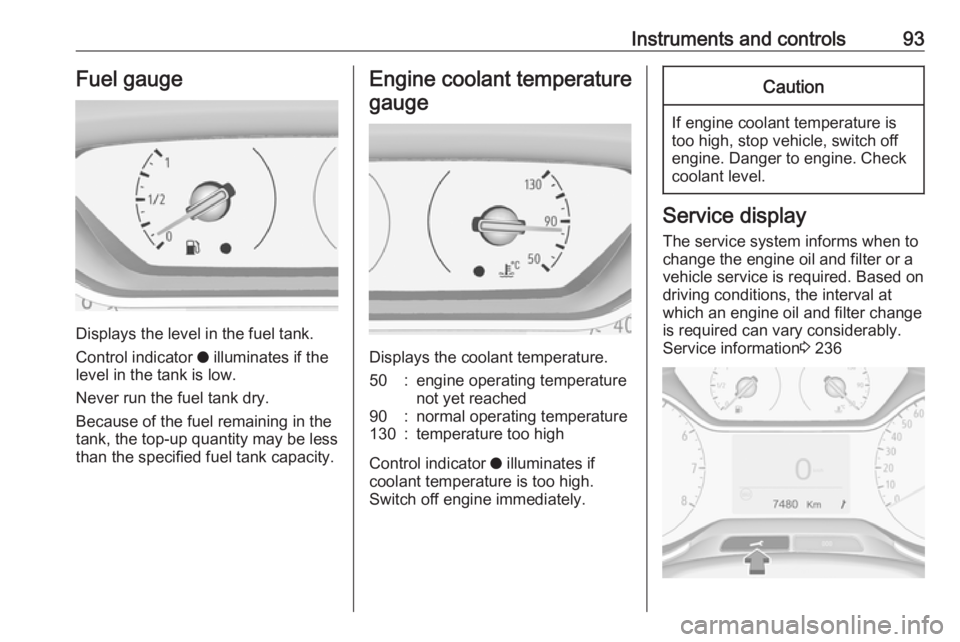
Displays the level in the fuel tank.
Control indicator o illuminates if the
level in the tank is low.
Never run the fuel tank dry.
Because of the fuel remaining in the
tank, the top-up quantity may be less
than the specified fuel tank capacity.
Engine coolant temperature
gauge
Displays the coolant temperature.
50:engine operating temperature
not yet reached90:normal operating temperature130:temperature too high
Control indicator o illuminates if
coolant temperature is too high. Switch off engine immediately.
Caution
If engine coolant temperature is
too high, stop vehicle, switch off
engine. Danger to engine. Check
coolant level.
Service display
The service system informs when to
change the engine oil and filter or a
vehicle service is required. Based on
driving conditions, the interval at
which an engine oil and filter change
is required can vary considerably.
Service information 3 236
Page 101 of 265
Instruments and controls99Preheating
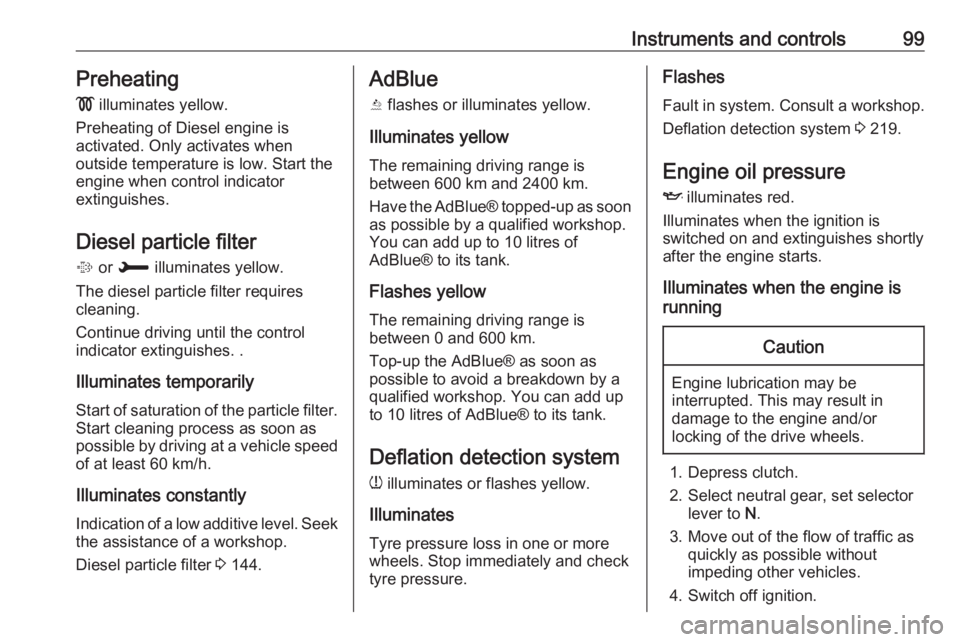
! illuminates yellow.
Preheating of Diesel engine is
activated. Only activates when
outside temperature is low. Start the
engine when control indicator
extinguishes.
Diesel particle filter % or H illuminates yellow.
The diesel particle filter requires
cleaning.
Continue driving until the control
indicator extinguishes. .
Illuminates temporarily Start of saturation of the particle filter.
Start cleaning process as soon as
possible by driving at a vehicle speed of at least 60 km/h.
Illuminates constantlyIndication of a low additive level. Seek
the assistance of a workshop.
Diesel particle filter 3 144.AdBlue
Y flashes or illuminates yellow.
Illuminates yellow
The remaining driving range is
between 600 km and 2400 km.
Have the AdBlue® topped-up as soon as possible by a qualified workshop.
You can add up to 10 litres of
AdBlue® to its tank.
Flashes yellow
The remaining driving range is
between 0 and 600 km.
Top-up the AdBlue® as soon as
possible to avoid a breakdown by a
qualified workshop. You can add up
to 10 litres of AdBlue® to its tank.
Deflation detection systemw illuminates or flashes yellow.
Illuminates
Tyre pressure loss in one or more
wheels. Stop immediately and check
tyre pressure.Flashes
Fault in system. Consult a workshop.
Deflation detection system 3 219.
Engine oil pressure
I illuminates red.
Illuminates when the ignition is
switched on and extinguishes shortly after the engine starts.
Illuminates when the engine is
runningCaution
Engine lubrication may be
interrupted. This may result in
damage to the engine and/or
locking of the drive wheels.
1. Depress clutch.
2. Select neutral gear, set selector lever to N.
3. Move out of the flow of traffic as quickly as possible without
impeding other vehicles.
4. Switch off ignition.
Page 102 of 265
100Instruments and controls9Warning
When the engine is off,
considerably more force is needed
to brake and steer. During an
Autostop the brake servo unit will still be operational.
Do not remove key until vehicle is stationary, otherwise the steeringwheel lock could engage
unexpectedly.
Check oil level before seeking the
assistance of a workshop 3 206.
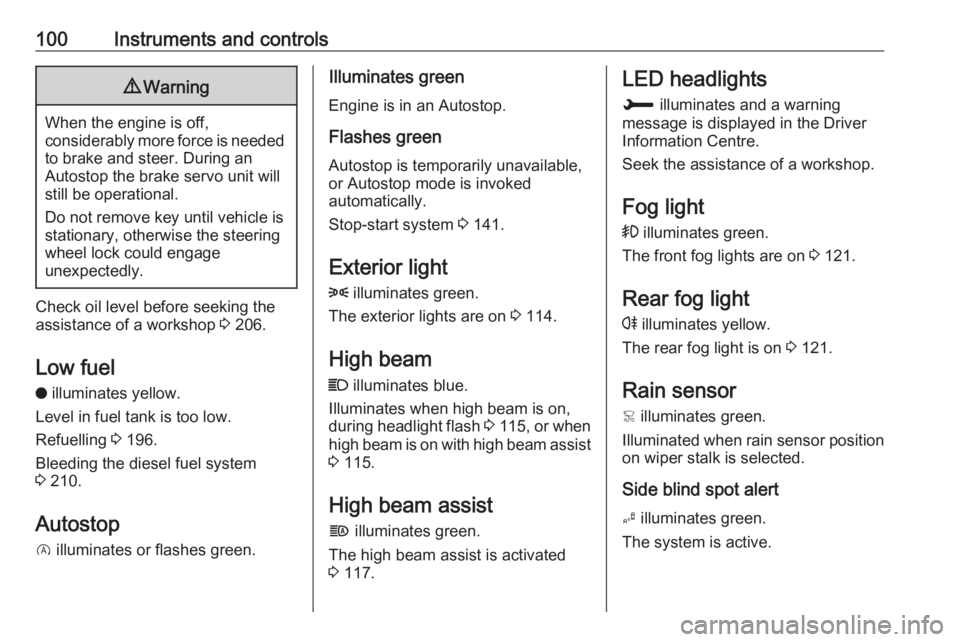
Low fuel
o illuminates yellow.
Level in fuel tank is too low.
Refuelling 3 196.
Bleeding the diesel fuel system
3 210.
Autostop
D illuminates or flashes green.
Illuminates green
Engine is in an Autostop.
Flashes green
Autostop is temporarily unavailable,
or Autostop mode is invoked
automatically.
Stop-start system 3 141.
Exterior light
8 illuminates green.
The exterior lights are on 3 114.
High beam
C illuminates blue.
Illuminates when high beam is on,
during headlight flash 3 115 , or when
high beam is on with high beam assist
3 115.
High beam assist f illuminates green.
The high beam assist is activated
3 117.LED headlights
H illuminates and a warning
message is displayed in the Driver
Information Centre.
Seek the assistance of a workshop.
Fog light
> illuminates green.
The front fog lights are on 3 121.
Rear fog light
r illuminates yellow.
The rear fog light is on 3 121.
Rain sensor
< illuminates green.
Illuminated when rain sensor position on wiper stalk is selected.
Side blind spot alert
B illuminates green.
The system is active.
Page 205 of 265
Vehicle care203Vehicle careGeneral Information...................203
Accessories and vehicle modifications .......................... 203
Vehicle storage ........................204
End-of-life vehicle recovery .....205
Vehicle checks ........................... 205
Performing work ......................205
Bonnet ..................................... 205
Engine oil ................................. 206
Engine coolant ......................... 207
Washer fluid ............................ 208
Brakes ..................................... 208
Brake fluid ............................... 208
Vehicle battery ......................... 208
Diesel fuel system bleeding .....210
Wiper blade replacement ........210
Bulb replacement .......................211
Halogen headlights ..................211
LED headlights ........................ 212
Fog lights ................................. 212
Tail lights ................................. 213
Side turn signal lights ..............216
Number plate light ...................216
Interior lights ............................ 216
Instrument panel illumination ...216Vehicle tools .............................. 217
Tools ........................................ 217
Wheels and tyres .......................218
Winter tyres ............................. 218
Tyre designations ....................218
Tyre pressure .......................... 218
Tyre deflation detection system .................................... 219
Tread depth ............................. 220
Changing tyre and wheel size . 221
Wheel covers ........................... 221
Tyre chains .............................. 222
Tyre repair kit .......................... 222
Wheel changing .......................225
Spare wheel ............................ 228
Jump starting ............................. 229
Towing ....................................... 230
Towing the vehicle ...................230
Towing another vehicle ...........231
Appearance care .......................232
Exterior care ............................ 232
Interior care ............................. 234General Information
Accessories and vehicle modifications
We recommend the use of genuine
parts and accessories and factory
approved parts specific for your
vehicle type. We cannot assess or guarantee reliability of other products - even if they have a regulatory or
otherwise granted approval.
Any modification, conversion or other
changes made to standard vehicle
specifications (including, without
limitation, software modifications,
modifications of the electronic control units) may invalidate the warranty
offered by Opel. Furthermore, such
changes may affect driver assistance
systems, may impact fuel
consumption, CO 2 emissions and
other emissions of the vehicle and
cause the vehicle to no longer
conform to the operating permit,
impacting the validity of your vehicle
registration.
Page 206 of 265
204Vehicle careCaution
When transporting the vehicle on
a train or on a recovery vehicle, the
mud flaps might be damaged.
Cold protection covers
In order to prevent the accumulation
of snow at the radiator cooling fan, it is recommended to install removable
protection covers.
Contact your dealer to install the
protection covers.
Caution
The protection covers must be removed when one of the
following conditions occur:
● The ambient temperature is abbove 10° C.
● When the vehicle is towed.
● The vehicle is driven at speeds
above 120 km/h.
Vehicle storage
Storage for a long period of time If the vehicle is to be stored for several months:
● Wash and wax the vehicle.
● Have the wax in the engine compartment and underbody
checked.
● Clean and preserve the rubber seals.
● Fill up fuel tank completely.
● Change the engine oil.
● Drain the washer fluid reservoir.
● Check the coolant antifreeze and
corrosion protection.
● Adjust tyre pressure to the value specified for full load.
● Park the vehicle in a dry, well ventilated place. Engage first or
reverse gear or set selector lever
to P. Prevent the vehicle from
rolling.
● Do not apply the parking brake.● Open the bonnet, close all doors and lock the vehicle.
● Disconnect the clamp from the negative terminal of the vehicle
battery. Beware that all systems
are not functional, e.g. anti-theft
alarm system.
Putting back into operation When the vehicle is to be put back into
operation:
● Connect the clamp to the negative terminal of the vehicle
battery. Activate the electronics
of the power windows.
● Check tyre pressure.
● Fill up the washer fluid reservoir.
● Check the engine oil level.
● Check the coolant level.
● Fit the number plate if necessary.
Page 208 of 265
206Vehicle care
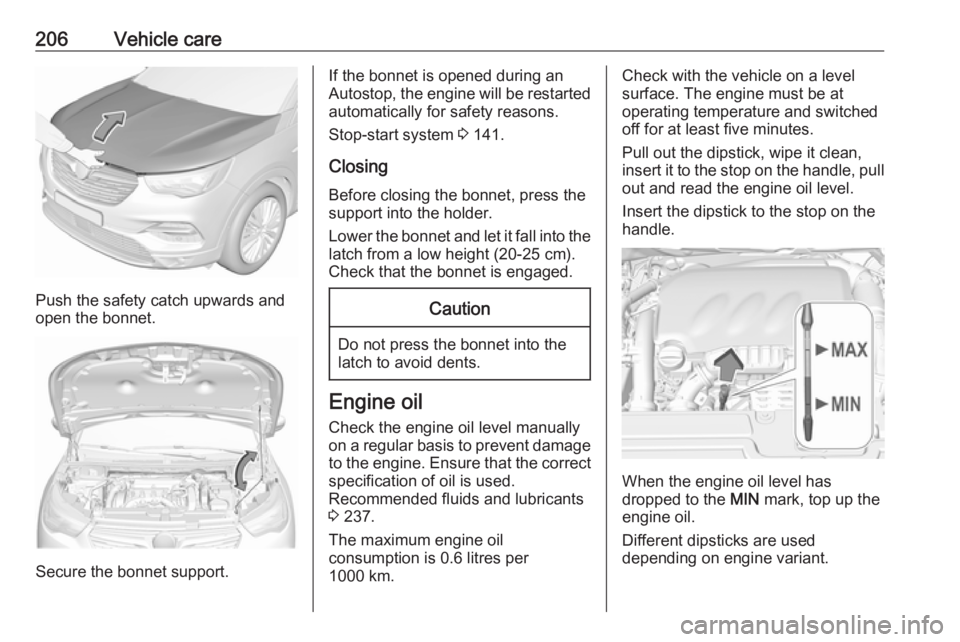
Push the safety catch upwards and
open the bonnet.
Secure the bonnet support.
If the bonnet is opened during an
Autostop, the engine will be restarted automatically for safety reasons.
Stop-start system 3 141.
Closing
Before closing the bonnet, press the
support into the holder.
Lower the bonnet and let it fall into the latch from a low height (20-25 cm).
Check that the bonnet is engaged.Caution
Do not press the bonnet into the
latch to avoid dents.
Engine oil
Check the engine oil level manually
on a regular basis to prevent damage
to the engine. Ensure that the correct
specification of oil is used.
Recommended fluids and lubricants
3 237.
The maximum engine oil
consumption is 0.6 litres per
1000 km.
Check with the vehicle on a level
surface. The engine must be at
operating temperature and switched
off for at least five minutes.
Pull out the dipstick, wipe it clean, insert it to the stop on the handle, pull
out and read the engine oil level.
Insert the dipstick to the stop on the
handle.
When the engine oil level has
dropped to the MIN mark, top up the
engine oil.
Different dipsticks are used
depending on engine variant.