Eco OPEL GRANDLAND X 2019.75 Owner's Manual
[x] Cancel search | Manufacturer: OPEL, Model Year: 2019.75, Model line: GRANDLAND X, Model: OPEL GRANDLAND X 2019.75Pages: 273, PDF Size: 7.85 MB
Page 5 of 273
Introduction3Vehicle specific dataPlease enter your vehicle's data on
the previous page to keep it easily
accessible.
Please refer to the sections "Service
and maintenance", "Technical data",
the vehicle’s identification plate and
national registration documents.
Introduction
Your vehicle is a designed
combination of advanced technology, safety, environmental friendliness
and economy.
This Owner's Manual provides you
with all the necessary information to
enable you to drive your vehicle
safely and efficiently.
Make sure your passengers are
aware of the possible risk of accident
and injury which may result from
improper use of the vehicle.
You must always comply with the
specific laws and regulations of the
country that you are in. These laws
may differ from the information in this Owner's Manual.Disregarding the description given in
this manual may affect your warranty.
When this Owner's Manual refers to a
workshop visit, we recommend your Opel Service Partner.
All Opel Service Partners provide
first-class service at reasonable
prices. Experienced mechanics
trained by Opel work according to
specific Opel instructions.
The customer literature pack should
always be kept ready to hand in the
vehicle.
Using this manual ● This manual describes all options
and features available for this
model. Certain descriptions,
including those for display and
menu functions, may not apply to
your vehicle due to model
variant, country specifications,
special equipment or
accessories.
● The "In brief" section will give you
an initial overview.● The table of contents at the beginning of this manual and
within each section shows where the information is located.
● The index will enable you to search for specific information.
● This Owner's Manual depicts left-
hand drive vehicles. Operation is similar for right-hand drive
vehicles.
● The Owner's Manual uses the engine identifier code. The
corresponding sales designation
and engineering code can be
found in the section "Technical
data".
● Directional data, e.g. left or right, or front or back, always relate to
the direction of travel.
● Displays may not support your specific language.
● Display messages and interior labelling are written in bold
letters.
Page 13 of 273
In brief111Power windows .....................40
2 Exterior mirrors .....................37
3 Side air vents ...................... 127
4 Turn lights, headlight
flash, low / high beam,
high beam assist .................114
Exit lighting ......................... 118
Parking lights ...................... 116
Buttons for Driver
Information Centre ................99
5 Cruise control .....................153
Speed limiter ....................... 156
Heated steering wheel ..........80
6 Instruments ........................... 89
Driver Information Centre ...... 99
7 Infotainment controls
8 Windscreen wiper and
washer, rear wiper and
washer ................................. 81
9 Power button ....................... 132
10 Air vents ............................. 127
11 Hazard warning flashers ....114
12 Info Display ........................ 10113Light sensor ........................ 110
Rain sensor ........................... 81
Sun sensor .......................... 123
14 Central locking system ..........24
15 Glovebox .............................. 69
16 Controls for Info Display
operation ............................. 101
17 Climate control system ........ 120
18 USB charging port ................ 85
19 Power outlet .......................... 85
20 Parking assist / Advanced
parking assist .....................170
Lane departure warning .....184
Eco button for stop-start
system ................................. 135
Electronic Stability Control and Traction Control ...........150
Sport mode ......................... 152
21 Manual transmission ..........146
Automatic transmission ......143
22 Electric parking brake .........147
23 Selective ride control ..........15124Ignition switch .....................131
25 Steering wheel adjustment ..80
26 Horn ..................................... 81
27 Storage ................................. 69
28 Bonnet release lever ..........200
29 Light switch ........................ 109
Headlight range
adjustment ......................... 110
Front / rear fog lights ..........115
Instrument illumination .......116
Page 22 of 273
20In briefStop-start system
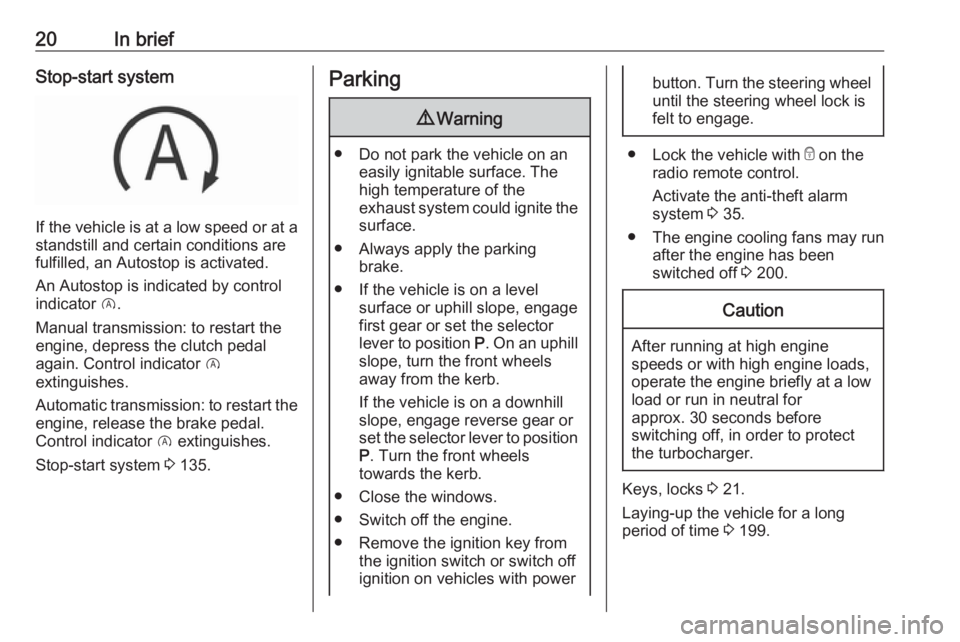
If the vehicle is at a low speed or at astandstill and certain conditions are
fulfilled, an Autostop is activated.
An Autostop is indicated by control
indicator D.
Manual transmission: to restart the
engine, depress the clutch pedal
again. Control indicator D
extinguishes.
Automatic transmission: to restart the
engine, release the brake pedal.
Control indicator D extinguishes.
Stop-start system 3 135.
Parking9 Warning
● Do not park the vehicle on an
easily ignitable surface. The
high temperature of the
exhaust system could ignite the
surface.
● Always apply the parking brake.
● If the vehicle is on a level surface or uphill slope, engage
first gear or set the selector
lever to position P. On an uphill
slope, turn the front wheels
away from the kerb.
If the vehicle is on a downhill
slope, engage reverse gear or
set the selector lever to position
P . Turn the front wheels
towards the kerb.
● Close the windows.
● Switch off the engine.
● Remove the ignition key from the ignition switch or switch off
ignition on vehicles with power
button. Turn the steering wheel until the steering wheel lock is
felt to engage.
● Lock the vehicle with e on the
radio remote control.
Activate the anti-theft alarm
system 3 35.
● The engine cooling fans may run
after the engine has been
switched off 3 200.
Caution
After running at high engine
speeds or with high engine loads,
operate the engine briefly at a low load or run in neutral for
approx. 30 seconds before
switching off, in order to protect
the turbocharger.
Keys, locks 3 21.
Laying-up the vehicle for a long
period of time 3 199.
Page 27 of 273
Keys, doors and windows25opened. A precondition is that the
setting is activated in the vehicle
personalisation 3 104.
Remote control operation
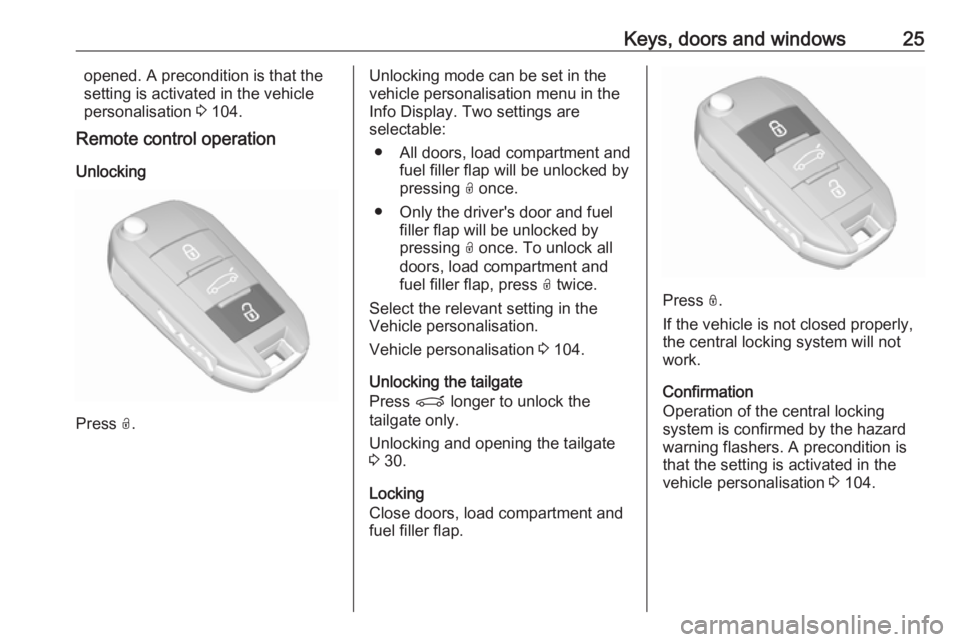
Unlocking
Press O.
Unlocking mode can be set in the
vehicle personalisation menu in the
Info Display. Two settings are
selectable:
● All doors, load compartment and fuel filler flap will be unlocked by
pressing O once.
● Only the driver's door and fuel filler flap will be unlocked by
pressing O once. To unlock all
doors, load compartment and
fuel filler flap, press O twice.
Select the relevant setting in the
Vehicle personalisation.
Vehicle personalisation 3 104.
Unlocking the tailgate
Press P longer to unlock the
tailgate only.
Unlocking and opening the tailgate
3 30.
Locking
Close doors, load compartment and
fuel filler flap.
Press N.
If the vehicle is not closed properly,
the central locking system will not
work.
Confirmation
Operation of the central locking
system is confirmed by the hazard
warning flashers. A precondition is
that the setting is activated in the
vehicle personalisation 3 104.
Page 29 of 273
Keys, doors and windows27If the vehicle is not closed properly,
the electronic key remains in the
vehicle or the ignition is not off,
locking will not be permitted and a
warning chime sounds.
Keep the hand behind the door
handle or keep the tailgate button
pressed to close the windows.
Unlocking and opening the tailgate
The tailgate can be unlocked and
opened hands-free by pushing the
touchpad under the tailgate moulding
when the electronic key is in range.
The doors remain locked.
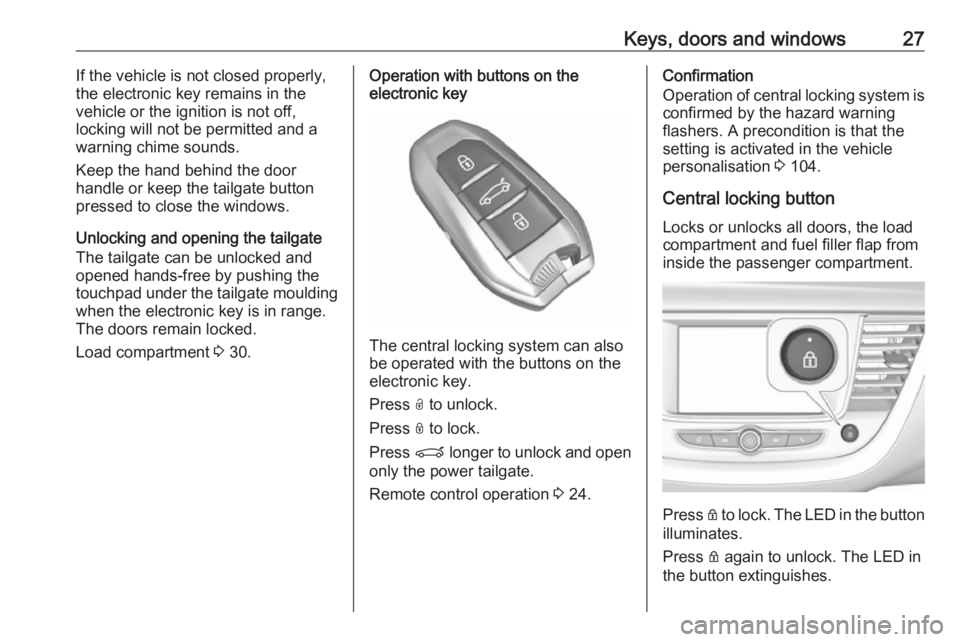
Load compartment 3 30.Operation with buttons on the
electronic key
The central locking system can also
be operated with the buttons on the
electronic key.
Press O to unlock.
Press N to lock.
Press P longer to unlock and open
only the power tailgate.
Remote control operation 3 24.
Confirmation
Operation of central locking system is
confirmed by the hazard warning
flashers. A precondition is that the
setting is activated in the vehicle
personalisation 3 104.
Central locking button
Locks or unlocks all doors, the load
compartment and fuel filler flap from
inside the passenger compartment.
Press Q
to lock. The LED in the button
illuminates.
Press Q again to unlock. The LED in
the button extinguishes.
Page 33 of 273
Keys, doors and windows31Power tailgate9Warning
Take care when operating the
power tailgate. Risk of injury,
particularly to children.
Keep a close watch on the
movable tailgate when operating.
Ensure that nothing becomes
trapped during operating and no
one is standing within the moving
area.
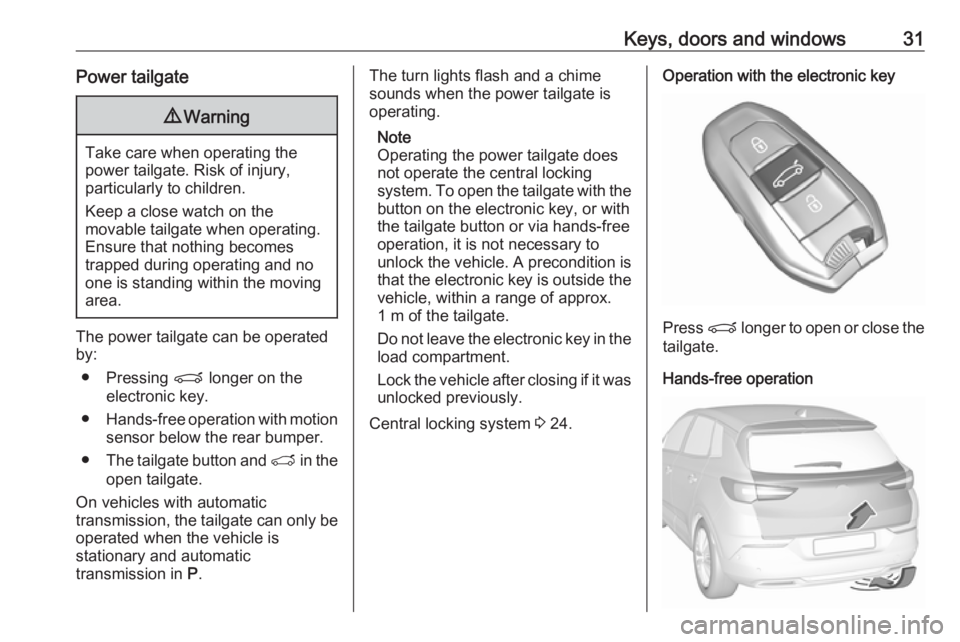
The power tailgate can be operated
by:
● Pressing P longer on the
electronic key.
● Hands-free operation with motion
sensor below the rear bumper.
● The tailgate button and T in the
open tailgate.
On vehicles with automatic
transmission, the tailgate can only be operated when the vehicle is
stationary and automatic
transmission in P.
The turn lights flash and a chime
sounds when the power tailgate is
operating.
Note
Operating the power tailgate does
not operate the central locking
system. To open the tailgate with the
button on the electronic key, or with
the tailgate button or via hands-free
operation, it is not necessary to
unlock the vehicle. A precondition is
that the electronic key is outside the
vehicle, within a range of approx.
1 m of the tailgate.
Do not leave the electronic key in the load compartment.
Lock the vehicle after closing if it was
unlocked previously.
Central locking system 3 24.Operation with the electronic key
Press P longer to open or close the
tailgate.
Hands-free operation
Page 35 of 273
Keys, doors and windows33
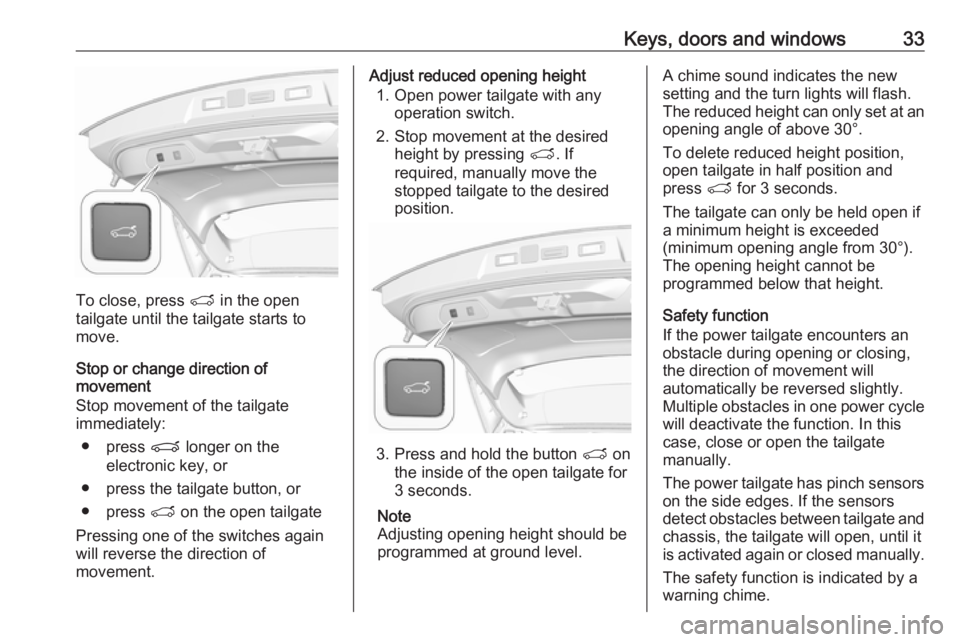
To close, press T in the open
tailgate until the tailgate starts to
move.
Stop or change direction of
movement
Stop movement of the tailgate immediately:
● press P longer on the
electronic key, or
● press the tailgate button, or
● press T on the open tailgate
Pressing one of the switches again
will reverse the direction of
movement.
Adjust reduced opening height
1. Open power tailgate with any operation switch.
2. Stop movement at the desired height by pressing T. If
required, manually move the
stopped tailgate to the desired
position.
3. Press and hold the button T on
the inside of the open tailgate for
3 seconds.
Note
Adjusting opening height should be programmed at ground level.
A chime sound indicates the new
setting and the turn lights will flash.
The reduced height can only set at an
opening angle of above 30°.
To delete reduced height position,
open tailgate in half position and
press T for 3 seconds.
The tailgate can only be held open if a minimum height is exceeded
(minimum opening angle from 30°).
The opening height cannot be
programmed below that height.
Safety function
If the power tailgate encounters an
obstacle during opening or closing,
the direction of movement will
automatically be reversed slightly.
Multiple obstacles in one power cycle will deactivate the function. In this
case, close or open the tailgate
manually.
The power tailgate has pinch sensors
on the side edges. If the sensors
detect obstacles between tailgate and chassis, the tailgate will open, until it
is activated again or closed manually.
The safety function is indicated by a
warning chime.
Page 37 of 273
Keys, doors and windows35Vehicle security
Anti-theft locking system9 Warning
Do not use the system if there are
people in the vehicle! The doorscannot be unlocked from the
inside.
The system deadlocks all the doors. All doors must be closed otherwise
the system cannot be activated.
Unlocking the vehicle disables the
mechanical anti-theft locking system.
This is not possible with the central
locking button.
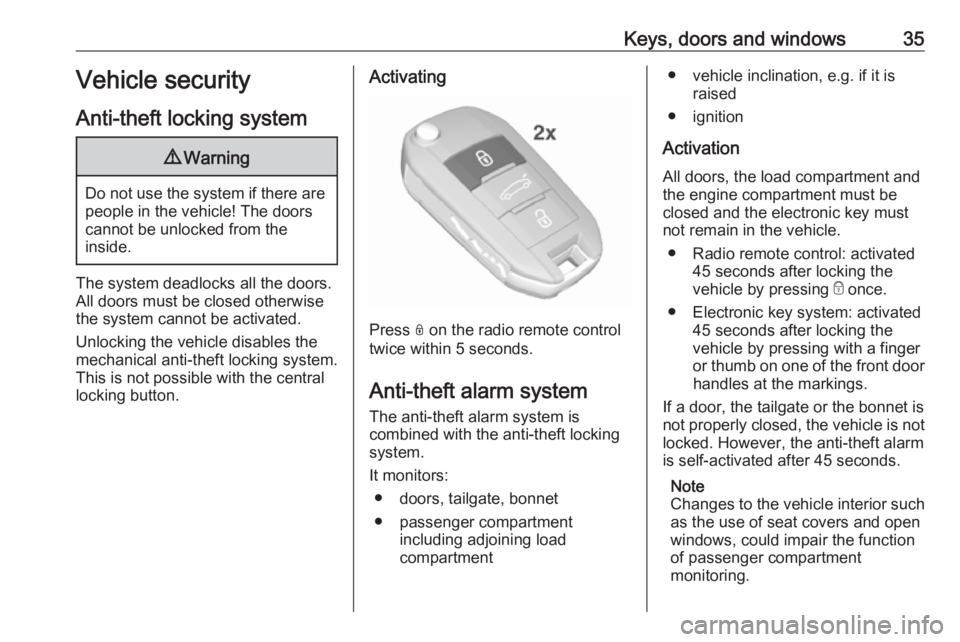
Activating
Press N on the radio remote control
twice within 5 seconds.
Anti-theft alarm system
The anti-theft alarm system is
combined with the anti-theft locking
system.
It monitors: ● doors, tailgate, bonnet
● passenger compartment including adjoining load
compartment
● vehicle inclination, e.g. if it is raised
● ignition
Activation
All doors, the load compartment and the engine compartment must be
closed and the electronic key must
not remain in the vehicle.
● Radio remote control: activated 45 seconds after locking the
vehicle by pressing e once.
● Electronic key system: activated 45 seconds after locking the
vehicle by pressing with a finger
or thumb on one of the front door handles at the markings.
If a door, the tailgate or the bonnet is
not properly closed, the vehicle is not locked. However, the anti-theft alarm
is self-activated after 45 seconds.
Note
Changes to the vehicle interior such
as the use of seat covers and open
windows, could impair the function
of passenger compartment
monitoring.
Page 38 of 273
36Keys, doors and windowsActivation without monitoring of
passenger compartment and
vehicle inclination
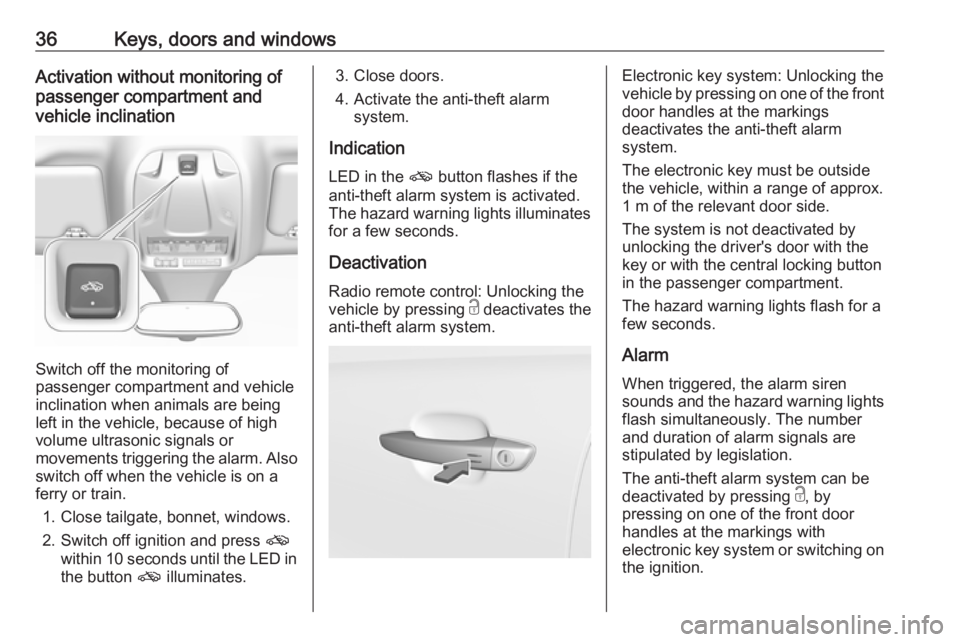
Switch off the monitoring of
passenger compartment and vehicle
inclination when animals are being
left in the vehicle, because of high
volume ultrasonic signals or
movements triggering the alarm. Also switch off when the vehicle is on a
ferry or train.
1. Close tailgate, bonnet, windows.
2. Switch off ignition and press o
within 10 seconds until the LED in the button o illuminates.
3. Close doors.
4. Activate the anti-theft alarm system.
Indication LED in the o button flashes if the
anti-theft alarm system is activated.
The hazard warning lights illuminates
for a few seconds.
DeactivationRadio remote control: Unlocking the
vehicle by pressing c deactivates the
anti-theft alarm system.Electronic key system: Unlocking the
vehicle by pressing on one of the front
door handles at the markings
deactivates the anti-theft alarm
system.
The electronic key must be outside
the vehicle, within a range of approx. 1 m of the relevant door side.
The system is not deactivated by
unlocking the driver's door with the
key or with the central locking button
in the passenger compartment.
The hazard warning lights flash for a
few seconds.
AlarmWhen triggered, the alarm siren
sounds and the hazard warning lights
flash simultaneously. The number
and duration of alarm signals are
stipulated by legislation.
The anti-theft alarm system can be
deactivated by pressing c, by
pressing on one of the front door
handles at the markings with
electronic key system or switching on the ignition.
Page 39 of 273
Keys, doors and windows37A triggered alarm, which has not been
interrupted by the driver, will be
indicated by the LED in the button
o . The LED will flash quickly the
next time the vehicle is unlocked with the radio remote control.
If the battery has been reconnected
(e.g. after maintenance work), wait for 10 minutes to restart the engine.
Fault
If the LED in the button o
illuminates permanently when
switching on the ignition, seek the
assistance of a workshop.
Locking the vehicle without
activation of the anti-theft alarm
Lock the vehicle by locking the
driver's door with the integral key.
Immobiliser
The system is part of the ignition
switch and checks whether the
vehicle is allowed to be started with the key being used.The immobiliser is activated
automatically after the key has been
removed from the ignition switch.
Note
Radio Frequency Identification
(RFID) tags may cause interference with the key. Do not have it placednear the key when starting the
vehicle.
Note
The immobiliser does not lock the doors. Always lock the vehicle after
leaving it 3 24.
Switch on the anti-theft alarm system 3 35.
Emergency operation of electronic key 3 132.Exterior mirrors
Convex shape
The shape of the mirror makes
objects appear smaller, which will affect the ability to estimate
distances.
Side blind spot alert 3 178.
Electric adjustment
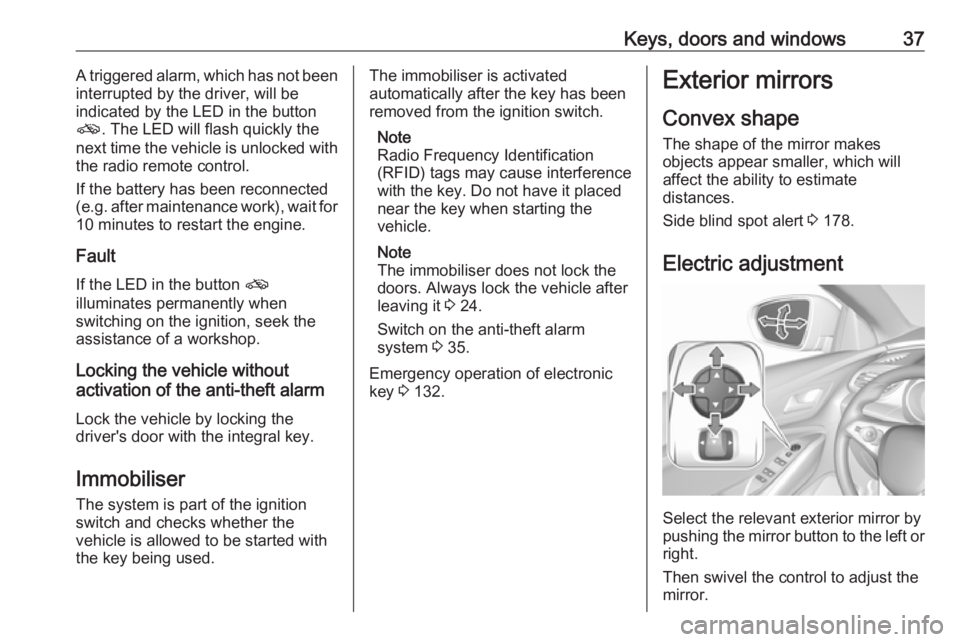
Select the relevant exterior mirror by
pushing the mirror button to the left or right.
Then swivel the control to adjust the
mirror.