lights OPEL INSIGNIA 2014 Manual user
[x] Cancel search | Manufacturer: OPEL, Model Year: 2014, Model line: INSIGNIA, Model: OPEL INSIGNIA 2014Pages: 321, PDF Size: 8.95 MB
Page 129 of 321
Lighting127
High Beam AssistThis feature allows the high beam to
function as the main driving light at
night and when vehicle speed is
faster than 40 km/h.
It switches automatically to low beam
when:
■ the camera in the windscreen detects the lights of oncoming or
preceding vehicles
■ the vehicle speed is slower than 20 km/h
■ it is foggy or snowy
■ driving in urban areas
If there are no restrictions detected,
the system switches back to high
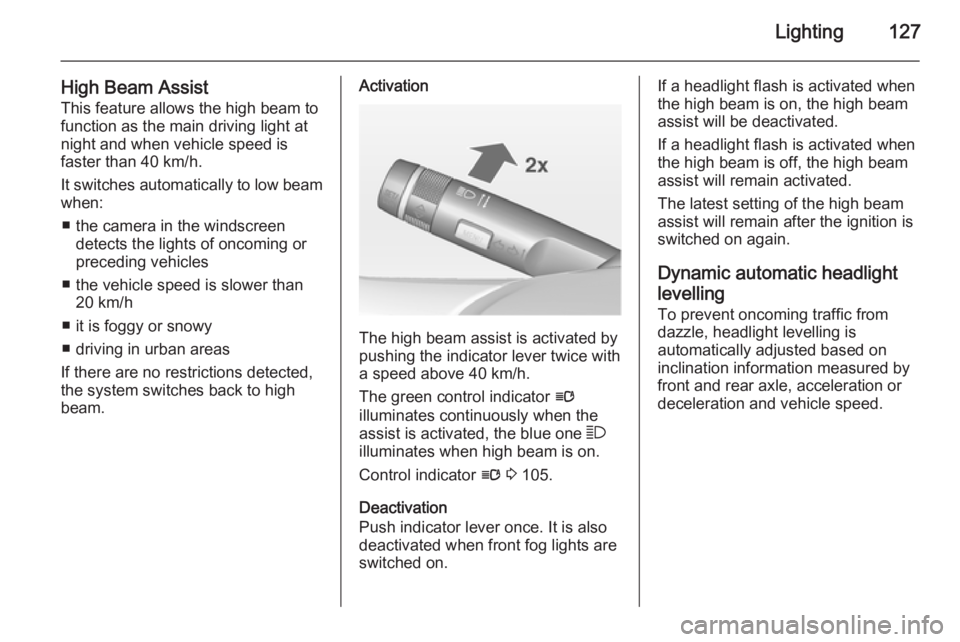
beam.Activation
The high beam assist is activated by
pushing the indicator lever twice with
a speed above 40 km/h.
The green control indicator l
illuminates continuously when the
assist is activated, the blue one 7
illuminates when high beam is on.
Control indicator l 3 105.
Deactivation
Push indicator lever once. It is also
deactivated when front fog lights are
switched on.
If a headlight flash is activated when
the high beam is on, the high beam
assist will be deactivated.
If a headlight flash is activated when
the high beam is off, the high beam
assist will remain activated.
The latest setting of the high beam
assist will remain after the ignition is
switched on again.
Dynamic automatic headlight
levelling
To prevent oncoming traffic from
dazzle, headlight levelling is
automatically adjusted based on
inclination information measured by
front and rear axle, acceleration or
deceleration and vehicle speed.
Page 130 of 321
128Lighting
Fault in Adaptive forward
lighting system When the system detects a failure in
the Adaptive forward lighting system,
the system moves to a preset position to avoid dazzling of oncoming traffic.
If this is not possible, the affected
headlight will be automatically
switched off. In any case, one
headlight will stay on. A warning is
displayed in the Driver Information
Centre.
Hazard warning flashers
Operated with the ¨ button.
In the event of an accident with airbag
deployment the hazard warning
flashers are activated automatically.
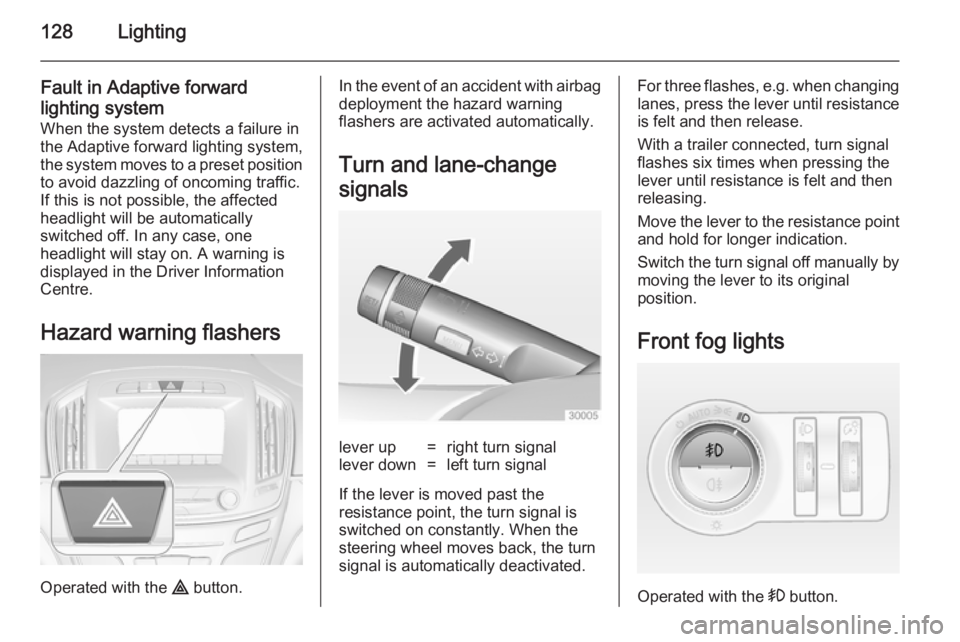
Turn and lane-change
signalslever up=right turn signallever down=left turn signal
If the lever is moved past the
resistance point, the turn signal is
switched on constantly. When the
steering wheel moves back, the turn
signal is automatically deactivated.
For three flashes, e.g. when changing lanes, press the lever until resistance
is felt and then release.
With a trailer connected, turn signal
flashes six times when pressing the
lever until resistance is felt and then
releasing.
Move the lever to the resistance point
and hold for longer indication.
Switch the turn signal off manually by moving the lever to its original
position.
Front fog lights
Operated with the > button.
Page 131 of 321
Lighting129
Light switch in position AUTO:
switching on front fog lights will switch headlights on automatically.
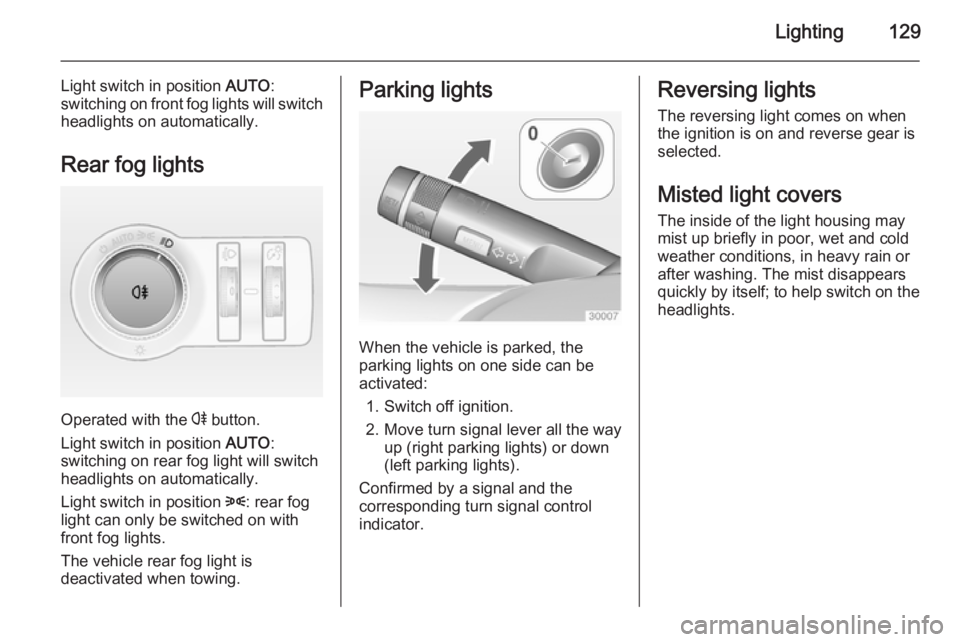
Rear fog lights
Operated with the r button.
Light switch in position AUTO:
switching on rear fog light will switch
headlights on automatically.
Light switch in position 8: rear fog
light can only be switched on with
front fog lights.
The vehicle rear fog light is
deactivated when towing.
Parking lights
When the vehicle is parked, the
parking lights on one side can be
activated:
1. Switch off ignition.
2. Move turn signal lever all the way up (right parking lights) or down
(left parking lights).
Confirmed by a signal and the
corresponding turn signal control
indicator.
Reversing lights
The reversing light comes on when
the ignition is on and reverse gear is
selected.
Misted light covers The inside of the light housing may
mist up briefly in poor, wet and cold weather conditions, in heavy rain or
after washing. The mist disappears
quickly by itself; to help switch on the
headlights.
Page 132 of 321
130LightingInterior lightingInstrument panel
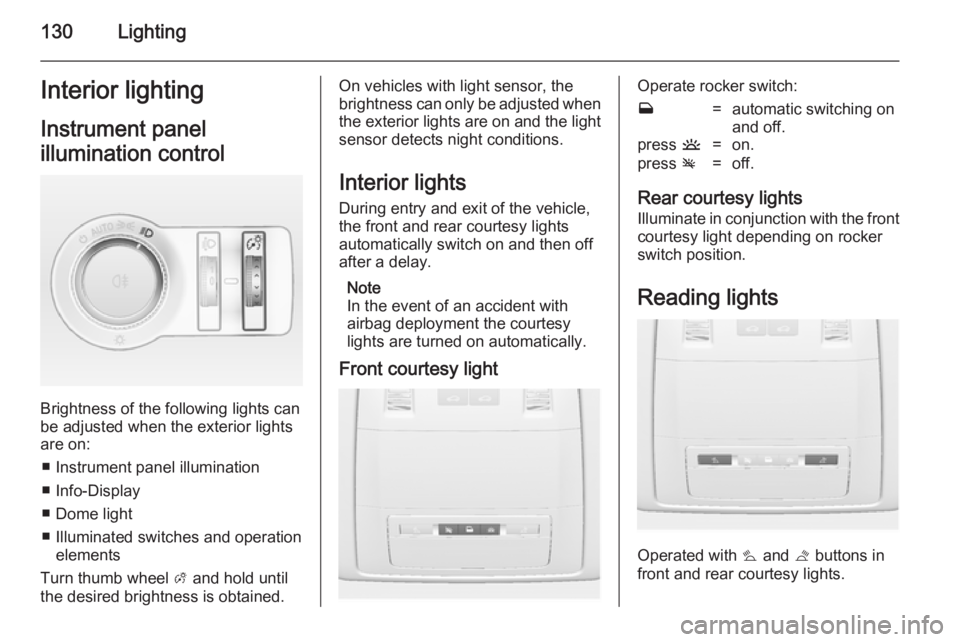
illumination control
Brightness of the following lights can
be adjusted when the exterior lights
are on:
■ Instrument panel illumination
■ Info-Display
■ Dome light
■ Illuminated switches and operation elements
Turn thumb wheel A and hold until
the desired brightness is obtained.
On vehicles with light sensor, the
brightness can only be adjusted when
the exterior lights are on and the light sensor detects night conditions.
Interior lights
During entry and exit of the vehicle,
the front and rear courtesy lights
automatically switch on and then off
after a delay.
Note
In the event of an accident with airbag deployment the courtesy
lights are turned on automatically.
Front courtesy lightOperate rocker switch:w=automatic switching on
and off.press u=on.press v=off.
Rear courtesy lights
Illuminate in conjunction with the front courtesy light depending on rocker
switch position.
Reading lights
Operated with s and t buttons in
front and rear courtesy lights.
Page 133 of 321
Lighting131
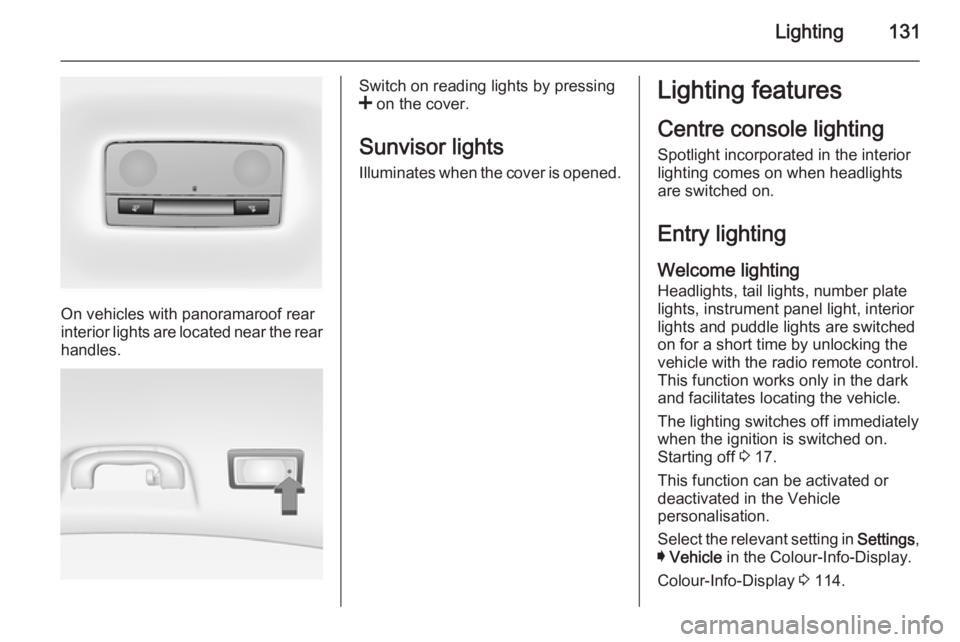
On vehicles with panoramaroof rear
interior lights are located near the rear
handles.
Switch on reading lights by pressing
< on the cover.
Sunvisor lights
Illuminates when the cover is opened.Lighting features
Centre console lighting Spotlight incorporated in the interior
lighting comes on when headlights are switched on.
Entry lighting
Welcome lighting
Headlights, tail lights, number plate
lights, instrument panel light, interior
lights and puddle lights are switched
on for a short time by unlocking the
vehicle with the radio remote control.
This function works only in the dark
and facilitates locating the vehicle.
The lighting switches off immediately
when the ignition is switched on.
Starting off 3 17.
This function can be activated or
deactivated in the Vehicle
personalisation.
Select the relevant setting in Settings,
I Vehicle in the Colour-Info-Display.
Colour-Info-Display 3 114.
Page 134 of 321
132Lighting
Vehicle personalisation 3 118.
The settings can be saved for the key
being used 3 23.
The following lights will additionally
switch on when the driver's door is
opened:
■ All switches
■ Driver Information Centre
■ Door pocket lights
Exit lighting
The following lights switch on if the
key is removed from the ignition
switch:
■ Interior lights
■ Instrument panel light
■ Puddle lights
They will switch off automatically after
a delay. This function works only in
the dark. Theatre lighting is activated
if the driver's door is opened during
this time.
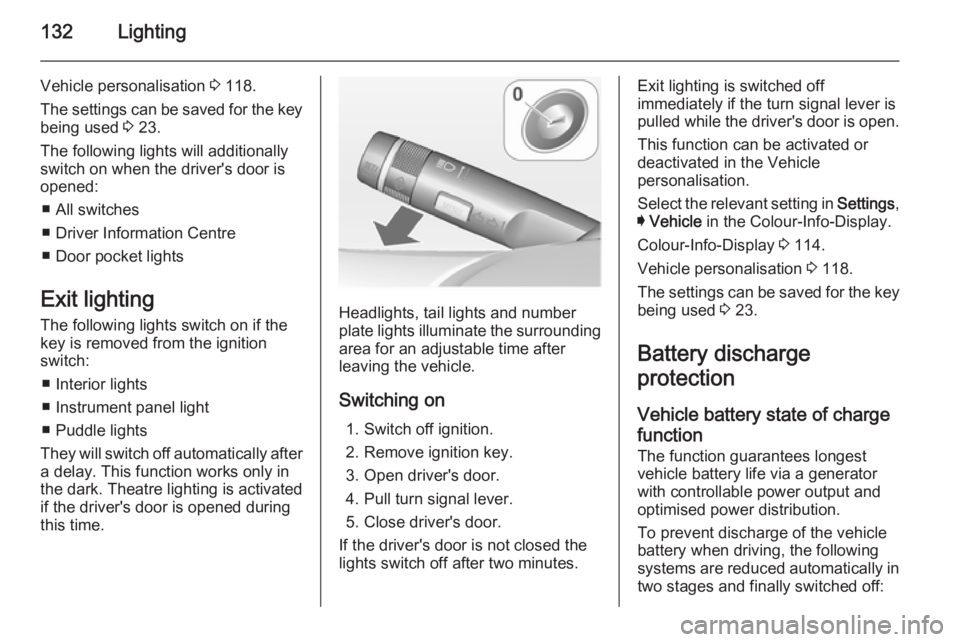
Headlights, tail lights and number plate lights illuminate the surrounding area for an adjustable time after
leaving the vehicle.
Switching on 1. Switch off ignition.
2. Remove ignition key.
3. Open driver's door.
4. Pull turn signal lever.
5. Close driver's door.
If the driver's door is not closed the
lights switch off after two minutes.
Exit lighting is switched off
immediately if the turn signal lever is pulled while the driver's door is open.
This function can be activated or
deactivated in the Vehicle
personalisation.
Select the relevant setting in Settings,
I Vehicle in the Colour-Info-Display.
Colour-Info-Display 3 114.
Vehicle personalisation 3 118.
The settings can be saved for the key
being used 3 23.
Battery discharge
protection
Vehicle battery state of charge
function
The function guarantees longest vehicle battery life via a generatorwith controllable power output and
optimised power distribution.
To prevent discharge of the vehicle
battery when driving, the following
systems are reduced automatically in two stages and finally switched off:
Page 135 of 321
Lighting133
■ Auxiliary heater
■ Heated rear window and mirrors
■ Heated seats
■ Fan
In the second stage a message which confirms the activation of the vehicle
battery discharge protection will be
displayed in the Driver Information
Centre.
Switching off electric lights To prevent discharge of the vehicle
battery when the ignition is switched
off, some interior lights are switched
off automatically after some time.
Page 155 of 321
Driving and operating153Stop-start system
The stop-start system helps to save
fuel and to reduce the exhaust
emissions. When conditions allow, it
switches off the engine as soon as the vehicle is at a low speed or at a
standstill, e.g. at a traffic light or in a
traffic jam. It starts the engine
automatically as soon as the clutch is
depressed. A battery sensor ensures
that an Autostop is only performed if
the vehicle battery is sufficiently
charged for a restart.
Activation The stop-start system is available assoon as the engine is started, the
vehicle starts-off and the conditions
as stated below in this section are
fulfilled.Deactivation
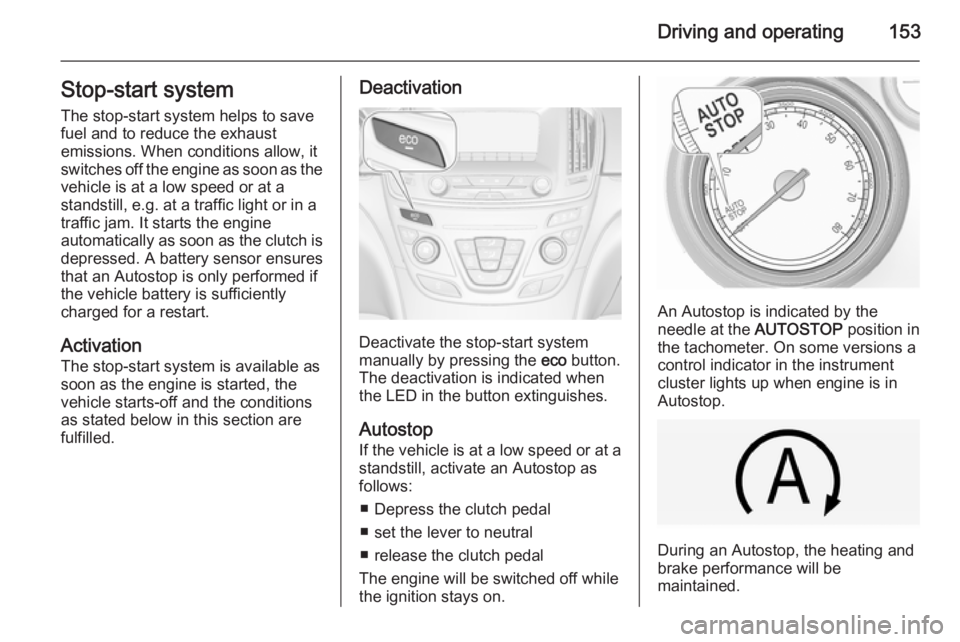
Deactivate the stop-start system
manually by pressing the eco button.
The deactivation is indicated when
the LED in the button extinguishes.
Autostop
If the vehicle is at a low speed or at a
standstill, activate an Autostop as
follows:
■ Depress the clutch pedal
■ set the lever to neutral
■ release the clutch pedal
The engine will be switched off while
the ignition stays on.
An Autostop is indicated by the
needle at the AUTOSTOP position in
the tachometer. On some versions a
control indicator in the instrument
cluster lights up when engine is in Autostop.
During an Autostop, the heating and
brake performance will be
maintained.
Page 165 of 321
Driving and operating163Drive systems
All-wheel drive The All-wheel drive system enhances
driving characteristics and stability,
and helps to achieve the best
possible driveability regardless of
ground surface. The system is always
active and cannot be deactivated.
The torque is distributed steplessly
between the wheels of the front and rear axle, depending on the driving
conditions. Additionally the torque
between the rear wheels is distributed depending on the surface.
For optimum system performance,
the vehicle's tyres should not have
varying degrees of wear.
If a service message is displayed in
the Driver Information Centre, the
system may have limited functionality
(or be completely disabled in some
cases, i.e. the vehicle switches to
Front-wheel drive). Seek the
assistance of a workshop.
Towing the vehicle 3 254.Brakes
The brake system comprises twoindependent brake circuits.
If a brake circuit fails, the vehicle can
still be braked using the other brake
circuit. However, braking effect is
achieved only when the brake pedal
is depressed firmly. Considerably
more force is needed for this. The
braking distance is extended. Seek the assistance of a workshop before
continuing your journey.
When the engine is not running, the
support of the brake servo unit
disappears once the brake pedal has
been depressed once or twice.
Braking effect is not reduced, but
braking requires significantly greater
force. It is especially important to bear this in mind when being towed.
Control indicator R 3 102.
Antilock brake system
Antilock brake system (ABS)
prevents the wheels from locking.ABS starts to regulate brake pressure as soon as a wheel shows a tendency to lock. The vehicle remains
steerable, even during hard braking.
ABS control is made apparent
through a pulse in the brake pedal
and the noise of the regulation
process.
For optimum braking, keep the brake
pedal fully depressed throughout the
braking process, despite the fact that the pedal is pulsating. Do not reduce
the pressure on the pedal.
After starting off, the system performs a self-test which may be audible.
Control indicator u 3 103.
Adaptive brake light During full braking, all three brakelights flash for the duration of ABS
control.
Page 166 of 321
164Driving and operating
Fault9Warning
If there is a fault in the ABS, the
wheels may be liable to lock due
to braking that is heavier than
normal. The advantages of ABS are no longer available. During
hard braking, the vehicle can no longer be steered and may
swerve.
Have the cause of the fault remedied
by a workshop.
Parking brake
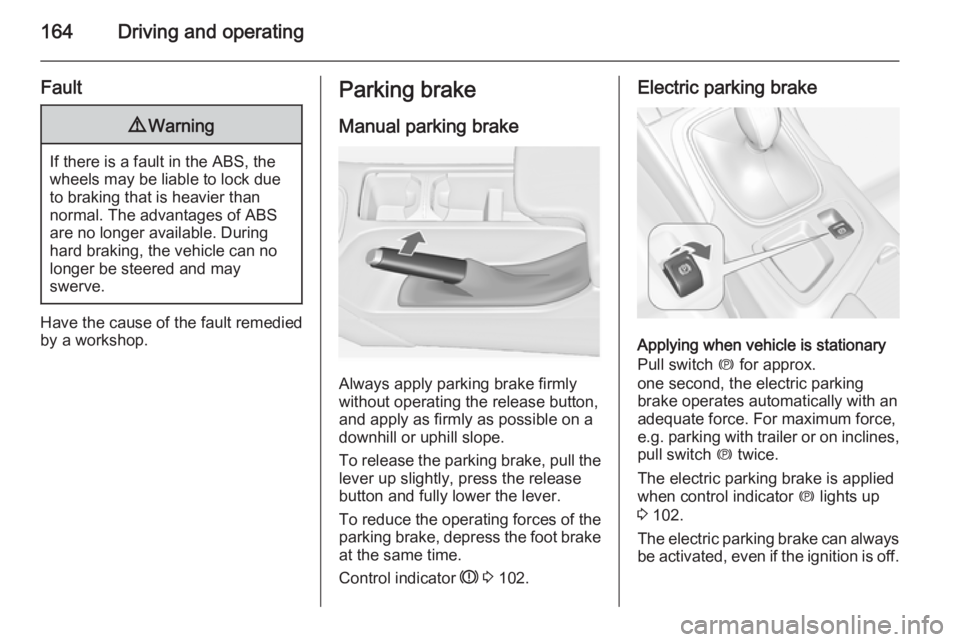
Manual parking brake
Always apply parking brake firmly
without operating the release button,
and apply as firmly as possible on a
downhill or uphill slope.
To release the parking brake, pull the lever up slightly, press the release
button and fully lower the lever.
To reduce the operating forces of the
parking brake, depress the foot brake
at the same time.
Control indicator R 3 102.
Electric parking brake
Applying when vehicle is stationary
Pull switch m for approx.
one second, the electric parking
brake operates automatically with an adequate force. For maximum force,
e.g. parking with trailer or on inclines,
pull switch m twice.
The electric parking brake is applied
when control indicator m lights up
3 102.
The electric parking brake can always
be activated, even if the ignition is off.