cooling OPEL INSIGNIA 2017 Manual user
[x] Cancel search | Manufacturer: OPEL, Model Year: 2017, Model line: INSIGNIA, Model: OPEL INSIGNIA 2017Pages: 327, PDF Size: 9.3 MB
Page 151 of 327

Climate control149Basic setting for maximum comfort:● Press AUTO, the air distribution
and fan speed are regulated
automatically. The LED in the
button illuminates to indicate
activation.
● Press A/C to switch on optimal
cooling and demisting. The LED in the button illuminates to
indicate activation.
● Set temperature by touching R or
S on the driver side. Suggested
comfort setting is 22 °C.
Temperature can be set
differently for driver and
passenger. Touch R or S on the
passenger side to allow different
temperature zones.
● Open all air vents to allow optimised air distribution in
automatic mode.
Setting of fan speed regulation in
automatic mode can be changed in
the vehicle personalisation menu in
the Colour-Info-Display.
Select the relevant setting in Settings,
I Vehicle in the Colour-Info-Display.
Colour-Info-Display 3 118.Vehicle personalisation 3 121.
Temperature preselection SR
Set desired temperature by touching
R for higher temperatures or S for
lower temperatures.
Selected temperature is indicated in
the panels. Using driver's side panel
changes temperatures for both sides (when SYNC is selected), while using
the passenger side panel changes
only the passenger side temperature and turns off SYNC (if previously
selected).
If the minimum temperature Lo is set,
the climate control system runs at
maximum cooling, if cooling A/C is
switched on.
If the maximum temperature Hi is set,
the climate control system runs at
maximum heating.
Note
If AC is switched on, reducing the set
cabin temperature can cause the
engine to restart from an Autostop or
inhibit an Autostop.
Stop-start system 3 160.
Dual zone temperature
synchronisation SYNC
Press SYNC to link passenger side
temperature setting to the driver side.
The LED in the button illuminates to
indicate activation.
When passenger side settings will be
adjusted, the LED extinguishes.
Page 153 of 327
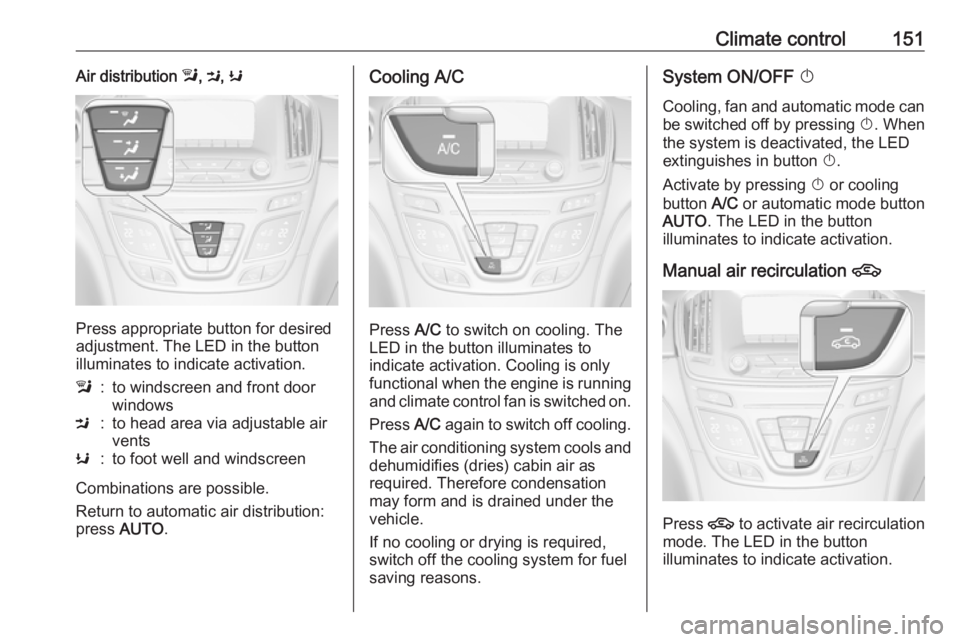
Climate control151Air distribution l, M , K
Press appropriate button for desired
adjustment. The LED in the button
illuminates to indicate activation.
l:to windscreen and front door
windowsM:to head area via adjustable air
ventsK:to foot well and windscreen
Combinations are possible.
Return to automatic air distribution:
press AUTO .
Cooling A/C
Press A/C to switch on cooling. The
LED in the button illuminates to
indicate activation. Cooling is only
functional when the engine is running and climate control fan is switched on.
Press A/C again to switch off cooling.
The air conditioning system cools and
dehumidifies (dries) cabin air as
required. Therefore condensation
may form and is drained under the
vehicle.
If no cooling or drying is required,
switch off the cooling system for fuel
saving reasons.
System ON/OFF X
Cooling, fan and automatic mode can
be switched off by pressing X. When
the system is deactivated, the LED
extinguishes in button X.
Activate by pressing X or cooling
button A/C or automatic mode button
AUTO . The LED in the button
illuminates to indicate activation.
Manual air recirculation 4
Press 4 to activate air recirculation
mode. The LED in the button
illuminates to indicate activation.
Page 154 of 327
152Climate controlSelect air recirculation to assist incooling the interior or in blocking
outside odours or exhaust. When
recirculation is selected, a partial
ventilation to refresh the interior air
will occur every 10 minutes.
Press 4 again to deactivate
recirculation mode.
In warm and very humid ambient air conditions, the windscreen may mist
up from outside when cold air is
directed towards it. If windscreen
mists up from outside, activate
windscreen wiper and deactivate l.
Automatic air recirculation An air humidity sensor automatically
switches the system to external air if
internal air humidity is too high.
Basic settings Some basic settings can be changed
in the vehicle personalisation menu in
the Colour-Info-Display.
Select the relevant settings in
Settings , I Vehicle in the Colour-Info-
Display.
Colour-Info-Display 3 118.Vehicle personalisation 3 121.
Auxiliary heater
Air heater Quickheat is an electric auxiliary air
heater which automatically warms up
the passenger compartment more
quickly.Air vents
Adjustable air vents Front air vents
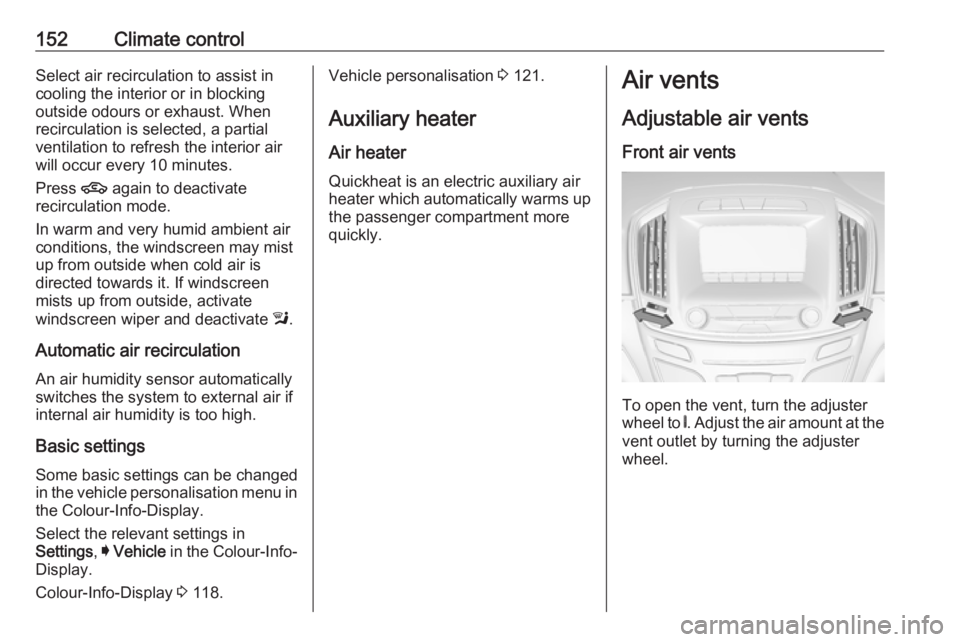
To open the vent, turn the adjuster
wheel to B. Adjust the air amount at the
vent outlet by turning the adjuster
wheel.
Page 156 of 327

154Climate controlActive carbon filter
In addition to the particle filter, the active carbon filter reduces odours.
Air conditioning regularoperation
In order to ensure continuously
efficient performance, it is
recommended that air conditioning
should be operated for a few minutes once a month, irrespective of the
weather and time of year.
Service For optimal cooling performance, it is recommended to annually check the
climate control system, starting
three years after initial vehicle
registration, including:
● functionality and pressure test
● heating functionality
● leakage check
● check of drive belts
● cleaning of condenser and evaporator drainage
● performance checkNote
Refrigerant R-134a contains
fluorinated greenhouse gases.
Page 165 of 327
Driving and operating163Parking9Warning
● Do not park the vehicle on an
easily ignitable surface. The
high temperature of the
exhaust system could ignite the
surface.
● Always apply the parking brake. Activate the manual
parking brake without pressing the release button. Apply as
firmly as possible on a downhill slope or uphill slope. Depress
brake pedal at the same time to
reduce operating force.
For vehicles with electric
parking brake, pull switch m for
approx. one second.
The electric parking brake is
applied when control indicator
m illuminates 3 106.
● Switch off the engine.
● If the vehicle is on a level surface or uphill slope, engage
first gear or set the selector
lever to position P before
removing the ignition key or
switching off ignition on
vehicles with power button. On
an uphill slope, turn the front
wheels away from the kerb.
If the vehicle is on a downhill
slope, engage reverse gear or
set the selector lever to position
P before removing the ignition
key or switching off ignition on
vehicles with power button.
Turn the front wheels towards
the kerb.
● Close the windows and the sunroof.
● Remove the ignition key from the ignition switch or switch off
ignition on vehicles with power
button. Turn the steering wheel until the steering wheel lock is
felt to engage.
For vehicles with automatic
transmission, the key can only
be removed when the selector
lever is in position P.●
Lock the vehicle with button e on
the radio remote control.
Activate the anti-theft alarm
system 3 35.
● The engine cooling fans may run
after the engine has been
switched off 3 228.Caution
After running at high engine
speeds or with high engine loads,
operate the engine briefly at a low load or run in neutral for
approx. 30 seconds before
switching off, in order to protect
the turbocharger.
Note
In the event of an accident with
airbag deployment, the engine is
turned off automatically if the vehicle
comes to a standstill within a certain time.
Page 224 of 327
222Driving and operatingFuel consumption data and CO2
emission data are determined
according to regulation R (EC) No.
715/2007 (in the version respectively
applicable), taking into consideration
the vehicle weight in running order, as specified by the regulation.
The figures are provided only for the
purpose of comparison between
different vehicle variants and must not be taken as a guarantee for the
actual fuel consumption of a
particular vehicle. Additional
equipment may result in slightly
higher results than the stated
consumption and CO 2 figures.
Furthermore, fuel consumption is
dependent on personal driving style
as well as road and traffic conditions.Trailer hitch
General information
The factory-fitted towing equipment is
folded up under the rear bumper
fascia.
Entrust retrofitting of towing
equipment to a workshop. It may be
necessary to make changes that
affect the cooling system, heat
shields or other equipment. Only use
towing equipment that has been
approved for your vehicle.
To avoid vehicle damage, the power
tailgate cannot be operated with the
radio remote control when a trailer is
electrically connected.
The bulb outage detection function for trailer brake light cannot detect a
partial bulb outage, e.g. in case of four
times five watt bulbs, the function only detects lamp outage when only a
single five Watt lamp remains or none
remain.
Fitting of towing equipment could
cover the opening of the towing eye.
If this is the case use the coupling ball bar for towing.Driving characteristics and
towing tips
Before attaching a trailer, lubricate the coupling ball. However, do not do
so if a stabiliser, which acts on the
coupling ball, is being used to reduce snaking movements.
For trailers with low driving stability
and trailers with a permitted gross
vehicle weight of more than 1400 kg (Front-wheel drive)/1600 kg (All-
wheel drive) the use of a stabiliser is
strongly recommended when driving
above 80 km/h.
If the trailer starts snaking, drive more
slowly, do not attempt to correct the
steering and brake sharply if
necessary.
When driving downhill, drive in the
same gear as if driving uphill and
drive at a similar speed.
Adjust tyre pressure to the value
specified for full load 3 295.
Page 230 of 327
228Vehicle care● Since the durability of AdBlue islimited to two years, fluid should
be exchanged if it is too old. Seek the assistance of a workshop.
● Fit the number plate if necessary.
End-of-life vehicle recovery
Information on end-of-life vehicle
recovery centres and the recycling of
end-of-life vehicles is available on our website, where legally required. Only
entrust this work to an authorised
recycling centre.
Gas vehicles must be recycled by a
service centre authorised for gas
vehicles.Vehicle checks
Performing work9 Warning
Only perform engine compartment
checks when the ignition is off.
The cooling fan may start
operating even if the ignition is off.
9 Danger
The ignition system and Xenon
headlights use extremely high
voltage. Do not touch.
Bonnet
Opening
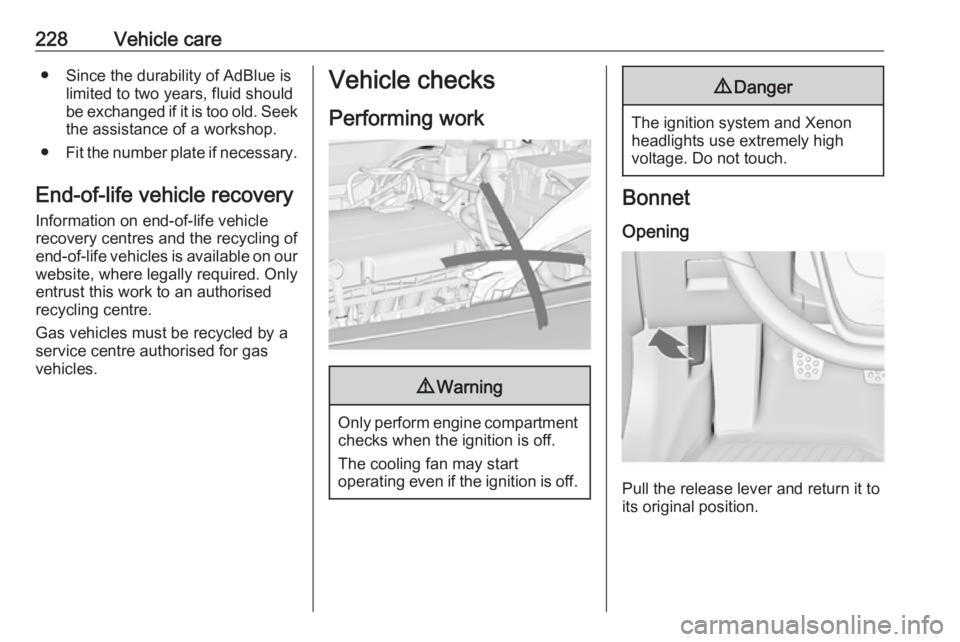
Pull the release lever and return it to
its original position.
Page 233 of 327
Vehicle care231Engine coolant
The coolant provides freeze
protection down to approx. -28 °C. In
cold regions with very low
temperatures, the factory filled
coolant provides frost protection
down to approx. -37 °C.Caution
Only use approved antifreeze.
Coolant and antifreeze 3 276.
Coolant level
Caution
Too low a coolant level can cause engine damage.
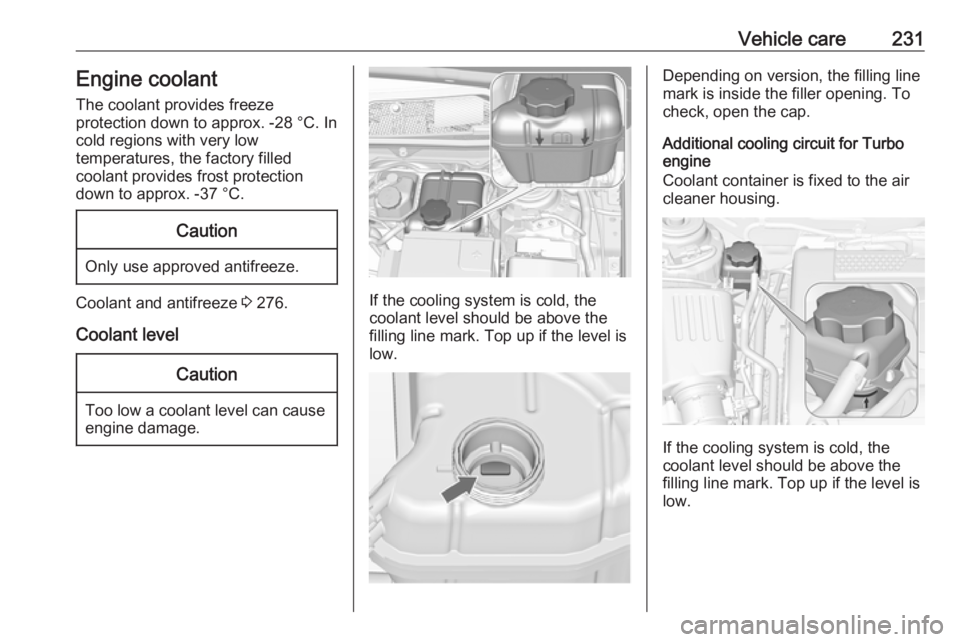
If the cooling system is cold, the
coolant level should be above the
filling line mark. Top up if the level is
low.
Depending on version, the filling line
mark is inside the filler opening. To check, open the cap.
Additional cooling circuit for Turbo
engine
Coolant container is fixed to the air
cleaner housing.
If the cooling system is cold, the
coolant level should be above the
filling line mark. Top up if the level is
low.
Page 253 of 327
Vehicle care251No.Circuit1Infotainment system/Info
display/Anti-theft alarm system2Body control unit3Body control unit4Infotainment system/Info
display5Infotainment system/Info
display/High beam assist6Cigarette lighter7Power outlet8Body control unit9Body control unit10Body control unit11Interior fan12–13–14Diagnostic connector15AirbagNo.Circuit16Central locking system/Tailgate17Air conditioning system18Transportation fuse19Memory20–21Instrument22Ignition/Central locking system/
Electronic key system23Body control unit24Body control unit25Steering wheel control26Power outlet load compartment
Power seats, No's. 12 and 13, have
an overload protection. The circuit will
be closed again after cooling down.
Load compartment fuse box
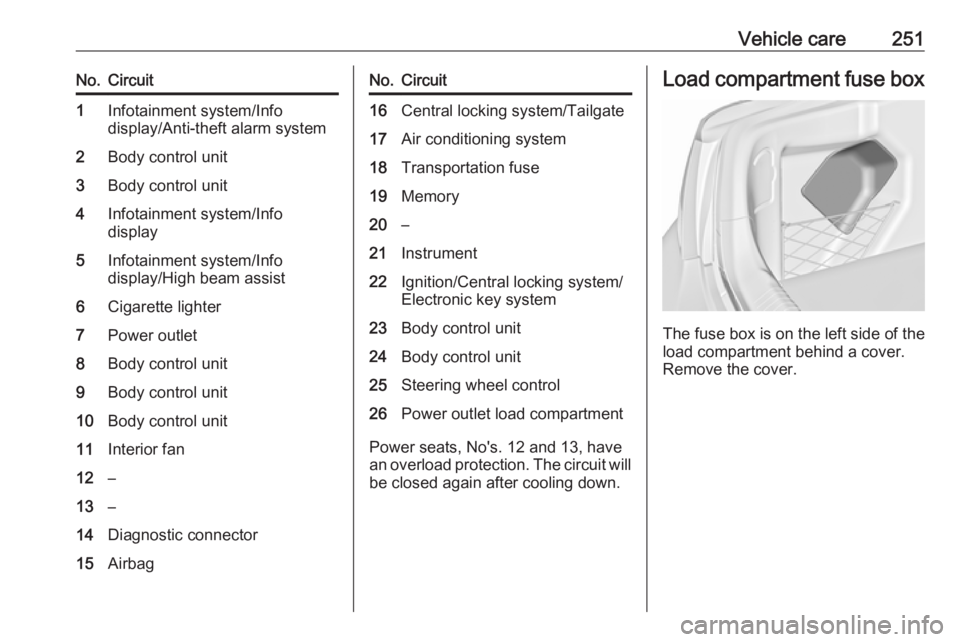
The fuse box is on the left side of the
load compartment behind a cover.
Remove the cover.
Page 260 of 327
258Vehicle care
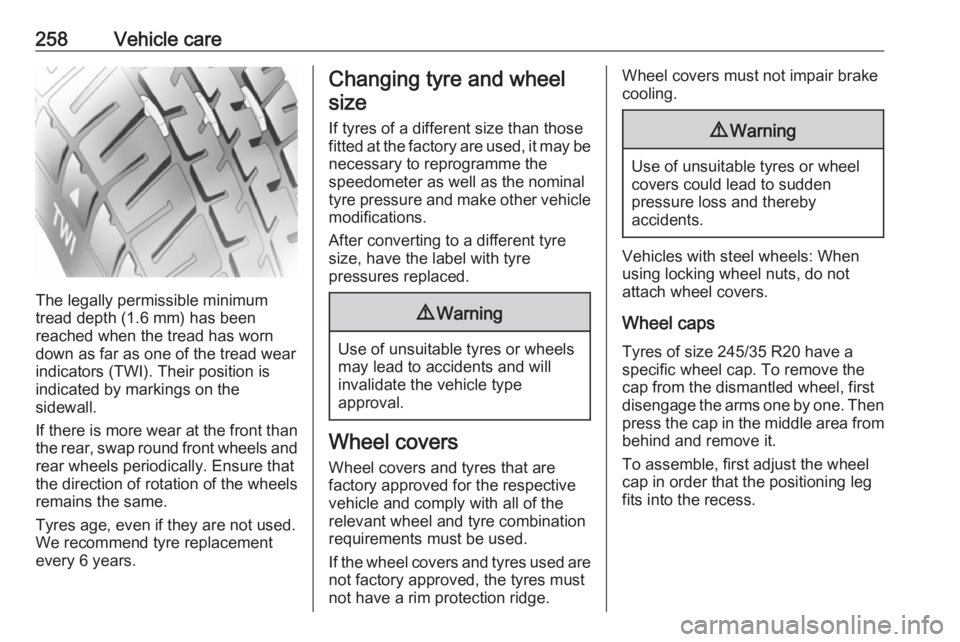
The legally permissible minimum
tread depth (1.6 mm) has been
reached when the tread has worn
down as far as one of the tread wear
indicators (TWI). Their position is
indicated by markings on the
sidewall.
If there is more wear at the front than
the rear, swap round front wheels and rear wheels periodically. Ensure that
the direction of rotation of the wheels
remains the same.
Tyres age, even if they are not used.
We recommend tyre replacement
every 6 years.
Changing tyre and wheel
size
If tyres of a different size than those
fitted at the factory are used, it may be necessary to reprogramme the
speedometer as well as the nominal
tyre pressure and make other vehicle modifications.
After converting to a different tyre
size, have the label with tyre
pressures replaced.9 Warning
Use of unsuitable tyres or wheels
may lead to accidents and will
invalidate the vehicle type
approval.
Wheel covers
Wheel covers and tyres that are
factory approved for the respective
vehicle and comply with all of the
relevant wheel and tyre combination requirements must be used.
If the wheel covers and tyres used are
not factory approved, the tyres must
not have a rim protection ridge.
Wheel covers must not impair brake
cooling.9 Warning
Use of unsuitable tyres or wheel
covers could lead to sudden
pressure loss and thereby
accidents.
Vehicles with steel wheels: When
using locking wheel nuts, do not
attach wheel covers.
Wheel caps Tyres of size 245/35 R20 have a
specific wheel cap. To remove the
cap from the dismantled wheel, first
disengage the arms one by one. Then press the cap in the middle area from
behind and remove it.
To assemble, first adjust the wheel
cap in order that the positioning leg
fits into the recess.