seat adjustment OPEL INSIGNIA 2017 Manual user
[x] Cancel search | Manufacturer: OPEL, Model Year: 2017, Model line: INSIGNIA, Model: OPEL INSIGNIA 2017Pages: 327, PDF Size: 9.3 MB
Page 8 of 327
6In briefIn briefInitial drive informationVehicle unlocking
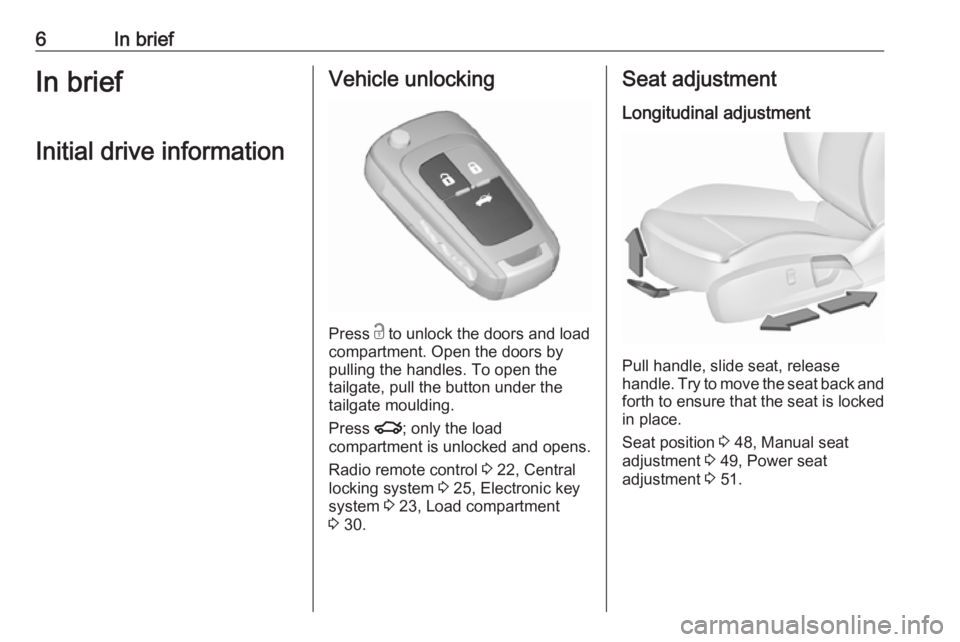
Press c
to unlock the doors and load
compartment. Open the doors by
pulling the handles. To open the
tailgate, pull the button under the
tailgate moulding.
Press x; only the load
compartment is unlocked and opens.
Radio remote control 3 22, Central
locking system 3 25, Electronic key
system 3 23, Load compartment
3 30.
Seat adjustment
Longitudinal adjustment
Pull handle, slide seat, release
handle. Try to move the seat back and forth to ensure that the seat is locked
in place.
Seat position 3 48, Manual seat
adjustment 3 49, Power seat
adjustment 3 51.
Page 9 of 327
In brief7Backrest inclination
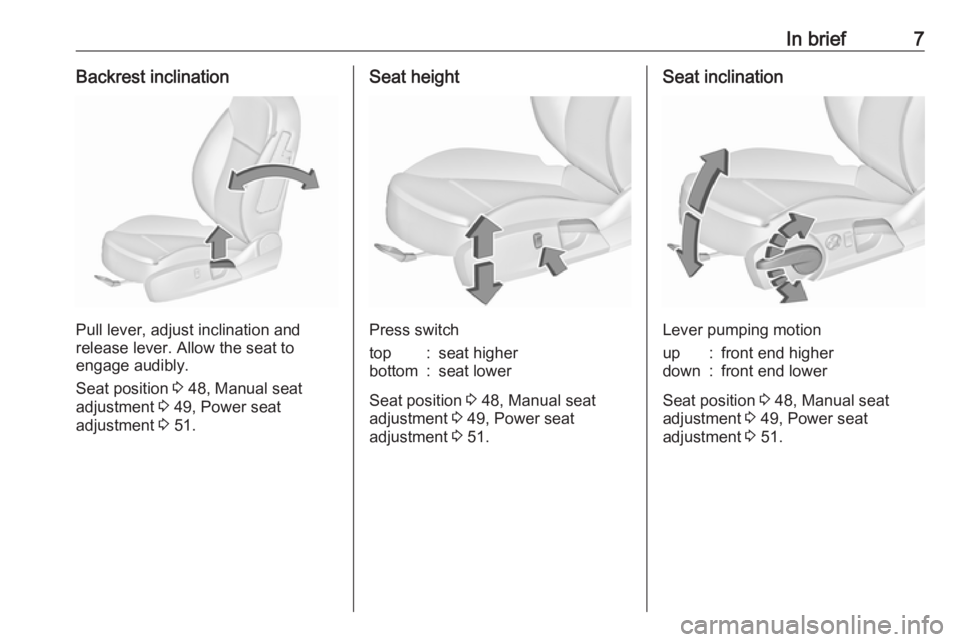
Pull lever, adjust inclination and
release lever. Allow the seat to
engage audibly.
Seat position 3 48, Manual seat
adjustment 3 49, Power seat
adjustment 3 51.
Seat height
Press switch
top:seat higherbottom:seat lower
Seat position 3 48, Manual seat
adjustment 3 49, Power seat
adjustment 3 51.
Seat inclination
Lever pumping motion
up:front end higherdown:front end lower
Seat position 3 48, Manual seat
adjustment 3 49, Power seat
adjustment 3 51.
Page 10 of 327
8In briefHead restraint adjustment
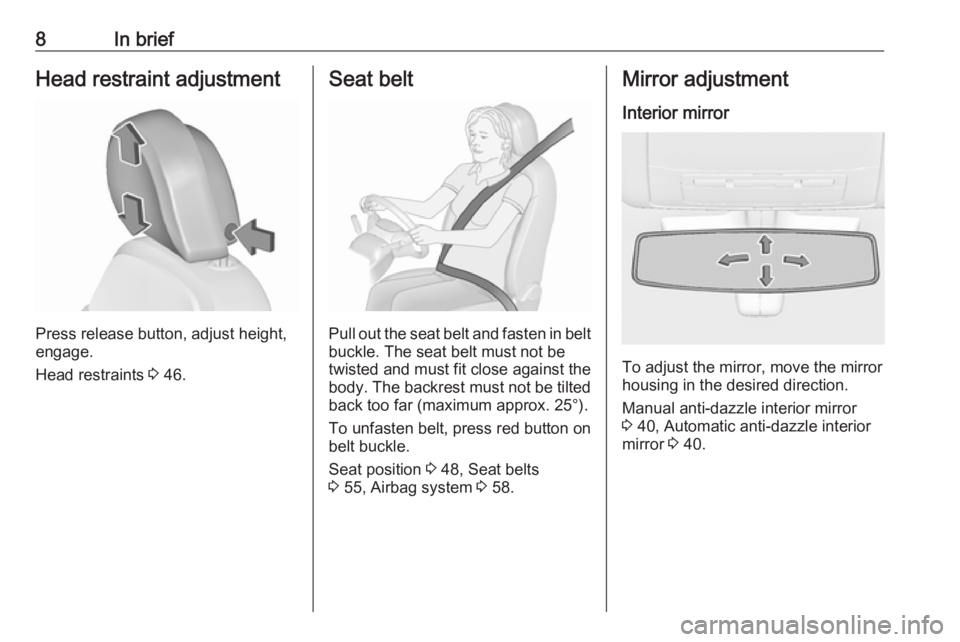
Press release button, adjust height,
engage.
Head restraints 3 46.
Seat belt
Pull out the seat belt and fasten in belt
buckle. The seat belt must not be
twisted and must fit close against the
body. The backrest must not be tilted back too far (maximum approx. 25°).
To unfasten belt, press red button on belt buckle.
Seat position 3 48, Seat belts
3 55, Airbag system 3 58.
Mirror adjustment
Interior mirror
To adjust the mirror, move the mirror
housing in the desired direction.
Manual anti-dazzle interior mirror
3 40, Automatic anti-dazzle interior
mirror 3 40.
Page 13 of 327
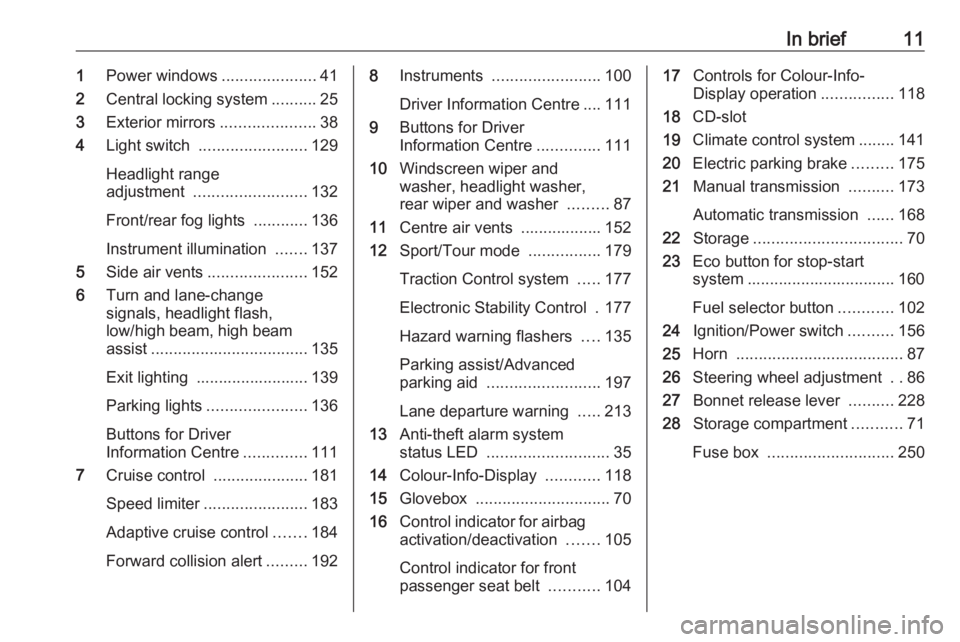
In brief111Power windows .....................41
2 Central locking system ..........25
3 Exterior mirrors .....................38
4 Light switch ........................ 129
Headlight range
adjustment ......................... 132
Front/rear fog lights ............136
Instrument illumination .......137
5 Side air vents ...................... 152
6 Turn and lane-change
signals, headlight flash,
low/high beam, high beam assist ................................... 135
Exit lighting ......................... 139
Parking lights ...................... 136
Buttons for Driver
Information Centre ..............111
7 Cruise control .....................181
Speed limiter ....................... 183
Adaptive cruise control .......184
Forward collision alert .........1928Instruments ........................ 100
Driver Information Centre .... 111
9 Buttons for Driver
Information Centre ..............111
10 Windscreen wiper and
washer, headlight washer,
rear wiper and washer .........87
11 Centre air vents .................. 152
12 Sport/Tour mode ................179
Traction Control system .....177
Electronic Stability Control . 177
Hazard warning flashers ....135
Parking assist/Advanced
parking aid ......................... 197
Lane departure warning .....213
13 Anti-theft alarm system
status LED ........................... 35
14 Colour-Info-Display ............118
15 Glovebox .............................. 70
16 Control indicator for airbag
activation/deactivation .......105
Control indicator for front
passenger seat belt ...........10417Controls for Colour-Info-
Display operation ................118
18 CD-slot
19 Climate control system ........ 141
20 Electric parking brake .........175
21 Manual transmission ..........173
Automatic transmission ......168
22 Storage ................................. 70
23 Eco button for stop-start
system ................................. 160
Fuel selector button ............102
24 Ignition/Power switch ..........156
25 Horn ..................................... 87
26 Steering wheel adjustment ..86
27 Bonnet release lever ..........228
28 Storage compartment ...........71
Fuse box ............................ 250
Page 26 of 327
24Keys, doors and windowsNote
Do not put the electronic key in the
load compartment or in front of the
Info-Display.
Replacing battery in electronic
key
Replace the battery as soon as the
system no longer operates properly
or the range is reduced. The need for battery replacement is indicated by a
message in the Driver Information
Centre 3 120.
Battery replacement, see 'Radio
remote control' 3 22.
Electronic key synchronisation The electronic key synchronises itself automatically during every starting
procedure.Fault
If the central locking cannot be
operated or the engine cannot be
started, the cause may be one of the
following:
● Fault in electronic key.
● Electronic key is out of reception range.
● The battery voltage is too low. ● Overload of the central locking system by operating at frequent
intervals; the power supply is
interrupted for a short time.
● Interference from higher-power radio waves from other sources.
To rectify the cause of the fault,
change the position of the electronic
key.
Manual unlocking 3 25.
Memorised settings
Whenever the ignition is switched off, the following settings are
automatically memorised by the
remote control unit or the electronic key:● automatic climate control
● lighting
● Infotainment system
● central locking system
● Sport mode settings
● comfort settings
The saved settings are automatically
used the next time the ignition is
switched on with the memorised key
with remote control unit 3 156 or
electronic key 3 23.
A precondition is that Personalisation
by Driver is activated in the personal
settings of the Info-Display. This must
be set for each remote control unit or
electronic key which is used.
Also memorised are the adjustments
of the driver's seat and exterior
mirrors, independent of the memory
positions 3 51.
Power seat automatically moves into the saved position when unlocking
and opening the driver's door with the
memorised remote control or
electronic key and Auto Memory
Recall in the Info-Display is activated.
Vehicle personalisation 3 121.
Page 48 of 327
46Seats, restraintsSeats, restraintsHead restraints............................ 46
Active head restraints ................47
Front seats ................................... 48
Seat position .............................. 48
Manual seat adjustment ............49
Power seat adjustment ..............51
Armrest ...................................... 53
Heating ...................................... 54
Ventilating .................................. 54
Rear seats ................................... 54
Armrest ...................................... 54
Seat belts ..................................... 55
Three-point seat belt .................56
Airbag system .............................. 58
Front airbag system ...................61
Side airbag system ....................62
Curtain airbag system ...............62
Airbag deactivation ....................63
Child restraints ............................. 64
Child restraint systems ..............64
Child restraint installation locations ................................... 66
ISOFIX child restraint systems ..69
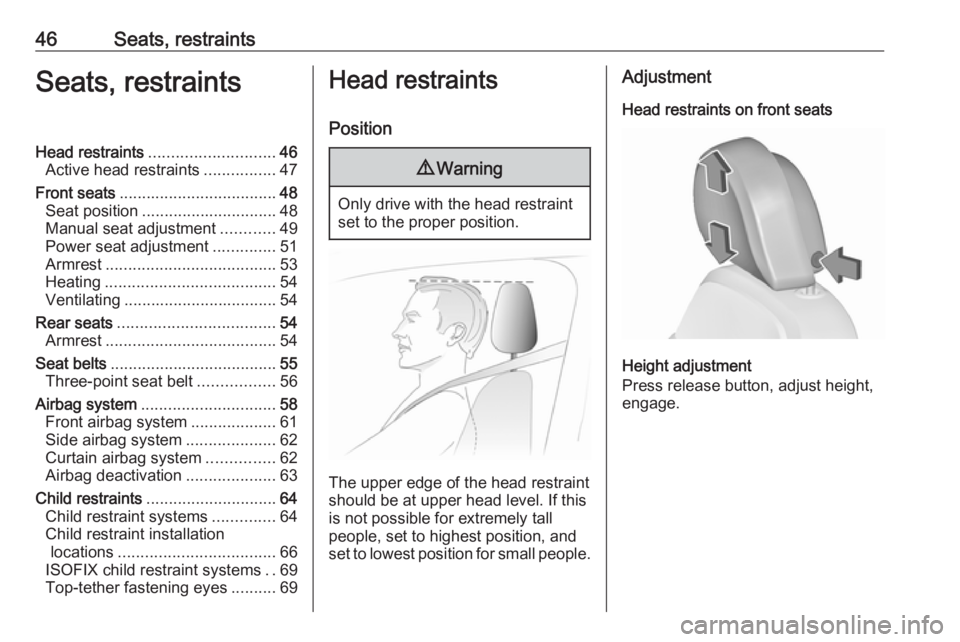
Top-tether fastening eyes ..........69Head restraints
Position9 Warning
Only drive with the head restraint
set to the proper position.
The upper edge of the head restraint
should be at upper head level. If this
is not possible for extremely tall
people, set to highest position, and
set to lowest position for small people.
Adjustment
Head restraints on front seats
Height adjustment
Press release button, adjust height,
engage.
Page 49 of 327
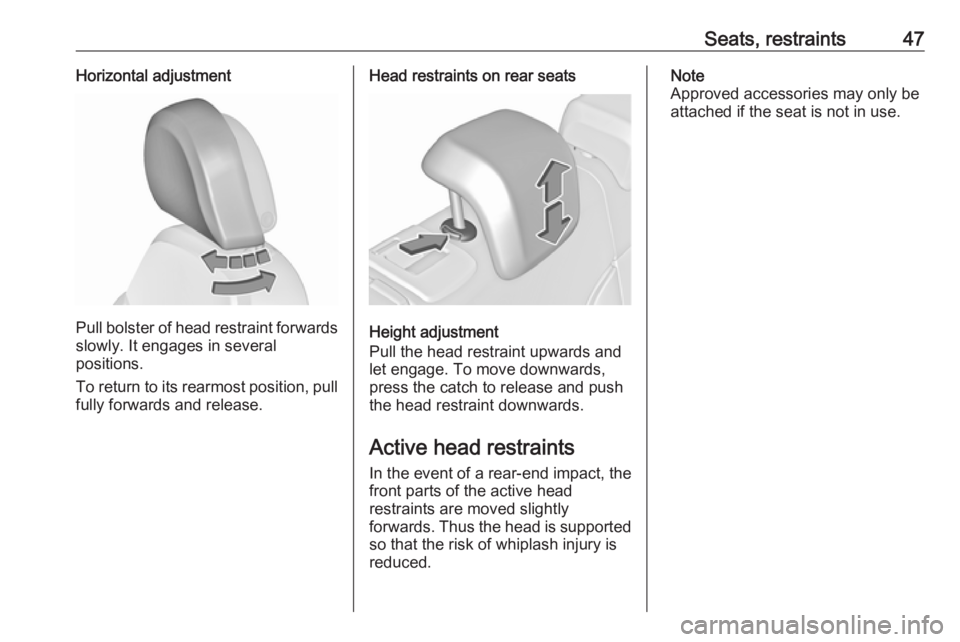
Seats, restraints47Horizontal adjustment
Pull bolster of head restraint forwardsslowly. It engages in several
positions.
To return to its rearmost position, pull
fully forwards and release.
Head restraints on rear seats
Height adjustment
Pull the head restraint upwards and
let engage. To move downwards, press the catch to release and push
the head restraint downwards.
Active head restraints
In the event of a rear-end impact, the
front parts of the active head
restraints are moved slightly
forwards. Thus the head is supported
so that the risk of whiplash injury is
reduced.
Note
Approved accessories may only be attached if the seat is not in use.
Page 51 of 327
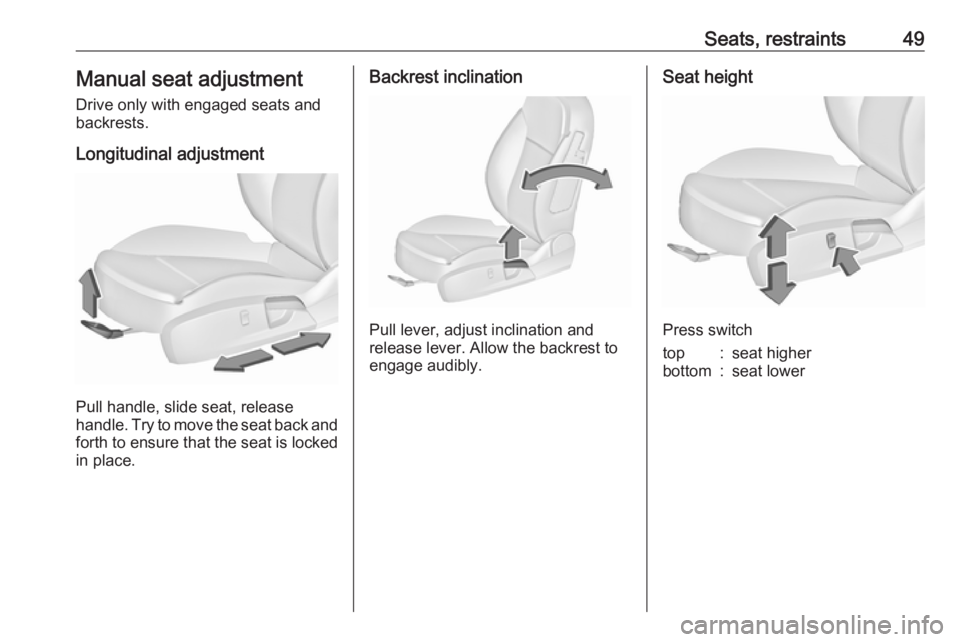
Seats, restraints49Manual seat adjustment
Drive only with engaged seats and
backrests.
Longitudinal adjustment
Pull handle, slide seat, release
handle. Try to move the seat back and forth to ensure that the seat is locked
in place.
Backrest inclination
Pull lever, adjust inclination and
release lever. Allow the backrest to
engage audibly.
Seat height
Press switch
top:seat higherbottom:seat lower
Page 53 of 327
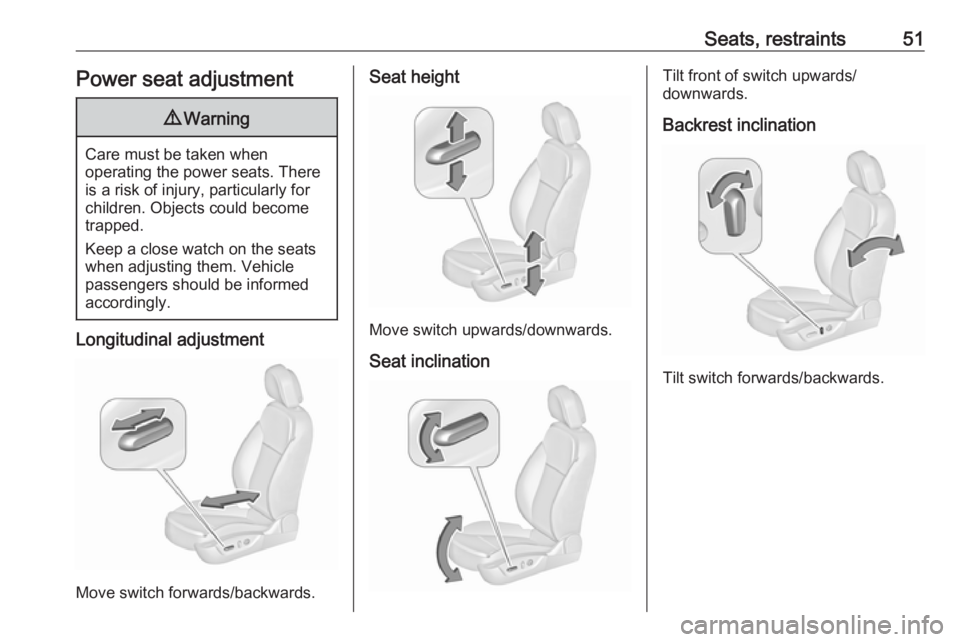
Seats, restraints51Power seat adjustment9Warning
Care must be taken when
operating the power seats. There
is a risk of injury, particularly for
children. Objects could become
trapped.
Keep a close watch on the seats
when adjusting them. Vehicle
passengers should be informed
accordingly.
Longitudinal adjustment
Move switch forwards/backwards.
Seat height
Move switch upwards/downwards.
Seat inclination
Tilt front of switch upwards/
downwards.
Backrest inclination
Tilt switch forwards/backwards.
Page 54 of 327
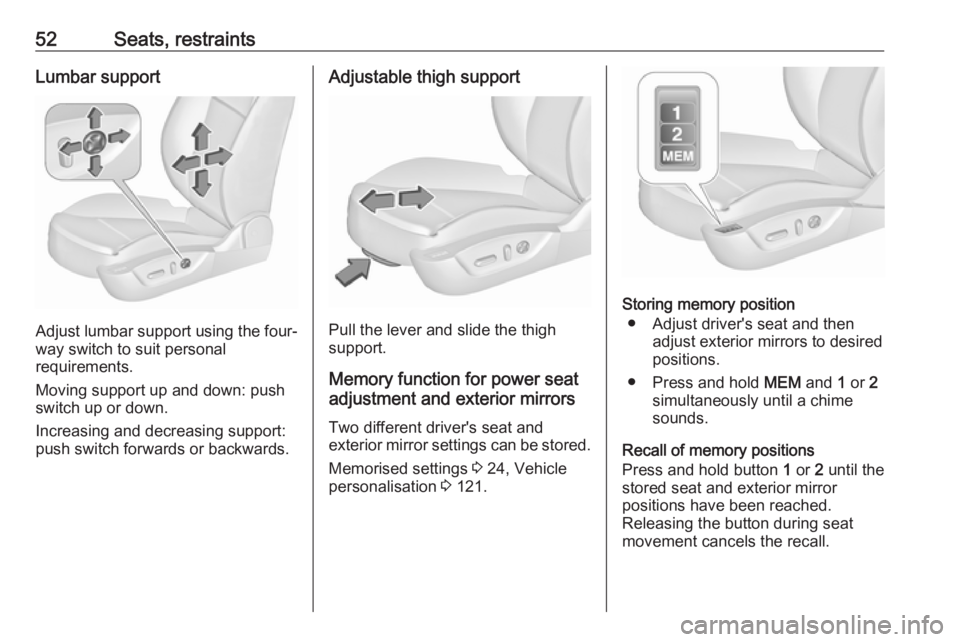
52Seats, restraintsLumbar support
Adjust lumbar support using the four-way switch to suit personal
requirements.
Moving support up and down: push switch up or down.
Increasing and decreasing support:
push switch forwards or backwards.
Adjustable thigh support
Pull the lever and slide the thigh
support.
Memory function for power seat
adjustment and exterior mirrors
Two different driver's seat and
exterior mirror settings can be stored.
Memorised settings 3 24, Vehicle
personalisation 3 121.
Storing memory position
● Adjust driver's seat and then adjust exterior mirrors to desired
positions.
● Press and hold MEM and 1 or 2
simultaneously until a chime
sounds.
Recall of memory positions
Press and hold button 1 or 2 until the
stored seat and exterior mirror positions have been reached.
Releasing the button during seat
movement cancels the recall.