warning light OPEL INSIGNIA 2017 Manual user
[x] Cancel search | Manufacturer: OPEL, Model Year: 2017, Model line: INSIGNIA, Model: OPEL INSIGNIA 2017Pages: 327, PDF Size: 9.3 MB
Page 13 of 327
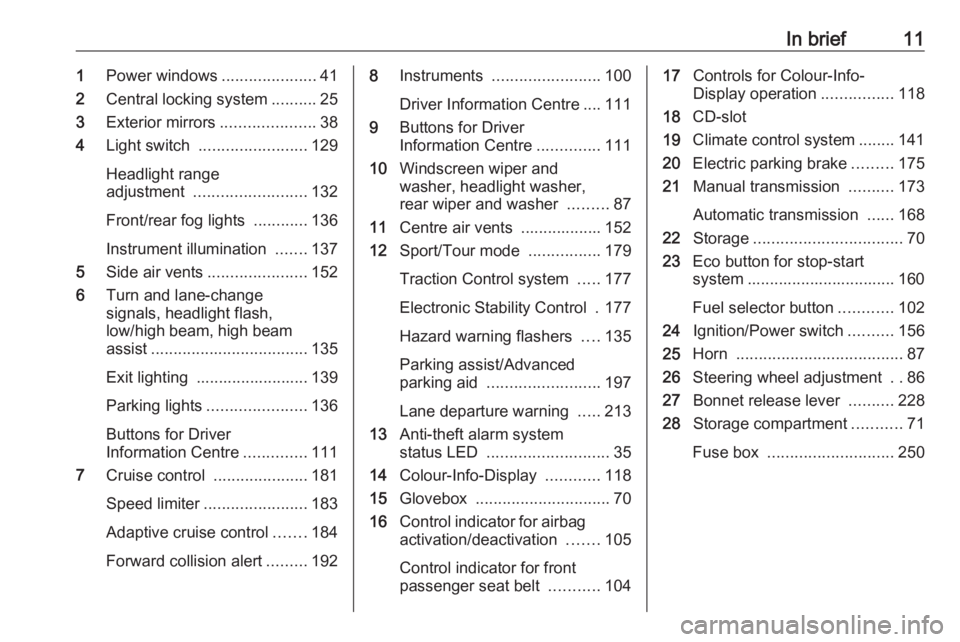
In brief111Power windows .....................41
2 Central locking system ..........25
3 Exterior mirrors .....................38
4 Light switch ........................ 129
Headlight range
adjustment ......................... 132
Front/rear fog lights ............136
Instrument illumination .......137
5 Side air vents ...................... 152
6 Turn and lane-change
signals, headlight flash,
low/high beam, high beam assist ................................... 135
Exit lighting ......................... 139
Parking lights ...................... 136
Buttons for Driver
Information Centre ..............111
7 Cruise control .....................181
Speed limiter ....................... 183
Adaptive cruise control .......184
Forward collision alert .........1928Instruments ........................ 100
Driver Information Centre .... 111
9 Buttons for Driver
Information Centre ..............111
10 Windscreen wiper and
washer, headlight washer,
rear wiper and washer .........87
11 Centre air vents .................. 152
12 Sport/Tour mode ................179
Traction Control system .....177
Electronic Stability Control . 177
Hazard warning flashers ....135
Parking assist/Advanced
parking aid ......................... 197
Lane departure warning .....213
13 Anti-theft alarm system
status LED ........................... 35
14 Colour-Info-Display ............118
15 Glovebox .............................. 70
16 Control indicator for airbag
activation/deactivation .......105
Control indicator for front
passenger seat belt ...........10417Controls for Colour-Info-
Display operation ................118
18 CD-slot
19 Climate control system ........ 141
20 Electric parking brake .........175
21 Manual transmission ..........173
Automatic transmission ......168
22 Storage ................................. 70
23 Eco button for stop-start
system ................................. 160
Fuel selector button ............102
24 Ignition/Power switch ..........156
25 Horn ..................................... 87
26 Steering wheel adjustment ..86
27 Bonnet release lever ..........228
28 Storage compartment ...........71
Fuse box ............................ 250
Page 33 of 327
Keys, doors and windows31Power tailgate9Warning
Take care when operating the
power tailgate. Risk of injury,
particularly to children.
Keep a close watch on the
movable tailgate when operating.
Ensure that nothing becomes
trapped during operating and no
one is standing within the moving
area.
The power tailgate can be operated
by:
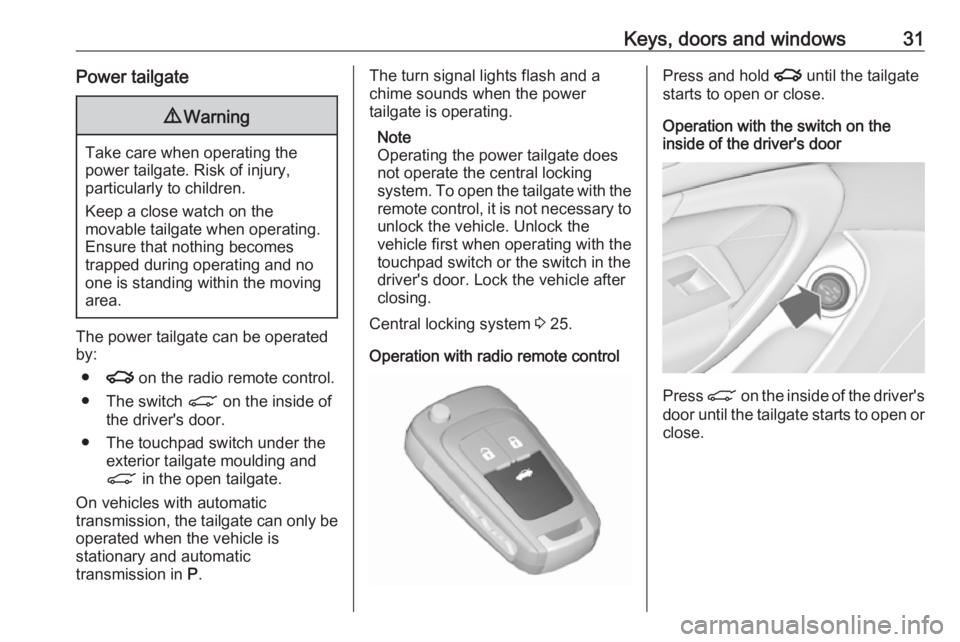
● x on the radio remote control.
● The switch C on the inside of
the driver's door.
● The touchpad switch under the exterior tailgate moulding and
C in the open tailgate.
On vehicles with automatic
transmission, the tailgate can only be operated when the vehicle is
stationary and automatic
transmission in P.
The turn signal lights flash and a
chime sounds when the power
tailgate is operating.
Note
Operating the power tailgate does not operate the central locking
system. To open the tailgate with the
remote control, it is not necessary to unlock the vehicle. Unlock the
vehicle first when operating with the
touchpad switch or the switch in the
driver's door. Lock the vehicle after
closing.
Central locking system 3 25.
Operation with radio remote controlPress and hold x until the tailgate
starts to open or close.
Operation with the switch on the
inside of the driver's door
Press C on the inside of the driver's
door until the tailgate starts to open or close.
Page 35 of 327
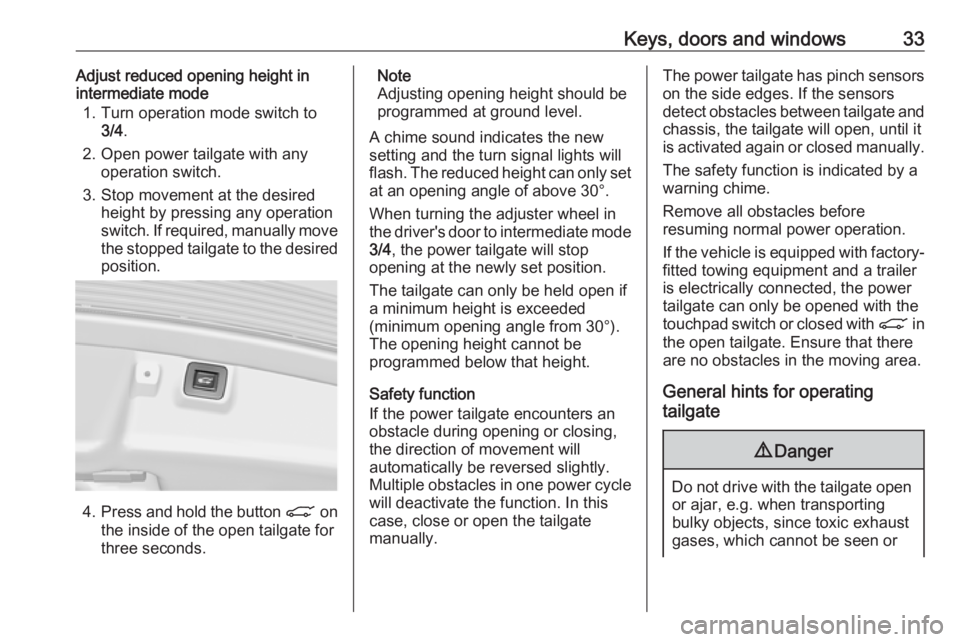
Keys, doors and windows33Adjust reduced opening height in
intermediate mode
1. Turn operation mode switch to 3/4 .
2. Open power tailgate with any operation switch.
3. Stop movement at the desired height by pressing any operation
switch. If required, manually move
the stopped tailgate to the desired position.
4. Press and hold the button C on
the inside of the open tailgate for
three seconds.
Note
Adjusting opening height should be
programmed at ground level.
A chime sound indicates the new
setting and the turn signal lights will
flash. The reduced height can only set at an opening angle of above 30°.
When turning the adjuster wheel in
the driver's door to intermediate mode 3/4 , the power tailgate will stop
opening at the newly set position.
The tailgate can only be held open if a minimum height is exceeded
(minimum opening angle from 30°).
The opening height cannot be
programmed below that height.
Safety function
If the power tailgate encounters an obstacle during opening or closing,
the direction of movement will
automatically be reversed slightly.
Multiple obstacles in one power cycle
will deactivate the function. In this
case, close or open the tailgate
manually.The power tailgate has pinch sensors
on the side edges. If the sensors
detect obstacles between tailgate and chassis, the tailgate will open, until it
is activated again or closed manually.
The safety function is indicated by a
warning chime.
Remove all obstacles before
resuming normal power operation.
If the vehicle is equipped with factory-
fitted towing equipment and a trailer
is electrically connected, the power
tailgate can only be opened with the
touchpad switch or closed with C in
the open tailgate. Ensure that there are no obstacles in the moving area.
General hints for operating
tailgate9 Danger
Do not drive with the tailgate open
or ajar, e.g. when transporting
bulky objects, since toxic exhaust
gases, which cannot be seen or
Page 36 of 327
34Keys, doors and windowssmelled, could enter the vehicle.
This can cause unconsciousness
and even death.Caution
Before opening the tailgate, check overhead obstructions, such as a
garage door, to avoid damage to
the tailgate. Always check the
moving area above and behind the
tailgate.
Note
Power tailgate: If the lifters of the
open tailgate lose pressure, the
tailgate falls a bit and will then be
stopped by the system. Following
the tailgate will be power opened
and closed. During this the tail lights will flash and a chime will sound.
After closing, the tailgate may not be operated until it has been serviced
by a workshop.
Note
The operation of the power tailgate
is disabled under low vehicle battery
conditions. In this case, the tailgate
may not even by manually operable.
Note
With the power tailgate disabled and
all doors unlocked, the tailgate can
only be operated manually. In this
event, manually closing the tailgate
requires significantly greater force.
Note
At low outside temperatures the
tailgate may not open fully by itself.
In this case lift the tailgate manually
to its normal end position.
Note
The installation of certain heavy
accessories onto the tailgate may
affect its ability to remain open.Vehicle security
Anti-theft locking system9 Warning
Do not use the system if there are
people in the vehicle! The doorscannot be unlocked from the
inside.
The system deadlocks all the doors. All doors must be closed and the
electronic key must not remain in the
vehicle. Otherwise the system cannot
be activated.
If the ignition was on, the driver's door
must be opened and closed once so
that the vehicle can be secured.
Unlocking the vehicle disables the
mechanical anti-theft locking system.
This is not possible with the central
locking button in the passenger
compartment.
Page 39 of 327
Keys, doors and windows37The system is not deactivated when
unlocking the driver's door with the
key or with the central locking button
in the passenger compartment.
Alarm When triggered, the alarm horn
sounds and the hazard warning lights
flash simultaneously. The number
and duration of alarm signals are
stipulated by legislation.
The anti-theft alarm system can be
deactivated only by pressing c or by
pressing the switch on the door
handle (electronic key system) or
switching on the ignition.
A triggered alarm, which has not been interrupted by the driver, will be
indicated by the hazard warning
lights. They will flash quickly three
times when the vehicle is unlocked
next time with the radio remote
control. Additionally, a warning
message is displayed in the Driver
Information Centre after switching on
the ignition.
Vehicle messages 3 120.If the vehicle's battery is to be
disconnected (e.g. for maintenance
work), the alarm siren must be
deactivated as follows: Switch the
ignition on then off, then disconnect
the vehicle's battery within
15 seconds.
Immobiliser The system is part of the ignition
switch and checks whether the
vehicle is allowed to be started with
the key being used.
The immobiliser is activated
automatically after the key is removed
from the ignition switch.
If control indicator d flashes when the
ignition is on, there is a fault in the
system; the engine cannot be started.
Switch off the ignition and repeat start
attempt.
If control indicator d continues
flashing, attempt to start the engine
using the spare key and seek the
assistance of a workshop.Note
The immobiliser does not lock the
doors. You should always lock the
vehicle after leaving it and switch on the anti-theft alarm system 3 25,
3 35.
Control indicator d 3 109.
Page 45 of 327
Keys, doors and windows43OverloadIf the windows are repeatedly
operated within short intervals, the window operation is disabled for
some time.
Initialising the power windows
If the windows cannot be closed
automatically (e.g. after
disconnecting the vehicle battery), a
warning message is displayed in the
Driver Information Centre.
Vehicle messages 3 120.
Activate the window electronics for
each window as following:
1. Close doors.
2. Switch on ignition.
3. Pull switch to the second detent until the window starts to close
and hold pulled for additional
4 seconds.
4. Push switch to the second detent until the window starts to open
automatically.
5. Repeat for each window.Heated rear window
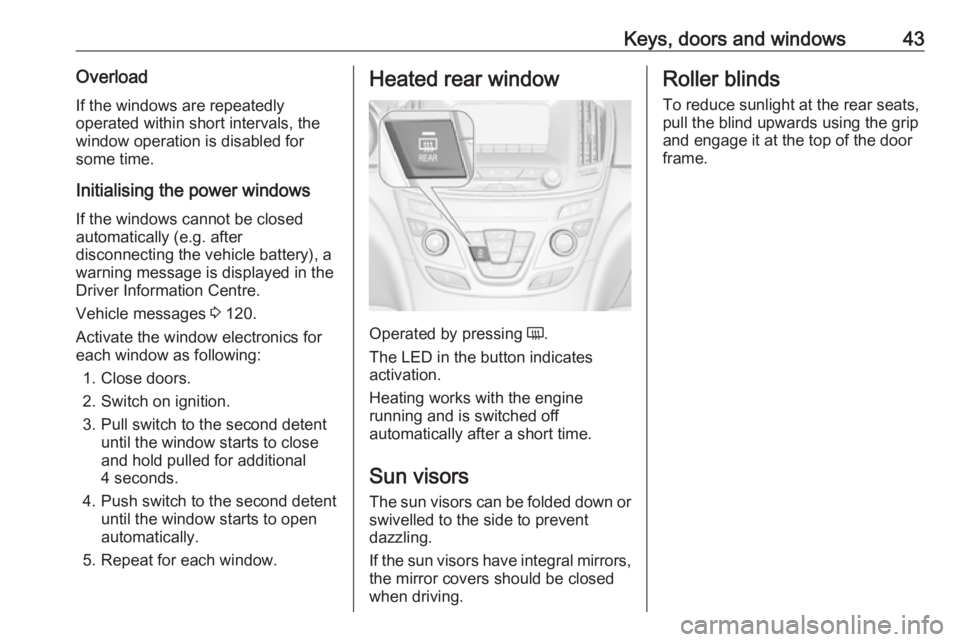
Operated by pressing Ü.
The LED in the button indicates
activation.
Heating works with the engine
running and is switched off
automatically after a short time.
Sun visors The sun visors can be folded down or
swivelled to the side to prevent
dazzling.
If the sun visors have integral mirrors, the mirror covers should be closed
when driving.
Roller blinds
To reduce sunlight at the rear seats, pull the blind upwards using the grip
and engage it at the top of the door
frame.
Page 50 of 327
48Seats, restraintsFront seatsSeat position9 Warning
Only drive with the seat correctly
adjusted.
9 Danger
Do not sit nearer than 25 cm from
the steering wheel, to permit safe
airbag deployment.
9 Warning
Never adjust seats while driving as
they could move uncontrollably.
9 Warning
Never store any objects under the
seats.
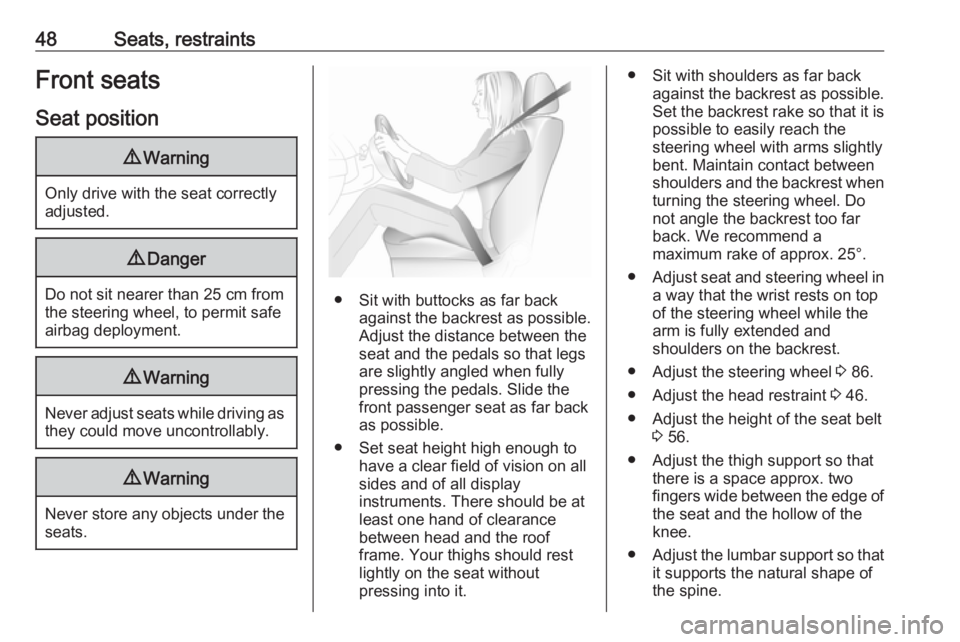
● Sit with buttocks as far back against the backrest as possible.
Adjust the distance between the
seat and the pedals so that legs
are slightly angled when fully
pressing the pedals. Slide the
front passenger seat as far back
as possible.
● Set seat height high enough to have a clear field of vision on all
sides and of all display
instruments. There should be at
least one hand of clearance
between head and the roof
frame. Your thighs should rest
lightly on the seat without
pressing into it.
● Sit with shoulders as far back against the backrest as possible.
Set the backrest rake so that it is possible to easily reach the
steering wheel with arms slightly
bent. Maintain contact between
shoulders and the backrest when turning the steering wheel. Do
not angle the backrest too far
back. We recommend a
maximum rake of approx. 25°.
● Adjust seat and steering wheel in
a way that the wrist rests on top
of the steering wheel while the
arm is fully extended and
shoulders on the backrest.
● Adjust the steering wheel 3 86.
● Adjust the head restraint 3 46.
● Adjust the height of the seat belt 3 56.
● Adjust the thigh support so that there is a space approx. two
fingers wide between the edge of the seat and the hollow of the
knee.
● Adjust the lumbar support so that
it supports the natural shape ofthe spine.
Page 65 of 327
Seats, restraints639Warning
Keep the area in which the airbag
inflates clear of obstructions.
The hooks on the handles in the
roof frame are only suitable for
hanging up light articles of
clothing, without coat hangers. Do not keep any items in these
clothes.
Airbag deactivation
Front airbag and side airbag systems for the front passenger seat must be
deactivated if a child restraint system
is to be fitted on this seat. The curtain
airbag system, the belt pretensioners and all driver airbag systems will
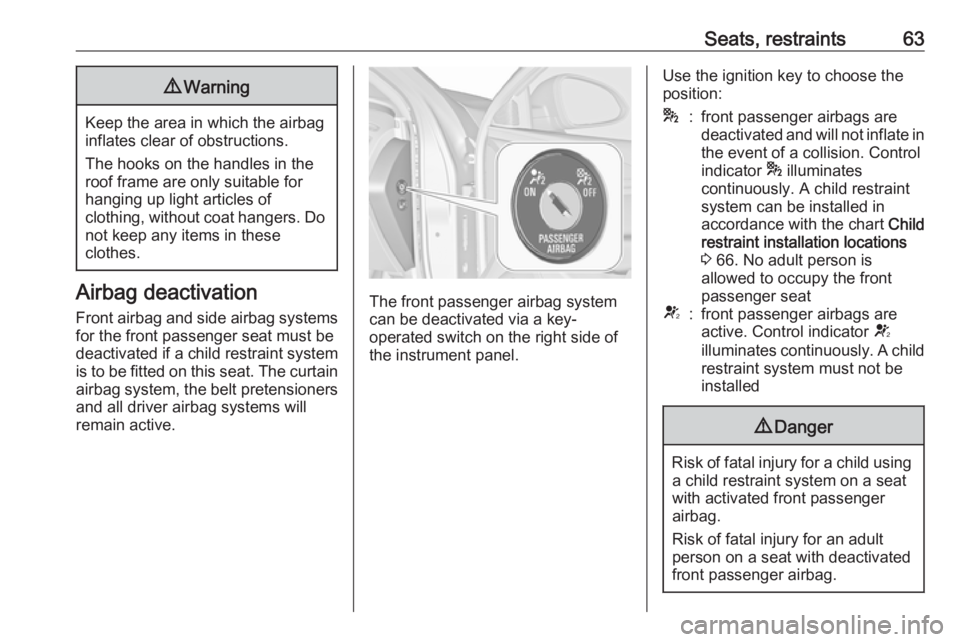
remain active.The front passenger airbag system
can be deactivated via a key-
operated switch on the right side of
the instrument panel.
Use the ignition key to choose the
position:*:front passenger airbags are
deactivated and will not inflate in the event of a collision. Control
indicator * illuminates
continuously. A child restraint
system can be installed in
accordance with the chart Child
restraint installation locations
3 66. No adult person is
allowed to occupy the front
passenger seatV:front passenger airbags are
active. Control indicator V
illuminates continuously. A child
restraint system must not be
installed9 Danger
Risk of fatal injury for a child using
a child restraint system on a seat
with activated front passenger
airbag.
Risk of fatal injury for an adult
person on a seat with deactivated
front passenger airbag.
Page 78 of 327
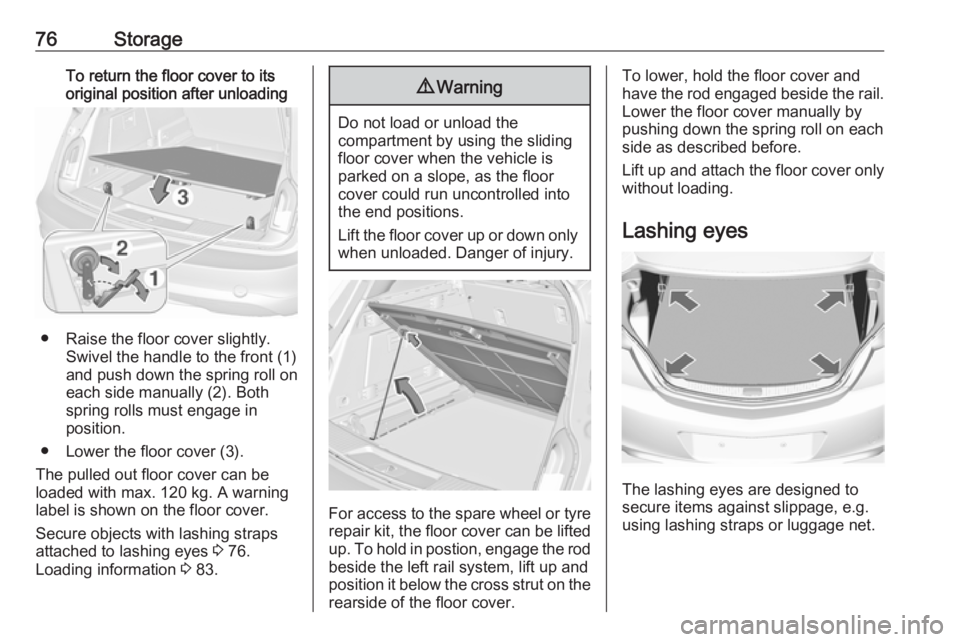
76StorageTo return the floor cover to its
original position after unloading
● Raise the floor cover slightly. Swivel the handle to the front (1)
and push down the spring roll on
each side manually (2). Both
spring rolls must engage in
position.
● Lower the floor cover (3).
The pulled out floor cover can be
loaded with max. 120 kg. A warning
label is shown on the floor cover.
Secure objects with lashing straps
attached to lashing eyes 3 76.
Loading information 3 83.
9
Warning
Do not load or unload the
compartment by using the sliding
floor cover when the vehicle is
parked on a slope, as the floor
cover could run uncontrolled into the end positions.
Lift the floor cover up or down only
when unloaded. Danger of injury.
For access to the spare wheel or tyre repair kit, the floor cover can be lifted
up. To hold in postion, engage the rod beside the left rail system, lift up and
position it below the cross strut on the
rearside of the floor cover.
To lower, hold the floor cover and
have the rod engaged beside the rail.
Lower the floor cover manually by
pushing down the spring roll on each side as described before.
Lift up and attach the floor cover only
without loading.
Lashing eyes
The lashing eyes are designed to
secure items against slippage, e.g.
using lashing straps or luggage net.
Page 87 of 327
Instruments and controls85Instruments and
controlsControls ....................................... 86
Steering wheel adjustment ........86
Steering wheel controls .............86
Heated steering wheel ...............86
Horn ........................................... 87
Windscreen wiper/washer .........87
Rear window wiper/washer .......89
Outside temperature ..................90
Clock ......................................... 90
Power outlets ............................. 92
Ashtrays .................................... 93
Warning lights, gauges and indi‐ cators ........................................... 94
Instrument cluster ......................94
Speedometer ........................... 100
Odometer ................................ 100
Trip odometer .......................... 100
Tachometer ............................. 101
Fuel gauge .............................. 101
Fuel selector ............................ 102
Engine coolant temperature gauge ..................................... 102
Service display ........................ 102
Control indicators ....................104Turn signal............................... 104
Seat belt reminder ...................104
Airbag and belt tensioners .......105
Airbag deactivation ..................105
Charging system .....................105
Malfunction indicator light ........106
Brake and clutch system .........106
Operate pedal .......................... 106
Electric parking brake ..............106
Electric parking brake fault ......106
Antilock brake system (ABS) ...107
Upshift ..................................... 107
Variable effort steering ............107
Following distance ...................107
Lane departure warning ..........107
Ultrasonic parking assist .........107
Electronic Stability Control off . 108
Electronic Stability Control and Traction Control system .........108
Traction Control system off .....108
Engine coolant temperature ....108
Preheating ............................... 108
Diesel particle filter ..................108
AdBlue ..................................... 108
Tyre pressure monitoring system .................................... 109
Engine oil pressure ..................109
Low fuel ................................... 109
Immobiliser .............................. 109
Autostop .................................. 110Exterior light............................ 110
High beam ............................... 110
High beam assist .....................110
Adaptive forward lighting .........110
Fog light ................................... 110
Rear fog light ........................... 110
Cruise control .......................... 110
Adaptive cruise control ............110
Vehicle detected ahead ...........110
Speed limiter ........................... 111
Traffic sign assistant ................111
Door open ................................ 111
Information displays ...................111
Driver Information Centre ........111
Colour-Info-Display ..................118
Smartphone controller .............119
Vehicle messages ......................120
Warning chimes .......................120
Battery voltage ........................ 121
Vehicle personalisation ..............121
Telematics service .....................125
OnStar ..................................... 125