key OPEL INSIGNIA BREAK 2017.5 Infotainment system
[x] Cancel search | Manufacturer: OPEL, Model Year: 2017.5, Model line: INSIGNIA BREAK, Model: OPEL INSIGNIA BREAK 2017.5Pages: 127, PDF Size: 2.4 MB
Page 14 of 127
14Basic operationBasic operationBasic operation............................ 14
Menu operation ............................ 16
Keyboards .................................... 17
Favourites .................................... 18
Contacts ....................................... 22
Tone settings ............................... 26
Volume settings ........................... 26
System settings ........................... 27Basic operation
The centre display has a touch-
sensitive surface that allows direct
interaction with the screen.
m screen button
To return to the next higher menu
level, select m.
Exit screen button To leave the menu currently active,
select Exit.
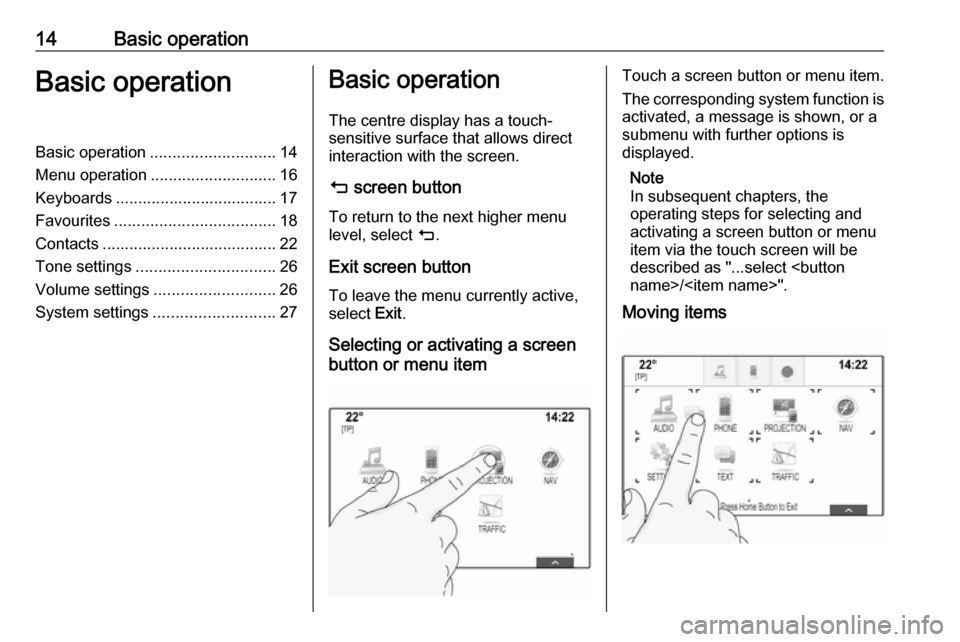
Selecting or activating a screen
button or menu itemTouch a screen button or menu item.
The corresponding system function is activated, a message is shown, or a
submenu with further options is
displayed.
Note
In subsequent chapters, the
operating steps for selecting and
activating a screen button or menu
item via the touch screen will be
described as "...select
Moving items
Page 15 of 127
Basic operation15Touch and hold the element you wish
to move until frame marks appear
around the icons. Move your finger to
the desired location and release the
element.
Note
Constant pressure must be applied
and the finger must be moved at a
constant speed.
All other items are rearranged.
Press ; on the control panel to exit
edit mode.
Note
In subsequent chapters, the
operating steps for moving a screen
element via the touch screen will be
described as "...drag the...icon to..."
or "...drag the...menu item to...".Scrolling lists
If there are more items available than
presentable on the screen, the list
must be scrolled.
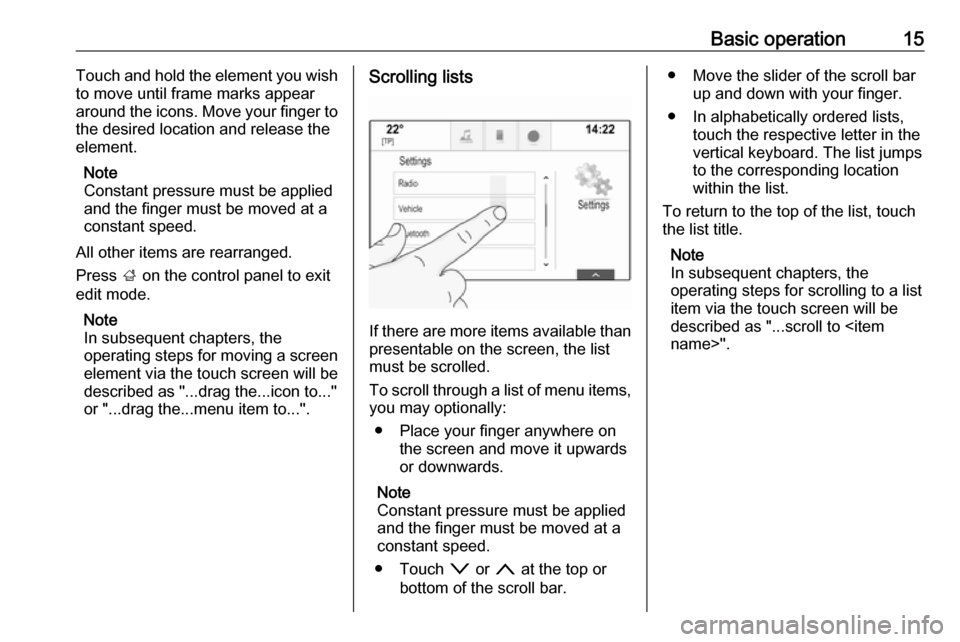
To scroll through a list of menu items, you may optionally:
● Place your finger anywhere on the screen and move it upwards
or downwards.
Note
Constant pressure must be applied and the finger must be moved at a
constant speed.
● Touch o or n at the top or
bottom of the scroll bar.
● Move the slider of the scroll bar up and down with your finger.
● In alphabetically ordered lists, touch the respective letter in the
vertical keyboard. The list jumps
to the corresponding location
within the list.
To return to the top of the list, touch
the list title.
Note
In subsequent chapters, the
operating steps for scrolling to a list
item via the touch screen will be
described as "...scroll to
Page 17 of 127
Basic operation17MessagesIn the case of a system event, before
the execution of a system function, or due to an outside trigger, e.g.
incoming phone call, you may be
prompted with a message.
Select one of the available options.
If ignored, most of the messages are
dismissed automatically after a
certain period of time. Alerts that are
not dismissed automatically remain
on the screen until they are
acknowledged or the trigger becomes
invalid.
Keyboards
Keyboard
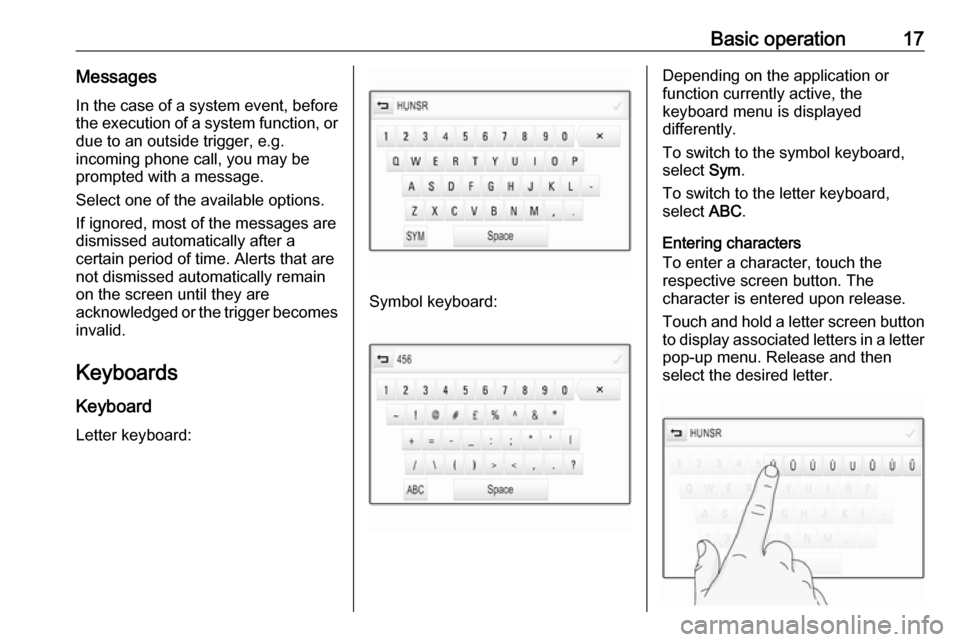
Letter keyboard:
Symbol keyboard:
Depending on the application or
function currently active, the
keyboard menu is displayed
differently.
To switch to the symbol keyboard,
select Sym.
To switch to the letter keyboard,
select ABC.
Entering characters
To enter a character, touch the
respective screen button. The
character is entered upon release.
Touch and hold a letter screen button
to display associated letters in a letter pop-up menu. Release and then
select the desired letter.
Page 18 of 127
18Basic operationTo confirm your input, select the
respective confirmation screen
button.
Autocomplete function
If a character sequence has been
entered once, it is stored within the
system and may be recalled by the autocomplete function.
As soon as one character (letter or
digit) is entered, the autocomplete
function becomes active. Every
additional character entered is
considered in the matching process, reducing the list of autocomplete
matches.
Select o next to the characters
entered to display a list of all
autocomplete matches.
Note
Above the o screen button, the
number of available options is
displayed. It changes according to
the number of matches found.
Select the respective list item. The
keyboard is redisplayed with the
respective list entry shown in the
entry field.Editing text
To place the cursor, touch the
respective position within the text.
Enter your changes.
Depending on the application, select
╳ to delete one entered character.
Touch and hold ╳ to delete all
characters.
Select the respective confirmation
screen button to confirm an input.
Mixed case characters
In most cases, only capital letters may be entered.
If mixed case character recognition is
available, an additional Shift screen
button is displayed.
To activate the shift function and
capitalise one letter, select Shift.
The function is automatically
deactivated after one letter has been
entered.Keypad
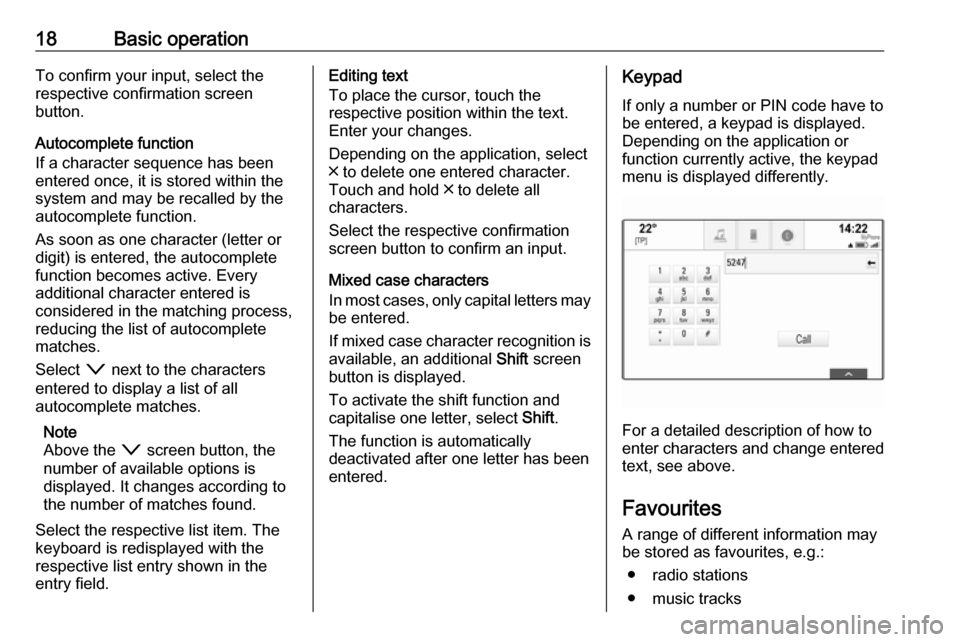
If only a number or PIN code have to
be entered, a keypad is displayed.
Depending on the application or
function currently active, the keypad
menu is displayed differently.
For a detailed description of how to
enter characters and change entered text, see above.
Favourites
A range of different information may
be stored as favourites, e.g.:
● radio stations
● music tracks
Page 21 of 127

Basic operation21Touch and hold the respective
favourite screen button. The
favourites page is minimised and the list of albums is redisplayed.
Select the album you wish to store as
a favourite. The selected album is
stored as a favourite.
Example: Destination
Press ; and select NAV on the home
screen.
Select DESTINATION , select
RECENT in the interaction selector
bar and then touch the desired
destination from the list 3 49.
To store the address as a favourite, reveal the favourites list and scroll to
the respective favourites page.
Touch and hold the respective
favourite screen button. The selected
address is stored as a favourite.
Example: Telephone number
Press ; and select PHONE on the
home screen.
Select KEYPAD and enter the
number you wish to call 3 69.To store this number as a favourite,
reveal the favourites list and scroll tothe respective favourites page.
Touch and hold the respective
favourite screen button. The number
is stored as a favourite.
Retrieving favourites Display a favourites page (see above)
and scroll to the desired favourites
page (if necessary).
Note
Unavailable favourites are greyed
out.
Select the respective favourite screen
button. Depending on the kind of
favourite selected, a radio station or
track is played, a phone call is
initiated, a route is calculated or an
application is started.
Note
The active favourite is highlighted.
Editing favourites
Select SETTINGS on the home
screen, Radio and then Manage
Favourites . A three-row view of thefavourites list is displayed with the
editing options shown in the
interaction selector bar.
Renaming favourites
Scroll to the respective favourites
page.
Select the favourite you wish to edit. Select RENAME .
A keyboard opens up with the current favourite label text displayed in the
entry field as well as in the label
preview area.
Enter the new label text and select
Save . You are returned to the
favourites page.
Page 25 of 127
Basic operation25
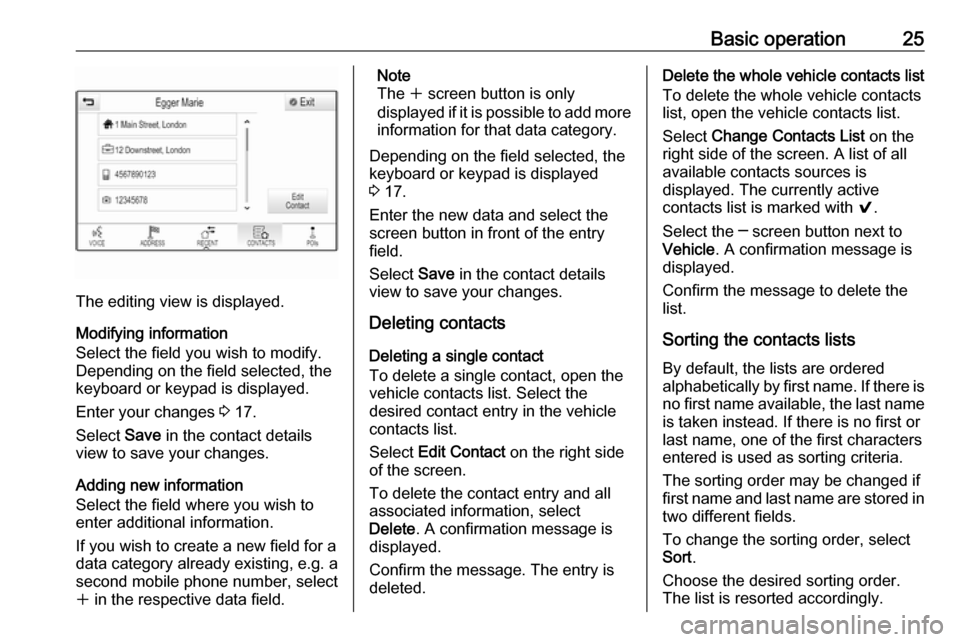
The editing view is displayed.
Modifying information
Select the field you wish to modify.
Depending on the field selected, the
keyboard or keypad is displayed.
Enter your changes 3 17.
Select Save in the contact details
view to save your changes.
Adding new information
Select the field where you wish to
enter additional information.
If you wish to create a new field for a
data category already existing, e.g. a
second mobile phone number, select
w in the respective data field.
Note
The w screen button is only
displayed if it is possible to add more information for that data category.
Depending on the field selected, the
keyboard or keypad is displayed
3 17.
Enter the new data and select the
screen button in front of the entry
field.
Select Save in the contact details
view to save your changes.
Deleting contacts
Deleting a single contact
To delete a single contact, open the
vehicle contacts list. Select the
desired contact entry in the vehicle
contacts list.
Select Edit Contact on the right side
of the screen.
To delete the contact entry and all
associated information, select
Delete . A confirmation message is
displayed.
Confirm the message. The entry is
deleted.Delete the whole vehicle contacts list
To delete the whole vehicle contacts
list, open the vehicle contacts list.
Select Change Contacts List on the
right side of the screen. A list of all available contacts sources is
displayed. The currently active
contacts list is marked with 9.
Select the ─ screen button next to Vehicle . A confirmation message is
displayed.
Confirm the message to delete the list.
Sorting the contacts lists By default, the lists are ordered
alphabetically by first name. If there is
no first name available, the last name
is taken instead. If there is no first or
last name, one of the first characters
entered is used as sorting criteria.
The sorting order may be changed if
first name and last name are stored in
two different fields.
To change the sorting order, select
Sort .
Choose the desired sorting order.
The list is resorted accordingly.
Page 28 of 127
28Basic operationNote
If date information is automatically
provided, this menu item is not
available.
Select Auto Set at the bottom of the
screen. Activate either On - RDS or
Off - Manual .
If Off - Manual is selected, adjust the
date by touching n or o.
Clock display
Select Clock Display to enter the
respective submenu.
To turn off the digital clock display in
the menus, select Off.
Language Press ; and select SETTINGS on
the home screen.
Scroll through the list and select
Language .
Note
The language currently active is
marked with 9.
Scroll through the list and select the
desired language.Valet mode
If valet mode is activated, all vehicle
displays are locked and no changes
may be performed within the system.
Note
Vehicle-related messages and the
rear view camera remain enabled.
Locking the system
Press ; and select SETTINGS on
the home screen.
Scroll through the list and select Valet
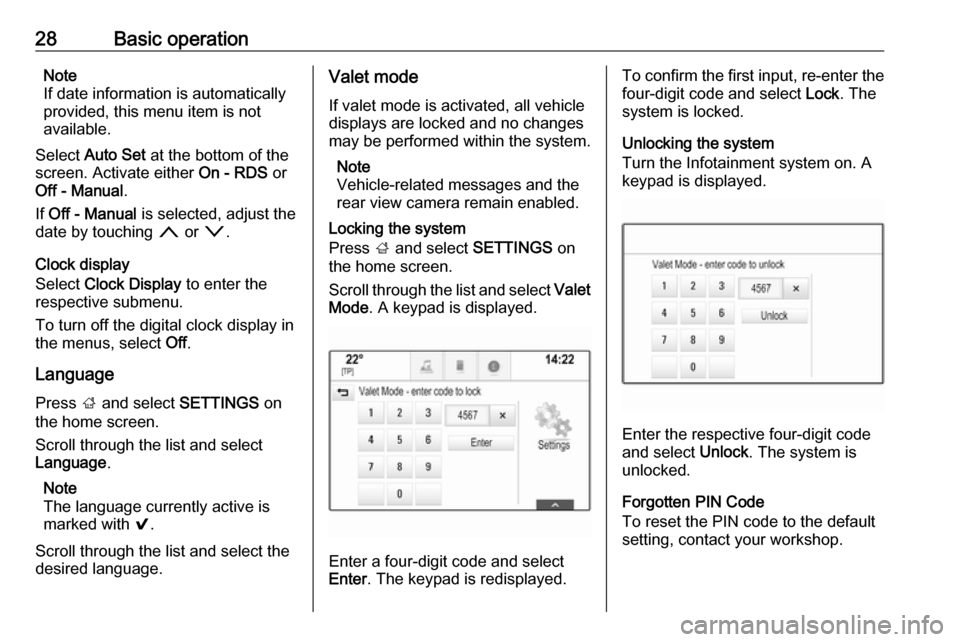
Mode . A keypad is displayed.
Enter a four-digit code and select
Enter . The keypad is redisplayed.
To confirm the first input, re-enter the
four-digit code and select Lock. The
system is locked.
Unlocking the system
Turn the Infotainment system on. A
keypad is displayed.
Enter the respective four-digit code
and select Unlock. The system is
unlocked.
Forgotten PIN Code
To reset the PIN code to the default
setting, contact your workshop.
Page 31 of 127
Radio31RadioUsage.......................................... 31
Station search .............................. 31
Radio data system (RDS) ............32
Digital audio broadcasting ...........33Usage
The radio function is part of the
AUDIO application.
Activating the radio function
Press ; and select AUDIO on the
home screen. Select RADIO in the
interaction selector bar.
Selecting the waveband Repeatedly select RADIO to toggle
between the different wavebands.
Station search
Automatic station search
Press t or v to play the previous
or next station.
Manual station search
Press and hold t or v . Release the
respective button when the desired frequency has almost been reached.
Station tuning
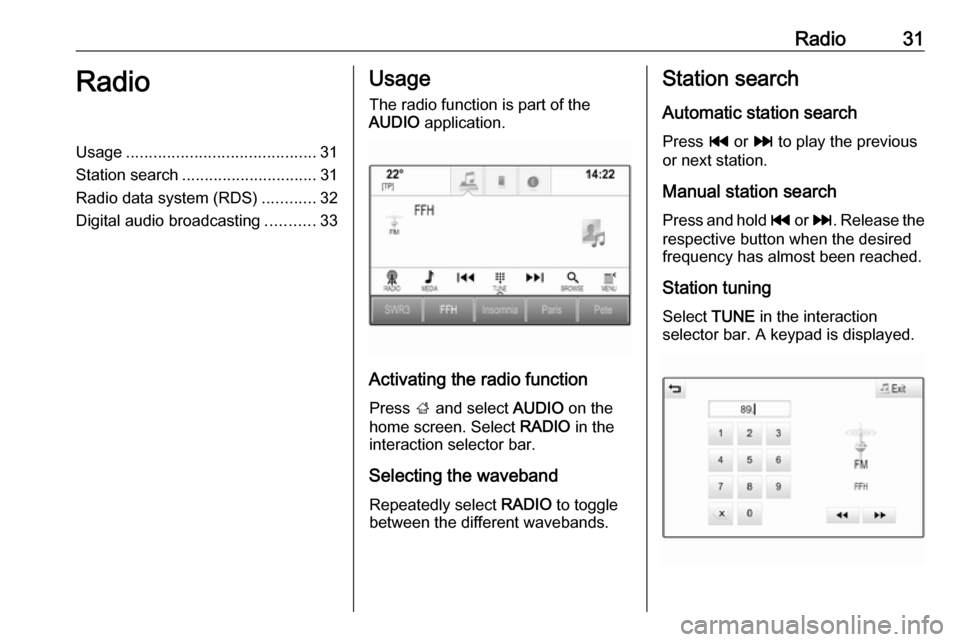
Select TUNE in the interaction
selector bar. A keypad is displayed.
Page 49 of 127

Navigation49Organising the POI data in several
subfolders
Optionally, you can organise the text
files in several randomly named
subfolders (max. depth of subfolder
structure: 2).
Examples: F:\myPOIs\AnnsPOIs or
F:\myPOIs\MyJourney\London,
where F:\ is the root directory of the
USB drive.
Note
In a folder, only subfolders or only
POI files may be stored. A mixture of
both will not be imported correctly to the system.
After downloading individual POI data
organised in that way to the
Infotainment system (see download
description further below), the My
POIs menu will show a list of
selectable submenus.
After selecting a submenu, further
submenus or the related list of
imported POI categories will be
displayed.Downloading the POI data to the
Infotainment system
Connect the USB device with your
user defined POI data to the USB port
3 36 of the Infotainment system.
A message is displayed that prompts
you to confirm the download.
After confirmation, the POI data will
be downloaded to the Infotainment system.
The downloaded POIs are then
selectable as destinations via the My
POIs menu, see "POIs entry" in
chapter "Destination input" 3 49.
Destination input The navigation application provides
different options to set a destination
for route guidance.
Press ; and select NAV on the home
screen to display the navigation map.
Select DESTINATION in the
interaction selector bar and then
select one of the different addressentry options.
One-shot destination entry
Touch the entry field in the top line of
the menu. A keyboard is displayed.
For a detailed description on the keyboards 3 17.
Enter an address or search term and
confirm your input.
Two lists with possible destinations
are created. To switch between the
list tabs, touch Address or POI in the
top line of the screen.
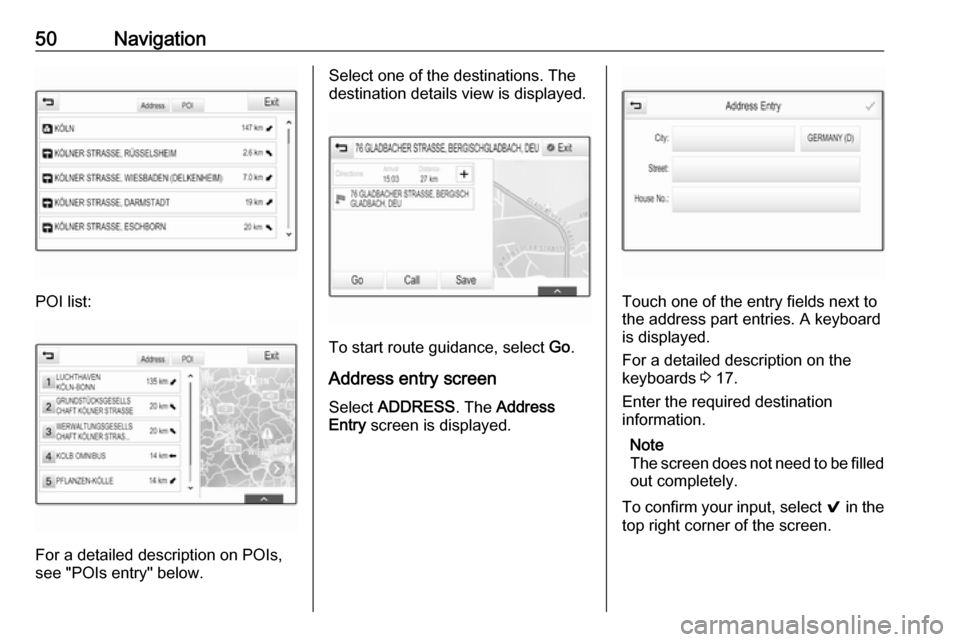
Address list:
Page 50 of 127
50Navigation
POI list:
For a detailed description on POIs,
see "POIs entry" below.
Select one of the destinations. The
destination details view is displayed.
To start route guidance, select Go.
Address entry screen
Select ADDRESS . The Address
Entry screen is displayed.
Touch one of the entry fields next to
the address part entries. A keyboard
is displayed.
For a detailed description on the
keyboards 3 17.
Enter the required destination
information.
Note
The screen does not need to be filled out completely.
To confirm your input, select 9 in the
top right corner of the screen.