light OPEL INSIGNIA BREAK 2017.5 Infotainment system
[x] Cancel search | Manufacturer: OPEL, Model Year: 2017.5, Model line: INSIGNIA BREAK, Model: OPEL INSIGNIA BREAK 2017.5Pages: 127, PDF Size: 2.4 MB
Page 21 of 127
Basic operation21Touch and hold the respective
favourite screen button. The
favourites page is minimised and the list of albums is redisplayed.
Select the album you wish to store as
a favourite. The selected album is
stored as a favourite.
Example: Destination
Press ; and select NAV on the home
screen.
Select DESTINATION , select
RECENT in the interaction selector
bar and then touch the desired
destination from the list 3 49.
To store the address as a favourite, reveal the favourites list and scroll to
the respective favourites page.
Touch and hold the respective
favourite screen button. The selected
address is stored as a favourite.
Example: Telephone number
Press ; and select PHONE on the
home screen.
Select KEYPAD and enter the
number you wish to call 3 69.To store this number as a favourite,
reveal the favourites list and scroll tothe respective favourites page.
Touch and hold the respective
favourite screen button. The number
is stored as a favourite.
Retrieving favourites Display a favourites page (see above)
and scroll to the desired favourites
page (if necessary).
Note
Unavailable favourites are greyed
out.
Select the respective favourite screen
button. Depending on the kind of
favourite selected, a radio station or
track is played, a phone call is
initiated, a route is calculated or an
application is started.
Note
The active favourite is highlighted.
Editing favourites
Select SETTINGS on the home
screen, Radio and then Manage
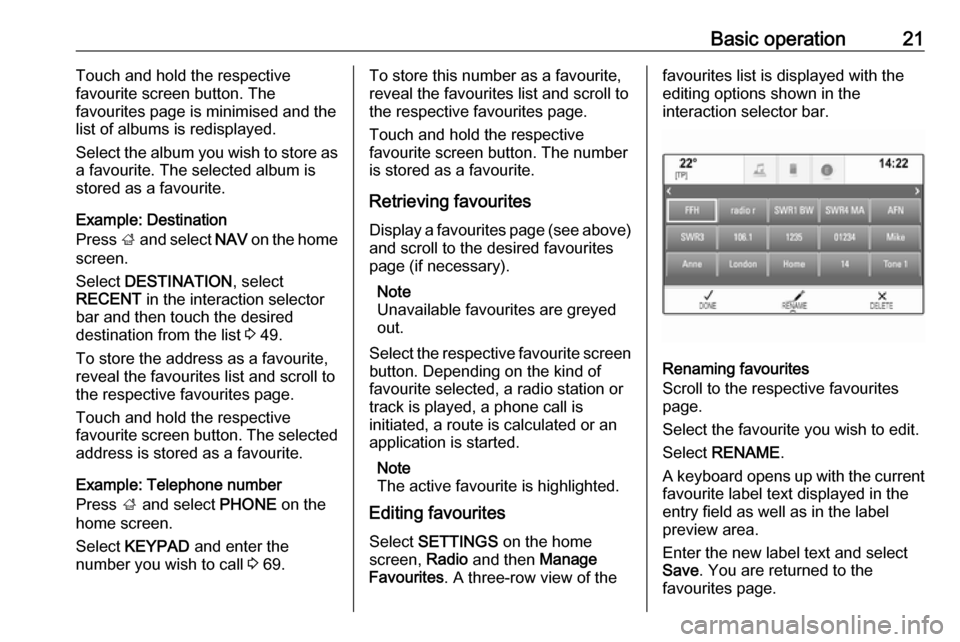
Favourites . A three-row view of thefavourites list is displayed with the
editing options shown in the
interaction selector bar.
Renaming favourites
Scroll to the respective favourites
page.
Select the favourite you wish to edit. Select RENAME .
A keyboard opens up with the current favourite label text displayed in the
entry field as well as in the label
preview area.
Enter the new label text and select
Save . You are returned to the
favourites page.
Page 29 of 127
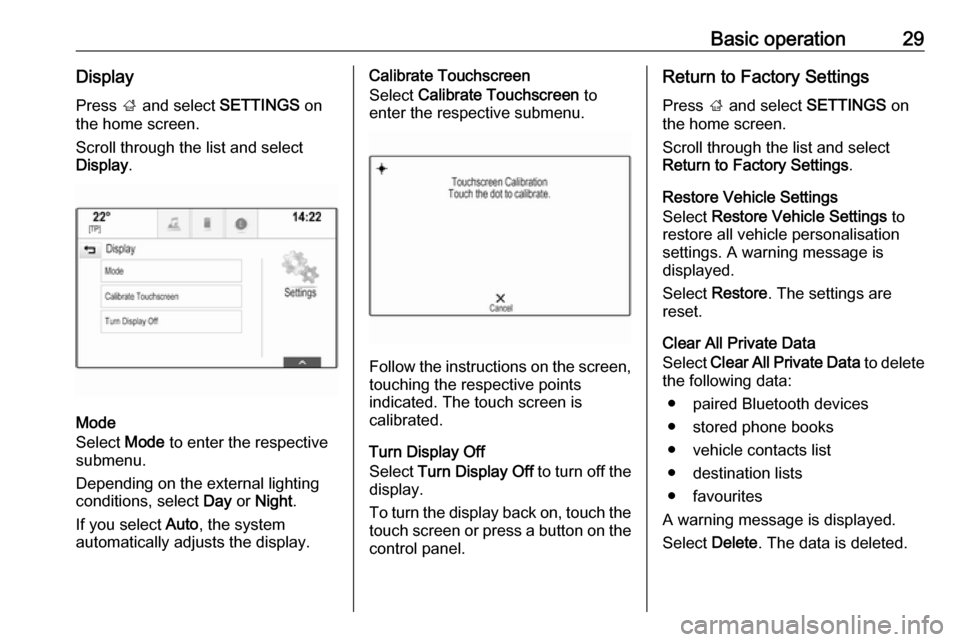
Basic operation29DisplayPress ; and select SETTINGS on
the home screen.
Scroll through the list and select
Display .
Mode
Select Mode to enter the respective
submenu.
Depending on the external lighting
conditions, select Day or Night .
If you select Auto, the system
automatically adjusts the display.
Calibrate Touchscreen
Select Calibrate Touchscreen to
enter the respective submenu.
Follow the instructions on the screen,
touching the respective points
indicated. The touch screen is
calibrated.
Turn Display Off
Select Turn Display Off to turn off the
display.
To turn the display back on, touch the touch screen or press a button on the
control panel.
Return to Factory Settings
Press ; and select SETTINGS on
the home screen.
Scroll through the list and select
Return to Factory Settings .
Restore Vehicle Settings
Select Restore Vehicle Settings to
restore all vehicle personalisation
settings. A warning message is
displayed.
Select Restore . The settings are
reset.
Clear All Private Data
Select Clear All Private Data to delete
the following data:
● paired Bluetooth devices● stored phone books
● vehicle contacts list
● destination lists
● favourites
A warning message is displayed.
Select Delete. The data is deleted.
Page 32 of 127
32RadioTouch the Direct Tune field and then
enter the desired frequency. Confirm your input.
Station lists In the station lists, all receivable radio stations within the current reception
area are available for selection.
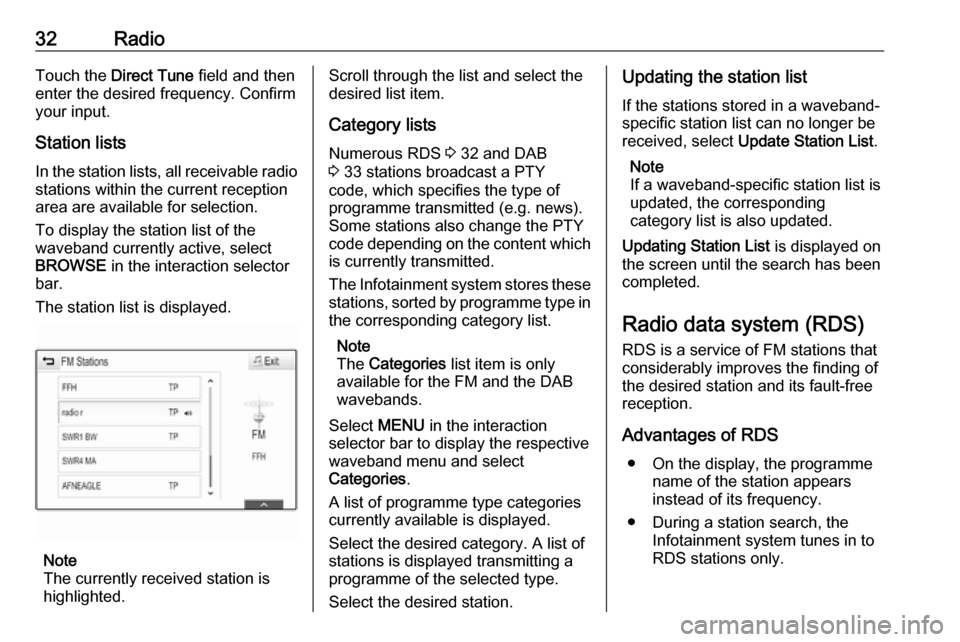
To display the station list of the
waveband currently active, select
BROWSE in the interaction selector
bar.
The station list is displayed.
Note
The currently received station is
highlighted.
Scroll through the list and select the
desired list item.
Category lists
Numerous RDS 3 32 and DAB
3 33 stations broadcast a PTY
code, which specifies the type of
programme transmitted (e.g. news).
Some stations also change the PTY
code depending on the content which is currently transmitted.
The Infotainment system stores these
stations, sorted by programme type in
the corresponding category list.
Note
The Categories list item is only
available for the FM and the DAB wavebands.
Select MENU in the interaction
selector bar to display the respective waveband menu and select
Categories .
A list of programme type categories
currently available is displayed.
Select the desired category. A list of
stations is displayed transmitting a
programme of the selected type.
Select the desired station.Updating the station list
If the stations stored in a waveband-
specific station list can no longer be
received, select Update Station List .
Note
If a waveband-specific station list is
updated, the corresponding
category list is also updated.
Updating Station List is displayed on
the screen until the search has been
completed.
Radio data system (RDS)
RDS is a service of FM stations that considerably improves the finding of
the desired station and its fault-free
reception.
Advantages of RDS ● On the display, the programme name of the station appears
instead of its frequency.
● During a station search, the Infotainment system tunes in to
RDS stations only.
Page 33 of 127
Radio33● The Infotainment system alwaystunes into the best receivable
broadcasting frequency of the set station by means of AF
(alternative frequency).
● Depending on the station received, the Infotainment
system displays radio text that
can contain e.g. information on the current programme.
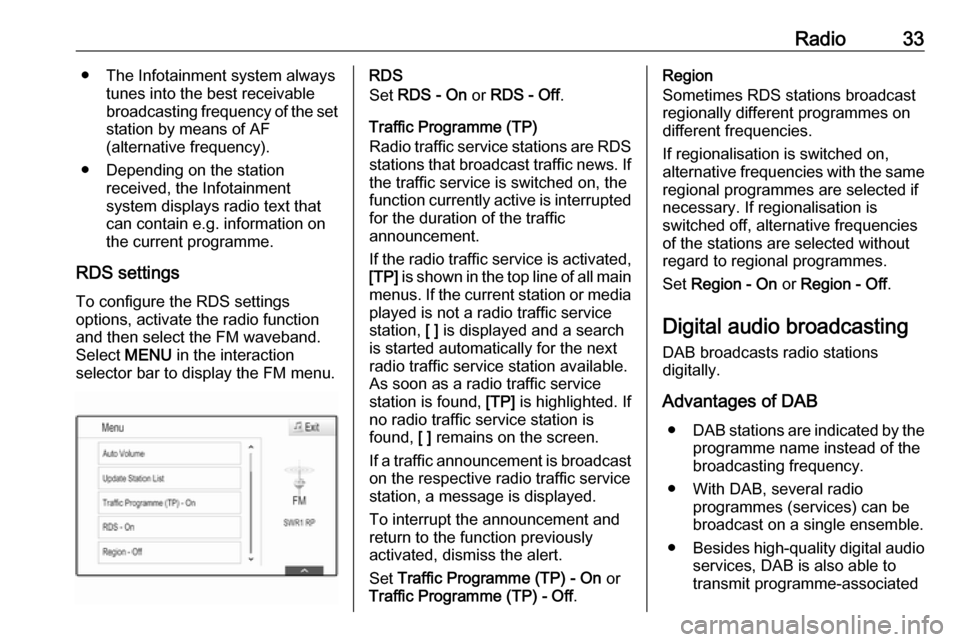
RDS settings To configure the RDS settings
options, activate the radio function
and then select the FM waveband.
Select MENU in the interaction
selector bar to display the FM menu.RDS
Set RDS - On or RDS - Off .
Traffic Programme (TP)
Radio traffic service stations are RDS
stations that broadcast traffic news. If the traffic service is switched on, the
function currently active is interrupted for the duration of the traffic
announcement.
If the radio traffic service is activated,
[TP] is shown in the top line of all main
menus. If the current station or media played is not a radio traffic service
station, [ ] is displayed and a search
is started automatically for the next
radio traffic service station available.
As soon as a radio traffic service
station is found, [TP] is highlighted. If
no radio traffic service station is
found, [ ] remains on the screen.
If a traffic announcement is broadcast
on the respective radio traffic service
station, a message is displayed.
To interrupt the announcement and
return to the function previously
activated, dismiss the alert.
Set Traffic Programme (TP) - On or
Traffic Programme (TP) - Off .Region
Sometimes RDS stations broadcast
regionally different programmes on
different frequencies.
If regionalisation is switched on,
alternative frequencies with the same regional programmes are selected if
necessary. If regionalisation is
switched off, alternative frequencies
of the stations are selected without
regard to regional programmes.
Set Region - On or Region - Off .
Digital audio broadcasting DAB broadcasts radio stations
digitally.
Advantages of DAB ● DAB stations are indicated by the
programme name instead of thebroadcasting frequency.
● With DAB, several radio programmes (services) can be
broadcast on a single ensemble.
● Besides high-quality digital audio
services, DAB is also able to
transmit programme-associated
Page 45 of 127

Navigation45To display an overview of the route
currently active on the map, select OVERVIEW .
The screen button changes to
RESET .
To return to the normal view, select
RESET .
Map display
View mode
Select MENU in the interaction
selector bar and then select Map
View to display the respective
submenu.
Select the desired map view ( 3D
View , Heading Up View , North Up
View ).
Note
Alternatively, you may repeatedly
select x in the application tray to
quickly toggle between the different
map views ( 3D View, Heading Up
View , North Up View ).Audio information
If Audio Information - On is set,
information on the station, album or song currently playing is displayed on the map screen.
Select MENU in the interaction
selector bar and then select Map
View to display the respective
submenu.
Set Audio Information - On or Audio
Information - Off .
Display mode
Select MENU in the interaction
selector bar and then select Map
View to display the respective
submenu.
Select Day / Night Mode .
Depending on the external lighting
conditions, activate Day or Night .
If you wish the screen to adjust
automatically, activate Auto.
Display of buildings
Select MENU in the interaction
selector bar and then select Map
View to display the respective
submenu.Buildings can be displayed in 3D or
normal view.
Set 3D Buildings - On or 3D Buildings
- Off .
Autozoom function
Select MENU in the interaction
selector bar and then select Map
View to display the respective
submenu.
The system may zoom in on the map
in case of special manoeuvres.
Set Autozoom - On or Autozoom - Off .
POI icons
Select MENU in the interaction
selector bar and then select Display
"Points of Interest" Icons to display
the respective submenu.
If POI Icons is activated, points of
interest around the current location or along the route are displayed on the
map.
Set POI Icons - On or POI Icons - Off .
If POI Icons is set to On, activate the
POI categories you wish to be
displayed.
Page 71 of 127
Phone71
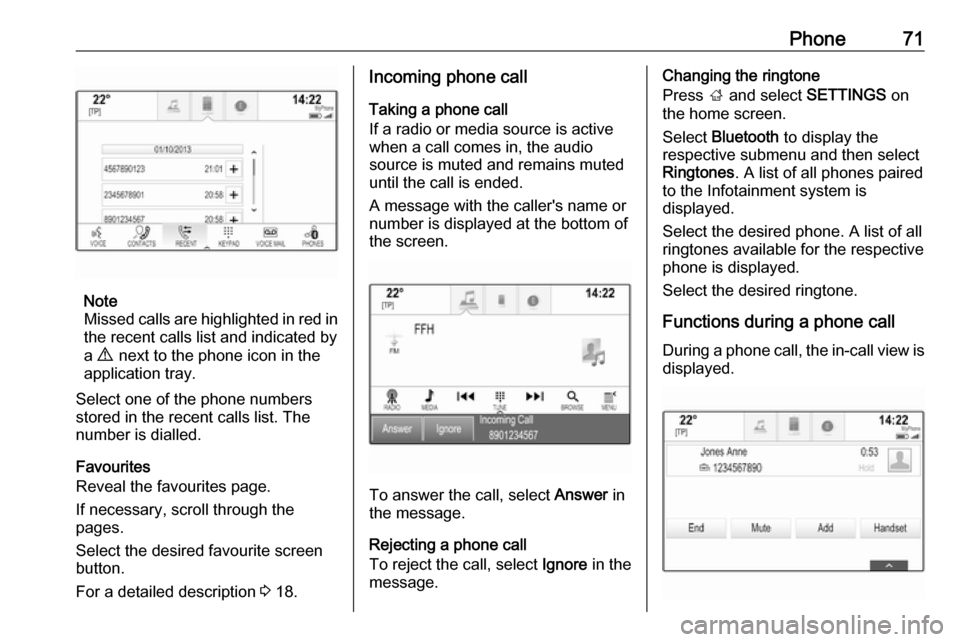
Note
Missed calls are highlighted in red in the recent calls list and indicated by
a 9 next to the phone icon in the
application tray.
Select one of the phone numbers
stored in the recent calls list. The
number is dialled.
Favourites
Reveal the favourites page.
If necessary, scroll through the
pages.
Select the desired favourite screen
button.
For a detailed description 3 18.
Incoming phone call
Taking a phone call
If a radio or media source is active
when a call comes in, the audio
source is muted and remains muted
until the call is ended.
A message with the caller's name or
number is displayed at the bottom of
the screen.
To answer the call, select Answer in
the message.
Rejecting a phone call
To reject the call, select Ignore in the
message.
Changing the ringtone
Press ; and select SETTINGS on
the home screen.
Select Bluetooth to display the
respective submenu and then select Ringtones . A list of all phones paired
to the Infotainment system is
displayed.
Select the desired phone. A list of all
ringtones available for the respective
phone is displayed.
Select the desired ringtone.
Functions during a phone call During a phone call, the in-call view is displayed.
Page 103 of 127
Radio103Note
The currently received radio station
is indicated by the l symbol next to
the station name.
Update station lists
If the stations stored in the waveband-
specific station list can no longer be
received, the AM and the DAB station lists must be updated.
Note
The FM station list is updated
automatically.
Select Menu in the bottom line of the
active radio main menu and then
select Update Station List .
Note
If a waveband-specific station list is
updated, the corresponding
category list is also updated.
A station search is started and a
corresponding message is displayed. Once the search is finished, the
respective station list is displayed.
Note
The currently received radio station
is indicated by the l symbol next to
the station name.Favourite lists
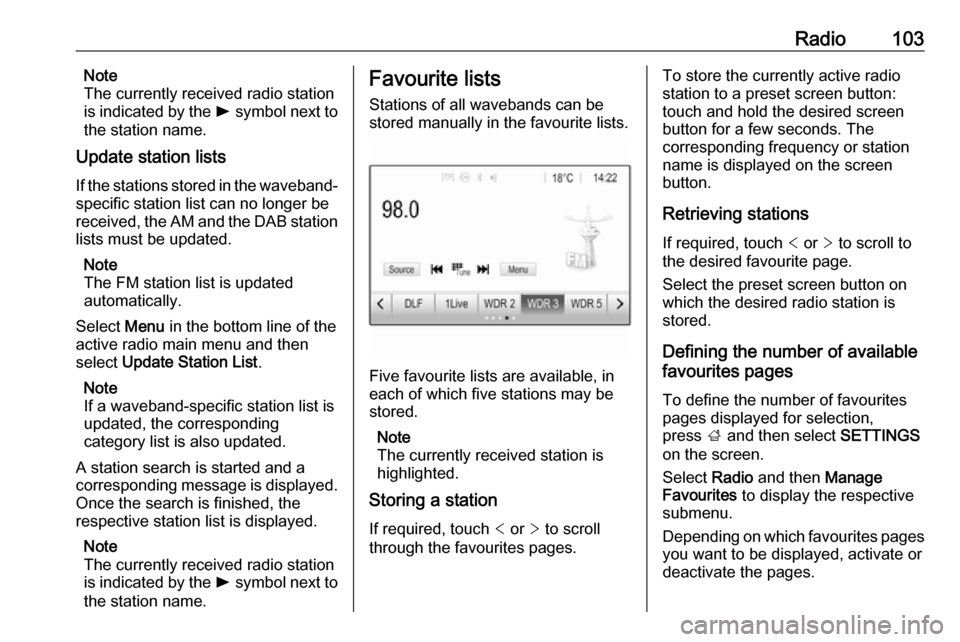
Stations of all wavebands can be
stored manually in the favourite lists.
Five favourite lists are available, in
each of which five stations may be
stored.
Note
The currently received station is highlighted.
Storing a station
If required, touch < or > to scroll
through the favourites pages.
To store the currently active radio
station to a preset screen button:
touch and hold the desired screen button for a few seconds. The
corresponding frequency or station
name is displayed on the screen
button.
Retrieving stations If required, touch < or > to scroll to
the desired favourite page.
Select the preset screen button on
which the desired radio station is
stored.
Defining the number of available
favourites pages
To define the number of favouritespages displayed for selection,
press ; and then select SETTINGS
on the screen.
Select Radio and then Manage
Favourites to display the respective
submenu.
Depending on which favourites pages you want to be displayed, activate or
deactivate the pages.
Page 104 of 127

104RadioRadio data system (RDS)
RDS is a service of FM stations that considerably facilitates the finding of
the desired station and its fault-free
reception.
Advantages of RDS ● On the display, the programme name of the station appears
instead of its frequency.
● During a station search, the Infotainment system tunes in to
RDS stations only.
● The Infotainment system always tunes into the best receivable
broadcasting frequency of the set station by means of AF
(alternative frequency).
● Depending on the station that is received, the Infotainment
system displays radio text that
can contain e.g. information on
the current programme.RDS configuration
Touch Menu in the bottom line of the
FM radio main menu to open the
corresponding waveband-specific
submenu.
Scroll to RDS.
Activate or deactivate RDS.
Traffic Programme
Radio traffic service stations are RDS stations that broadcast traffic news. If
the traffic service is switched on, the
currently playing audio source is
interrupted for the duration of the
traffic announcement.
Activating the traffic programme
function
Select Menu in the bottom line of the
FM radio main menu to open the corresponding waveband-specific
submenu.
Touch the screen button next to
Traffic Programme to activate or
deactivate the function.Note
In the station list, TP is displayed
next to the stations providing a traffic programme.
If the radio traffic service is activated,
[TP] is shown in the top line of all main
menus. If the current station is not a
radio traffic service station, TP is
greyed-out and a search is started
automatically for the next radio traffic
service station. As soon as a radio
traffic service station is found, TP is
highlighted. If no radio traffic service
station is found, TP remains greyed-
out.
If a traffic announcement is
broadcasted on the respective
station, a message is displayed.
To interrupt the announcement and
return to the function previously
activated, touch the screen or press
m .
Regionalisation Sometimes RDS stations broadcast
regionally different programmes on
different frequencies.
Page 117 of 127
Phone117
Note
If no phone is connected, the Device
Management menu can also be
accessed via the phone menu:
Press ; and then select PHONE.
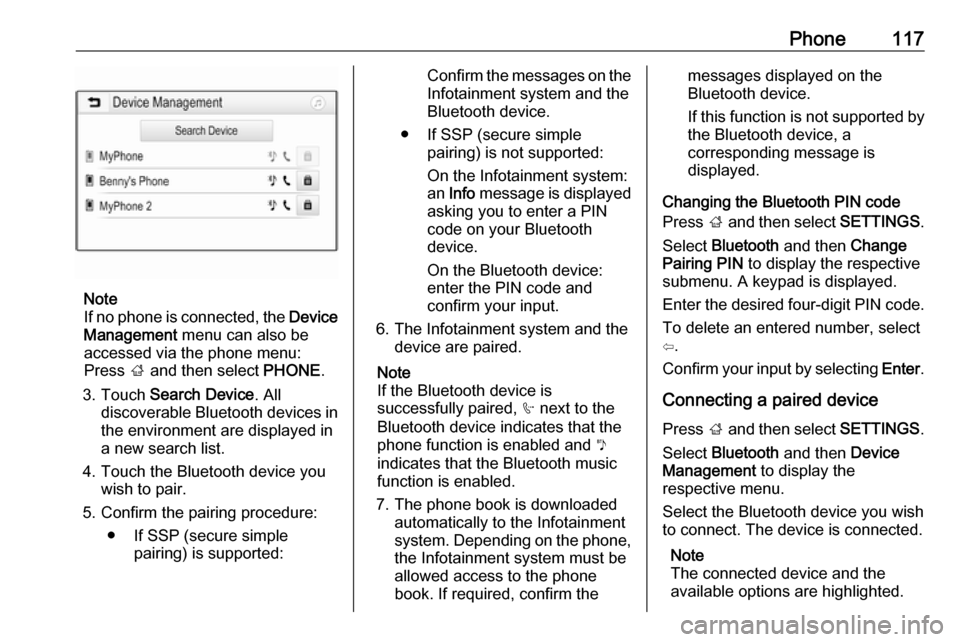
3. Touch Search Device . All
discoverable Bluetooth devices in
the environment are displayed in a new search list.
4. Touch the Bluetooth device you wish to pair.
5. Confirm the pairing procedure: ● If SSP (secure simple pairing) is supported:
Confirm the messages on the
Infotainment system and the
Bluetooth device.
● If SSP (secure simple pairing) is not supported:
On the Infotainment system: an Info message is displayed
asking you to enter a PIN
code on your Bluetooth
device.
On the Bluetooth device: enter the PIN code and
confirm your input.
6. The Infotainment system and the device are paired.
Note
If the Bluetooth device is
successfully paired, h next to the
Bluetooth device indicates that the
phone function is enabled and y
indicates that the Bluetooth music
function is enabled.
7. The phone book is downloaded automatically to the Infotainment
system. Depending on the phone, the Infotainment system must be
allowed access to the phone
book. If required, confirm themessages displayed on the
Bluetooth device.
If this function is not supported by
the Bluetooth device, a
corresponding message is
displayed.
Changing the Bluetooth PIN code
Press ; and then select SETTINGS.
Select Bluetooth and then Change
Pairing PIN to display the respective
submenu. A keypad is displayed.
Enter the desired four-digit PIN code.
To delete an entered number, select
⇦.
Confirm your input by selecting Enter.
Connecting a paired device Press ; and then select SETTINGS.
Select Bluetooth and then Device
Management to display the
respective menu.
Select the Bluetooth device you wish to connect. The device is connected.
Note
The connected device and the
available options are highlighted.