wheel OPEL INSIGNIA BREAK 2017.5 Owner's Guide
[x] Cancel search | Manufacturer: OPEL, Model Year: 2017.5, Model line: INSIGNIA BREAK, Model: OPEL INSIGNIA BREAK 2017.5Pages: 303, PDF Size: 8.46 MB
Page 107 of 303
Instruments and controls105Turn the adjuster wheel to select a
submenu of the main menu or to set a numeric value.
Press SET/CLR to select and confirm
a function.
Vehicle and service messages are
popped-up in the Driver Information Centre when required. Confirm
messages by pressing SET/CLR.
Vehicle messages 3 115.Steering wheel controls
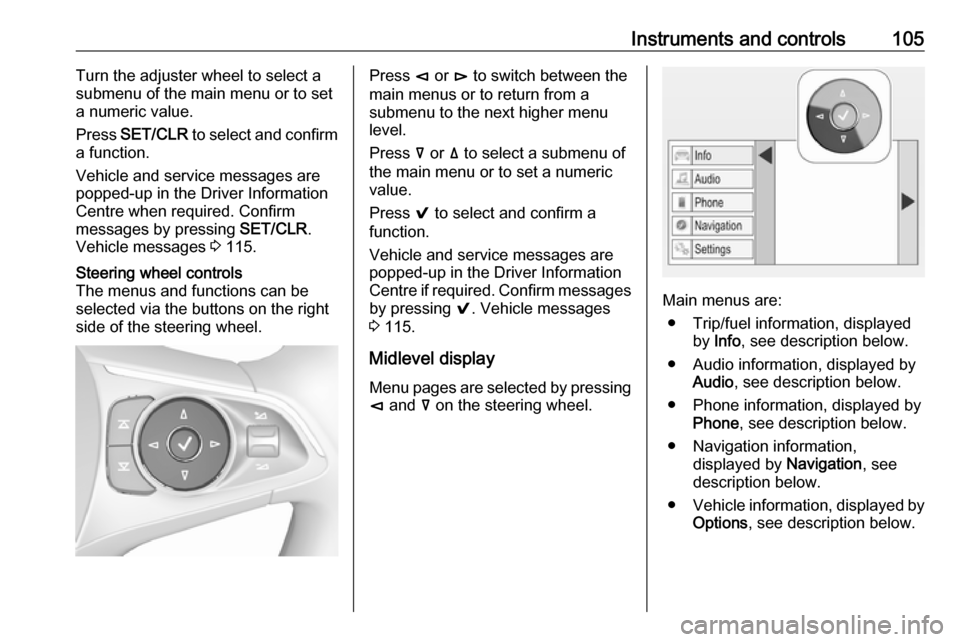
The menus and functions can be selected via the buttons on the right
side of the steering wheel.Press è or é to switch between the
main menus or to return from a
submenu to the next higher menu
level.
Press å or ä to select a submenu of
the main menu or to set a numeric
value.
Press 9 to select and confirm a
function.
Vehicle and service messages are
popped-up in the Driver Information
Centre if required. Confirm messages by pressing 9. Vehicle messages
3 115.
Midlevel display Menu pages are selected by pressing
è and å on the steering wheel.
Main menus are:
● Trip/fuel information, displayed by Info , see description below.
● Audio information, displayed by Audio , see description below.
● Phone information, displayed by Phone , see description below.
● Navigation information, displayed by Navigation, see
description below.
● Vehicle information, displayed by
Options , see description below.
Page 108 of 303
106Instruments and controlsSome of the displayed functions differ
when the vehicle is being driven or at
a standstill and some functions are
only active when the vehicle is being
driven.
Selecting menus and functions
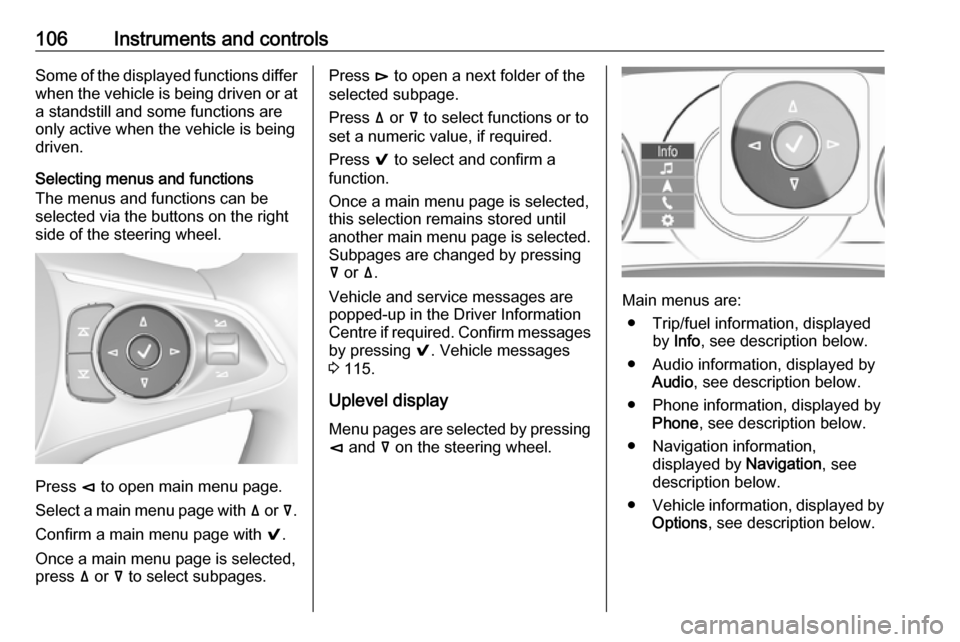
The menus and functions can be
selected via the buttons on the right
side of the steering wheel.
Press è to open main menu page.
Select a main menu page with ä or å.
Confirm a main menu page with 9.
Once a main menu page is selected, press ä or å to select subpages.
Press é to open a next folder of the
selected subpage.
Press ä or å to select functions or to
set a numeric value, if required.
Press 9 to select and confirm a
function.
Once a main menu page is selected, this selection remains stored until
another main menu page is selected.
Subpages are changed by pressing
å or ä.
Vehicle and service messages are
popped-up in the Driver Information
Centre if required. Confirm messages by pressing 9. Vehicle messages
3 115.
Uplevel display
Menu pages are selected by pressing è and å on the steering wheel.
Main menus are:
● Trip/fuel information, displayed by Info , see description below.
● Audio information, displayed by Audio , see description below.
● Phone information, displayed by Phone , see description below.
● Navigation information, displayed by Navigation, see
description below.
● Vehicle information, displayed by
Options , see description below.
Page 109 of 303
Instruments and controls107Some of the displayed functions differ
when the vehicle is being driven or at
a standstill and some functions are
only active when the vehicle is being
driven.
Uplevel instrument cluster can be
displayed as Sport mode or Tour
mode. See below: Settings Menu,
Display Themes.
Selecting menus and functions
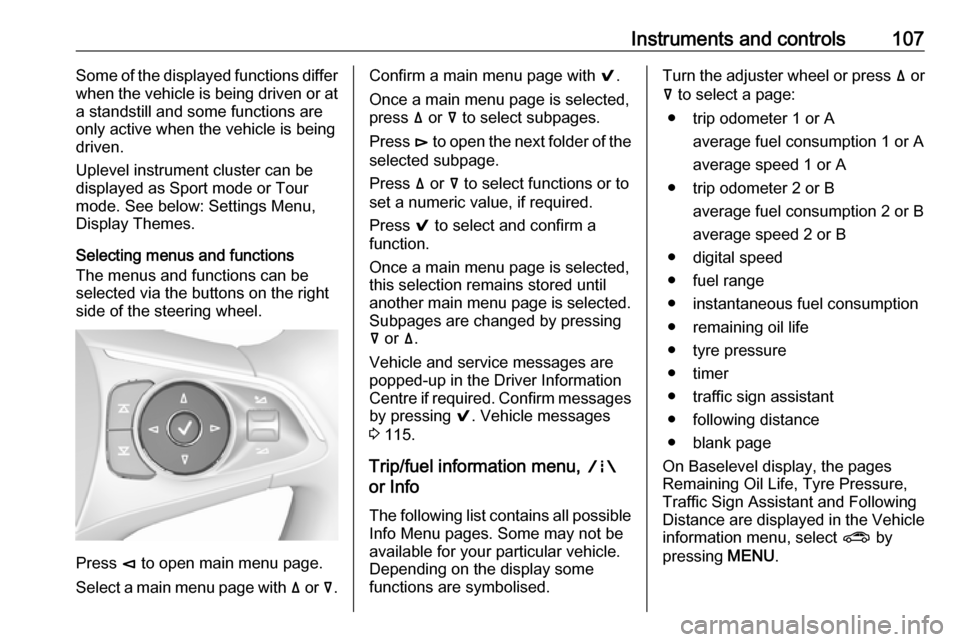
The menus and functions can be selected via the buttons on the right
side of the steering wheel.
Press è to open main menu page.
Select a main menu page with ä or å.
Confirm a main menu page with 9.
Once a main menu page is selected, press ä or å to select subpages.
Press é to open the next folder of the
selected subpage.
Press ä or å to select functions or to
set a numeric value, if required.
Press 9 to select and confirm a
function.
Once a main menu page is selected, this selection remains stored until
another main menu page is selected.
Subpages are changed by pressing
å or ä.
Vehicle and service messages are
popped-up in the Driver Information
Centre if required. Confirm messages
by pressing 9. Vehicle messages
3 115.
Trip/fuel information menu, ;
or Info
The following list contains all possible Info Menu pages. Some may not beavailable for your particular vehicle.
Depending on the display some
functions are symbolised.Turn the adjuster wheel or press ä or
å to select a page:
● trip odometer 1 or A average fuel consumption 1 or A
average speed 1 or A
● trip odometer 2 or B average fuel consumption 2 or B
average speed 2 or B
● digital speed
● fuel range
● instantaneous fuel consumption
● remaining oil life
● tyre pressure
● timer
● traffic sign assistant
● following distance
● blank page
On Baselevel display, the pages
Remaining Oil Life, Tyre Pressure,
Traffic Sign Assistant and Following
Distance are displayed in the Vehicle
information menu, select ? by
pressing MENU.
Page 110 of 303

108Instruments and controlsTrip odometer 1/A or 2/B
Trip odometer displays the current
distance since a certain reset.
Trip odometer counts up to a distance
of 9,999 km then restarts at 0.
To reset on Baselevel display, press
SET/CLR for a few seconds, on
Midlevel and Uplevel display, press
é and confirm with 9.
The information of trip odometer page 1 and 2 can be reset separately for
odometer, average consumption and
average speed while the respective
display is active.
Average fuel consumption 1/A or 2/B
Display of average consumption. The
measurement can be reset at any
time and starts with a default value.
To reset on Baselevel display, press
SET/CLR for a few seconds, on
Midlevel and Uplevel display, press
é and confirm with 9.
Average speed 1/A or 2/B
Display of average speed. The
measurement can be reset at any
time.To reset on Baselevel display, press
SET/CLR for a few seconds, on
Midlevel and Uplevel display, press
é and confirm with 9.
Digital speed
Digital display of the instantaneous
speed.
Fuel range
Range is calculated from current fuel
tank level and current consumption.
The display shows average values.
After refuelling, the range is updated
automatically after a brief delay.
When the fuel level in the tank is low, a message appears on the display
and control indicator Y in the fuel
gauge illuminates.
When the tank must be refuelled
immediately, a warning message
appears and remains on the display.
Additionally, control indicator Y in the
fuel gauge flashes 3 102.
Instantaneous fuel consumption
Display of the instantaneous
consumption.Remaining oil life
Indicates an estimate of the oil's
useful life. The number in % means
the remaining of current oil life 3 96.
Tire pressure
Checks tyre pressure of all wheels
during driving 3 252.
Timer
To start and stop press 9. To reset,
press é and confirm Reset.
Traffic sign assistant
Displays the detected traffic signs for
the current route section 3 215.
Following distance
Displays the distance in seconds to a
preceding moving vehicle 3 192. If
Adaptive cruise control is active this
page shows the following distance
setting instead.
Blank page
A blank page can be selected when
no DIC information is requested.
Page 112 of 303
110Instruments and controlsTurn the adjuster wheel or press ä or
å to select a page and follow the
instructions given in the submenus:
● units
● display themes
● info pages
● speed warning
● tyre loading
● pocket gauges
● software information
Units
Press é while units page is
displayed. Select imperial or metric
units by pressing 9.
Display themes
Press é while display themes is
displayed. Select Sport or Touring
mode by pressing 9. Sport mode
includes more vehicle information, Tour mode includes more media information.
This setting is only available with
Uplevel display.Info pages
Press é while Info pages is
displayed. A list of all items in the Info Menu is displayed. Select the
functions to be displayed in the Info
page by pressing 9. Selected pages
have a 9 in a checkbox. Non
viewable functions have a blank
checkbox. See Info Menu above.
Speed warning
The speed warning display allows
you to set a speed that you do not
want to exceed.
To set the speed warning, press é
while the page is displayed. Press ä
or å to adjust the value. Press 9 to
set the speed. Once the speed is set,
this feature can be turned off by
pressing 9 while viewing this page. If
the selected speed limit is exceeded, a pop-up warning is displayed with a
chime.
Tyre loading
The tyre pressure category according
to the actual tyre inflation pressure
can be selected 3 252.Pocket gauges
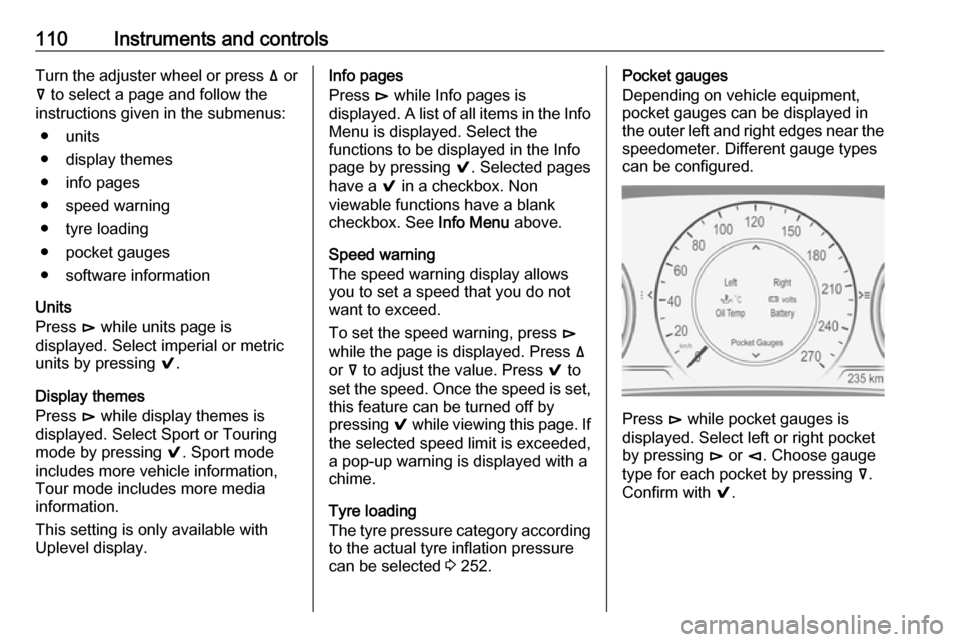
Depending on vehicle equipment,
pocket gauges can be displayed in the outer left and right edges near the speedometer. Different gauge types
can be configured.
Press é while pocket gauges is
displayed. Select left or right pocket
by pressing é or è. Choose gauge
type for each pocket by pressing å.
Confirm with 9.
Page 135 of 303

Lighting133Dynamic automatic headlight
levelling
To prevent oncoming traffic from
being dazzled, headlight levelling is
automatically adjusted based on
inclination information measured by
front and rear axle, acceleration or
deceleration and vehicle speed.
Headlights when driving abroad 3 129.
Fault in LED headlight system When the system detects a failure in
the LED headlight system, it selects a
preset position to avoid dazzling of
oncoming traffic. A warning is
displayed in the Driver Information
Centre.
Hazard warning flashers
Operated by pressing ¨.
In the event of an accident with airbag
deployment, the hazard warning
flashers are activated automatically.
Turn and lane-change
signalslever up:right turn signallever down:left turn signal
If the lever is moved past the
resistance point, the turn signal is
switched on constantly. When the
steering wheel moves back, the turn
signal is automatically deactivated.
For three flashes, e.g. when changing
lanes, press the lever until resistance
is felt and then release.
Page 140 of 303

138LightingThey will switch off automatically after
a delay. This function works only in
the dark. Theatre lighting is activated
if the driver's door is opened during
this time.
Path lighting Headlights, tail lights and number
plate lights illuminate the surrounding
area for an adjustable time after
leaving the vehicle.
ActivatingHalogen headlights
1. Switch off the ignition.
2. Open the driver's door.
3. Pull the turn signal lever.
4. Close the driver's door.
If the driver's door is not closed, the
lights switch off after two minutes.
Exit lighting is switched off
immediately if the turn signal lever is pulled while the driver's door is open.LED headlights
Path lighting is activated, when the
ignistion is switched off and the
driver's door is opened.
This function can be activated or
deactivated in the vehicle
personalisation.
Select the relevant setting in Settings,
I Vehicle in the Info-Display.
Info-Display 3 111.
Vehicle personalisation 3 117.
The settings can be saved for the key being used 3 23.
Battery discharge protection
Vehicle battery state of charge
function
The function guarantees longest
vehicle battery life via a generator
with controllable power output and
optimised power distribution.
To prevent discharge of the vehicle
battery when driving, the following
systems are reduced automatically in
two stages and finally switched off:
● auxiliary heater
● heated rear and front window
● heated steering wheel
● heated mirrors
● heated seats
● fan
In the second stage, a message
which confirms the activation of the
vehicle battery discharge protection
will be displayed in the Driver
Information Centre.
Page 154 of 303

152Driving and operatingDriving and
operatingDriving hints ............................... 153
Control of the vehicle ...............153
Steering ................................... 153
Starting and operating ...............153
New vehicle running-in ............153
Power button ........................... 154
Retained power off ..................155
Starting the engine ..................155
Overrun cut-off ........................ 156
Stop-start system ....................157
Parking .................................... 159
Engine exhaust .......................... 160
Diesel particle filter ..................160
Catalytic converter ...................161
AdBlue ..................................... 162
Automatic transmission ..............165
Manual transmission ..................169
Drive systems ............................ 170
All-wheel drive ......................... 170
Brakes ........................................ 170
Antilock brake system .............170
Parking brake .......................... 171Brake assist............................. 172
Hill start assist ......................... 173
Ride control systems .................173
Traction Control system ..........173
Electronic Stability Control ......174
Interactive driving system ........175
Driver assistance systems .........178
Cruise control .......................... 178
Speed limiter ........................... 180
Adaptive cruise control ............181
Forward collision alert .............189
Following distance indication ...192
Active emergency braking .......193
Front pedestrian protection .....196
Parking assist .......................... 198
Side blind zone assistant .........206
Lane change alert ....................207
Panoramic view system ...........209
Rear view camera ...................212
Rear cross traffic alert .............214
Traffic sign assistant ................215
Lane keep assist .....................219
Fuel ............................................ 221
Fuel for petrol engines .............221
Fuel for diesel engines ............222
Refuelling ................................ 222
Fuel consumption - CO 2-
Emissions ............................... 224Trailer hitch................................ 225
General information .................225
Driving characteristics and towing tips .............................. 225
Trailer towing ........................... 225
Towing equipment ...................226
Trailer stability assist ...............228
Page 156 of 303
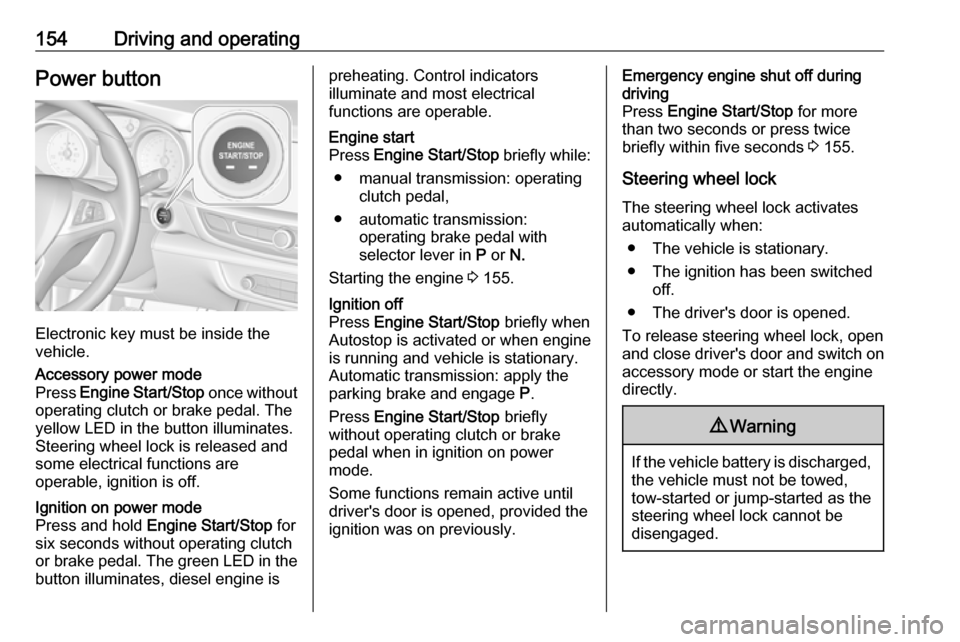
154Driving and operatingPower button
Electronic key must be inside the
vehicle.
Accessory power mode
Press Engine Start/Stop once without
operating clutch or brake pedal. The yellow LED in the button illuminates.
Steering wheel lock is released and
some electrical functions are
operable, ignition is off.Ignition on power mode
Press and hold Engine Start/Stop for
six seconds without operating clutch
or brake pedal. The green LED in the button illuminates, diesel engine ispreheating. Control indicators
illuminate and most electrical
functions are operable.Engine start
Press Engine Start/Stop briefly while:
● manual transmission: operating clutch pedal,
● automatic transmission: operating brake pedal with
selector lever in P or N.
Starting the engine 3 155.Ignition off
Press Engine Start/Stop briefly when
Autostop is activated or when engine is running and vehicle is stationary.
Automatic transmission: apply the
parking brake and engage P.
Press Engine Start/Stop briefly
without operating clutch or brake pedal when in ignition on power
mode.
Some functions remain active until
driver's door is opened, provided the
ignition was on previously.Emergency engine shut off during
driving
Press Engine Start/Stop for more
than two seconds or press twice
briefly within five seconds 3 155.
Steering wheel lock The steering wheel lock activates
automatically when:
● The vehicle is stationary.
● The ignition has been switched off.
● The driver's door is opened.
To release steering wheel lock, open
and close driver's door and switch on accessory mode or start the engine
directly.9 Warning
If the vehicle battery is discharged,
the vehicle must not be towed,
tow-started or jump-started as the
steering wheel lock cannot be
disengaged.
Page 161 of 303

Driving and operating159● The driver's seat belt isunfastened and the driver's door
is opened.
● The engine temperature is too low.
● The charging level of the vehicle battery is below a defined level.
● The brake vacuum is not sufficient.
● The vehicle is driven at least at walking speed.
● The climate control system requests an engine start.
● The air conditioning is manually switched on.
If the bonnet is not fully closed, a warning message is displayed in the
Driver Information Centre.
If an electrical accessory, e.g. a
portable CD player, is connected to
the power outlet, a brief power drop during the restart might be noticeable.Parking9 Warning
● Do not park the vehicle on an
easily ignitable surface. The
high temperature of the
exhaust system could ignite the
surface.
● Always apply the parking brake. Pull switch m for
approx. one second and check
if the control indicator m
illuminates.
The electric parking brake is applied when control indicator
m illuminates 3 99.
● Switch off the engine. ● If the vehicle is on a level surface or uphill slope, engage
first gear or set the selector
lever to position P before
removing the ignition key or
switching off ignition on
vehicles with power button. On
an uphill slope, turn the front
wheels away from the kerb.
If the vehicle is on a downhill
slope, engage reverse gear or
set the selector lever to position P before removing the ignition
key or switching off ignition on
vehicles with power button.
Turn the front wheels towards
the kerb.
● Close the windows and the sunroof.
● Remove the ignition key from the ignition switch or switch off
ignition on vehicles with power
button. Turn the steering wheel
until the steering wheel lock is
felt to engage.
For vehicles with automatic
transmission, the key can only
be removed when the selector
lever is in position P.
●
Lock the vehicle with button e on
the radio remote control.
Activate the anti-theft alarm
system 3 30.
● The engine cooling fans may run
after the engine has been
switched off 3 231.